This original crochet floor pouf pattern explains how to make crochet petal-top floor pouf from the first counted stitch through final assembly. The design is a practical free tutorial in US terms, with measurements and stitch checkpoints that you can verify as you work.
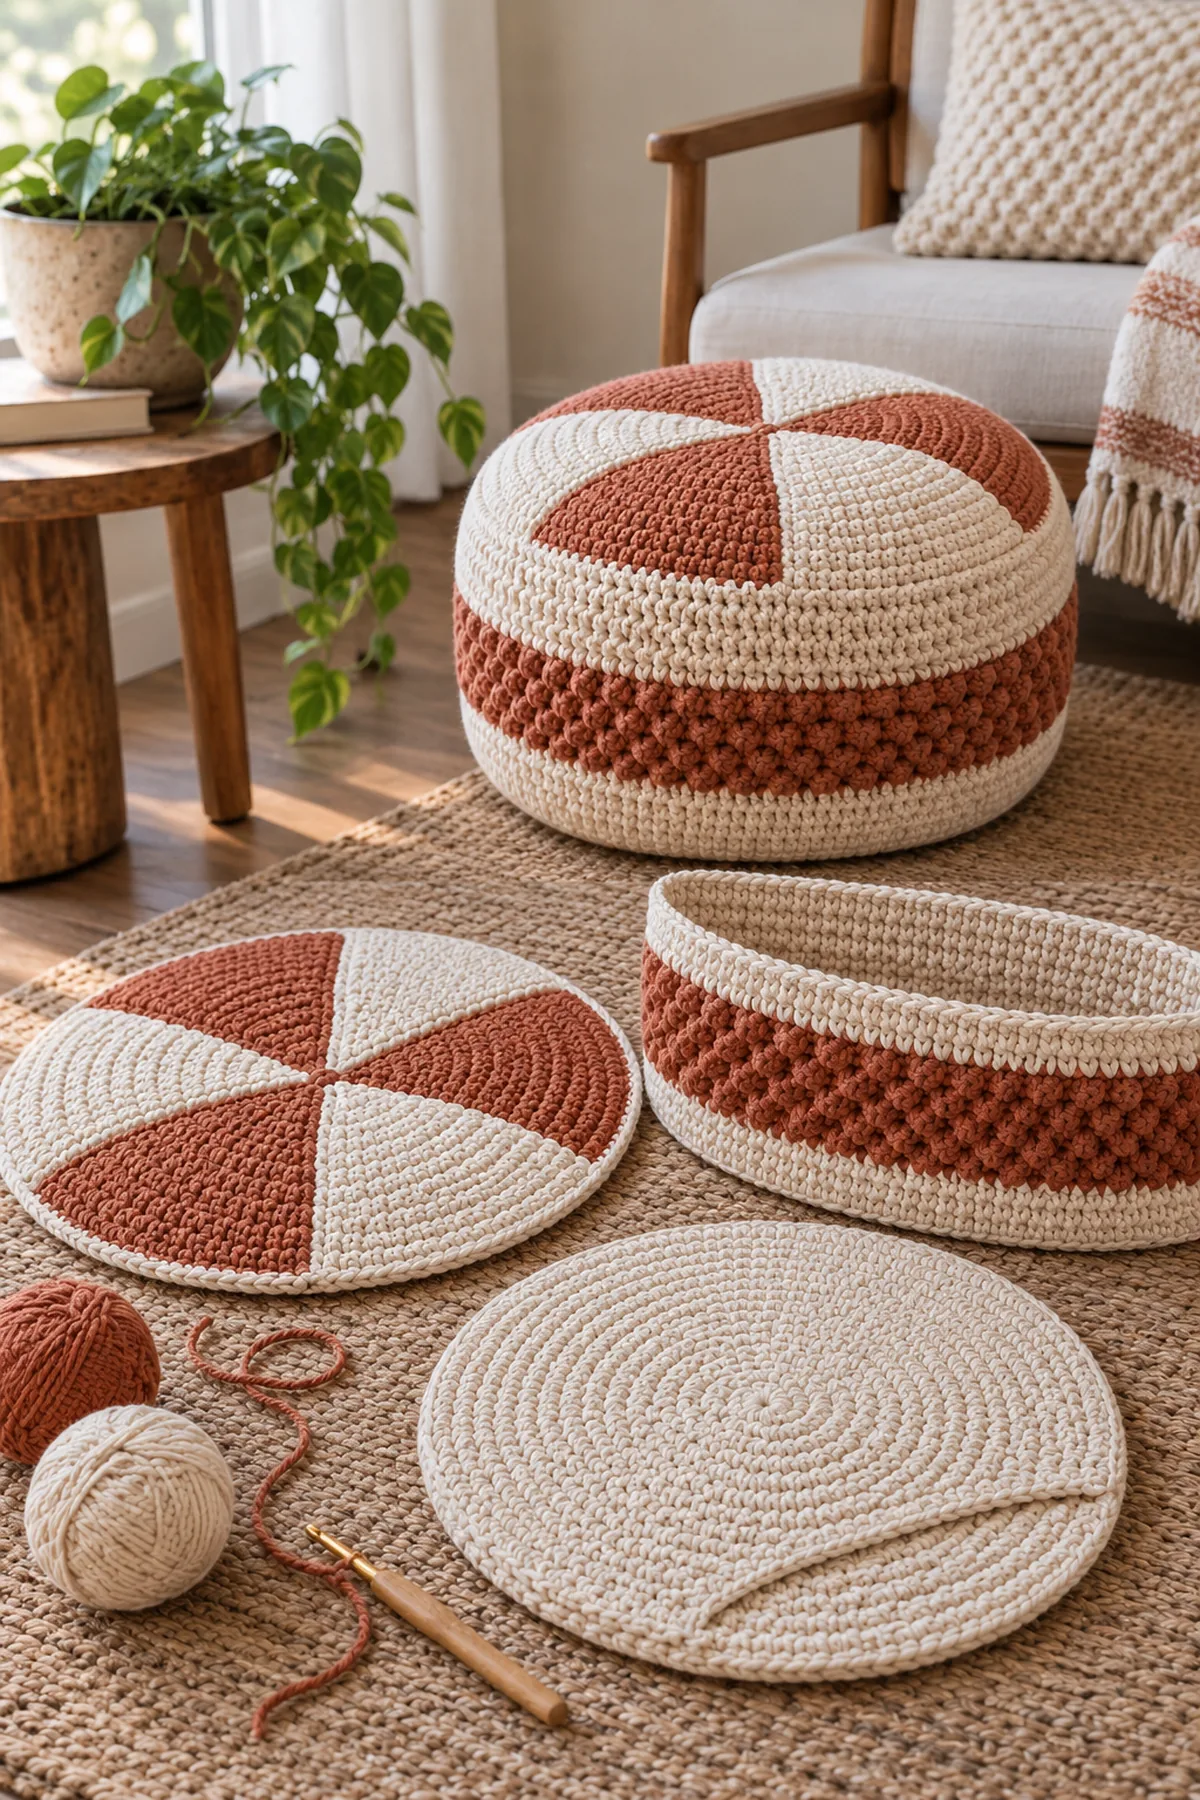
Crochet a 90-stitch circular base, a 90-stitch circumference side tube and six 15-stitch outer-edge petal wedges. Join the wedges into a domed top and match their 90 outer-edge stitches to the side tube. Join only 54 of 90 bottom stitches to the circular base, leaving a 36-stitch entry; an inward six-row flap hides the opening while a removable fabric liner is compressed inside. This is an adult decorative cushion, not tested seating furniture.
Pattern Details
- Hook Size: 8 mm for firm super-bulky cotton cord; adjust after a washed round swatch
- Finished Size: Cover approximately 15 inches across and 12 inches high when filled with a compressible 16-inch-diameter by 11-inch-high washable fabric liner
- Gauge: 8 sc and 8 sc rounds = 4 inches in washed, firm cotton-cord fabric
- Estimated Time: 18–25 hours for crochet cover, plus fabric-liner preparation
- Construction: One 15-round, 90-stitch base; one 90-stitch by 24-round side tube; six 13-row wedges reaching 15 outer stitches each; 36-stitch bottom envelope opening
- Skill level: Intermediate
Why You’ll Love This Project
The shape comes from counted stitches rather than an unexplained diagram. You can inspect each stage against the measurements, and the finished object has a clear purpose and a distinct silhouette in photographs.
Materials
- Approximately 650 yards cream and 350 yards terracotta washable super-bulky cotton cord, plus 10% for a washed swatch and seams
- 8 mm hook, 12 locking markers, sturdy blunt needle, tape measure, scissors and blocking mat
- One removable 16-inch-round by about 11-inch-high washable fabric liner or homemade soft fabric bag filled with washable cushion fill; do not put loose fill directly against the crochet opening
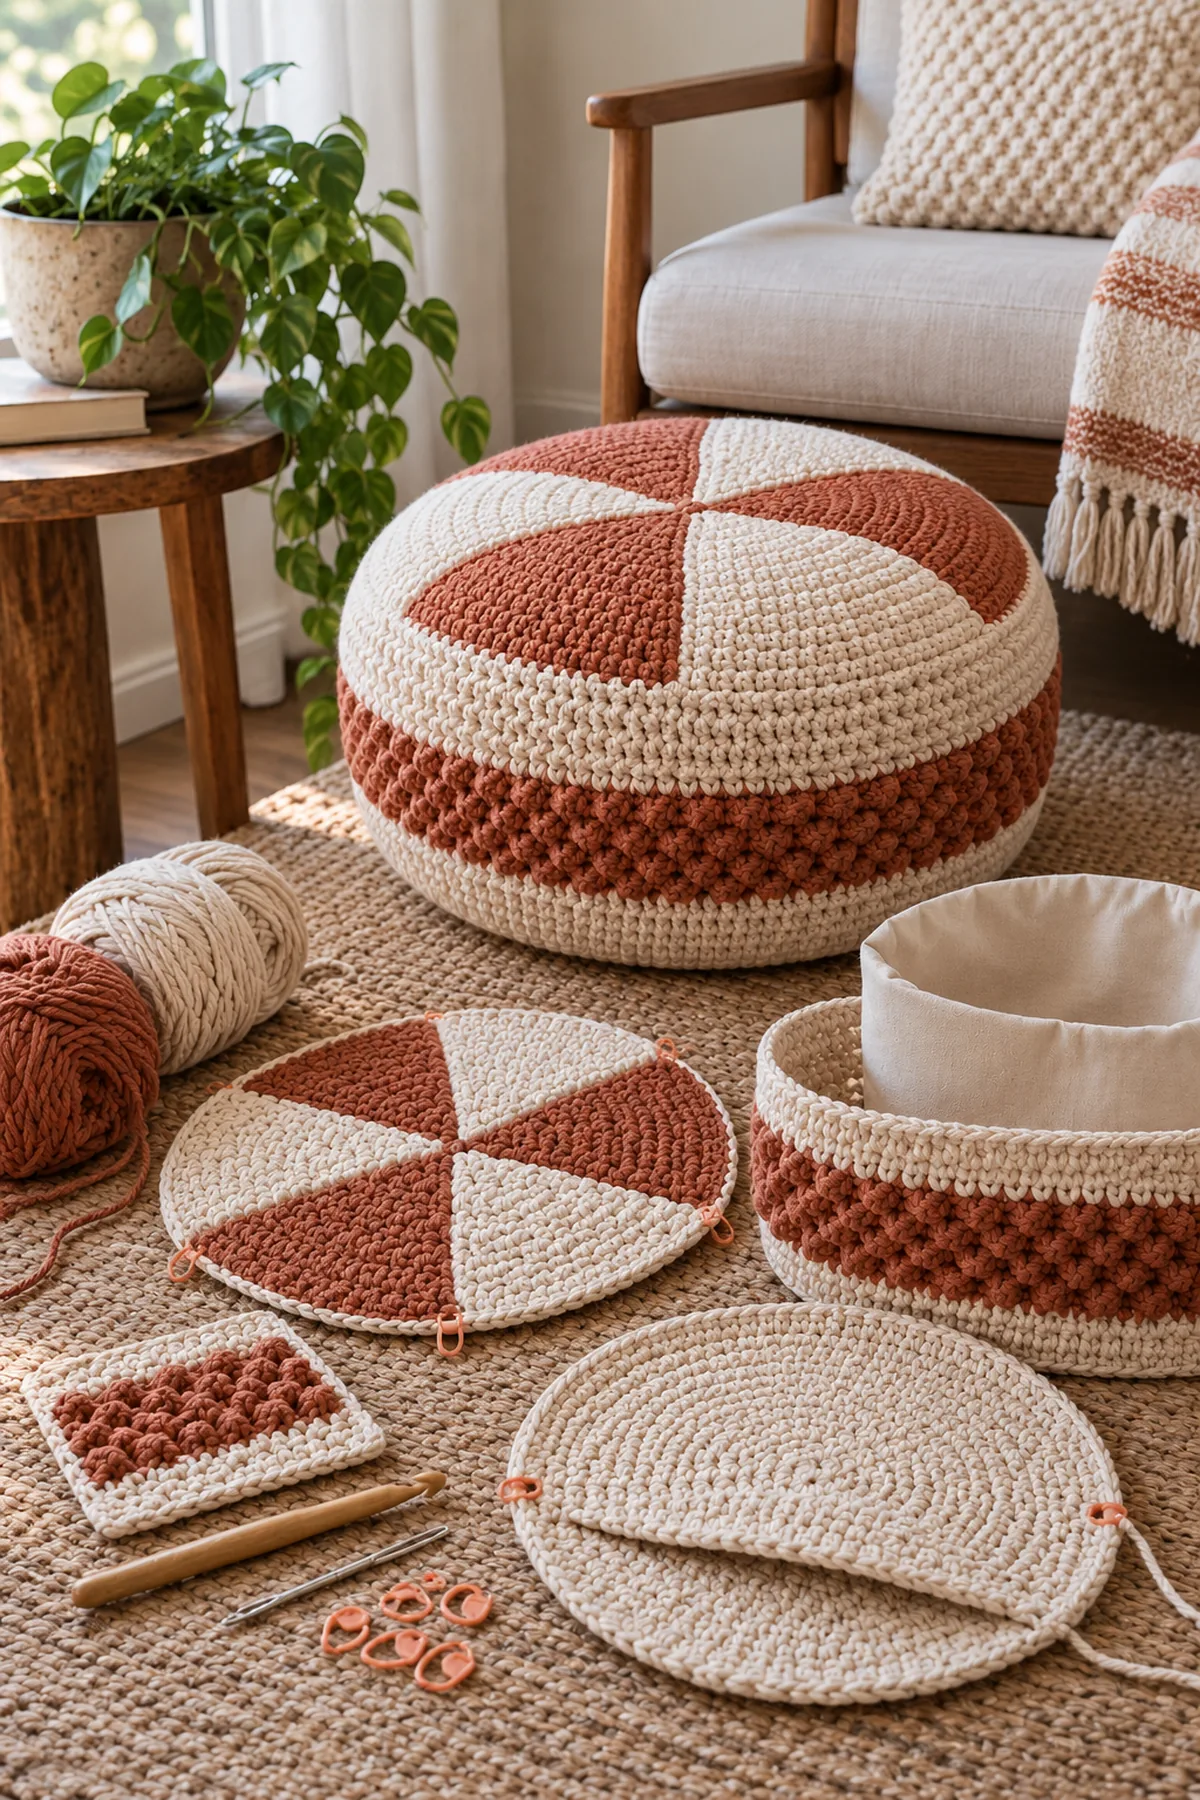
Gauge, Measurements, and Planning
Work a 24-stitch by 12-round firm sc swatch and wash it. Measure the center eight stitches and eight rounds; each should cover about four inches. A 90-stitch circumference targets about 45 inches, or 14.3 inches across as a perfect circle, before stretch. A slightly larger compressible 16-inch liner fills the cover without requiring a rigid frame. Check the actual liner against the finished cover before sewing the final seam; if it is too large, use a smaller soft liner rather than forcing stitches apart.
Make and wash a gauge swatch before beginning. Measure only after the swatch is completely dry. If the stitch width differs, change hook size rather than pulling the working yarn tighter. Keep a written count at the end of every section so the finished edges remain balanced and the assembly points line up.
Abbreviations and Special Stitches
- ch: chain
- sc: single crochet
- sl st: slip stitch
- st(s): stitch(es)
- rnd: round
- inc: 2 sc in one stitch
- sc2tog: single crochet two stitches together
- hdc: half double crochet
Special stitch guidance: For the six top wedges, work sc across each row and turn with an uncounted ch 1. On increase rows, work 2 sc in the first and last stitch; this adds exactly two stitches. For the side texture, alternate [sc, hdc] around the even 90-stitch circumference, and reverse the order in the next round. A joining slip stitch and beginning ch 1 do not count. Keep the fabric dense enough that the separate liner does not show through.
Important Notes
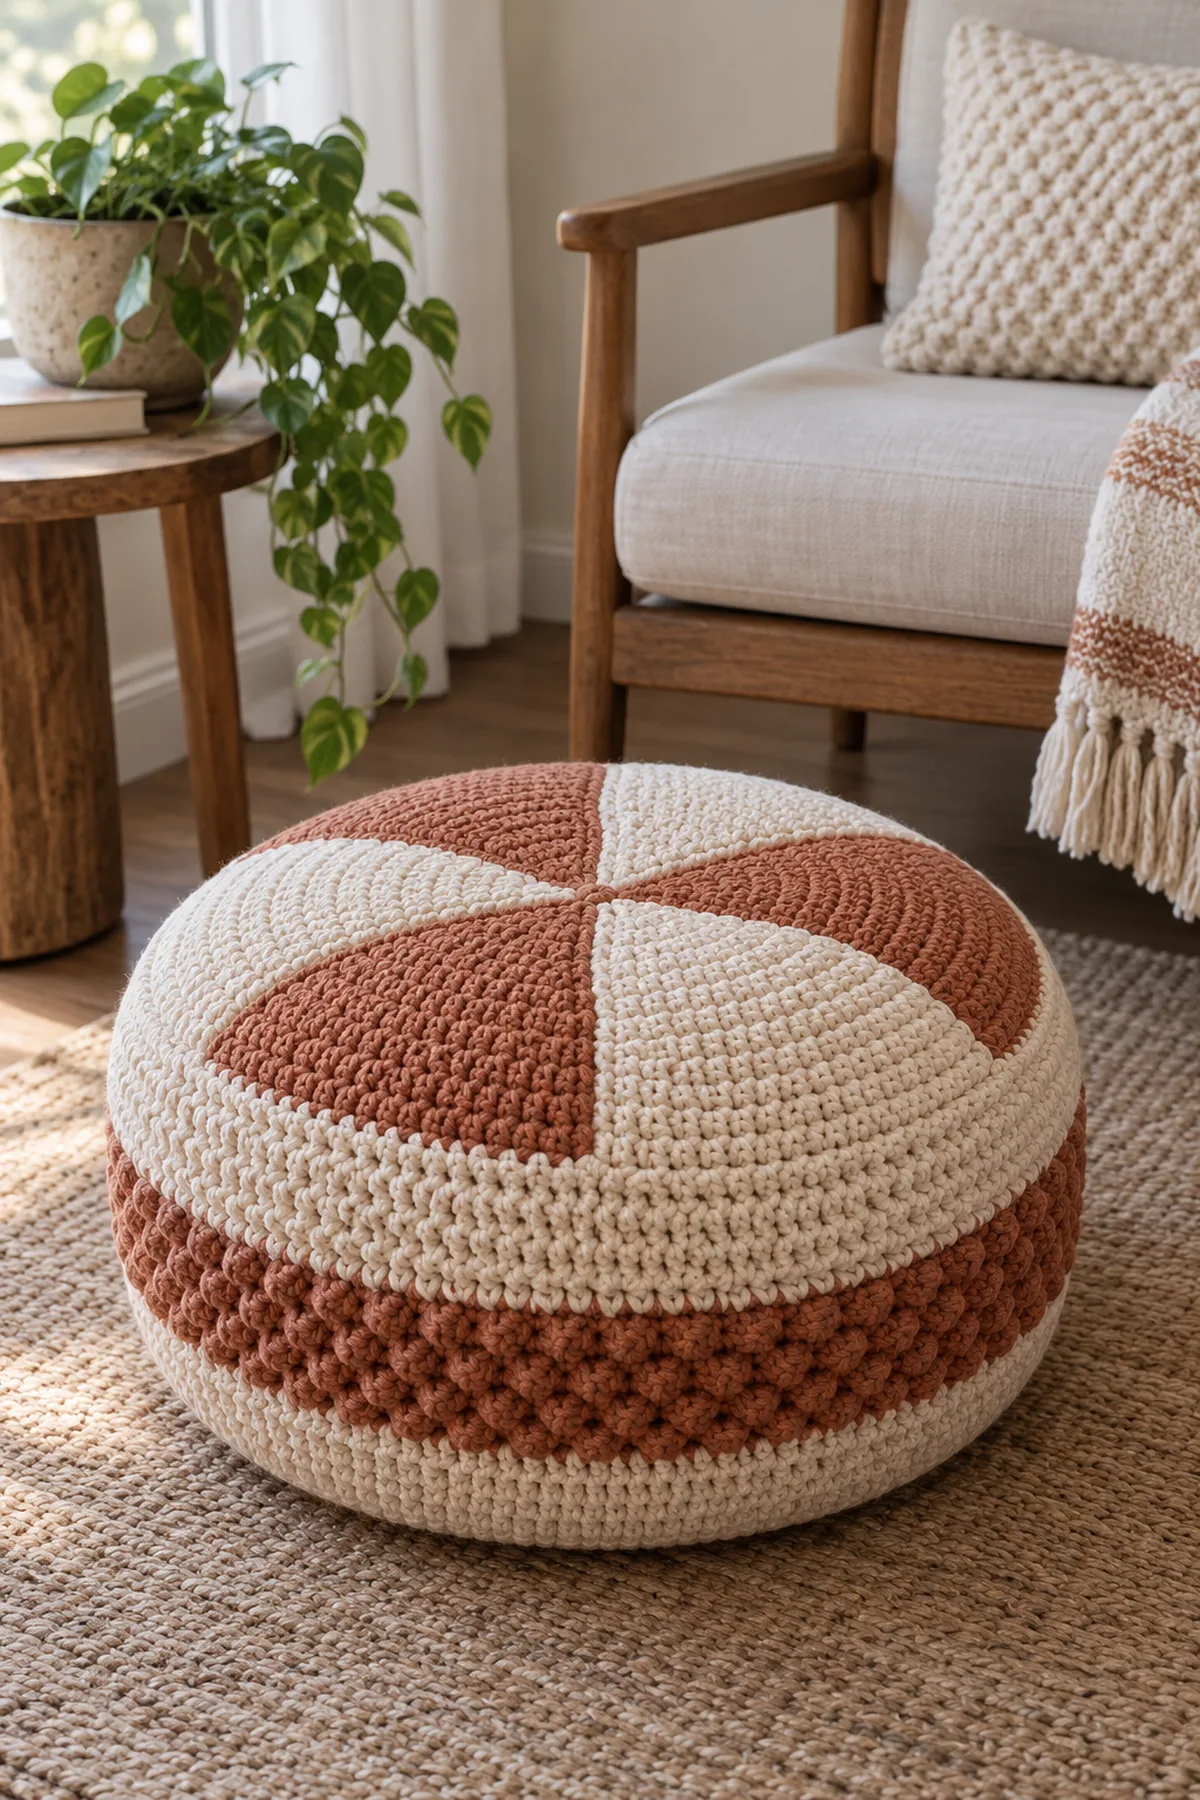
- AI-generated pictures illustrate the intended design; they are not photographs of a physically tested sample. Follow written counts rather than counting stitches in an image.
- The stitch arithmetic has been checked, but gauge, yardage and fit are planning targets until a physical sample is made. Wash a swatch and check measurements before gifting or wearing.
- A beginning ch 1 and a joining sl st never count as a stitch in this pattern. Mark the first counted stitch of each row or round.
- If a row count is wrong, return to that row. Adding an unplanned stitch later changes the shaping and the assembly alignment.
Complete Instructions for Crochet Petal-Top Floor Pouf
Make the Circular Base and Textured Side Tube
Work the base as a flat circle in a continuous spiral with the first stitch marked. The final six increases of each round are spaced evenly across six wedges. Work the side as a separate joined tube.
- Base Round 1: Make six sc in a magic ring. (6 sts) Round 2: inc in all six stitches. (12 sts)
- Base Rounds 3–15: Add exactly six sc per round by repeating [sc in the next R-2 stitches, inc] six times on Round R. For example, Round 3 repeats [sc, inc] to 18; Round 4 repeats [2 sc, inc] to 24. Continue the same rule: Round 5 = 30, 6 = 36, 7 = 42, 8 = 48, 9 = 54, 10 = 60, 11 = 66, 12 = 72, 13 = 78, 14 = 84, 15 = 90 stitches. Audit counts: (18 sts), (24 sts), (30 sts), (36 sts), (42 sts), (48 sts), (54 sts), (60 sts), (66 sts), (72 sts), (78 sts), (84 sts), (90 sts). Keep each increase in its six-stitch sector and stagger its position one stitch when possible to soften corners while preserving the stated round count.
- Side Round 1: Ch 90 loosely, join without twisting, ch 1 and sc once in each chain. Mark the first counted stitch. (90 sts)
- Side Rounds 2–24: Ch 1 after each joined round; work [sc, hdc] 45 times on even rounds and [hdc, sc] 45 times on odd rounds. Slip stitch to the first counted stitch and never count that joining slip stitch. (90 sts per round) At eight rounds per four inches, 24 rounds target about 12 inches tall.
- Mark side-tube stitches 1, 16, 31, 46, 61 and 76 around the upper edge. These are the six 15-stitch regions to which the petal wedges will attach. Mark a 36-stitch arc along the lower edge as the liner entry; do not close that arc when joining the base.
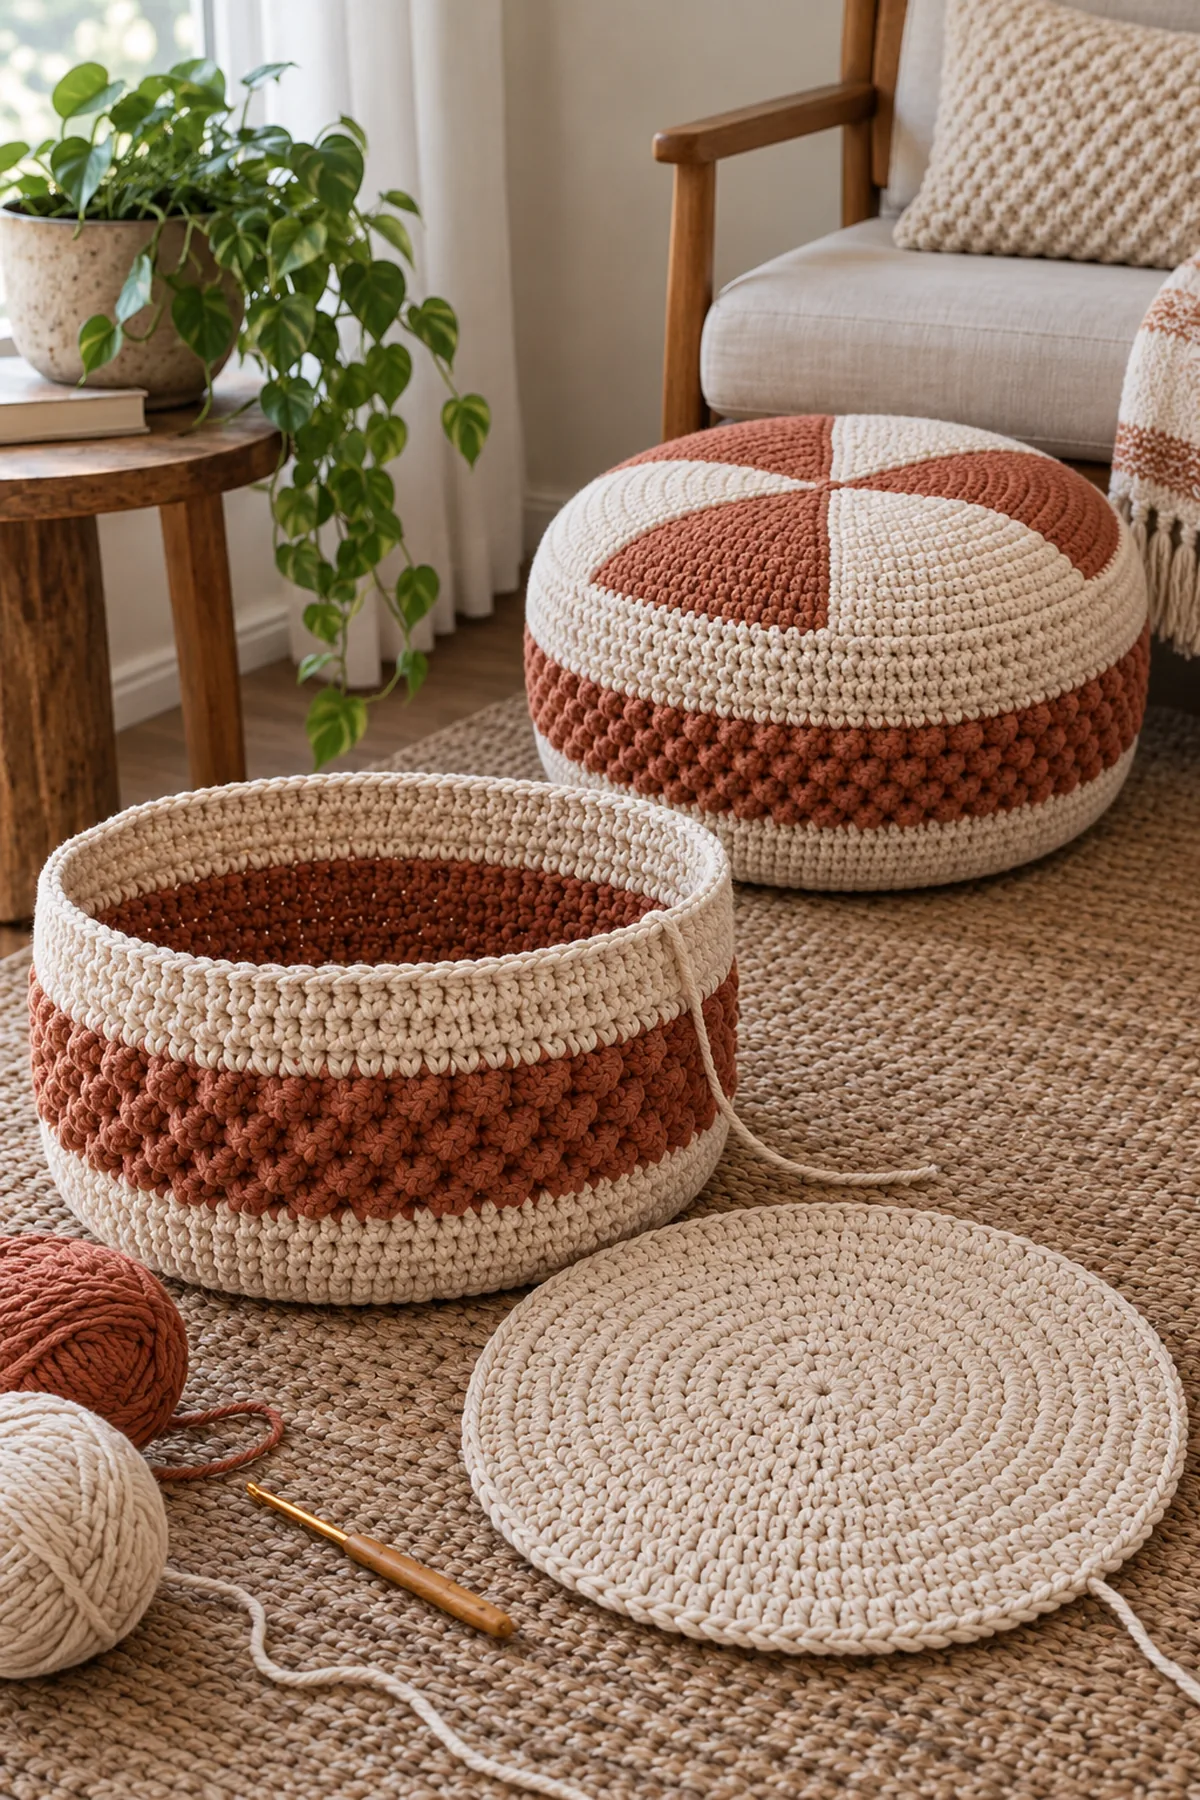
Crochet and Join Six Petal Wedges
Make six matching wedge panels, alternating cream and terracotta for a clear six-lobed top. Their outer edges each contribute 15 stitches to the 90-stitch upper perimeter.
- Each wedge Row 1: Ch 4, sc in the second and next two chains, turn. (3 sts)
- Rows 2, 4, 6, 8, 10 and 12: Ch 1, 2 sc in the first stitch, sc across all middle stitches, 2 sc in the last stitch, turn. The counts after these six rows are 5, 7, 9, 11, 13 and 15 stitches.
- Rows 3, 5, 7, 9, 11 and 13: Ch 1, sc in every stitch, turn. Row 13 ends with 15 sc. Check that each wedge has 13 rows and a 15-stitch outer edge; an extra increase distorts the top circle.
- Arrange all six narrow tips at the center and their broad outer edges around the circumference. Mattress-sew the long slanted edges in pairs from tip to rim to make a shallow six-seam dome. Reinforce the center through the three-stitch tips twice, burying the tail inside rather than tying a visible knot.
- Place the completed top right side out above the side tube. Join its six 15-stitch outer edges to the six marked 15-stitch regions of the side tube, stitch for stitch (6 × 15 = 90). Check that each seam meets its marker and the top lies smooth before closing the last section.
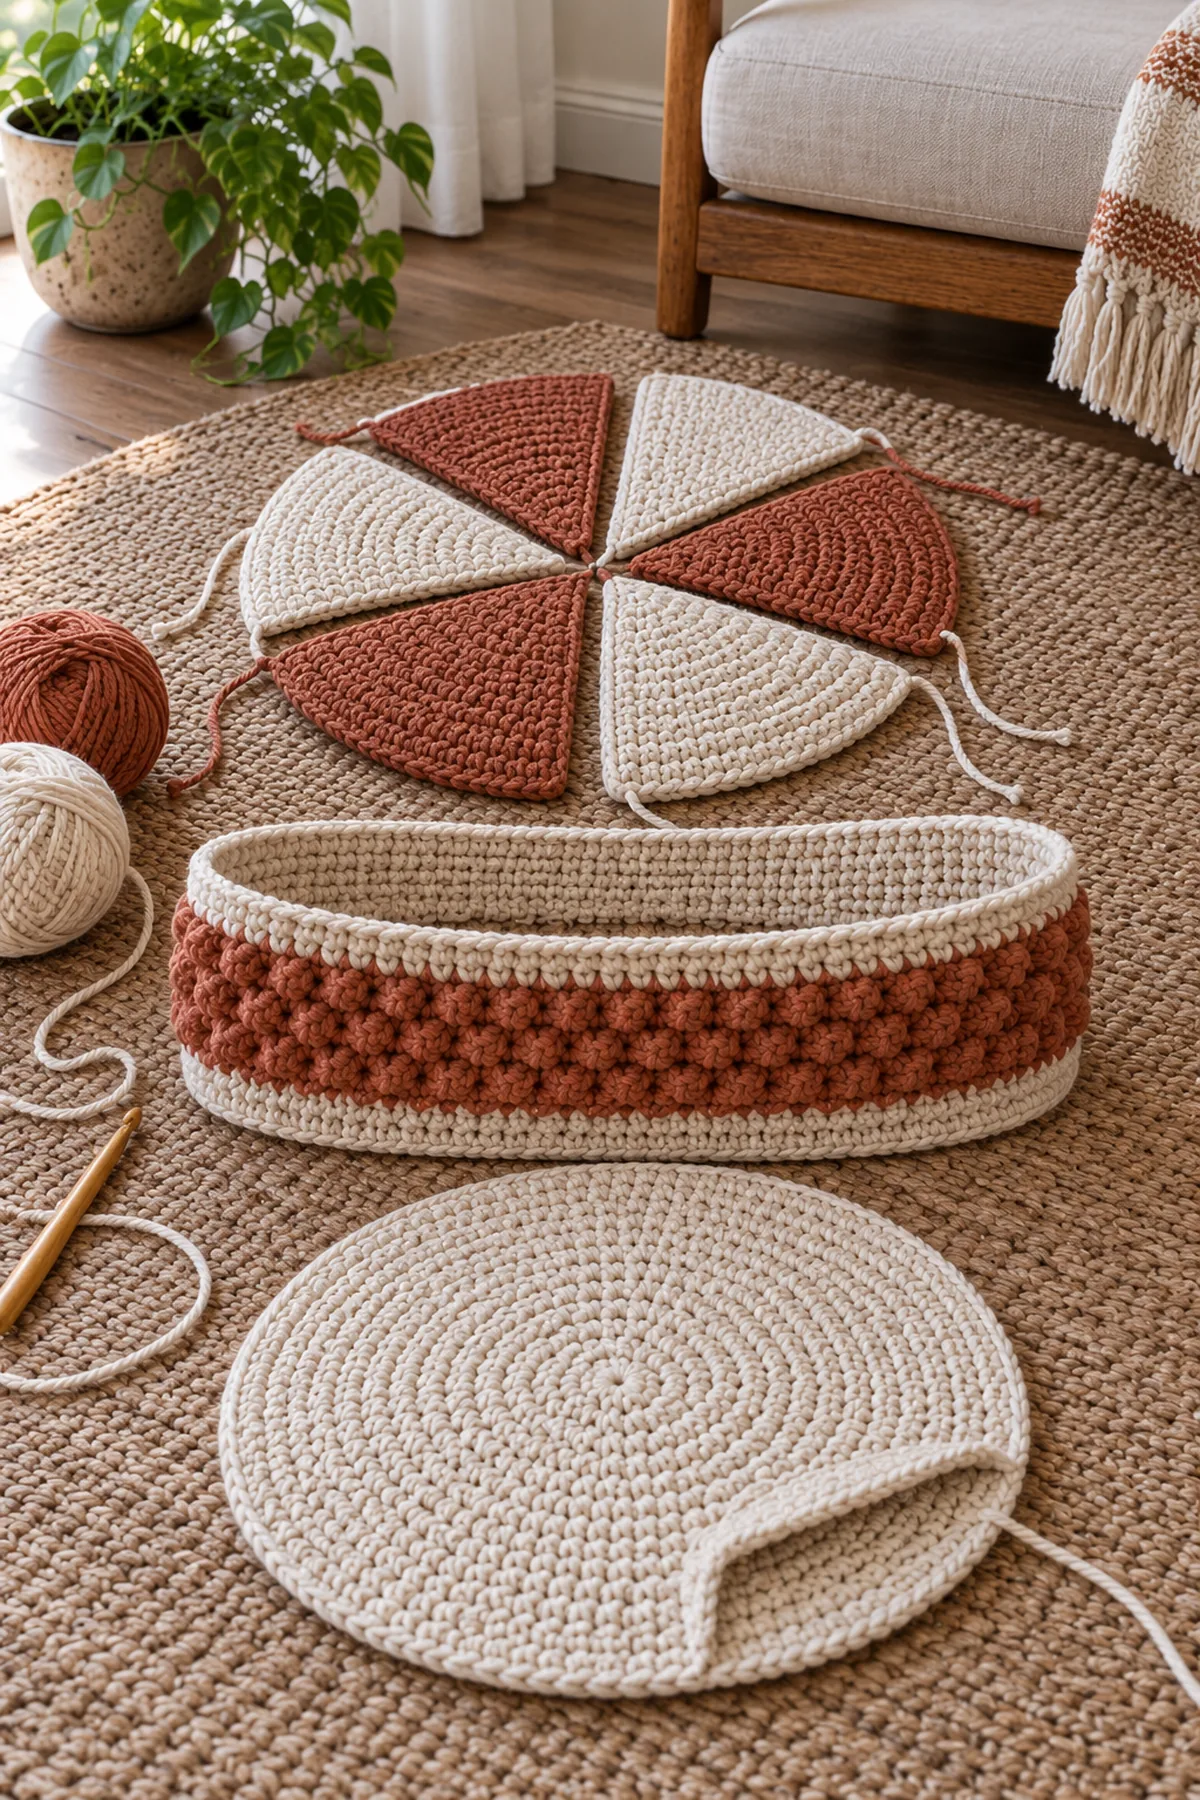
Make the Hidden Bottom Envelope and Insert a Liner
The entire crochet base stays one circular disc. Its partial join to the side creates a compressible entry at the lower perimeter, hidden by an inward crocheted flap with no button or zipper.
- Match base Round 15 to the lower 90-stitch side edge. Mattress-sew 54 consecutive matched stitch pairs, leaving the remaining 36 pairs open as one crescent-shaped entry. This opening is on the underside; do not sew through it later.
- Envelope flap Row 1: With the underside facing, join cream to the first stitch of the unsewn 36-stitch side arc; ch 1 and sc through each of those 36 side stitches, turn. (36 sts) Work Rows 2–6 as 36 sc, turning with an uncounted ch 1. The flap extends inward about three inches and lies behind the unsewn base edge. Fasten its two short ends to the side seam allowances only; leave its long free edge unattached so a soft liner can pass under it.
- Use a separate washable fabric liner: either a soft ready-made 16-inch-round cushion insert with washable casing or cut two 16-inch-diameter fabric circles and one 50-by-12-inch fabric band, seam with a half-inch allowance, leave a hand-wide fill opening, put washable fill in a contained inner bag, and close the fabric opening securely. This sewing outline is planning guidance; match the actual liner to the crochet cover.
- Compress and insert the liner through the 36-stitch lower opening. Spread it evenly, then tuck the crochet flap under the base edge so the liner is not visible. To wash, remove the liner first and wash cover and liner by their respective fiber labels. Do not sit or stand on the pouf until a physical sample and its liner have been load-tested; treat this pattern as adult floor decor, not certified furniture.
Assembly and Shaping
The base is one 90-stitch disc. The side circumference and combined six wedge outer edges are also 90 stitches, so both circular seams match exactly. At the underside, 54 matched stitches are joined and 36 remain open beneath an inward six-row flap. All fill remains in a separate removable fabric liner; the crochet cover alone has no tested seating rating.
Lay every component on a flat surface before joining. Match the marked centers first, then divide each remaining edge into equal sections. Work through both layers with consistent tension and pause after each section to check that the fabric lies flat. This measured approach prevents twisting and keeps decorative details facing the intended direction.
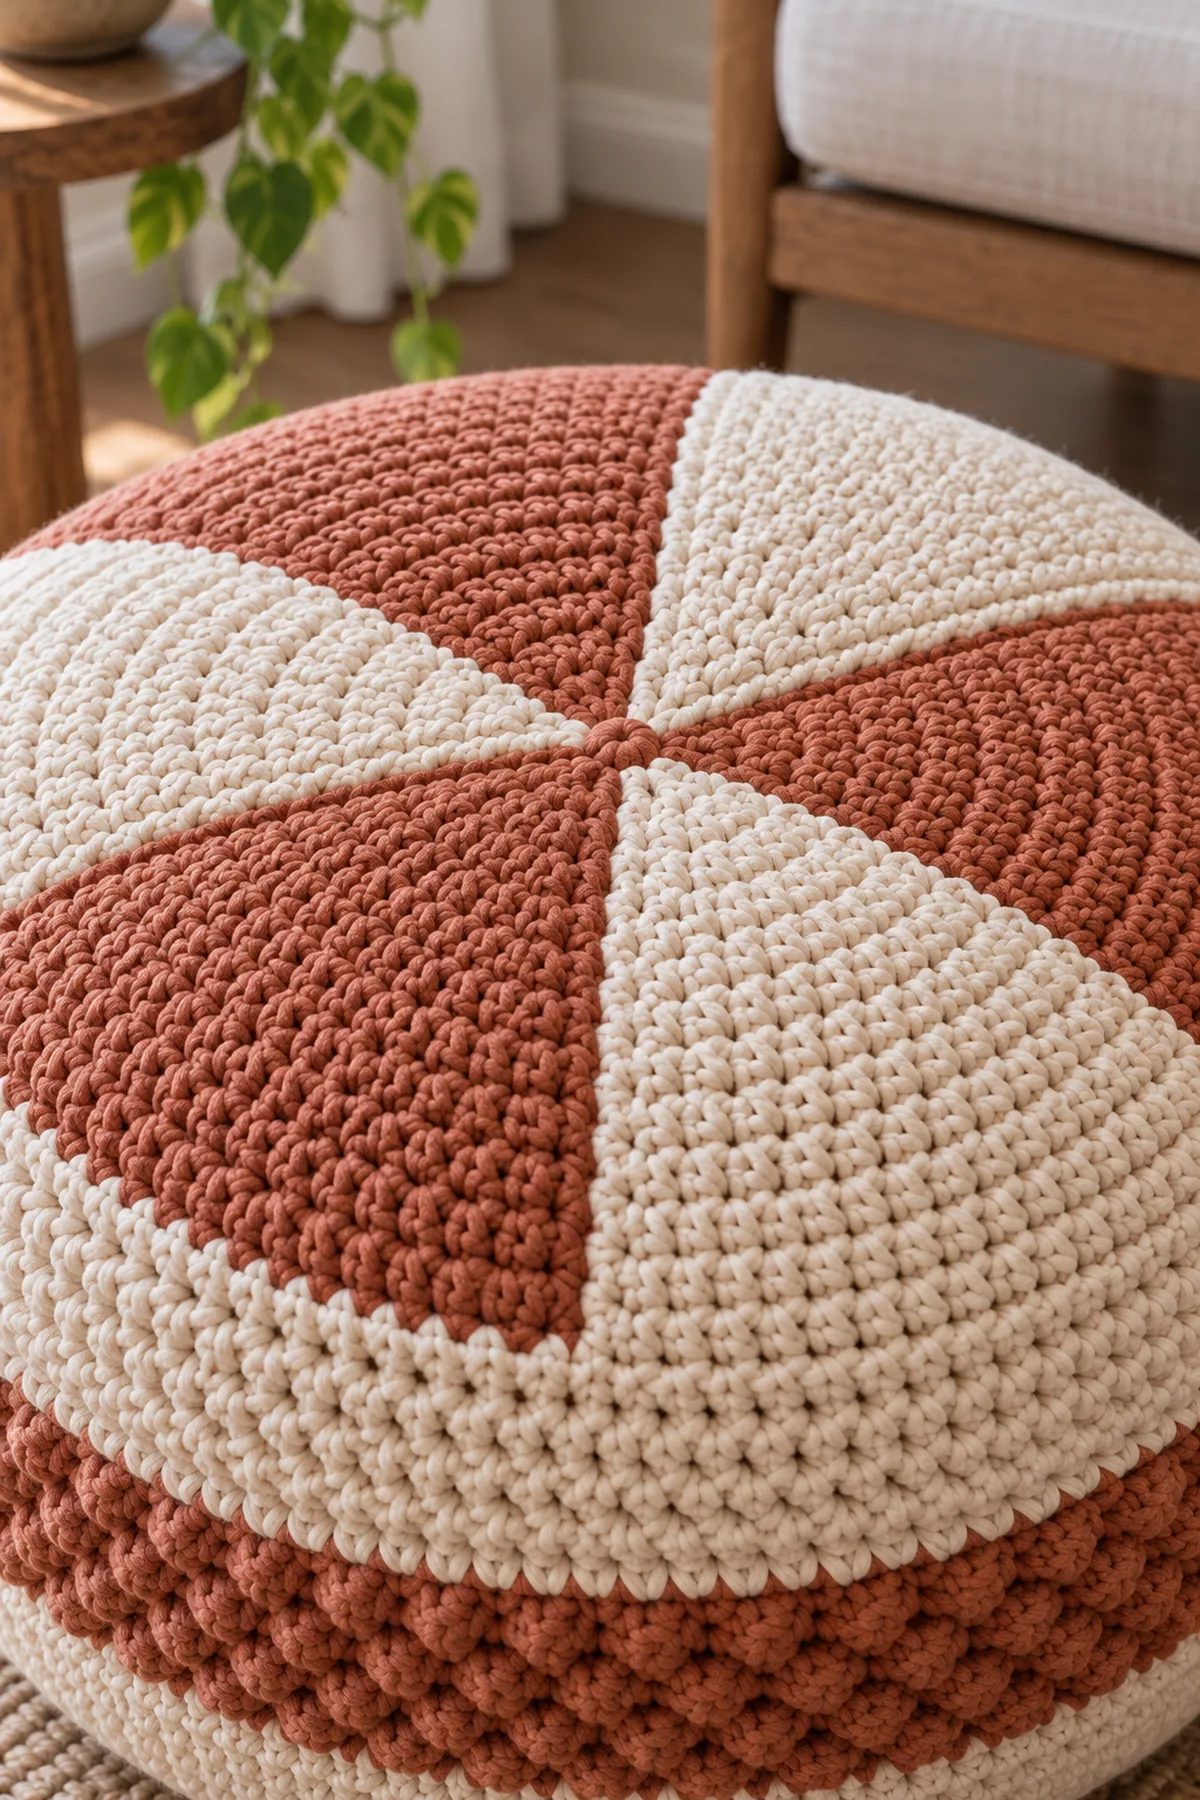
Finishing
- Weave each tail along three different paths on the wrong side; reverse direction before trimming.
- Wash or damp-block according to the yarn label and allow the work to dry at its measured shape.
- Inspect every seam, edge and attachment from both faces before first use, then inspect again after laundering.
For a polished result, weave each tail through several same-color stitches, reverse direction once, and trim only after the fabric has been gently stretched. Block to the listed dimensions without flattening textured stitches. Inspect joins, borders, straps, and decorative pieces before the project is used or gifted.
Helpful Tips
- Use contrasting locking markers at shaping points and record the count after every change row.
- Change hook size when the washed swatch differs from the stated gauge; do not compensate with uneven hand tension.
- Photograph the flat components before joining so it is easy to identify an inverted or twisted piece.
Good lighting and a contrasting stitch marker make counting much easier. If a section looks uneven, compare the current count with the previous checkpoint before continuing. Fixing one missed stitch early is faster than compensating later, and it preserves the measurements used by the assembly instructions.
Frequently Asked Questions
Can I sit on the finished pouf?
Do not rely on this untested tutorial as furniture. Use it as adult floor decor until a physical cover and chosen liner have been tested for the intended seating load, seam integrity and repeated compression.
How do I resize for another liner?
Measure the liner circumference and height, then swatch the cotton cord. Recalculate the base and side stitch counts together so the six top wedges divide the new circumference evenly; do not change the liner alone.
Conclusion
The six wedge seams make a petal-like top without applique, while the hidden lower entry lets the firm crochet cover separate from its washable liner. Check actual gauge and load behavior before any seating use.
BabyYarnie Printable Crochet Pattern Card
BabyYarnie — easy-to-follow crochet for everyday makers.
Project: Crochet Petal-Top Floor Pouf
Skill level: Intermediate Hook: 8 mm for firm super-bulky cotton cord; adjust after a washed round swatch Yarn: Super-bulky washable cotton cord
Finished size: Cover approximately 15 inches across and 12 inches high when filled with a compressible 16-inch-diameter by 11-inch-high washable fabric liner
Card Materials
- Approximately 650 yards cream and 350 yards terracotta washable super-bulky cotton cord, plus 10% for a washed swatch and seams
- 8 mm hook, 12 locking markers, sturdy blunt needle, tape measure, scissors and blocking mat
- One removable 16-inch-round by about 11-inch-high washable fabric liner or homemade soft fabric bag filled with washable cushion fill; do not put loose fill directly against the crochet opening
Card Instructions
- Make the Circular Base and Textured Side Tube: Increase a six-sector circular base from 6 to 90 sc in 15 rounds; make a separate 90-stitch textured side tube for 24 rounds.
- Crochet and Join Six Petal Wedges: Each of six 13-row wedges grows from 3 to 15 stitches by six two-stitch increase rows; seam wedge sides and join 6 × 15 top stitches to the 90-stitch tube.
- Make the Hidden Bottom Envelope and Insert a Liner: Join 54 of 90 bottom stitches, leave a 36-stitch liner entry, work a six-row 36-stitch inner envelope flap and insert a separate washable soft liner.
Finish: Check every count, weave in all ends, block to measurement, and inspect each join.