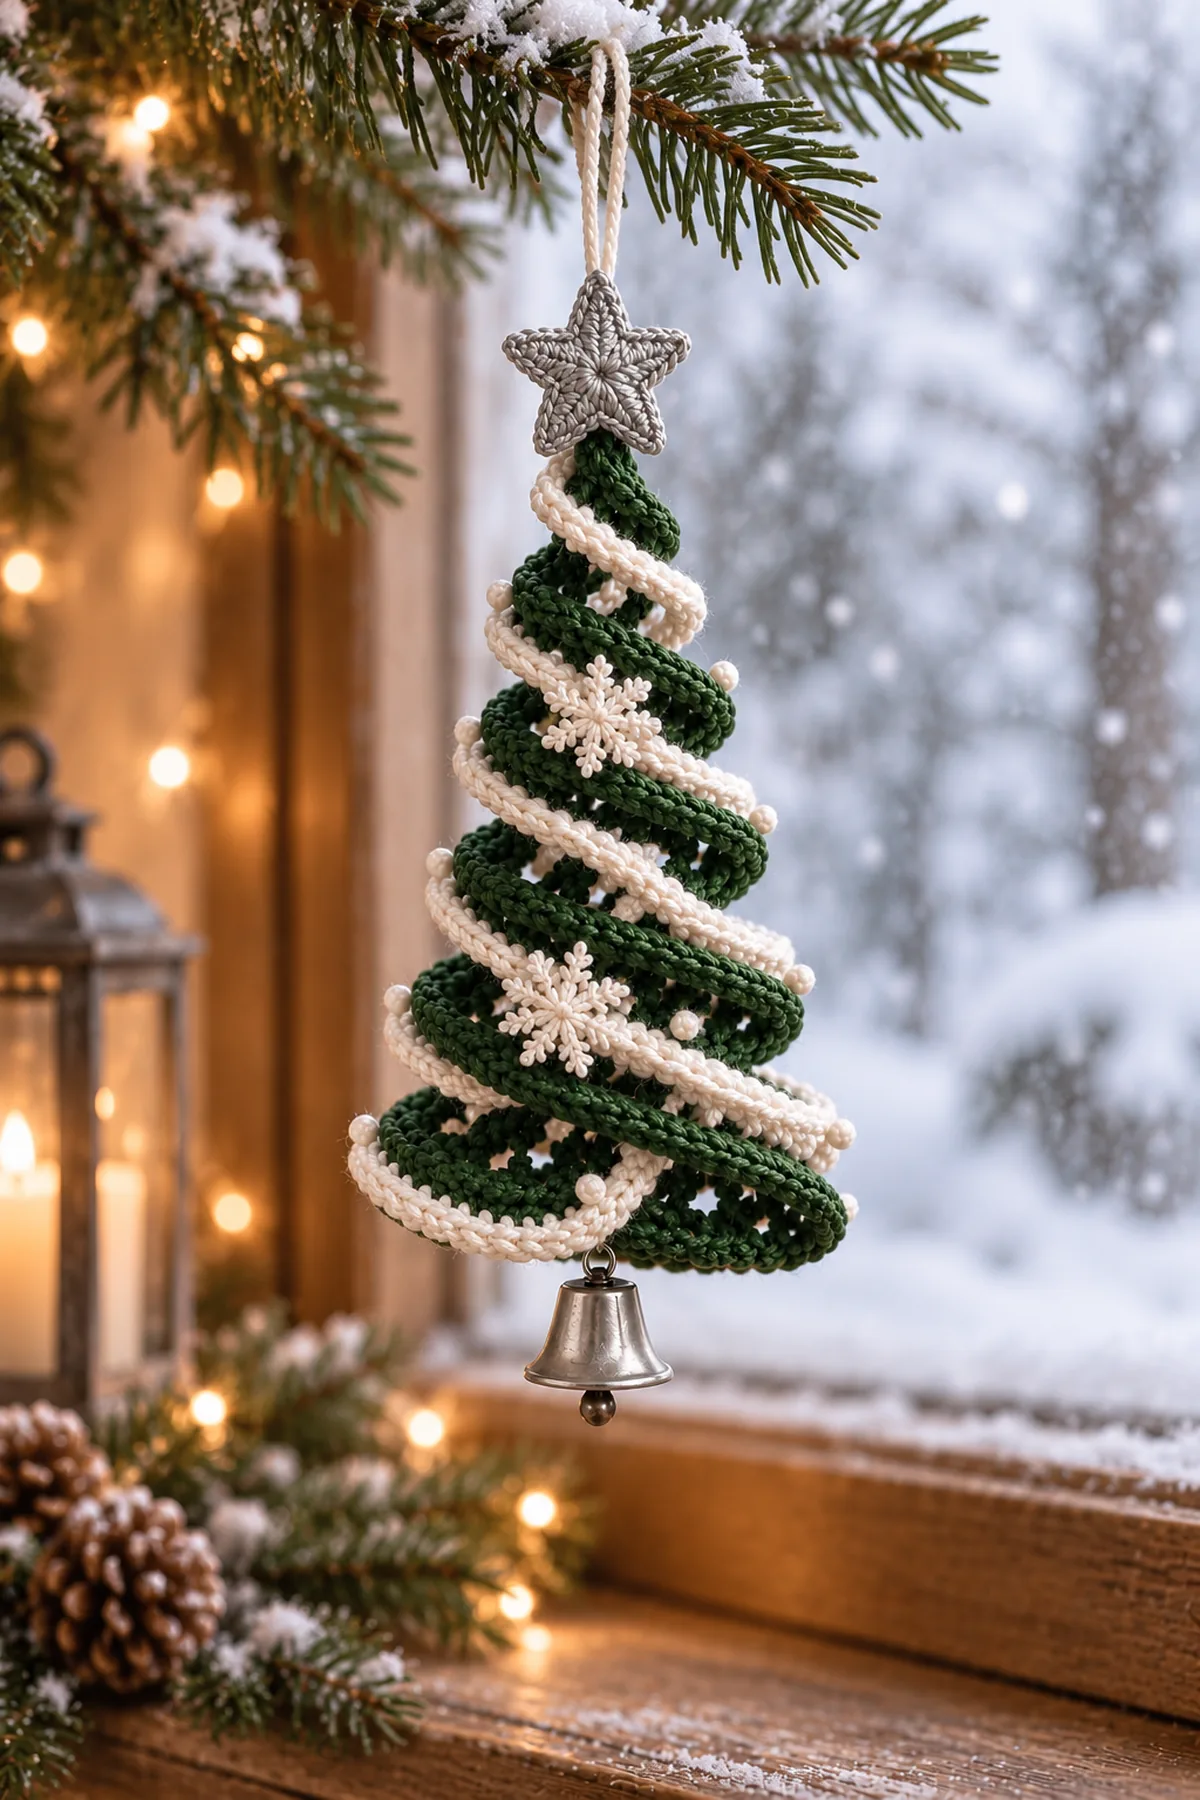
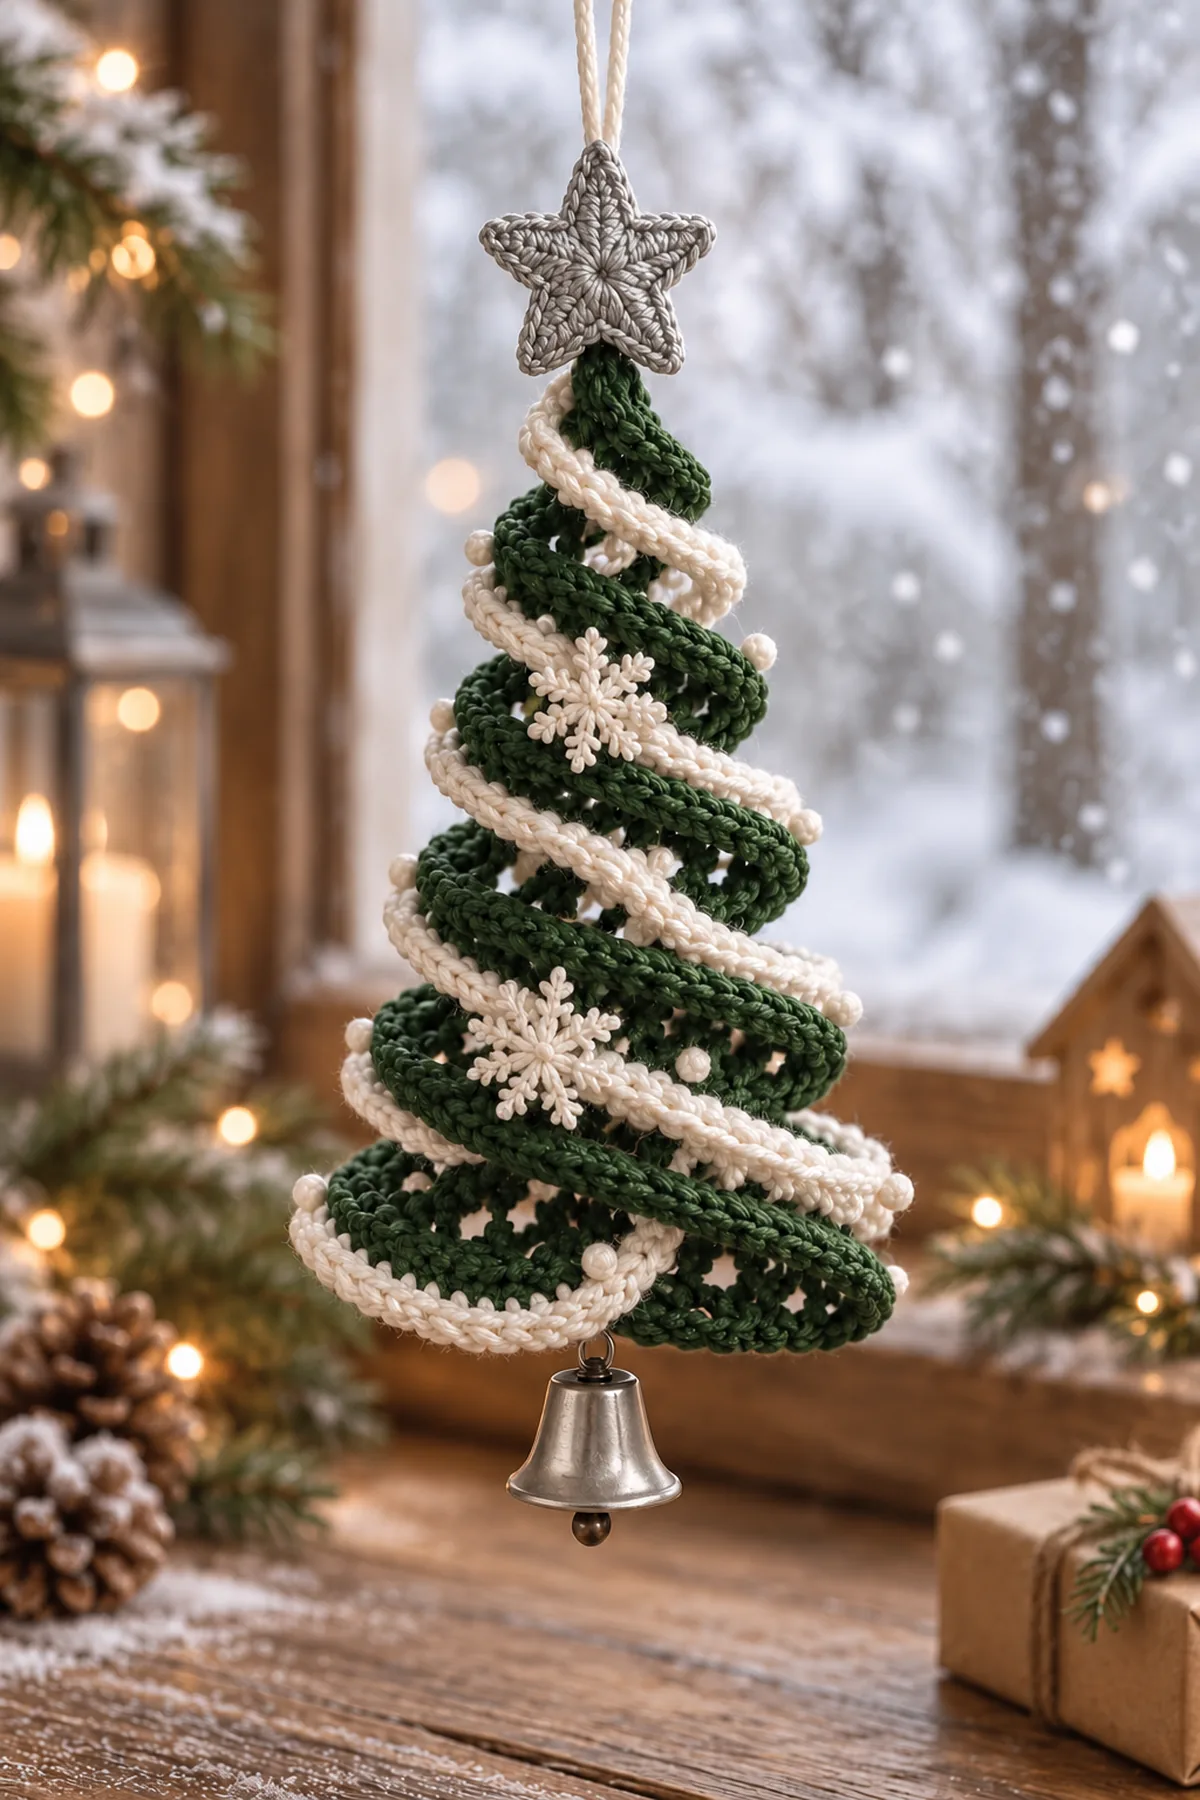
This original crochet Christmas spiral tree ornament follows your photograph as a mandatory visual brief: a forest-green open helix, a continuous soft ivory garland, a silver five-point star, small white snowflakes and a little silver bell below. The photograph does not supply stitch instructions. This new BabyYarnie construction makes one counted four-row ribbon and winds it in six increasing turns around a crocheted center cord. A sewn-in coated craft wire provides the pictured open shape rather than pretending loose cotton will stand in a cone by itself.
A 222-stitch green ribbon with an ivory upper edge is divided into six measured lengths of 12, 22, 32, 42, 52 and 62 stitches. Each length is one descending spiral turn, so the circumference and diameter grow toward the base. The turns are attached at marked levels on a 36-stitch center cord. Two joined silver stars cover the top hanger join; three ivory six-ray snowflakes are sewn to the tree. The bell and pearl-like dots are adult-display options, not load-bearing crochet parts.
Pattern Details
- Hook Size: 3.5 mm (E) starting point; use a hook that makes a firm ribbon
- Finished Size: Planning target about 7–8 in tall and 4–4.5 in across at the lowest turn, excluding hanger and optional bell; measure a trial piece
- Gauge: Target 18 sc and 20 rows per 4 in in firm DK cotton; wash and dry a swatch before measuring
- Estimated Time: Planning 5–7 hours plus full blocking/drying time
- Construction: One continuous 222-sc by four-row spiral ribbon, 36-stitch central cord, two five-point stars, three six-ray snowflakes, one 28-stitch doubled hanger; six marked turns
- Skill level: Intermediate
Why You’ll Love This Project
The pattern keeps the airy, three-dimensional helix visible in the reference instead of turning it into a flat tree appliqué. One continuous green ribbon gives a continuous snowy edge, and the segment markers make the cone geometry repeatable. The star, snowflakes and bell can be checked and reinforced as separate components before hanging.
Materials
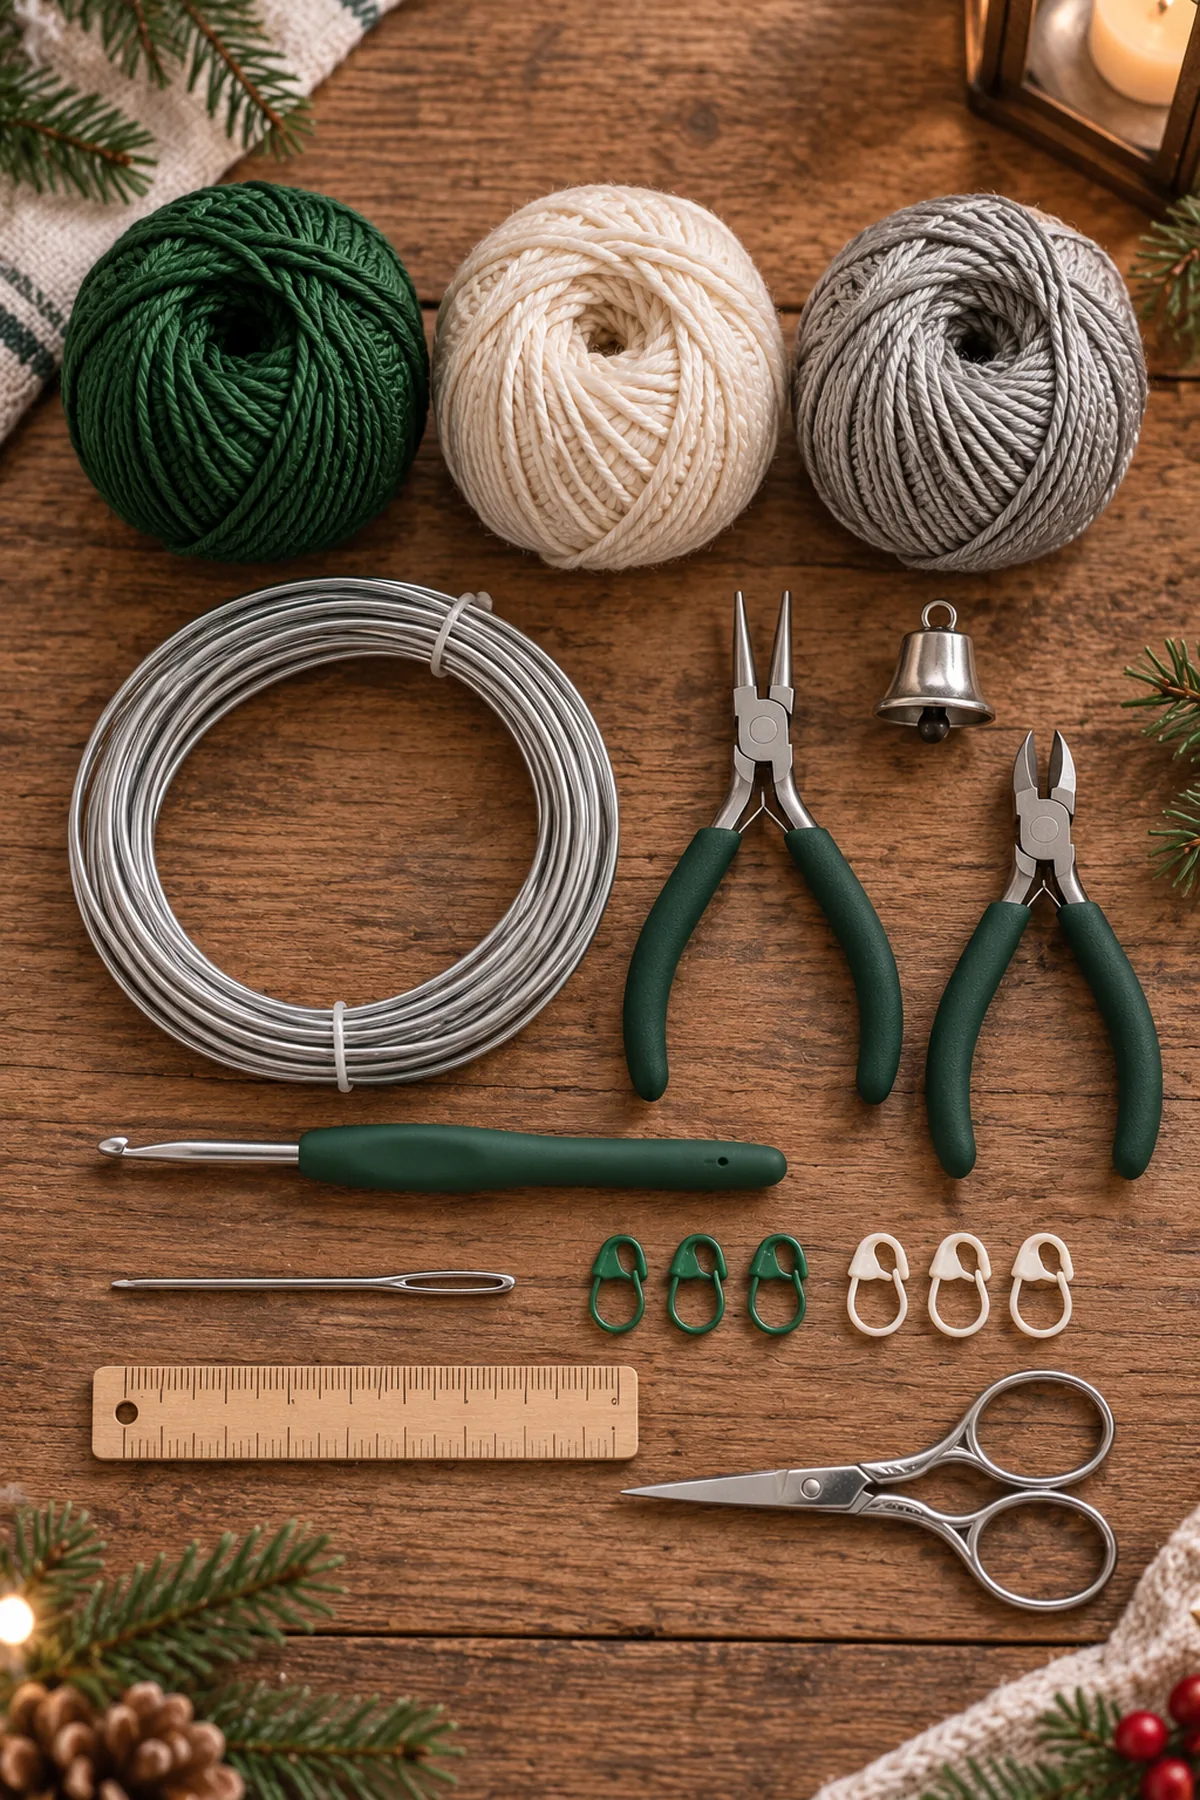
- Planning allowance: 90–110 yd forest-green DK 100% cotton, 25–35 yd soft ivory, 10–15 yd silver-gray; add swatch allowance and use matching smooth sewing yarn
- 3.5 mm (E) crochet hook, tapestry needle, six removable markers, scissors, ruler and blocking mat or clean towel
- One 52–55 in length of coated 18–20 gauge aluminum craft wire for the pictured open spiral; round-nose pliers and sturdy wire cutters. Wire is an adult-display structural material, not a child-safe component
- Optional small 18–20 mm silver craft bell with closed eyelet, sturdy sewing thread and needle; use none if the bell cannot be secured
Gauge, Measurements, and Planning
At the planning gauge of 18 sc per 4 in, the 222-stitch ribbon is about 49.3 in long before edging or blocking. The six marked lengths are about 2.7, 4.9, 7.1, 9.3, 11.6 and 13.8 in in circumference, giving approximate circular diameters 0.85 through 4.4 in. The 36-stitch cord is about 8 in long. These are arithmetic estimates, not measured finished dimensions. Blocking, wire bend radius and tension change the actual ornament; make and shape the ribbon first, then trim only the extra wire.
Make and wash a gauge swatch before beginning. Measure only after the swatch is completely dry. If the stitch width differs, change hook size rather than pulling the working yarn tighter. Keep a written count at the end of every section so the finished edges remain balanced and the assembly points line up.
Abbreviations and Special Stitches
- ch: chain
- sc: single crochet
- hdc: half double crochet
- dc: double crochet
- sl st: slip stitch
- BLO: back loop only
- st(s): stitch(es)
- MR: magic ring
Special stitch guidance: A turning ch 1 is never counted. BLO sc is made under only the back loop of the old stitch. For a firm star point, work five graded stitches back along its six-chain arm: sc, hdc, dc, hdc, sc, then anchor with a slip stitch in the next center sc. Five star points consume the ten center stitches. For each small snowflake ray, work sc, hdc, sc, sl st back along a five-chain arm and anchor it twice in the same center sc. The decorative star and ray counts are complete points, not ordinary live stitch counts. Work the long strip flat and do not join its ends into a tube.
Important Notes
- Development disclosure: crochet stitch counts and six turn lengths are numerically checked, but the ornament has not been physically sample-tested. Size, drape, wire length and yarn use are planning estimates; make one trial and adjust before gifting.
- The user photo is a mandatory silhouette and palette reference only. No source pixels, writing, logos or source pattern instructions are reused. AI-generated pictures illustrate the intended design; follow these written counts rather than counting stitches in the pictures.
- This is an adult hanging decoration, never a toy. The coated wire, optional metal bell and optional embellishments are unsafe for babies, children and pets. Keep out of reach and away from open flames, heaters and food.
- Do not use loose glued pearls. To echo the reference safely, embroider a few ivory French knots through the green ribbon and weave every tail securely. Hard beads are omitted.
- Use coated craft wire only with closed, fully covered ends. Stop and remove it if the coating splits or an end can be felt through the crochet. The hanger must carry the center cord and star, not pull on the wired outer spiral alone.
Complete Instructions for Crochet Christmas Spiral Tree Ornament
Crochet the Continuous Green-and-Ivory Spiral Ribbon
- Green spiral ribbon Row 1: ch 223; sc in second chain from hook and in each remaining chain. (222 sts) Ch 1 and turn; this chain never counts.
- Row 2: Ch 1 and turn. Sc in the back loop only of each of the 222 old stitches. (222 sts)
- Row 3: Ch 1 and turn. Hdc in each of the 222 old stitches. Change to ivory on the final yarn-over of the last hdc. (222 sts)
- Row 4: With ivory, ch 1 and turn. Sc in each of the 222 old stitches; fasten off with a long tail. This is the white outer garland edge. (222 sts)
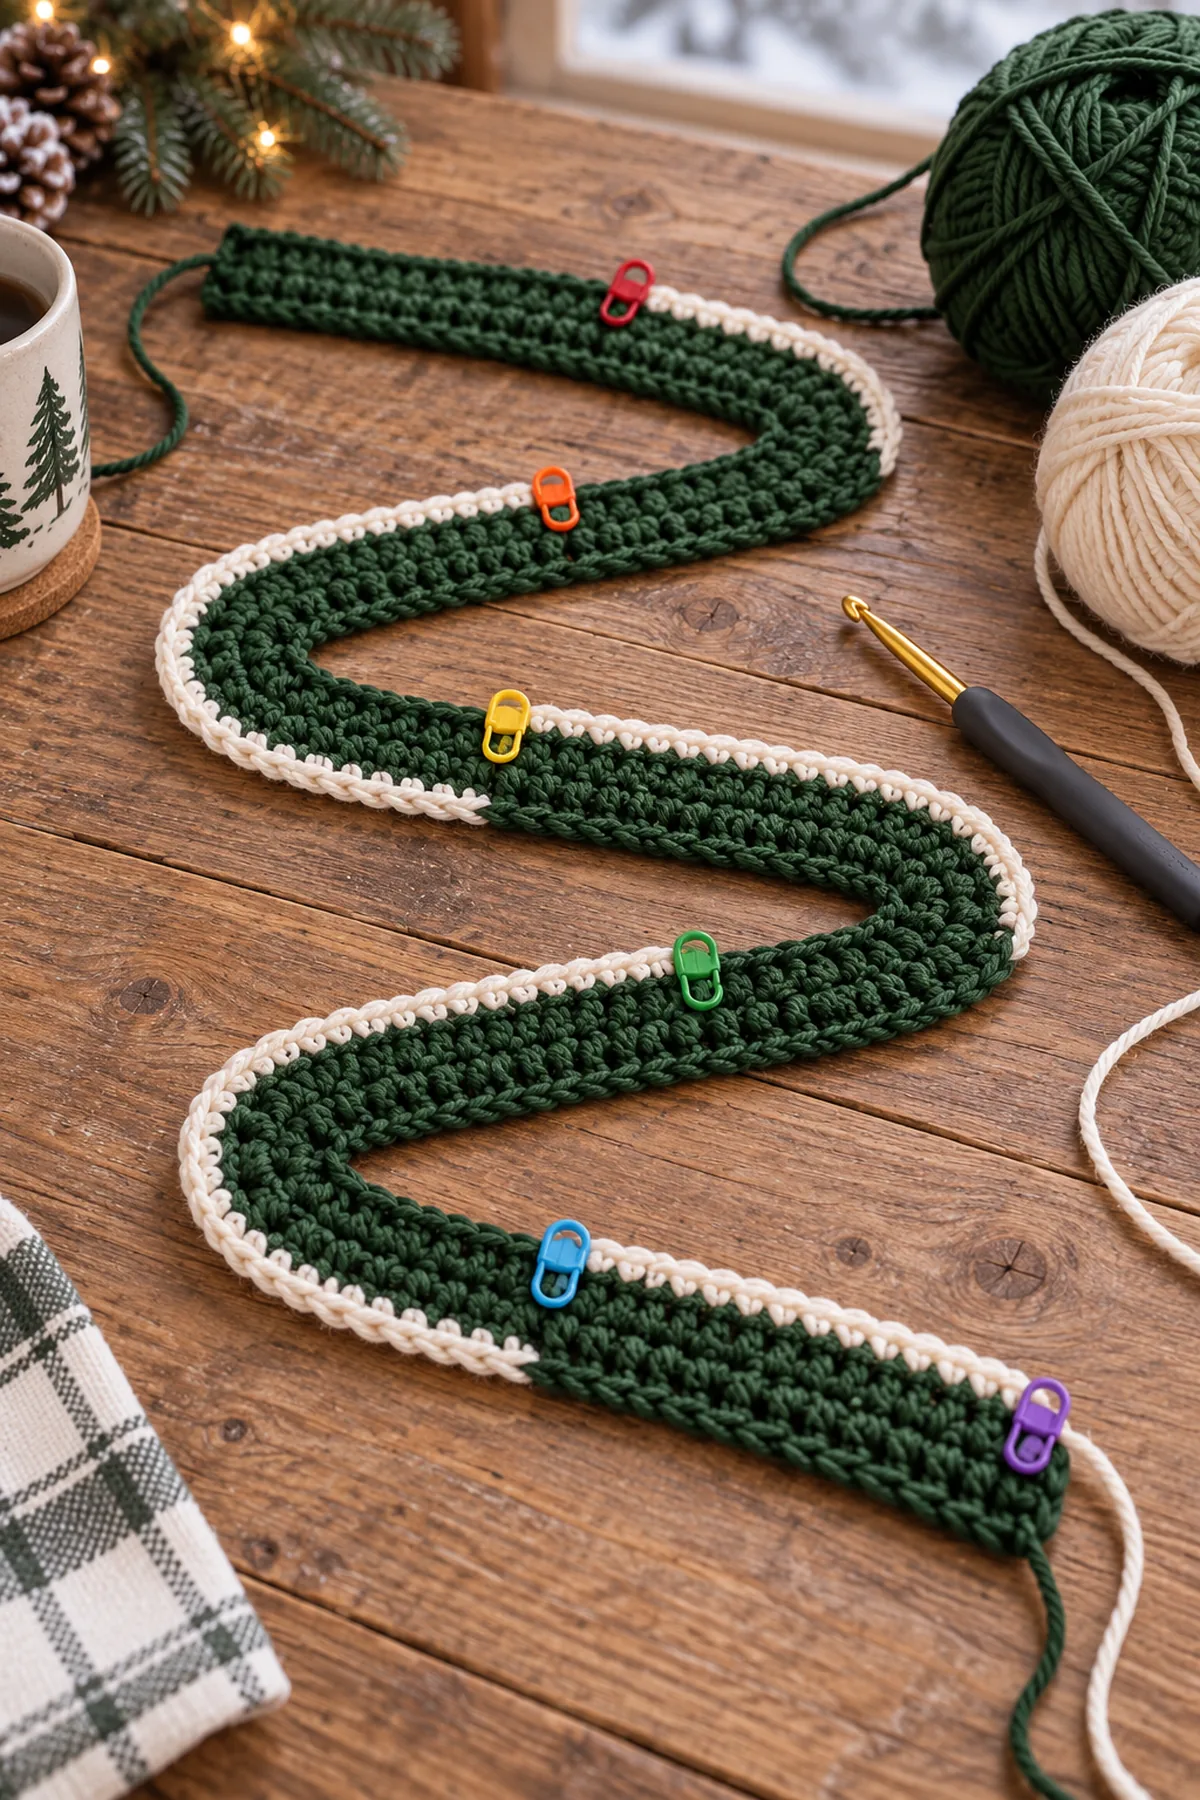
- Leave the ribbon flat. Work from the narrow top end along the long edge and place removable markers after stitch 12, 34, 66, 108, 160 and 222 of Row 3, counting from that end. These delimit exactly 12 + 22 + 32 + 42 + 52 + 62 = 222 stitches. The segment boundaries are bend/attachment guides, not decreases and not new rows.
- The ivory Row 4 is a continuous snowy edge on one long side only. If changing color on the last hdc has made an ivory loop on the reverse, hide it when the ribbon is shaped. Weave tails except for the long ivory finishing tail.
Make the Center Cord, Two Stars and Three Snowflakes
- Central hanging cord Row 1: ch 37; sc in second chain from hook and in each remaining chain. (36 sts) Ch 1 and turn; this chain never counts.
- Row 2: Ch 1 and turn. Sl st loosely into each of the 36 old stitches; fasten off with an 8-in tail. (36 sts)
- Mark cord stitches 2, 8, 15, 22, 29 and 35 from its top end. These six levels are about 1–1.5 in apart at the target gauge and hold the six turns. Keep the cord straight, not twisted.
- Silver five-point star Round 1: 10 sc into a magic ring. (10 sts) Tighten the ring, mark the first sc, and work a continuous spiral without joining or turning.
- Point round: Repeat five times: sl st in first of the next two center sc, ch 6; from second ch from hook work sc, hdc, dc, hdc, sc back along the chain, then sl st in the second center sc. Five complete points consume the ten center sc. Fasten off. (5 sts)
- Make two silver-gray five-point stars. Damp-block each flat; align backs together and whipstitch around the perimeter without closing over the top loop tails. Together they make one firm topper, not two separate ornaments.
- Six-ray snowflake Round 1: 6 sc into a magic ring. (6 sts) Tighten the ring, mark the first sc, and work a continuous spiral without joining or turning.
- Ray round: Repeat six times: sl st in next center sc, ch 5; from second ch from hook work sc, hdc, sc, sl st back to the center; sl st again in that same center sc. Count six complete rays. Fasten off with a sewing tail. (6 sts)
- Make three ivory snowflakes. Each has a six-sc center and six complete four-stitch rays. Sew through the center circle when attaching; do not let the tips be the only connection.
- Top hanging loop Row 1: ch 29; sc in second chain from hook and in each remaining chain. (28 sts) Ch 1 and turn; this chain never counts.
- Row 2: Ch 1 and turn. Sl st loosely in each of the 28 old stitches; fasten off leaving both tails for sewing. (28 sts)
- Fold the 28-stitch strip into a hanging loop. Sew at least four stitches of each end to the back of the upper center cord, then trap both ends between the two silver stars and reinforce with a second pass. Test the bare cord and loop gently before adding the spiral.
Encapsulate the Support Wire and Wind Six Turns
- Before cutting the wire to final length, smooth it and make a tiny inward closed loop with round-nose pliers at its first end. Place that loop beneath the first two green stitches of Row 2, on the wrong side and away from the white edge. With matching green sewing yarn, catch the wire under a small whipstitch every two or three ribbon stitches along Row 2. Do not pierce or fray the cotton. Keep every stitch snug enough to retain the wire but loose enough to bend the strip; do not leave exposed wire between stitches.
- At the far end, trim remaining wire only after the entire 222-stitch strip is supported. Bend the last end into another closed inward loop, cover both end loops with overlapping green fabric and sew a cap through several green stitches. No wire end may protrude or be felt through the fabric.
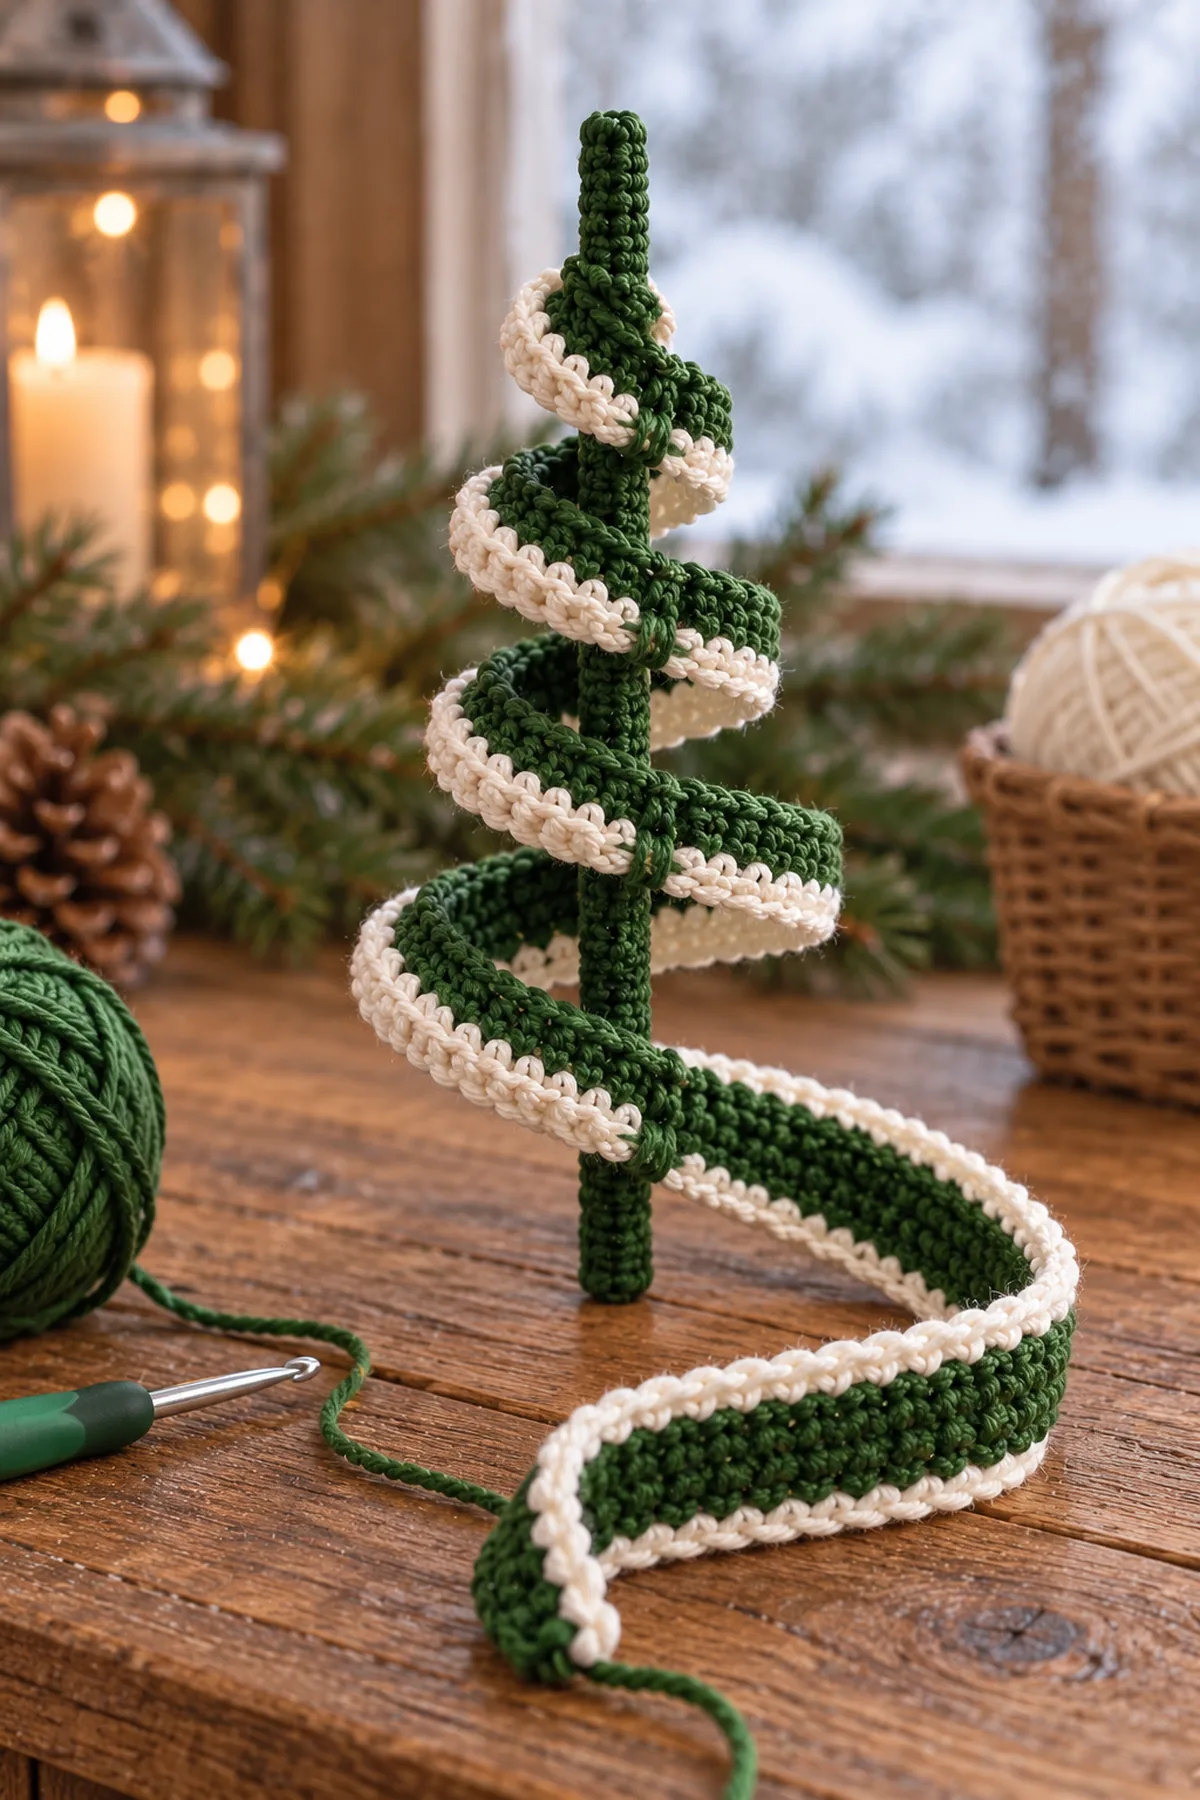
- Suspend the center cord temporarily. Starting at the top, bend the first 12-stitch ribbon segment into one small turn around it. Bring the segment boundary to cord stitch 2 and tack the inner edge broadly through four green ribbon stitches and two cord stitches. Continue the same uninterrupted helix with successive 22-, 32-, 42-, 52- and 62-stitch segments, attaching their ends at cord stitches 8, 15, 22, 29 and 35. Keep the ivory edge facing outward/upward on every turn. The circumference grows toward the bottom; do not stack six identical circles.
- At each level, put a second small green tack opposite the first between adjacent turns or from inner ribbon edge to the cord. Those discreet tacks and the coated wire resist sagging while preserving open spaces. Gently shape the widest turn to about 4–4.5 in across. If it collapses or exposes wire, unpick that section and correct it before decorating.
Attach the Star, Snowflakes and Optional Bell
- Sew the layered silver star over the top cord/hanger join, with one point straight up. Catch the center ring and lower two points through the top green turn, then make a second pass; keep the hanger emerging from behind the upper point. Gently lift the complete ornament by its loop and inspect every top stitch.
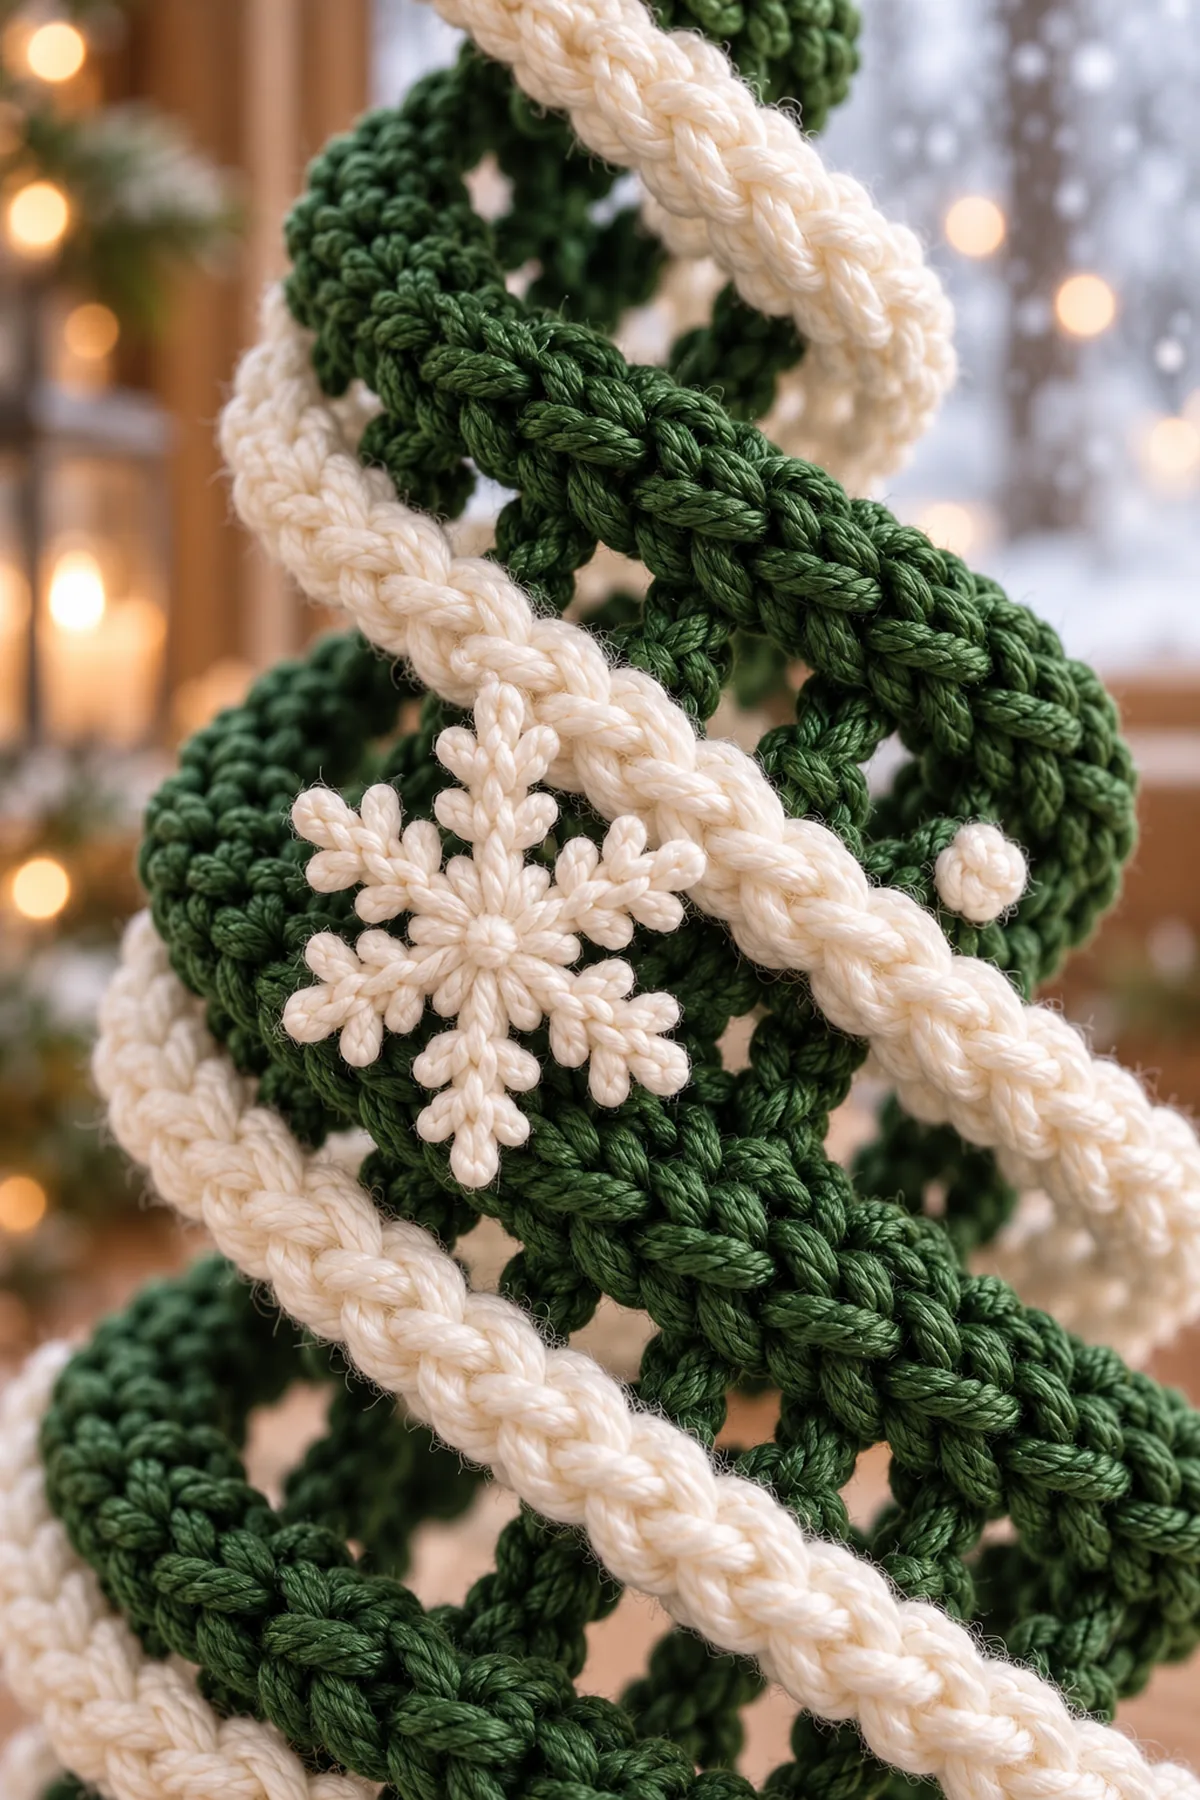
- Place the three white snowflakes on separate front-facing green turns, roughly upper, middle and lower. Sew every center ring through at least four green fabric stitches. Add a few ivory French-knot dots only if desired; each dot is thread, not a glued or sewn-on bead.
- Optional adult-only bell: if using a small metal bell with a closed eyelet, pass doubled strong sewing thread through the bell eyelet and through at least six bottom cord stitches twice, knot inside the lower turn and bury ends. The bell must hang below the widest turn without dragging the spiral out of shape. Leave it off if its eyelet opens, the thread frays, or it catches on the wire.
- Remove all temporary markers. Hang the ornament from a secure branch and inspect from every side: six descending open turns, a continuous ivory helix, an upright star, three firmly sewn snowflakes and no visible wire. This is decorative adult display only.
Assembly and Shaping
The 222-stitch continuous ribbon is marked 12/22/32/42/52/62 from top to bottom. A coated wire is sewn under its green middle row with both ends closed and covered. Each sequential turn winds once around the 36-stitch center cord and is tacked at cord levels 2/8/15/22/29/35, with a second discreet stabilizing tack. The double-layer silver star and 28-stitch loop cover the upper attachment; three snowflakes are sewn to separate turns. The optional silver bell attaches only to the lower center cord.
Lay every component on a flat surface before joining. Match the marked centers first, then divide each remaining edge into equal sections. Work through both layers with consistent tension and pause after each section to check that the fabric lies flat. This measured approach prevents twisting and keeps decorative details facing the intended direction.
Finishing
- Weave yarn tails in three different directions on the reverse and stretch the fabric gently before trimming.
- Cover both inward-looped wire ends completely; do not display any sharp, split or protruding wire.
- Check the 28-stitch loop and top cord attachment by lifting gently; check all six turn tacks, layered star and three snowflake centers.
- Spot-clean only unless your wire and optional bell materials explicitly permit washing. Dry fully and reshape by hand before storage. Keep away from children, pets, candles and heat.
For a polished result, weave each tail through several same-color stitches, reverse direction once, and trim only after the fabric has been gently stretched. Block to the listed dimensions without flattening textured stitches. Inspect joins, borders, straps, and decorative pieces before the project is used or gifted.
Helpful Tips
- Mark the six segment boundaries immediately after Row 3; totals should end exactly at stitch 222.
- Shape over a removable paper cone as a temporary former if helpful, but take it out before display; it is not an internal part.
- Do not force the smallest 12-stitch turn into a sharp kink; make a smooth loop and use the wire to hold it.
- Keep ivory Row 4 facing the same way while winding so the white line reads as one continuous garland.
Good lighting and a contrasting stitch marker make counting much easier. If a section looks uneven, compare the current count with the previous checkpoint before continuing. Fixing one missed stitch early is faster than compensating later, and it preserves the measurements used by the assembly instructions.
Frequently Asked Questions
Can I make the pictured open helix without wire?
A soft cotton strip may collapse. The written version uses covered coated craft wire plus center-cord tacks for the open photo-like shape. If you omit wire, expect a flatter or looser hanging form and do not claim the same finished shape.
Is the bell required?
No. The small silver bell is optional adult-only hardware. Do not attach it unless the eyelet is closed and the doubled thread is secure; the tree remains a complete crochet ornament without it.
Has this pattern been physically tested?
No physical sample is claimed. Stitch counts and segment totals were checked numerically, but size, stability, wire length and yardage are estimates. Make and shape a trial before gifting.
Is it safe as a baby-room ornament?
No. Wire and optional metal hardware make it an adult decoration to hang out of reach of babies, children and pets.
Conclusion
The finished ornament should read as one continuous forest-green cone-shaped helix edged in ivory, topped by a silver star and hanging above a small bell if you choose to use one. Keep your actual gauge and finished dimensions with the pattern notes, and inspect all hidden wire ends and suspension points before seasonal display.
BabyYarnie Printable Crochet Pattern Card
BabyYarnie — easy-to-follow crochet for everyday makers.
Project: Crochet Christmas Spiral Tree Ornament
Skill level: Intermediate Hook: 3.5 mm (E) starting point; use a hook that makes a firm ribbon Yarn: DK-weight firm 100% cotton
Finished size: Planning target about 7–8 in tall and 4–4.5 in across at the lowest turn, excluding hanger and optional bell; measure a trial piece
Card Materials
- Planning allowance: 90–110 yd forest-green DK 100% cotton, 25–35 yd soft ivory, 10–15 yd silver-gray; add swatch allowance and use matching smooth sewing yarn
- 3.5 mm (E) crochet hook, tapestry needle, six removable markers, scissors, ruler and blocking mat or clean towel
- One 52–55 in length of coated 18–20 gauge aluminum craft wire for the pictured open spiral; round-nose pliers and sturdy wire cutters. Wire is an adult-display structural material, not a child-safe component
- Optional small 18–20 mm silver craft bell with closed eyelet, sturdy sewing thread and needle; use none if the bell cannot be secured
Card Instructions
- Crochet the Continuous Green-and-Ivory Spiral Ribbon: One continuous 222-stitch ribbon: three green rows and one full ivory edge; mark six 12/22/32/42/52/62-stitch turns.
- Make the Center Cord, Two Stars and Three Snowflakes: 36-stitch center cord with six marked levels; two layered five-point stars; three six-ray snowflakes; a doubled 28-stitch hanger.
- Encapsulate the Support Wire and Wind Six Turns: Six increasing circumferences supported by a concealed coated wire and a 36-stitch vertical cord; broad two-pass tacks hold each level.
- Attach the Star, Snowflakes and Optional Bell: Reinforced silver star and hanger; three sewn snowflakes; optional firmly attached metal bell; no loose beads.
Finish: Check every count, weave in all ends, block to measurement, and inspect each join.