This original crochet lap blanket pattern explains how to make crochet modular mitered-stripe lap blanket from the first counted stitch through final assembly. The design is a practical free tutorial in US terms, with measurements and stitch checkpoints that you can verify as you work.
A panel begins along two adjacent outside legs represented by a 97-stitch foundation row. A centered sc3tog on each subsequent turned row removes two stitches, bringing the miter to one corner stitch at Row 49. Make twelve, block each square, rotate alternate panels and join three columns by four rows.
Pattern Details
- Hook Size: 5 mm for worsted washable wool/cotton blend; adjust to washed 16-sc and 16-row gauge
- Finished Size: About 36 by 48 inches before a narrow outside edging; twelve blocked 12-by-12-inch panels in a 3-by-4 grid
- Gauge: 16 sc and 16 turned rows = 4 inches after washing and laying flat
- Estimated Time: 35–50 hours
- Construction: Twelve 49-row center-decrease mitered squares; 3 columns by 4 rows; eight-row navy/oat/ochre stripe cycle
- Skill level: Intermediate
Why You’ll Love This Project
The shape comes from counted stitches rather than an unexplained diagram. You can inspect each stage against the measurements, and the finished object has a clear purpose and a distinct silhouette in photographs.
Materials
- Approximately 800 yards navy, 650 yards oat and 450 yards ochre washable worsted yarn; allow at least 10% additional yardage after measuring one washed sample panel
- 5 mm hook, 24 locking markers, yarn needle, measuring tape, row counter and blocking surface
- Optional soft fabric care label sewn away from the edge; no tassels, beads or stiff backing
Gauge, Measurements, and Planning
Make one full mitered panel and wash it before buying all yarn. At 16 sc and 16 rows per 4 inches, each 48-stitch foundation leg and each 48-row side should block close to 12 inches. The 97th foundation stitch is the center pivot and does not add a third leg. Multiply the measured yarn used by twelve and add 10% for seams and edging. If a sample square is not close to 12 inches, change hook or panel gauge rather than pulling seams into alignment.
Make and wash a gauge swatch before beginning. Measure only after the swatch is completely dry. If the stitch width differs, change hook size rather than pulling the working yarn tighter. Keep a written count at the end of every section so the finished edges remain balanced and the assembly points line up.
Abbreviations and Special Stitches
- ch: chain
- sc: single crochet
- sl st: slip stitch
- st(s): stitch(es)
- rnd: round
- inc: 2 sc in one stitch
- sc2tog: single crochet two stitches together
Special stitch guidance: Centered sc3tog: insert hook in the three consecutive stitches centered on the marked pivot, pulling up a loop through each, then yarn over and pull through all four loops. It consumes three stitches and produces one, decreasing the row total by two. In every odd-length row, the central three are positions (N−1)/2, (N+1)/2 and (N+3)/2. A beginning ch 1 is only a lift and never counts.
Important Notes
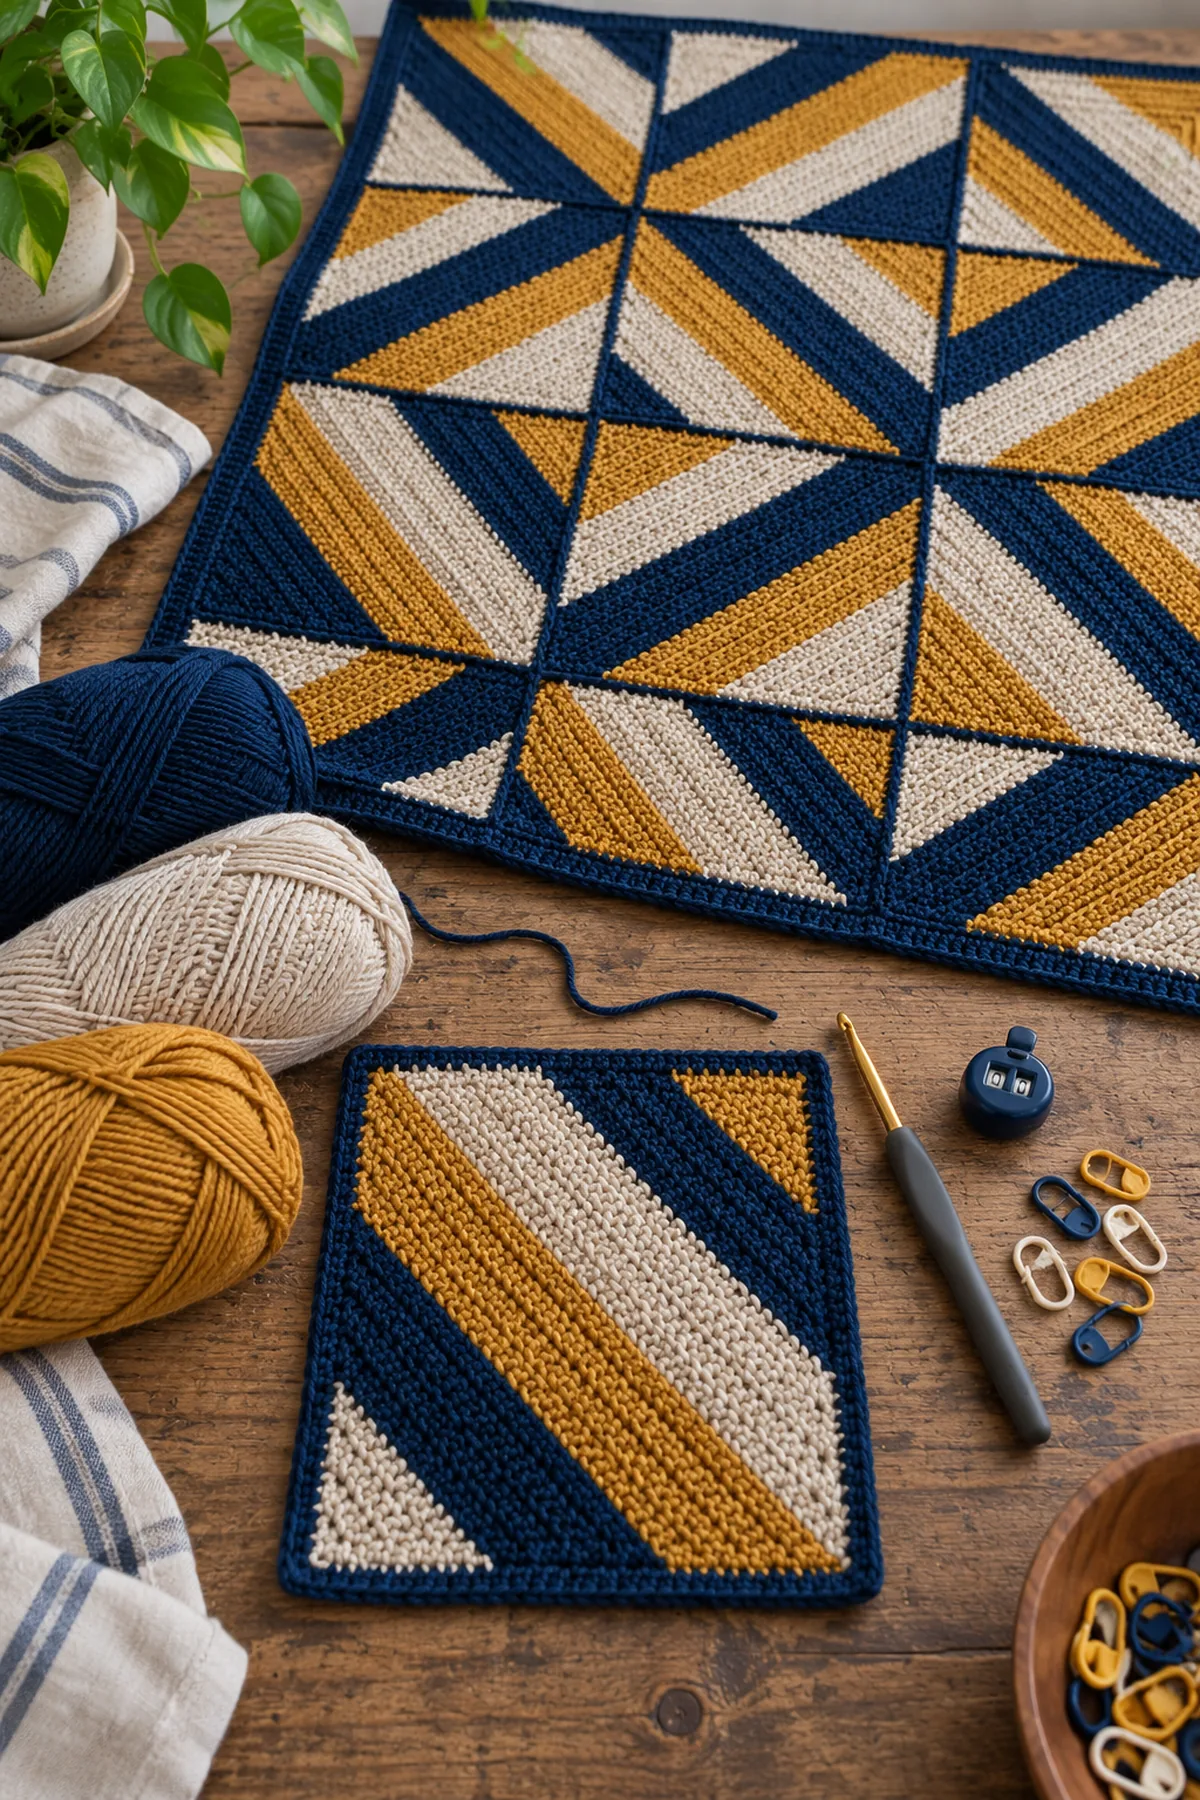
- AI-generated pictures illustrate the intended design; they are not photographs of a physically tested sample. Follow written counts rather than counting stitches in an image.
- The stitch arithmetic has been checked, but gauge, yardage and fit are planning targets until a physical sample is made. Wash a swatch and check measurements before gifting or wearing.
- A beginning ch 1 and a joining sl st never count as a stitch in this pattern. Mark the first counted stitch of each row or round.
- If a row count is wrong, return to that row. Adding an unplanned stitch later changes the shaping and the assembly alignment.
Complete Instructions for Crochet Modular Mitered-Stripe Lap Blanket
Work One Counted Mitered Square
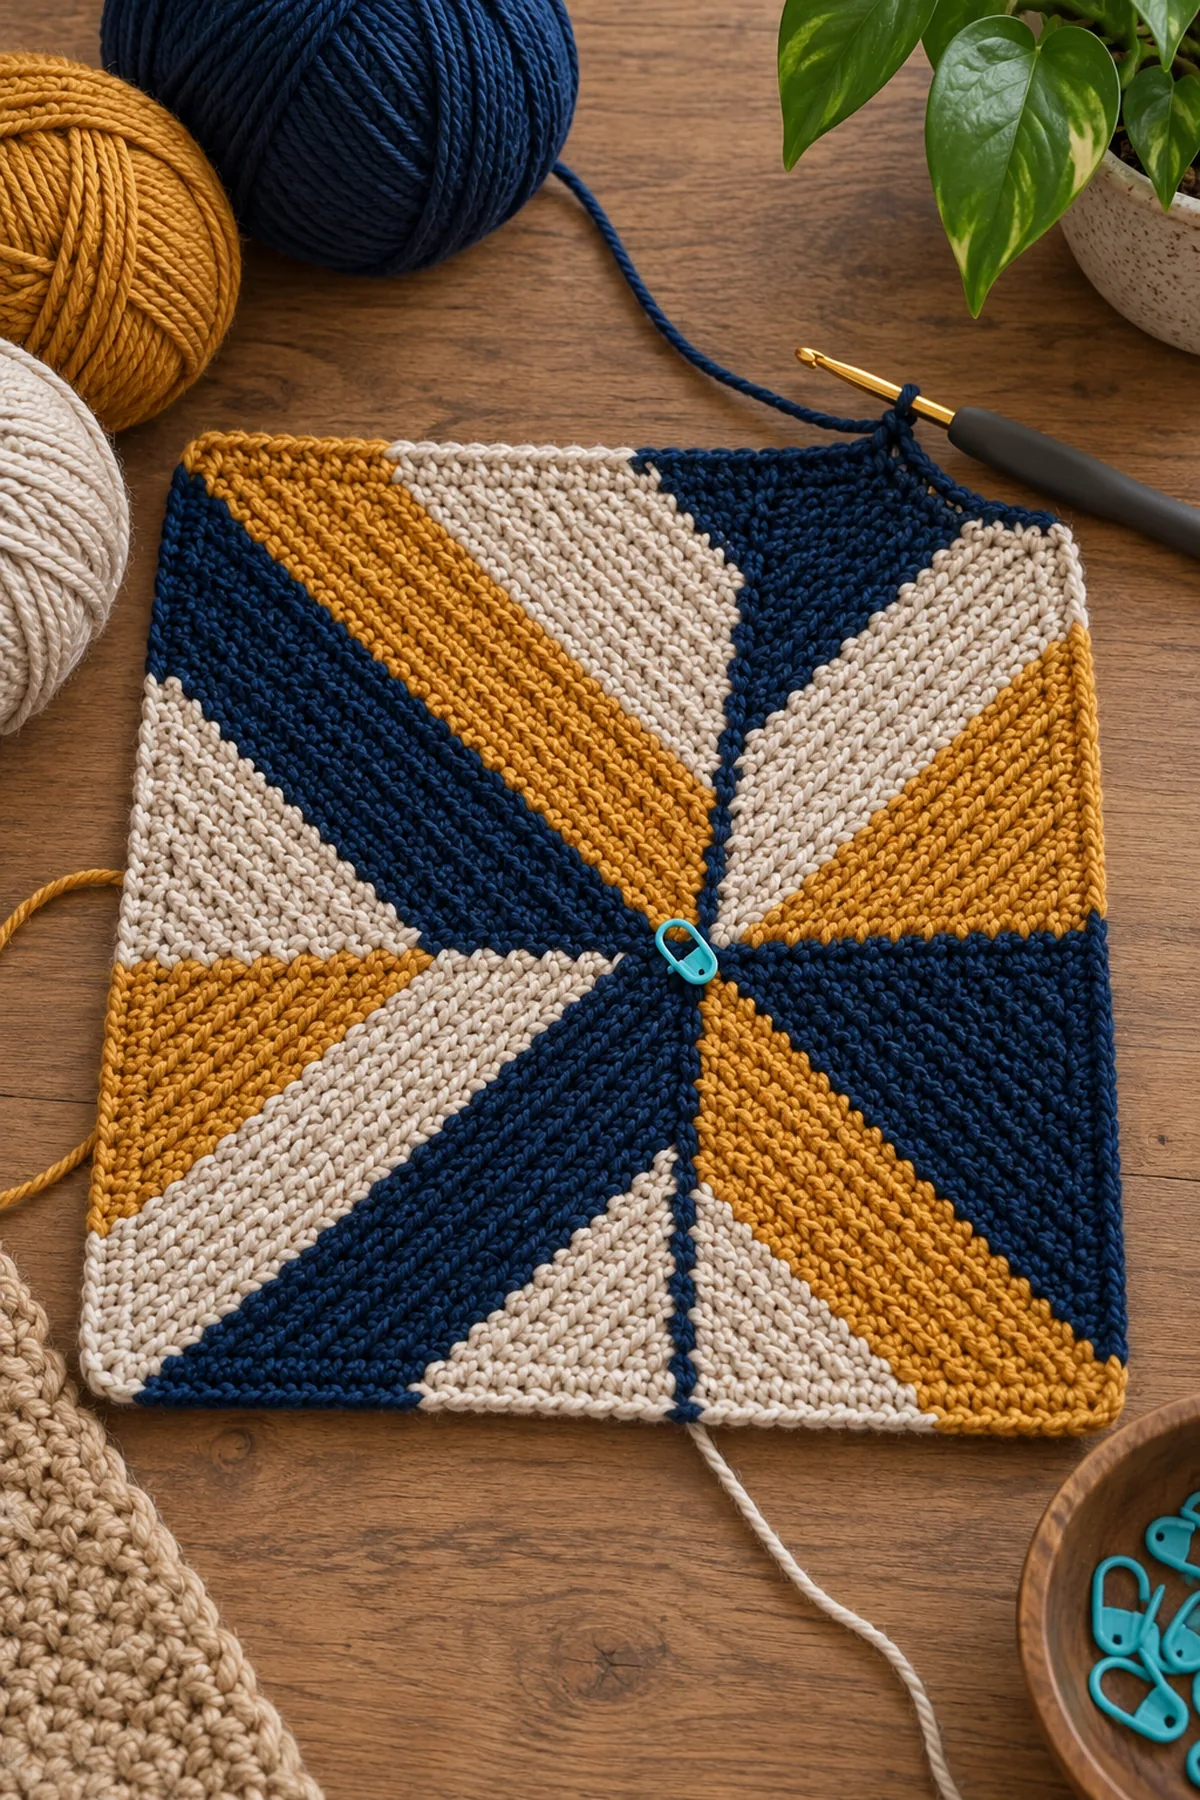
First make one complete test panel. Keep a pivot marker in the middle stitch; move it into the new center stitch after each decrease row. Turn after every row, including color-change rows.
- Row 1: With navy, ch 98. Sc in the second chain from the hook and every remaining chain. There are 48 stitches before the center pivot, one pivot stitch, and 48 stitches after it. Mark the pivot and turn. (97 sts)
- Row 2: Ch 1, sc in each of the 47 stitches before the central group of three, sc3tog over the stitch before the pivot, the pivot, and the stitch after it, then sc in the 47 remaining stitches; turn. (95 sts)
- Rows 3–49: Ch 1, sc across until three center stitches remain at the pivot, sc3tog over those three, sc across the equal number of remaining stitches, and turn except after Row 49. Each row loses two stitches. Row 48 has 3 stitches; Row 49 is one sc3tog and leaves the final corner stitch. Fasten off with a long seam tail. (1 sts) after Row 49.
- Use this complete row-count key to catch a misplaced decrease: Row 1: (97 sts), Row 2: (95 sts), Row 3: (93 sts), Row 4: (91 sts), Row 5: (89 sts), Row 6: (87 sts), Row 7: (85 sts), Row 8: (83 sts), Row 9: (81 sts), Row 10: (79 sts), Row 11: (77 sts), Row 12: (75 sts), Row 13: (73 sts), Row 14: (71 sts), Row 15: (69 sts), Row 16: (67 sts), Row 17: (65 sts), Row 18: (63 sts), Row 19: (61 sts), Row 20: (59 sts), Row 21: (57 sts), Row 22: (55 sts), Row 23: (53 sts), Row 24: (51 sts), Row 25: (49 sts), Row 26: (47 sts), Row 27: (45 sts), Row 28: (43 sts), Row 29: (41 sts), Row 30: (39 sts), Row 31: (37 sts), Row 32: (35 sts), Row 33: (33 sts), Row 34: (31 sts), Row 35: (29 sts), Row 36: (27 sts), Row 37: (25 sts), Row 38: (23 sts), Row 39: (21 sts), Row 40: (19 sts), Row 41: (17 sts), Row 42: (15 sts), Row 43: (13 sts), Row 44: (11 sts), Row 45: (9 sts), Row 46: (7 sts), Row 47: (5 sts), Row 48: (3 sts), Row 49: (1 sts). For every row in this key, read the number as counted sc tops after that row; the two stitches removed on each new row make the V-shaped miter.
- Stripe rows are 1–4 navy, 5–6 oat, 7–8 ochre; repeat that exact eight-row sequence for Rows 9–48 and make Row 49 navy. Change color on the last pull-through of the preceding row’s final sc, then turn and ch 1. Do not carry a contrasting float across the front.
Block Twelve Panels and Map the Pinwheel
Repeat the same square eleven more times. You need twelve total; a single large rectangle will not create the rotating miter direction.
- Wash and dry all twelve squares according to the yarn label. Block each to 12 by 12 inches, checking both outer foundation legs and the two row-end sides. Mark every side at 3, 6 and 9 inches so unequal stitch structures can be joined evenly.
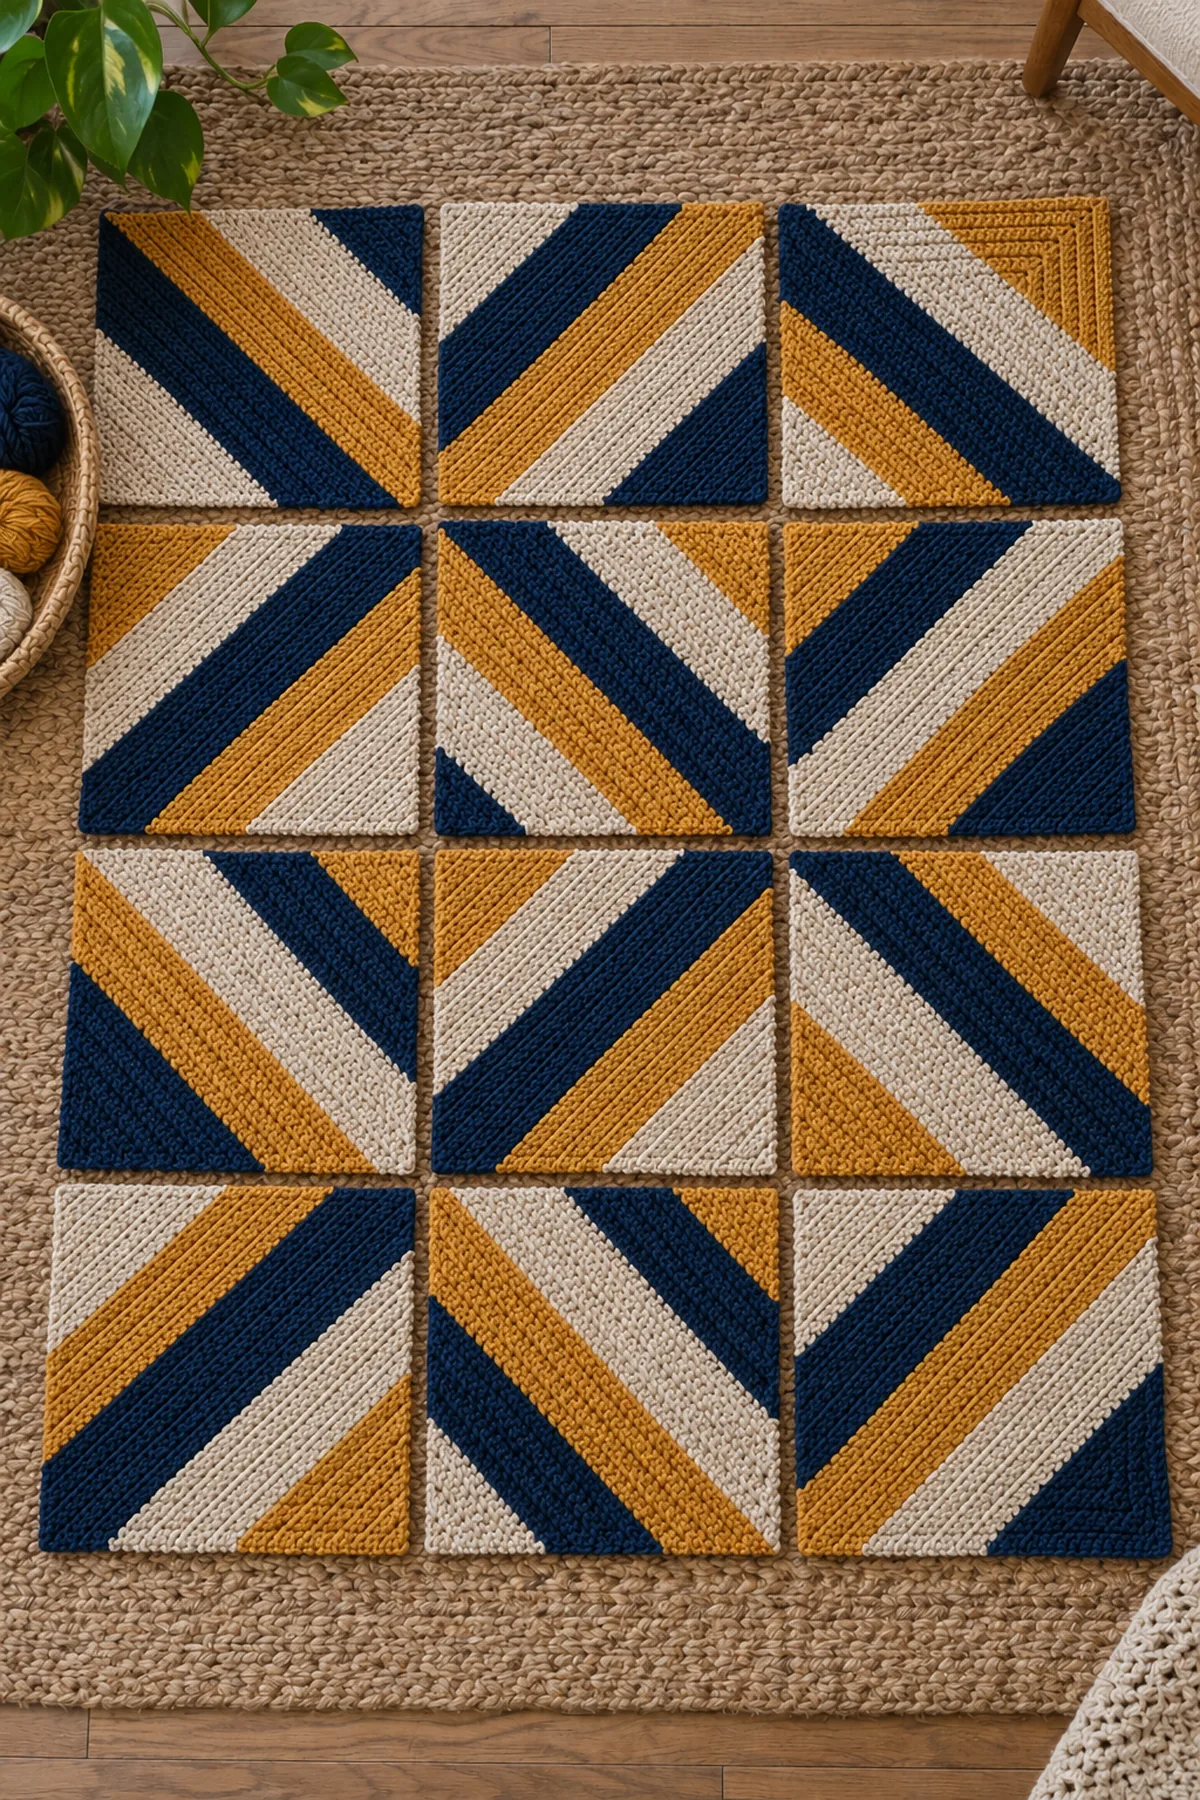
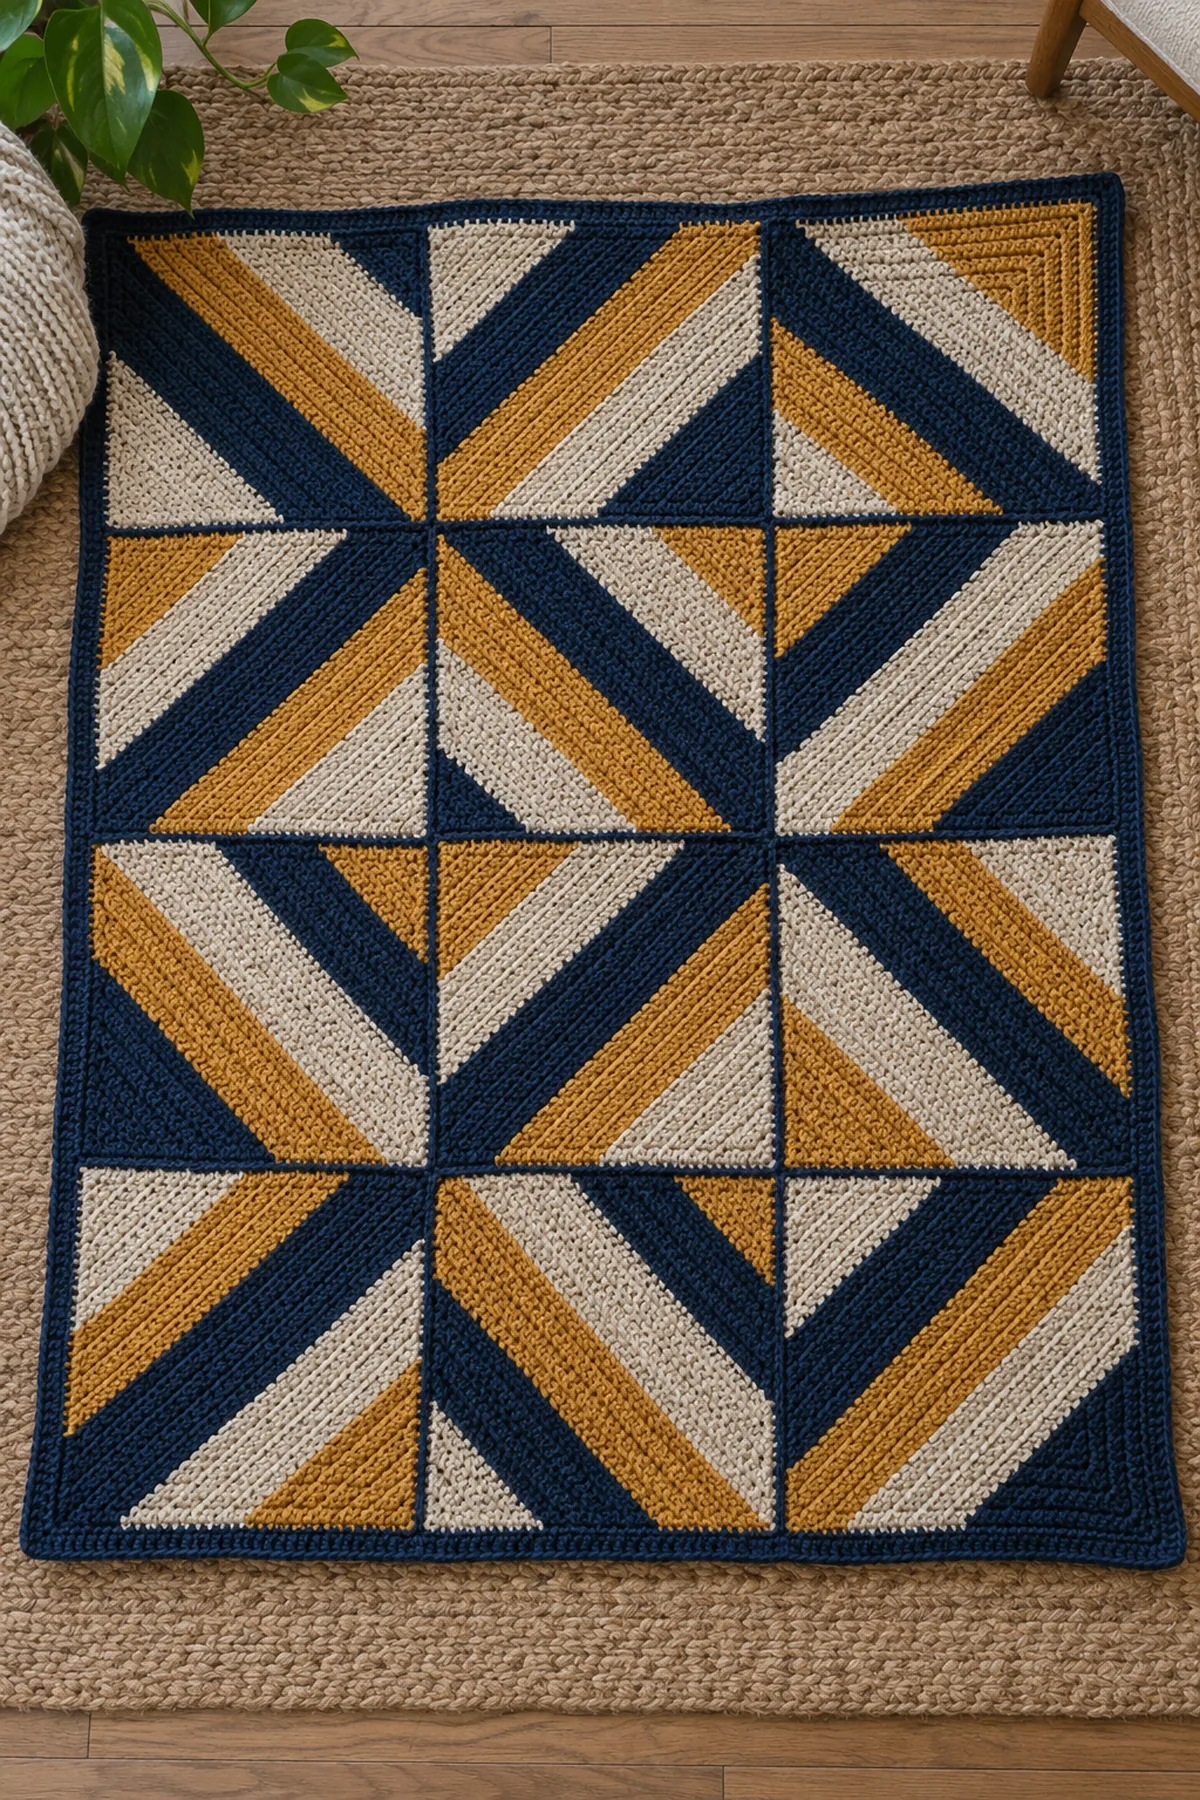
- Lay the squares in four horizontal rows of three. Rotate Panel 1 so its miter point faces upper-right; rotate Panels 2 and 3 clockwise by one and two quarter turns. Start the next blanket row with the next quarter-turn and continue the rotation across the 3-by-4 grid. The resulting stripe chevrons circulate rather than lining up as straight bars.
- Before joining, photograph the entire 36-by-48-inch layout. Name columns A, B and C from left to right and rows 1–4 from top to bottom. Write the orientation of each square on a removable scrap tag, not on the crochet fabric.
- If a square is visibly larger after washing, rework or reblock that square; a seam cannot safely absorb an inch of mismatch without puckering the blanket.
Join the Grid and Edge the Lap Blanket
Join with the right sides facing up. Stitch through corresponding outer edge bars, not through the decorative center miter.
- Mattress-join A to B, then B to C in each of the four horizontal blanket rows, matching the 3-, 6- and 9-inch markers. Sew the three horizontal seams between those rows, again matching marked quarters. There are eight short panel-to-panel joins within rows and three full-width row-to-row seams. Leave long seam tails woven back through the same-color fabric.
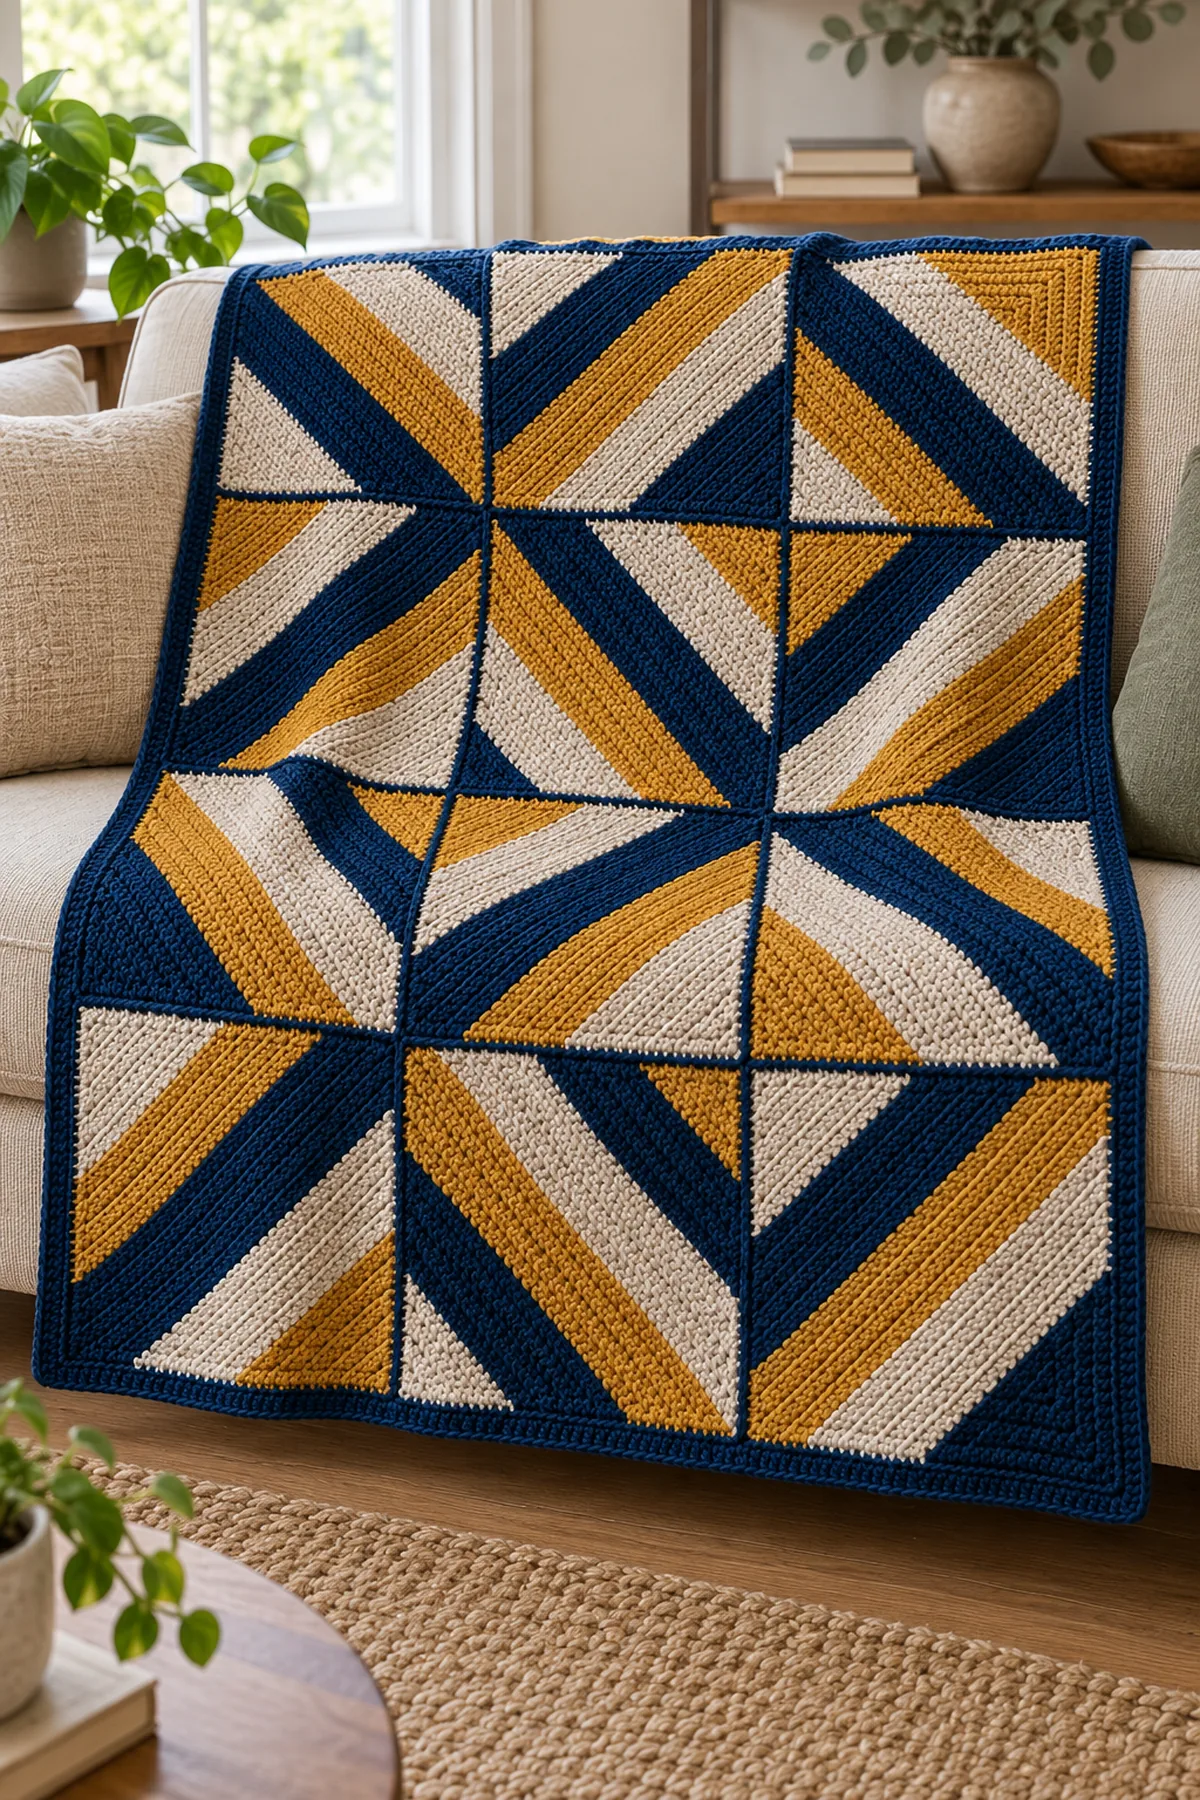
- With oat, join at one outer corner. Along each 12-inch panel edge, pick up 48 sc spaced between the measured quarter markers; work 3 sc at each of the four overall blanket corners. The outer perimeter has three 48-stitch panel edges on the top and bottom, four on each side, plus 12 corner stitches. (684 sts)
- Check the sum: 3×48 + 3×48 + 4×48 + 4×48 + 12 = 684. Join without turning and work a second sc edge round, putting one sc in each ordinary stitch and 3 sc in the central stitch of each prior corner group. (692 sts) Fasten off and block only until the four sides are straight.
- Spread the adult lap blanket over a sofa or chair and inspect all cross-points for open gaps. The washable finish should drape rather than stand stiffly at the miter centers.
Assembly and Shaping
Twelve mitered squares are arranged 3 across by 4 down, rotating each panel by quarter turns. Eight adjacent panel joins and three full-width joining seams make the grid. The first outer border has 684 stitches; a second with corner increases has 692. Final size depends on the washed panel sample.
Lay every component on a flat surface before joining. Match the marked centers first, then divide each remaining edge into equal sections. Work through both layers with consistent tension and pause after each section to check that the fabric lies flat. This measured approach prevents twisting and keeps decorative details facing the intended direction.
Finishing
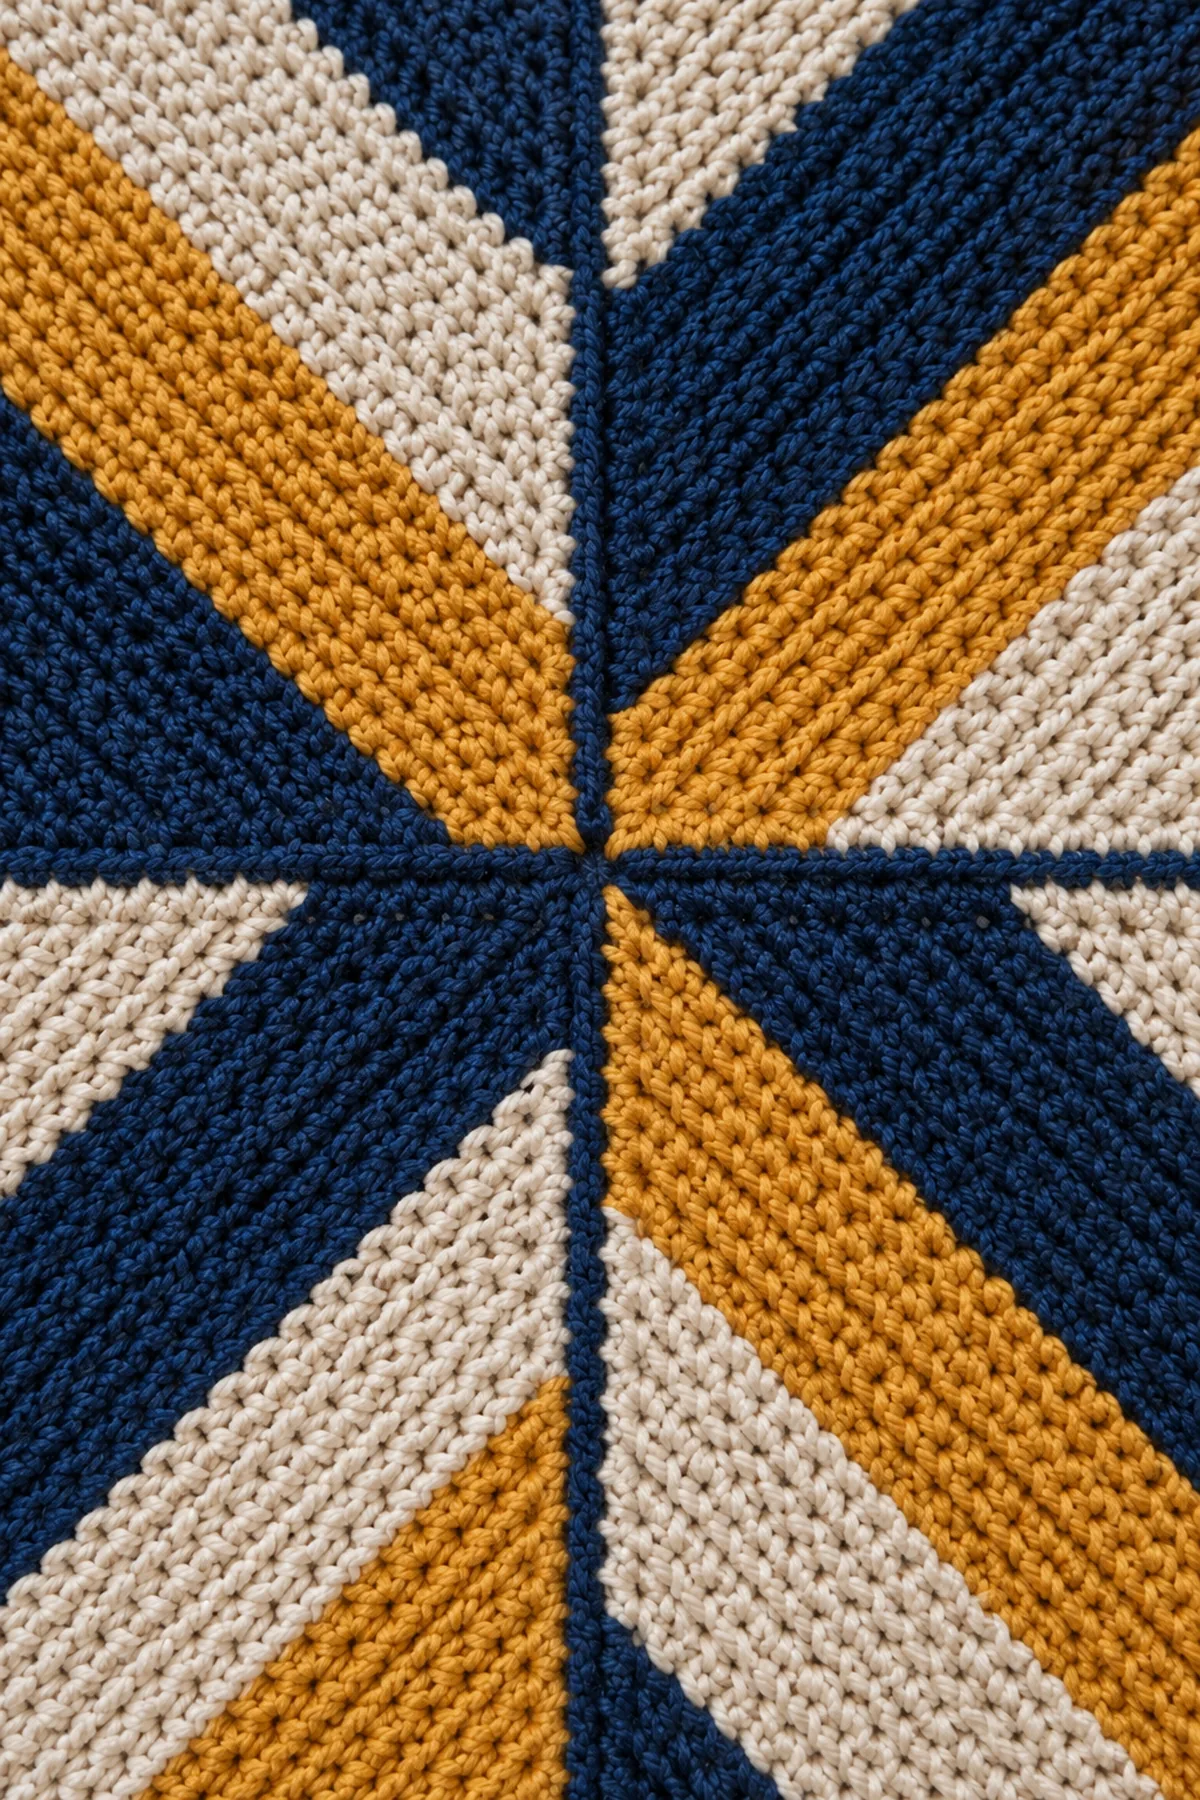
- Weave each tail along three different paths on the wrong side; reverse direction before trimming.
- Wash or damp-block according to the yarn label and allow the work to dry at its measured shape.
- Inspect every seam, edge and attachment from both faces before first use, then inspect again after laundering.
For a polished result, weave each tail through several same-color stitches, reverse direction once, and trim only after the fabric has been gently stretched. Block to the listed dimensions without flattening textured stitches. Inspect joins, borders, straps, and decorative pieces before the project is used or gifted.
Helpful Tips
- Use contrasting locking markers at shaping points and record the count after every change row.
- Change hook size when the washed swatch differs from the stated gauge; do not compensate with uneven hand tension.
- Photograph the flat components before joining so it is easy to identify an inverted or twisted piece.
Good lighting and a contrasting stitch marker make counting much easier. If a section looks uneven, compare the current count with the previous checkpoint before continuing. Fixing one missed stitch early is faster than compensating later, and it preserves the measurements used by the assembly instructions.
Frequently Asked Questions
How can I resize the adult lap blanket?
Add an entire 12-inch panel column or row after checking yardage. Keep every square’s 97-to-1 miter construction and recompute the outer-edge count for the new grid.
Why mark the pivot on every row?
Only the centered three stitches decrease. Losing a stitch at an edge would tilt a square and prevent the adjacent panels from matching.
Conclusion
Each panel contributes one directional set of stripes, so the twelve rotated miters make a changing pinwheel rhythm across a practical adult-size lap throw.
BabyYarnie Printable Crochet Pattern Card
BabyYarnie — easy-to-follow crochet for everyday makers.
Project: Crochet Modular Mitered-Stripe Lap Blanket
Skill level: Intermediate Hook: 5 mm for worsted washable wool/cotton blend; adjust to washed 16-sc and 16-row gauge Yarn: Worsted washable wool or cotton blend
Finished size: About 36 by 48 inches before a narrow outside edging; twelve blocked 12-by-12-inch panels in a 3-by-4 grid
Card Materials
- Approximately 800 yards navy, 650 yards oat and 450 yards ochre washable worsted yarn; allow at least 10% additional yardage after measuring one washed sample panel
- 5 mm hook, 24 locking markers, yarn needle, measuring tape, row counter and blocking surface
- Optional soft fabric care label sewn away from the edge; no tassels, beads or stiff backing
Card Instructions
- Work One Counted Mitered Square: Ch 98 for 97 sc, mark center, then sc3tog over the three center stitches every row through Row 49, reducing by two to one final corner stitch.
- Block Twelve Panels and Map the Pinwheel: Make twelve identical 49-row squares, block each to 12 inches and arrange a rotating 3-column by 4-row pinwheel map.
- Join the Grid and Edge the Lap Blanket: Join 3 by 4 rotated squares; outer border counts 684 then 692 stitches with four 3-sc corners each round.
Finish: Check every count, weave in all ends, block to measurement, and inspect each join.