This original crochet corset belt pattern explains how to make crochet lace-up corset belt from the first counted stitch through final assembly. The design is a practical free tutorial in US terms, with measurements and stitch checkpoints that you can verify as you work.
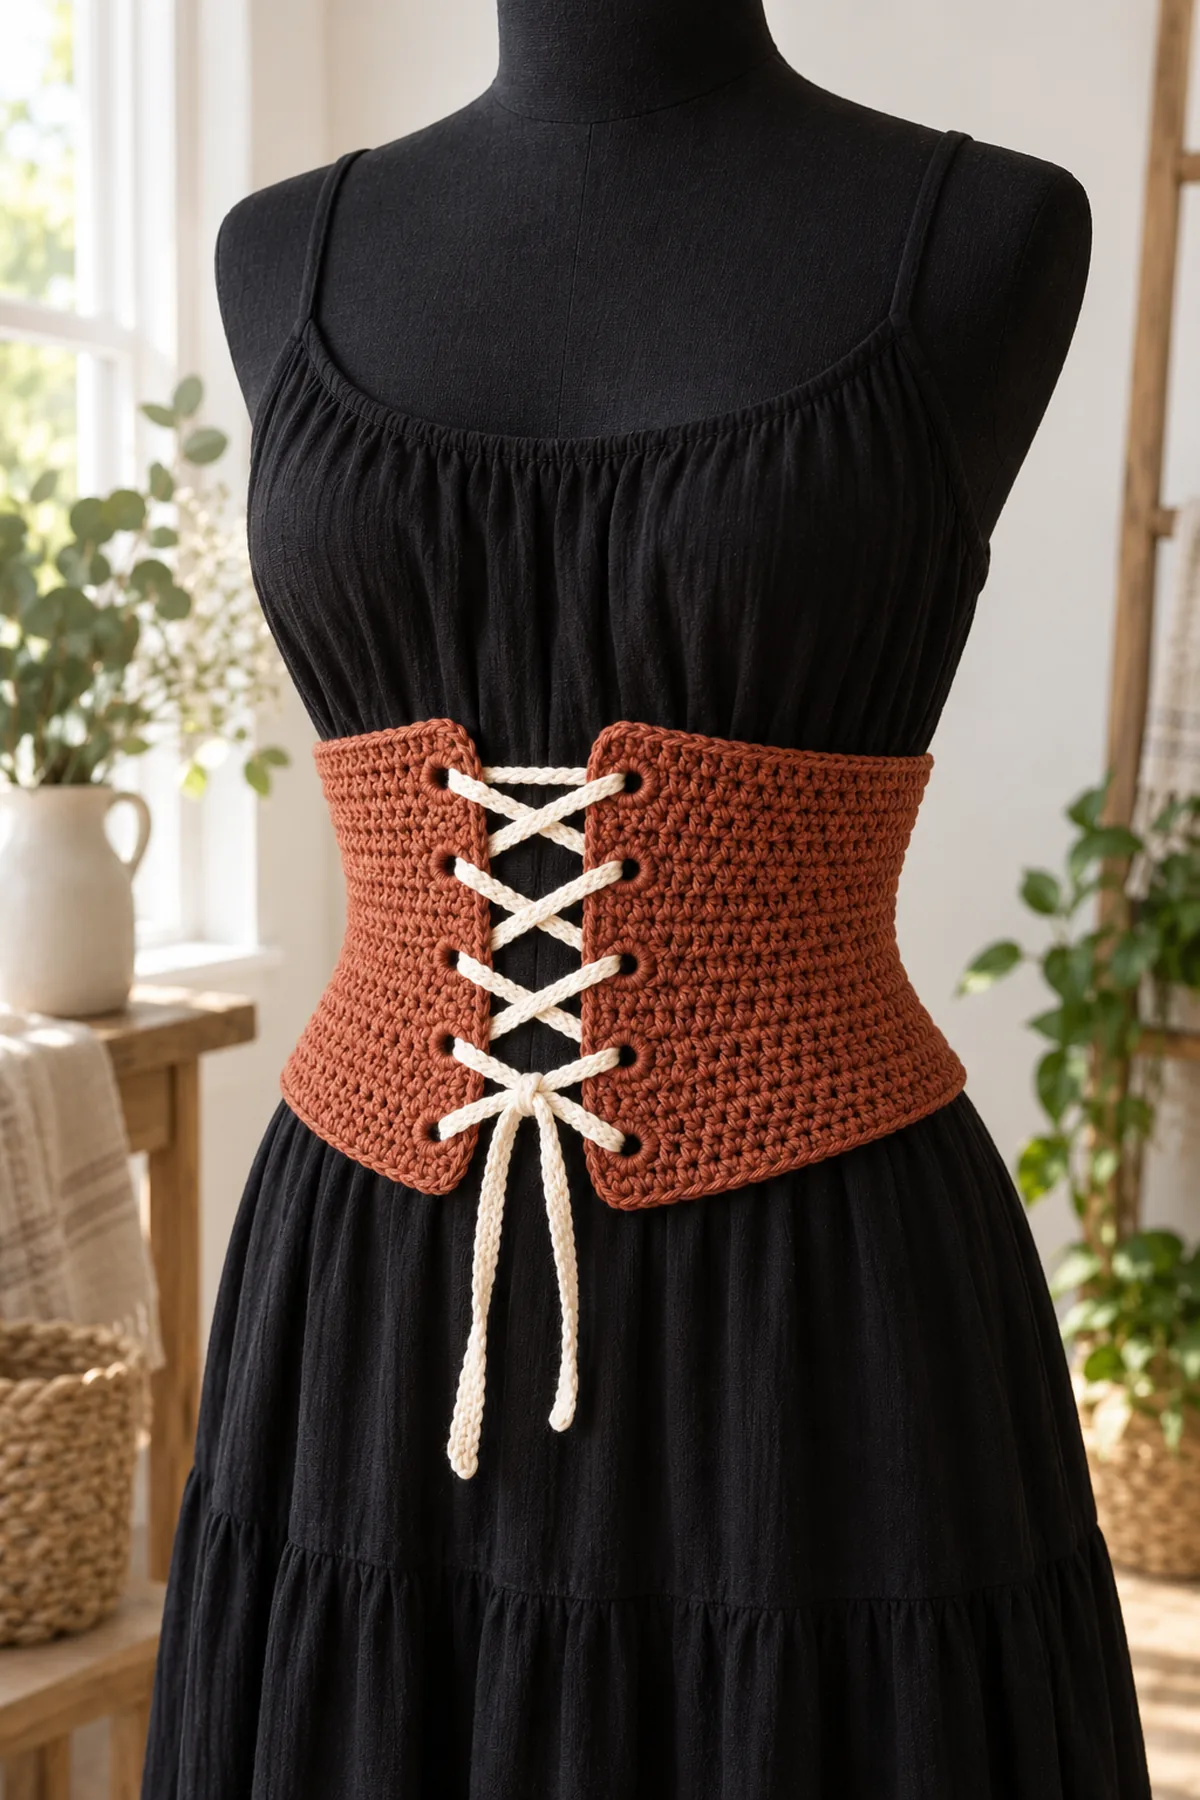
Two equal panels provide the body of the belt. One short end of each is seamed at center back; the opposite short edges form the eight-hole lacing opening. The flat ribbon is crocheted separately, then threaded upward through corresponding eyelets.
Pattern Details
- Hook Size: 4.5 mm for panels; 4 mm for ribbon and eyelet reinforcement
- Finished Size: A/B/C: fabric circumference about 28/32/36 inches before lacing; fits measured waists about 29–32/33–36/37–40 inches with a 1–4-inch front gap; depth about 4.5 inches
- Gauge: 16 sc and 16 turned rows = 4 inches after washing, in firm worsted cotton
- Estimated Time: 8–12 hours
- Construction: Two 18-row shaped panels, one 18-row-end center-back seam, eight front eyelets total and a two-row crochet ribbon
- Skill level: Intermediate
Why You’ll Love This Project
The shape comes from counted stitches rather than an unexplained diagram. You can inspect each stage against the measurements, and the finished object has a clear purpose and a distinct silhouette in photographs.
Materials
- Worsted cotton: approximately 260/300/350 yards rust for A/B/C; reserve 70 yards cream for the long ribbon and matching edge reinforcement
- 4.5 mm and 4 mm hooks, 8 locking markers, measuring tape, yarn needle and scissors
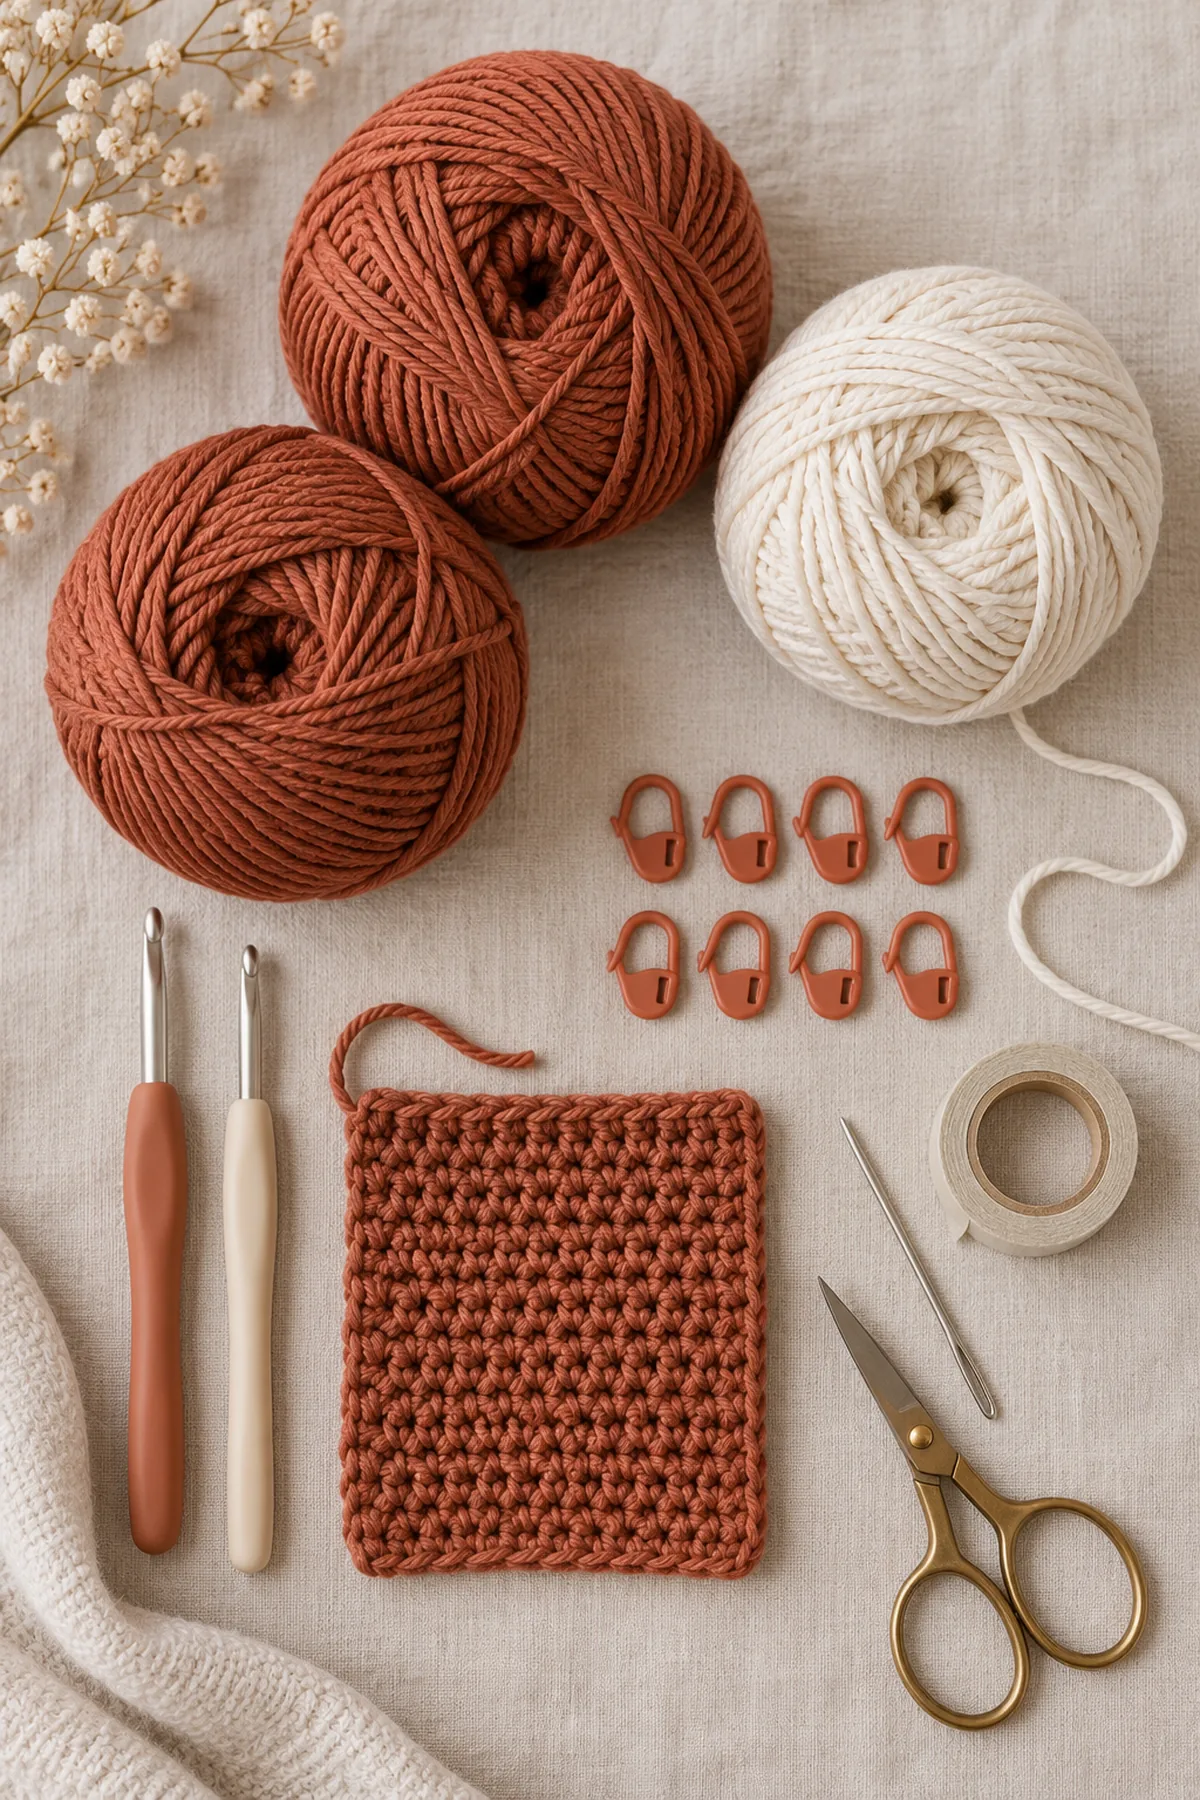
Gauge, Measurements, and Planning
Measure the waist over the clothing that will sit under the belt. Select A for 29–32 inches, B for 33–36 inches or C for 37–40 inches. At the stated washed gauge each panel starts 56/64/72 stitches, giving a relaxed 14/16/18-inch length. The laced gap should be 1–4 inches; if it exceeds 4 inches, use the next size. This is a fashion accessory and is not structural shapewear.
Make and wash a gauge swatch before beginning. Measure only after the swatch is completely dry. If the stitch width differs, change hook size rather than pulling the working yarn tighter. Keep a written count at the end of every section so the finished edges remain balanced and the assembly points line up.
Abbreviations and Special Stitches
- ch: chain
- sc: single crochet
- sl st: slip stitch
- st(s): stitch(es)
- rnd: round
- inc: 2 sc in one stitch
- sc2tog: single crochet two stitches together
Special stitch guidance: An edge increase is 2 sc in the first or last stitch. An edge decrease is sc2tog across the first or last two stitches. For every eyelet, ch 2 over one skipped row-end position and keep the arch open when reinforcing it.
Important Notes
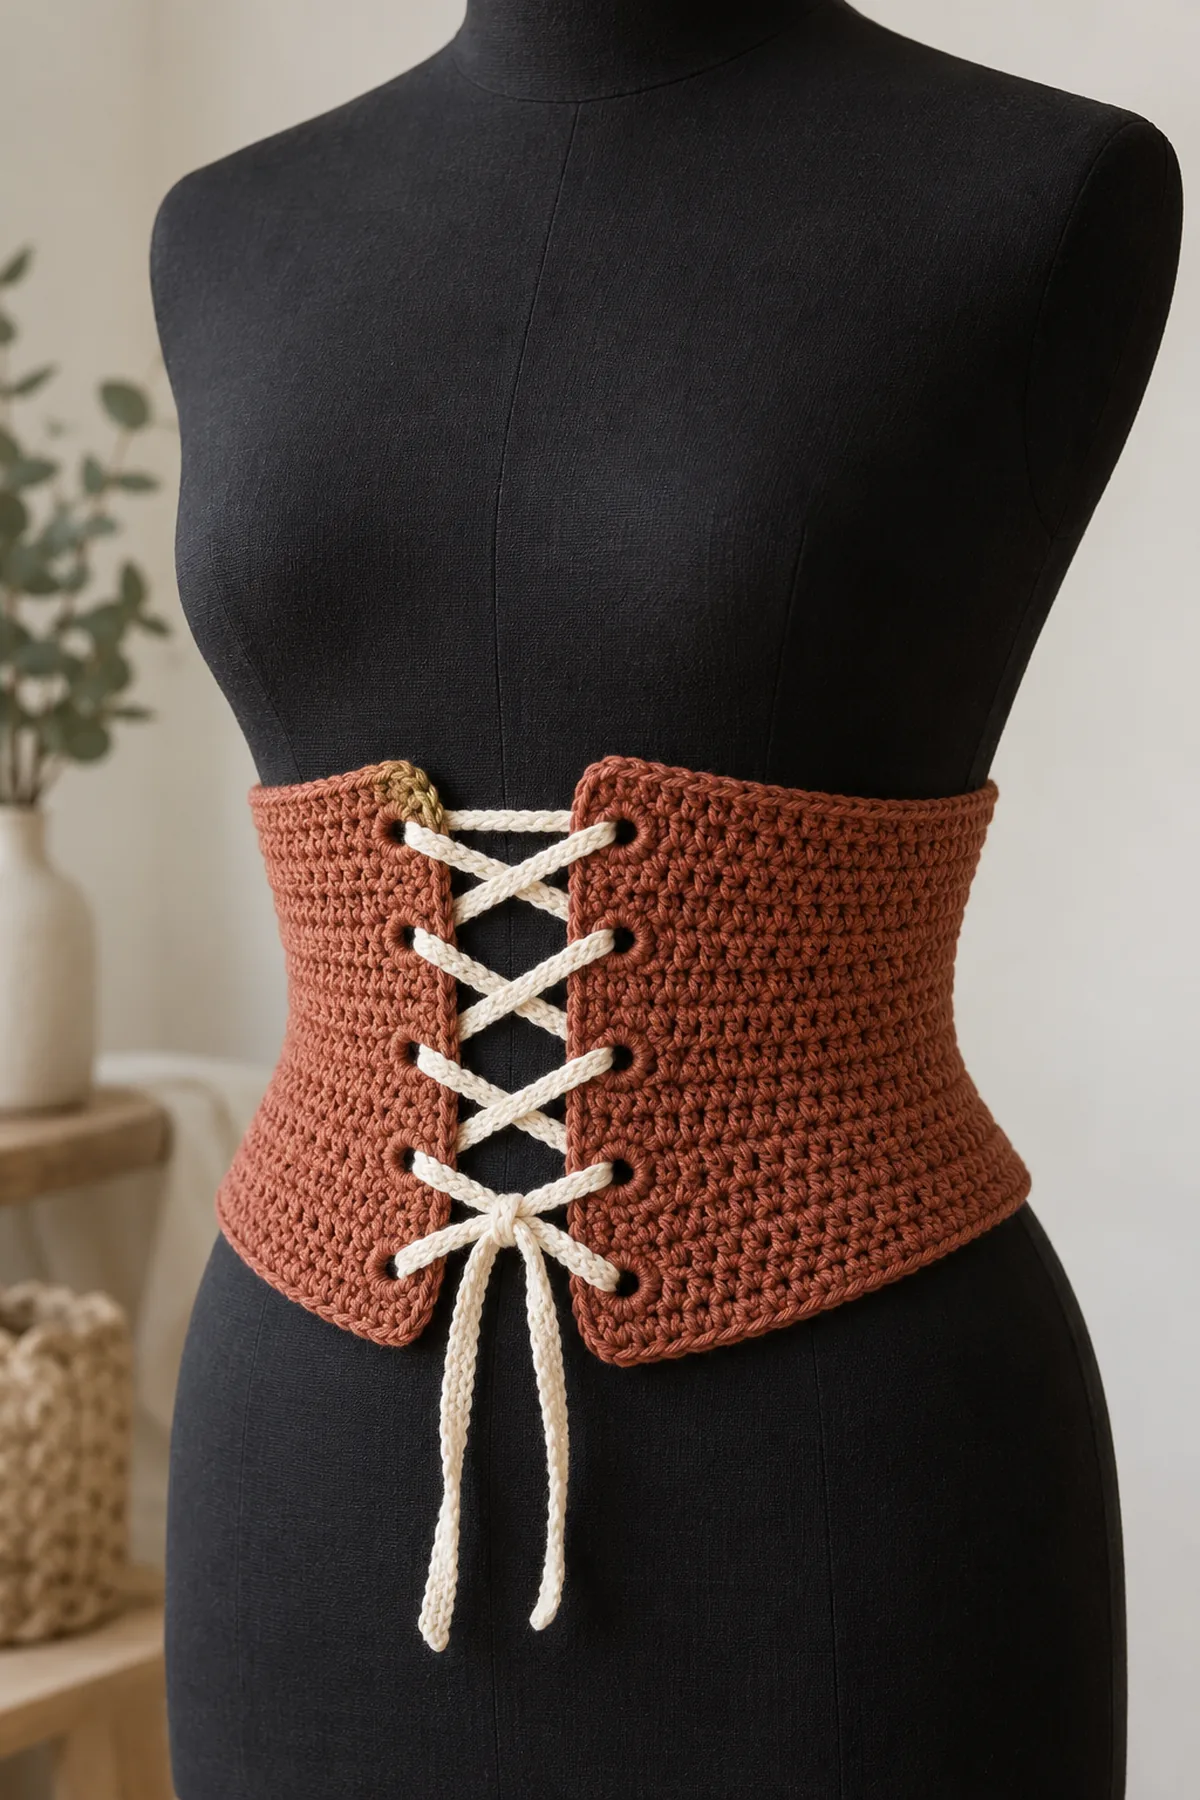
- AI-generated pictures illustrate the intended design; they are not photographs of a physically tested sample. Follow written counts rather than counting stitches in an image.
- The stitch arithmetic has been checked, but gauge, yardage and fit are planning targets until a physical sample is made. Wash a swatch and check measurements before gifting or wearing.
- A beginning ch 1 and a joining sl st never count as a stitch in this pattern. Mark the first counted stitch of each row or round.
- If a row count is wrong, return to that row. Adding an unplanned stitch later changes the shaping and the assembly alignment.
Complete Instructions for Crochet Lace-Up Corset Belt
Crochet Both Shaped Panels
Make two identical panels. The A counts below are audited; B and C add 8 or 16 stitches to every stated width. Turn after every row and do not count the turning chain.
- Panel Row 1: For A/B/C, ch 57/65/73. Sc in the second chain from the hook and each remaining chain; turn. (56 sts) for A, 64 for B, 72 for C.
- Rows 2–3: Ch 1, sc across and turn; 56/64/72 stitches remain. Keep both outside edges marked.
- Row 4: Ch 1, 2 sc in first stitch, sc across to the last stitch, 2 sc in last stitch; turn. (58 sts) for A, 66 for B, 74 for C.
- Row 5: Repeat Row 4, increasing once at each end; turn. (60 sts) for A, 68 for B, 76 for C.
- Rows 6–13: Ch 1, sc in each stitch across and turn after every row. Maintain the Row 5 count; do not increase in the first or last stitch.
- Row 14: Ch 1, sc2tog across first 2 stitches, sc to final 2 stitches, sc2tog; turn. (58 sts) for A, 66 for B, 74 for C.
- Row 15: Repeat Row 14, decreasing once at each end; turn. (56 sts) for A, 64 for B, 72 for C.
- Rows 16–18: Ch 1, sc evenly across and turn after Rows 16 and 17. Fasten off after Row 18. The final edge returns to the foundation width.
- Lay the two panels with right sides facing out and verify that the 18-row short edges have the same height. Block to about 14/16/18 inches along the foundation edge and about 4.5 inches deep.
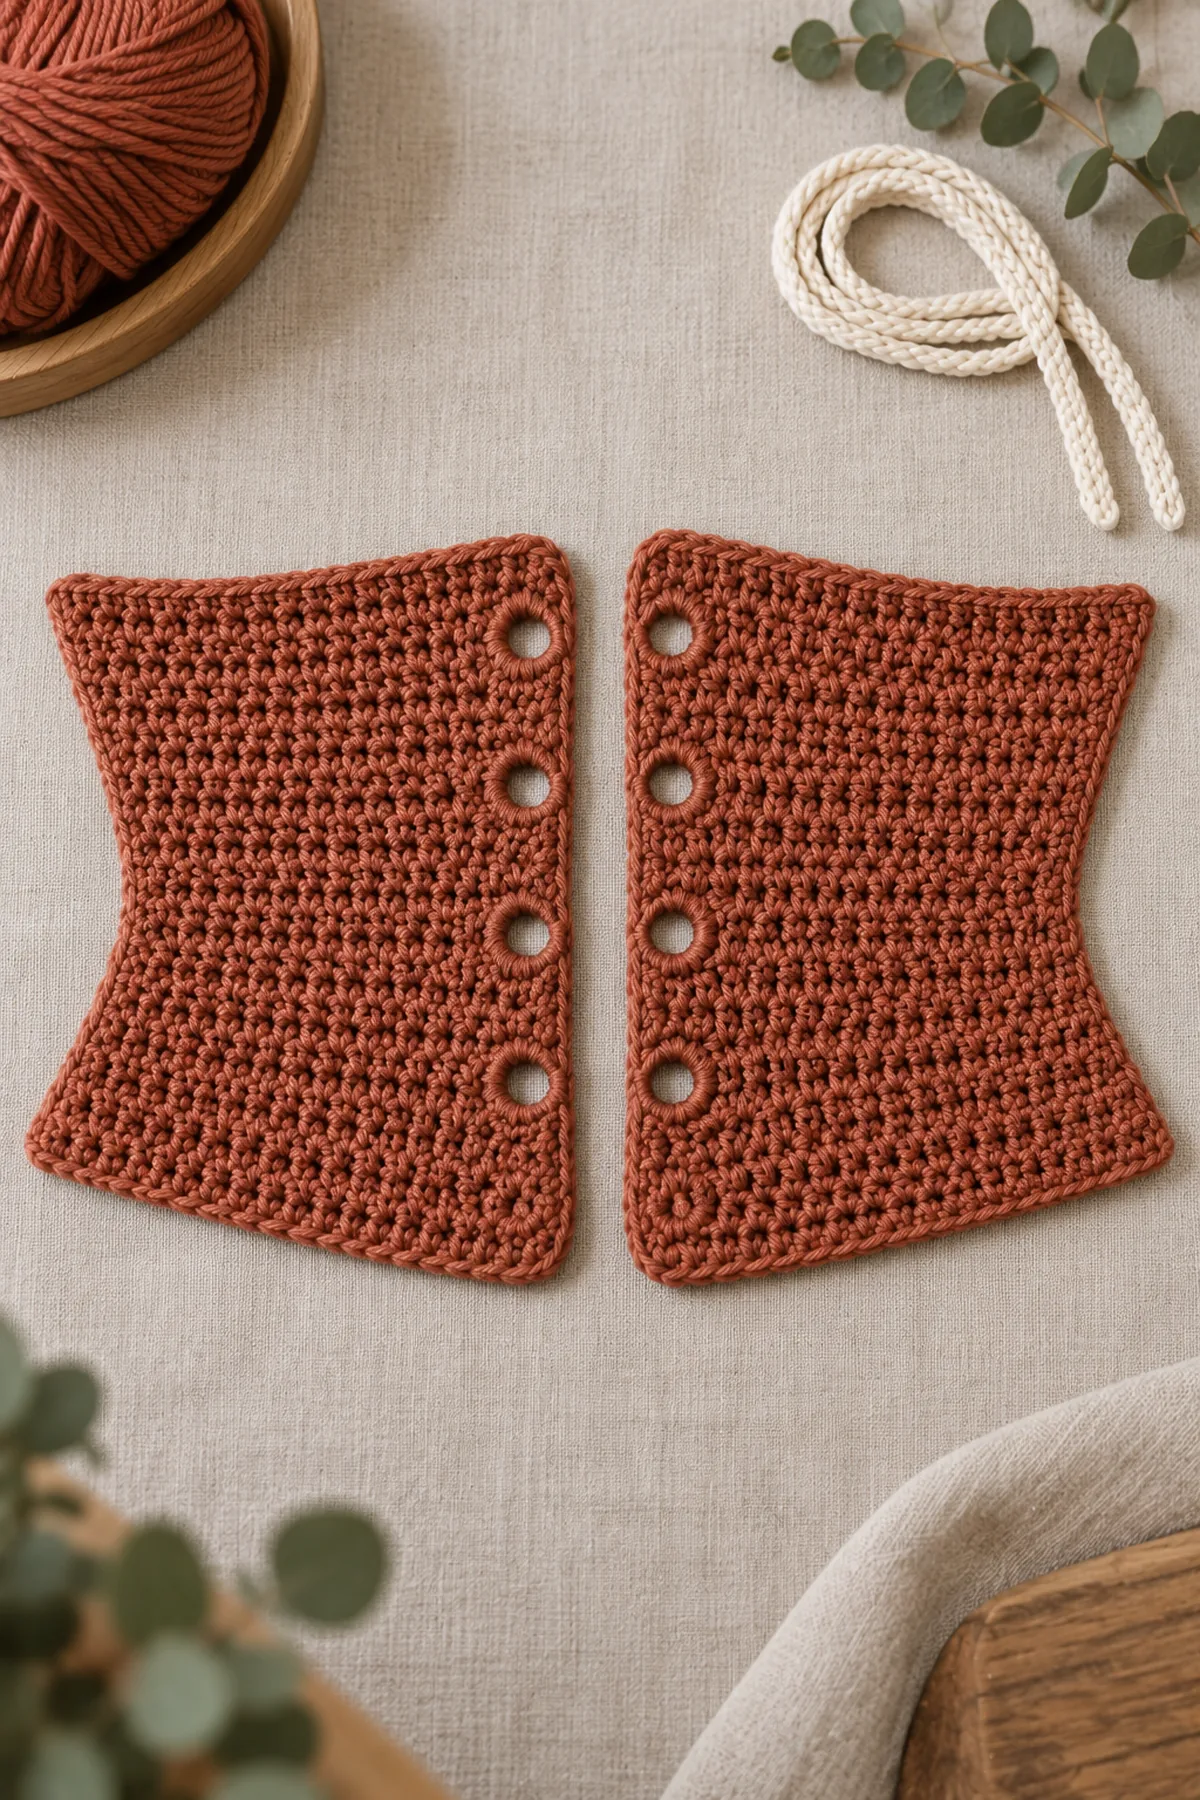
Join the Back and Form Eight Eyelets
Choose one 18-row short edge on each panel for the back seam. The two remaining short edges become the front opening.
- Align the center-back edges row for row and sew through both edge loops of all 18 row ends with firm matching yarn. Begin at Row 1 and finish at Row 18 so the shaping is oriented the same way on both sides.
- On the first front edge, join rust at the Row 1 end. Sc into row ends 1–3; for row end 4, ch 2 and skip that row end. Sc into 5–7; ch 2 and skip 8. Repeat the same placement at row ends 12 and 16. Sc into row ends 17–18. Fasten off. This gives four open eyelets.
- Repeat that edge sequence on the other panel so the four holes face their partners. Use the smaller hook to slip stitch along both strands of every ch-2 arch without bridging across its opening; secure the reinforcement tail on the wrong side.
- Check that each pair lines up across the 1–4-inch gap. If one opening is misplaced, undo the edge row rather than pulling the ribbon diagonally to compensate.
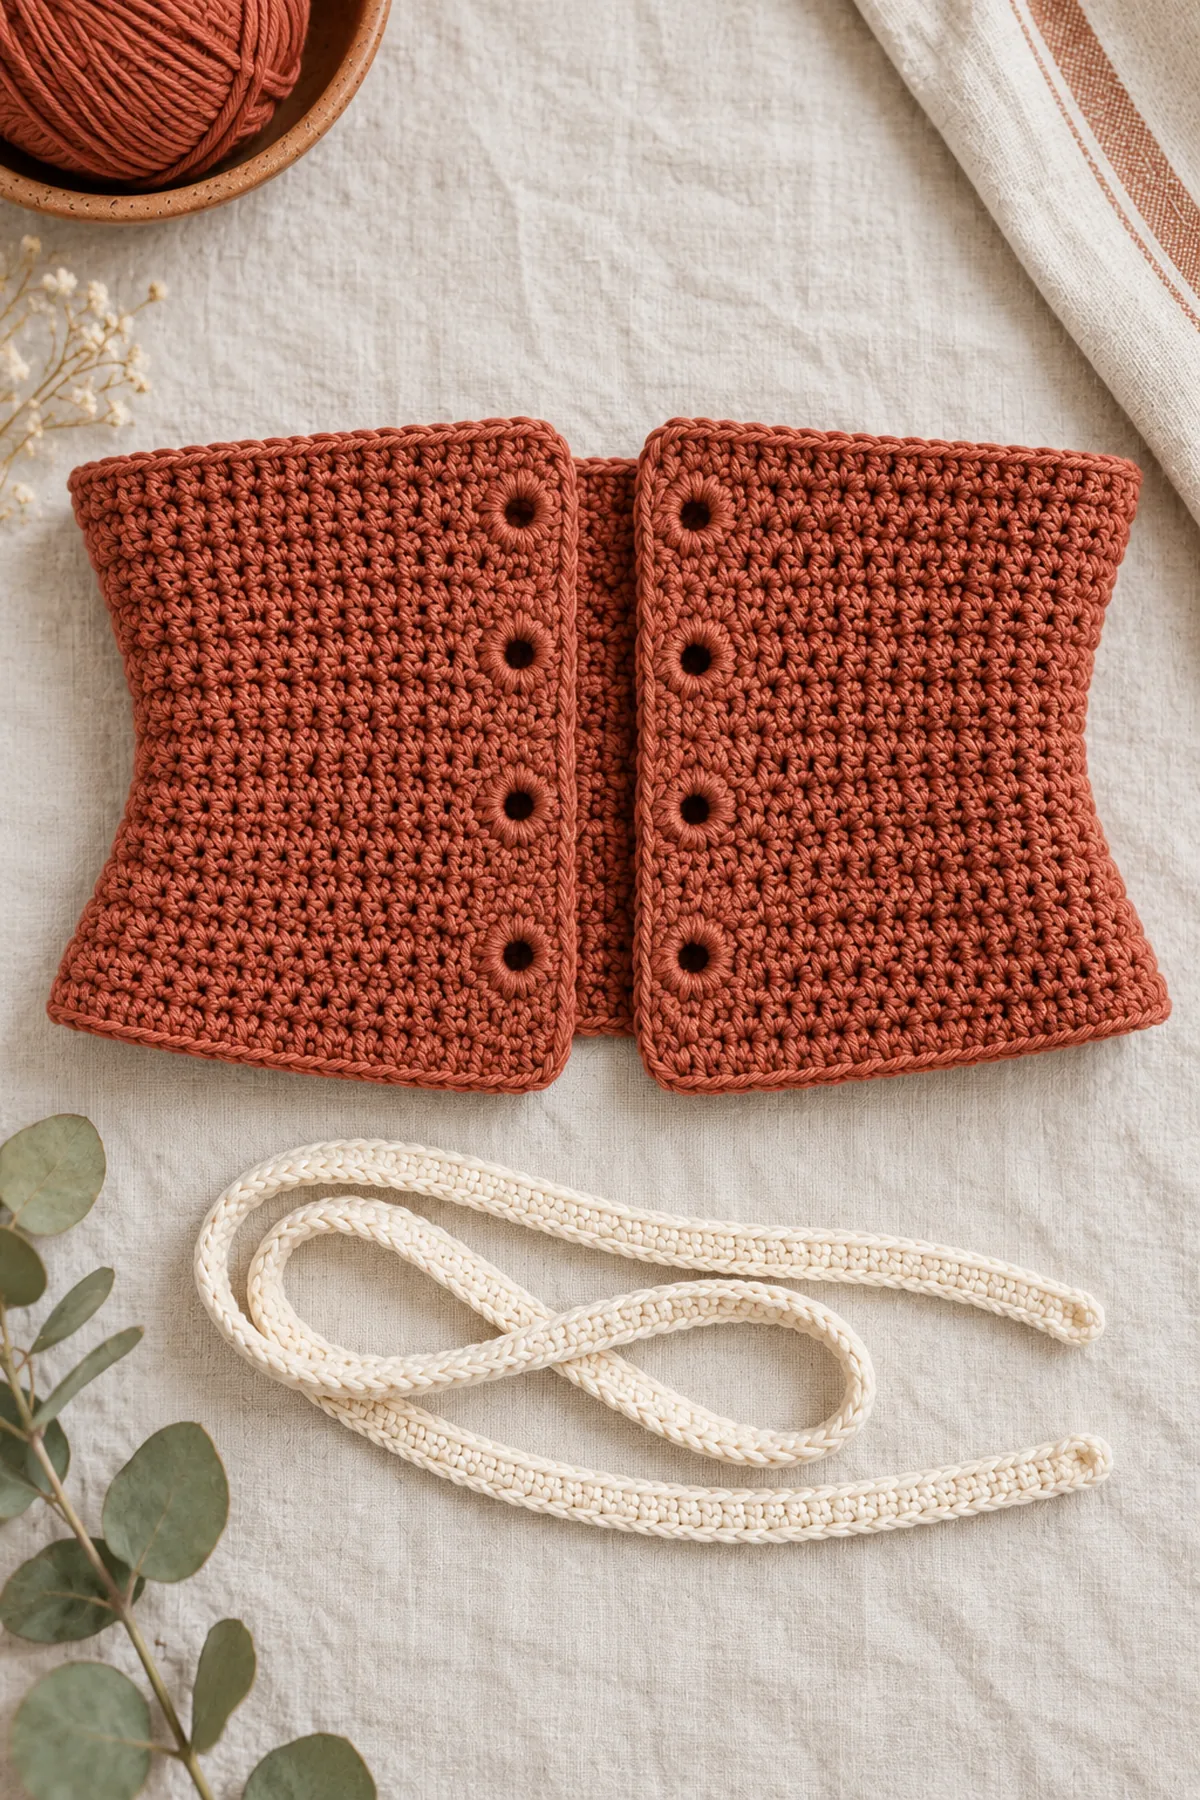
Crochet and Thread the Ribbon
The ribbon is worked flat; a single foundation chain would be too thin for the reinforced eyelets.
- With cream and the 4 mm hook, ch 216 loosely. Starting in the second chain, sc into each chain and turn. (215 sts)
- Ch 1, sc in all 215 stitches, fasten off with a 10-inch tail, and weave that tail back through the ribbon for at least 4 inches. Block the flat ribbon to approximately 85 inches long and 0.5 inch wide.
- Center the ribbon across the lowest pair of eyelets. Cross the two halves, pass each end through the next opposite opening, and repeat through all four paired levels. Leave enough free length for a flat bow; do not wrap the ribbon around the torso multiple times.
- Put the belt on over clothing, spread the laces evenly and tighten only until it stays in place. The front gap must remain visible and breathing and movement must be unrestricted.
Assembly and Shaping
The two shaped panels share one complete 18-row-end back seam. The eight reinforced front openings form four matched pairs, through which one separate ribbon passes. There are no hidden grommets, hooks or boning. Compare the relaxed circumference and the laced gap to the measured waist before trimming any tails.
Lay every component on a flat surface before joining. Match the marked centers first, then divide each remaining edge into equal sections. Work through both layers with consistent tension and pause after each section to check that the fabric lies flat. This measured approach prevents twisting and keeps decorative details facing the intended direction.
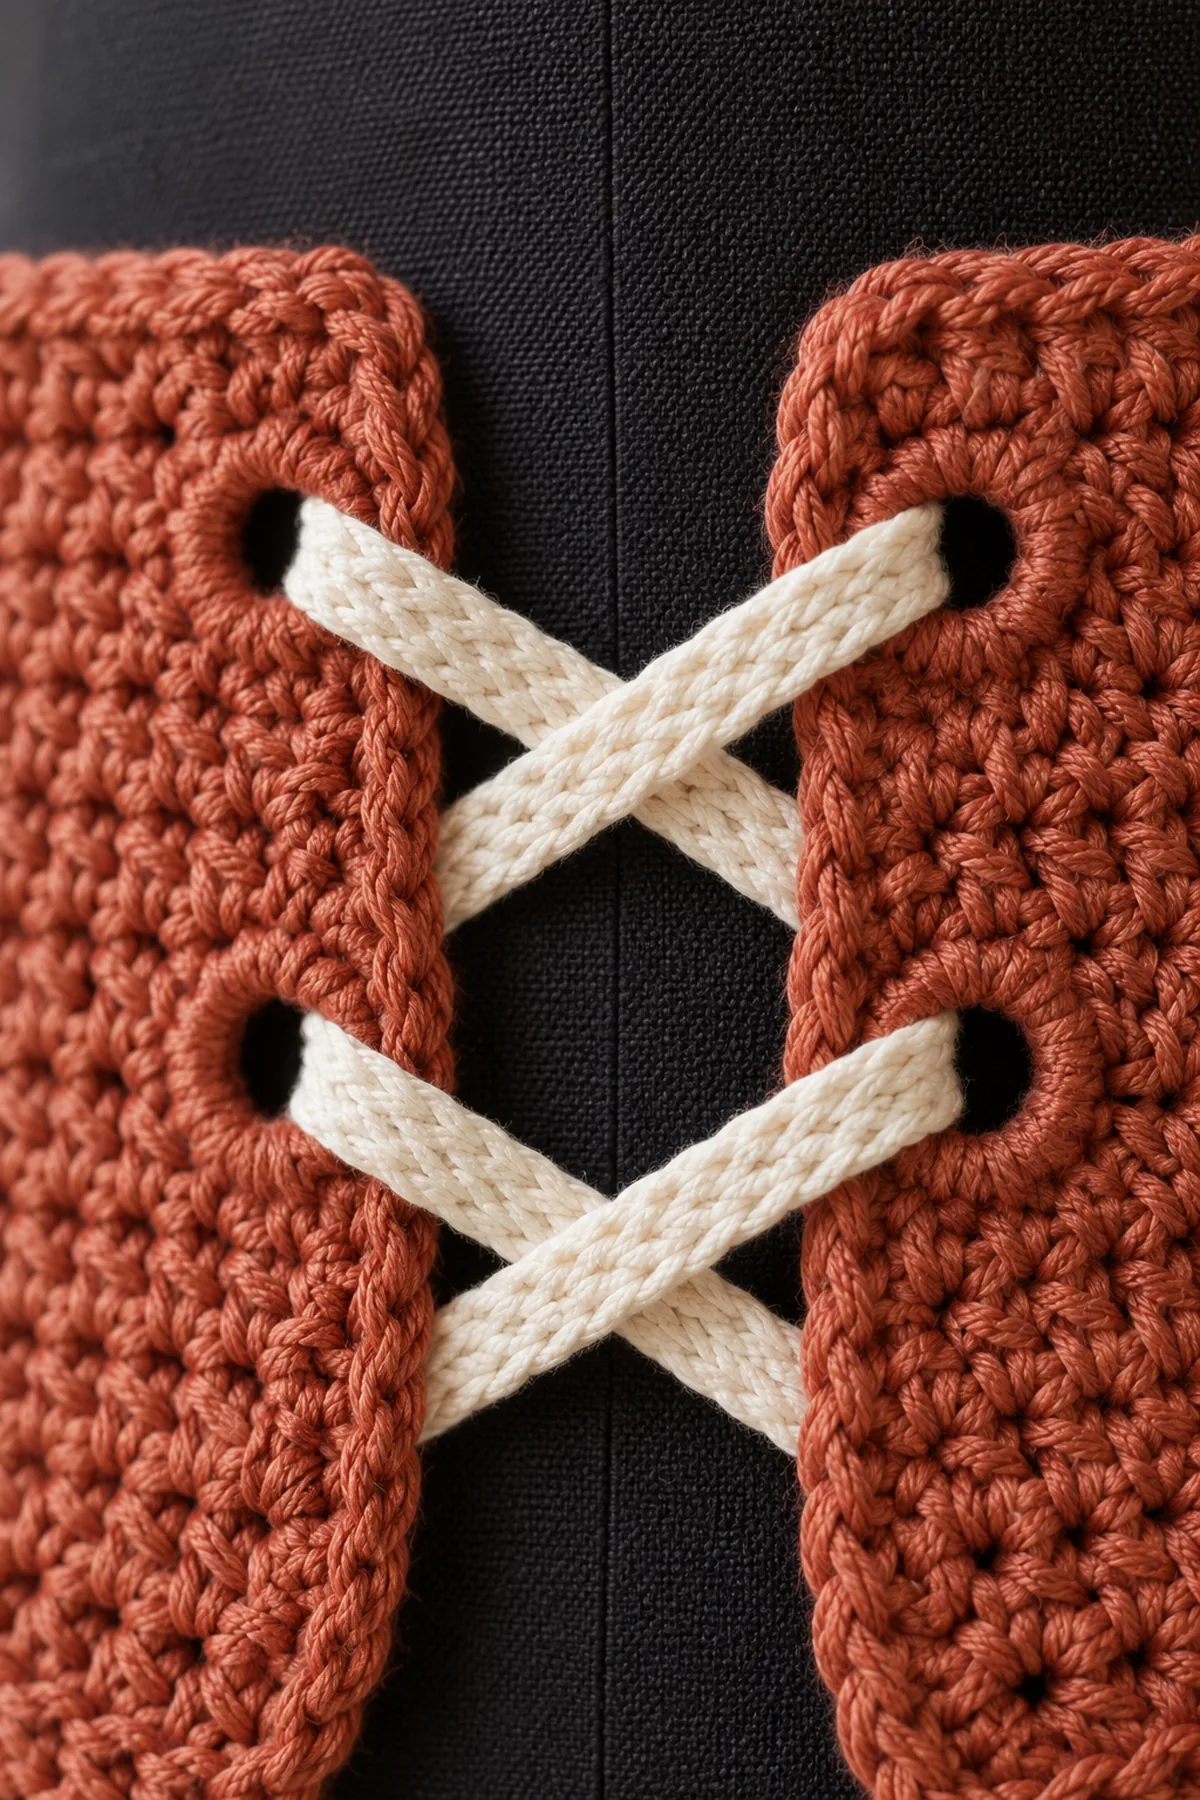
Finishing
- Weave each tail along three different paths on the wrong side; reverse direction before trimming.
- Wash or damp-block according to the yarn label and allow the work to dry at its measured shape.
- Inspect every seam, edge and attachment from both faces before first use, then inspect again after laundering.
For a polished result, weave each tail through several same-color stitches, reverse direction once, and trim only after the fabric has been gently stretched. Block to the listed dimensions without flattening textured stitches. Inspect joins, borders, straps, and decorative pieces before the project is used or gifted.
Helpful Tips
- Use contrasting locking markers at shaping points and record the count after every change row.
- Change hook size when the washed swatch differs from the stated gauge; do not compensate with uneven hand tension.
- Photograph the flat components before joining so it is easy to identify an inverted or twisted piece.
Good lighting and a contrasting stitch marker make counting much easier. If a section looks uneven, compare the current count with the previous checkpoint before continuing. Fixing one missed stitch early is faster than compensating later, and it preserves the measurements used by the assembly instructions.
Frequently Asked Questions
Can the belt replace a supportive corset?
No. This soft crochet belt is decorative fashion wear. It does not support the body or supply corset compression.
How do I change the fit?
Choose the 56-, 64- or 72-stitch foundation size after swatching. Keep the four eyelet levels unchanged and use the front lacing gap for small adjustments only.
Conclusion
The finished belt uses shaped crochet panels and eight visible eyelets for a distinct lace-up silhouette. Its back seam and two-row ribbon can be inspected independently, which makes later repair straightforward.
BabyYarnie Printable Crochet Pattern Card
BabyYarnie — easy-to-follow crochet for everyday makers.
Project: Crochet Lace-Up Corset Belt
Skill level: Intermediate Hook: 4.5 mm for panels; 4 mm for ribbon and eyelet reinforcement Yarn: Worsted cotton
Finished size: A/B/C: fabric circumference about 28/32/36 inches before lacing; fits measured waists about 29–32/33–36/37–40 inches with a 1–4-inch front gap; depth about 4.5 inches
Card Materials
- Worsted cotton: approximately 260/300/350 yards rust for A/B/C; reserve 70 yards cream for the long ribbon and matching edge reinforcement
- 4.5 mm and 4 mm hooks, 8 locking markers, measuring tape, yarn needle and scissors
Card Instructions
- Crochet Both Shaped Panels: Make two 18-row cotton panels: width N, N, N+2, N+4, hold N+4, decrease to N+2 then N; N is 56/64/72 for A/B/C.
- Join the Back and Form Eight Eyelets: Sew one 18-row back seam and make four ch-2 eyelets on each free short edge at row ends 4, 8, 12 and 16; reinforce each arch.
- Crochet and Thread the Ribbon: Make a 215-stitch, two-row cotton ribbon and cross-lace it through four paired eyelet levels from bottom to top.
Finish: Check every count, weave in all ends, block to measurement, and inspect each join.