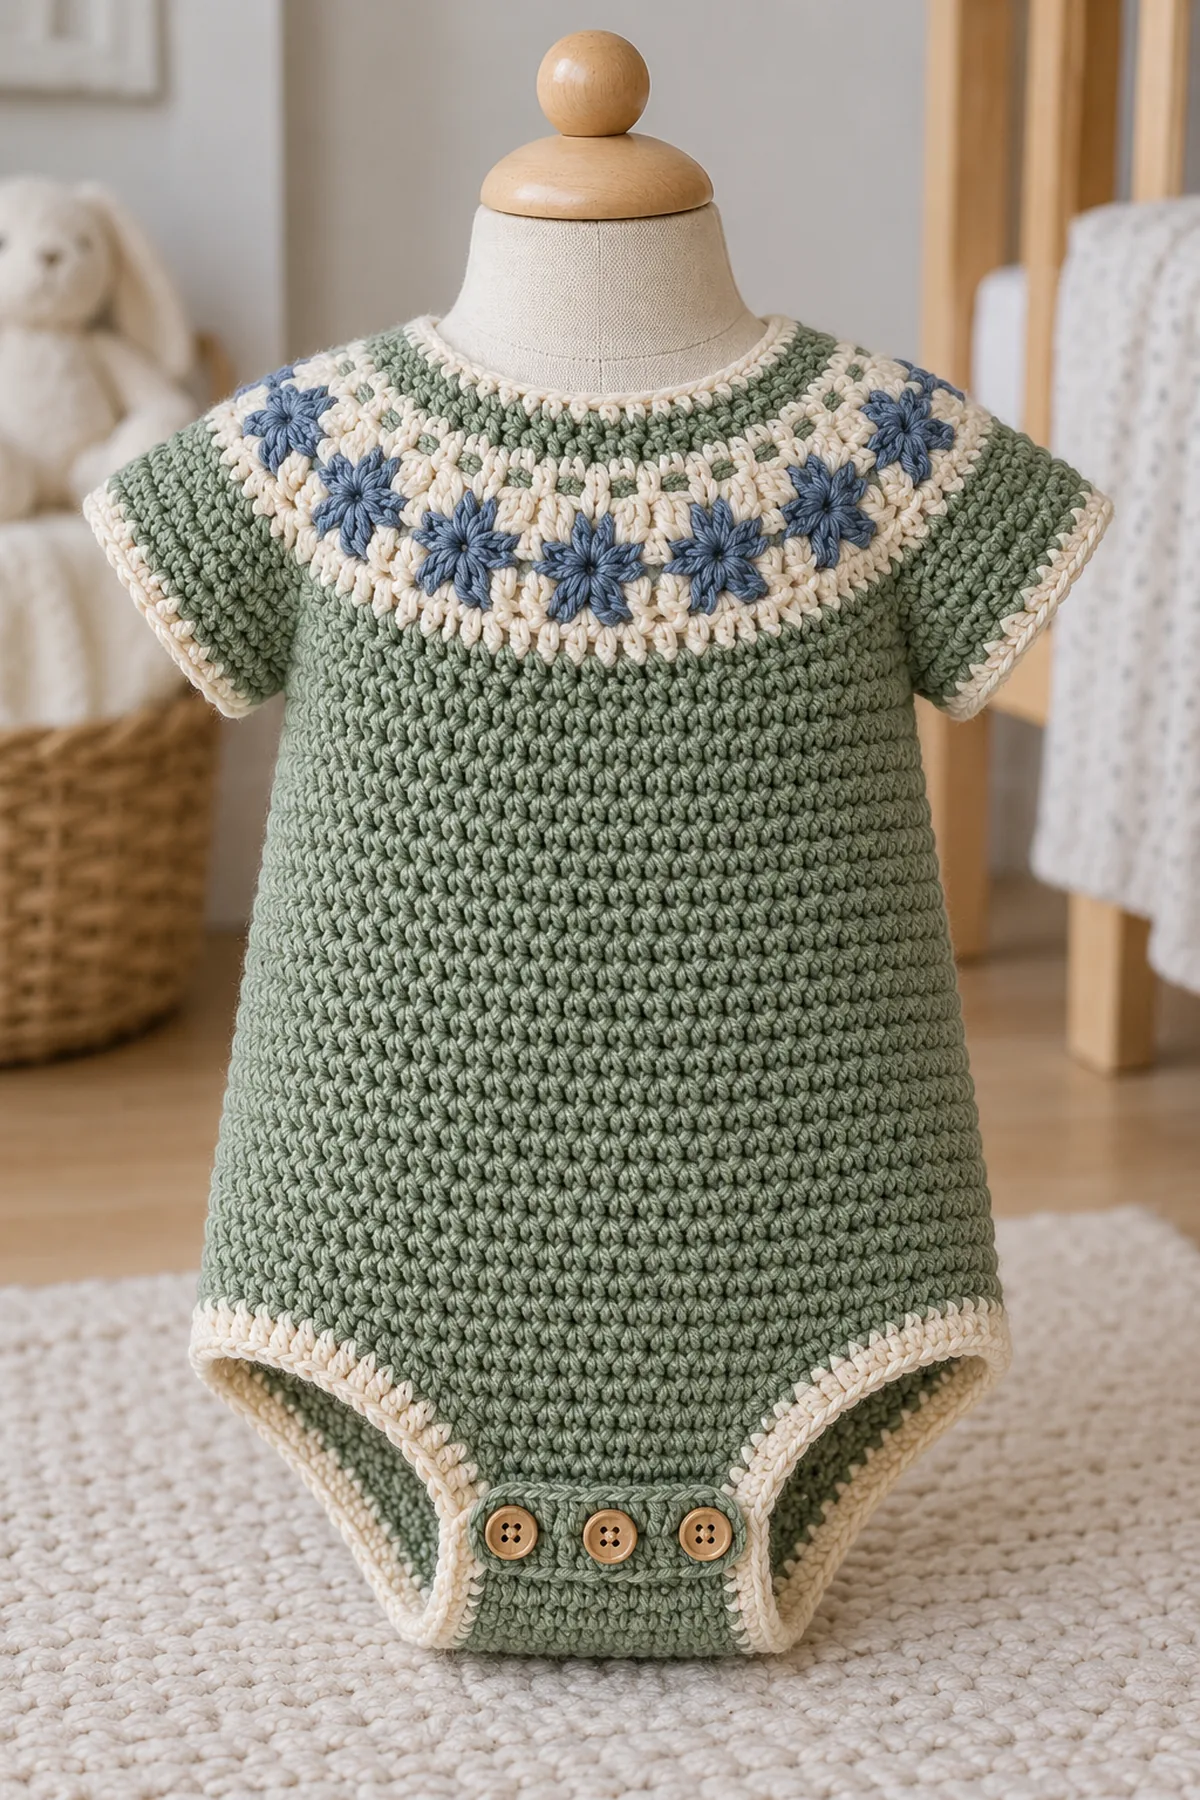
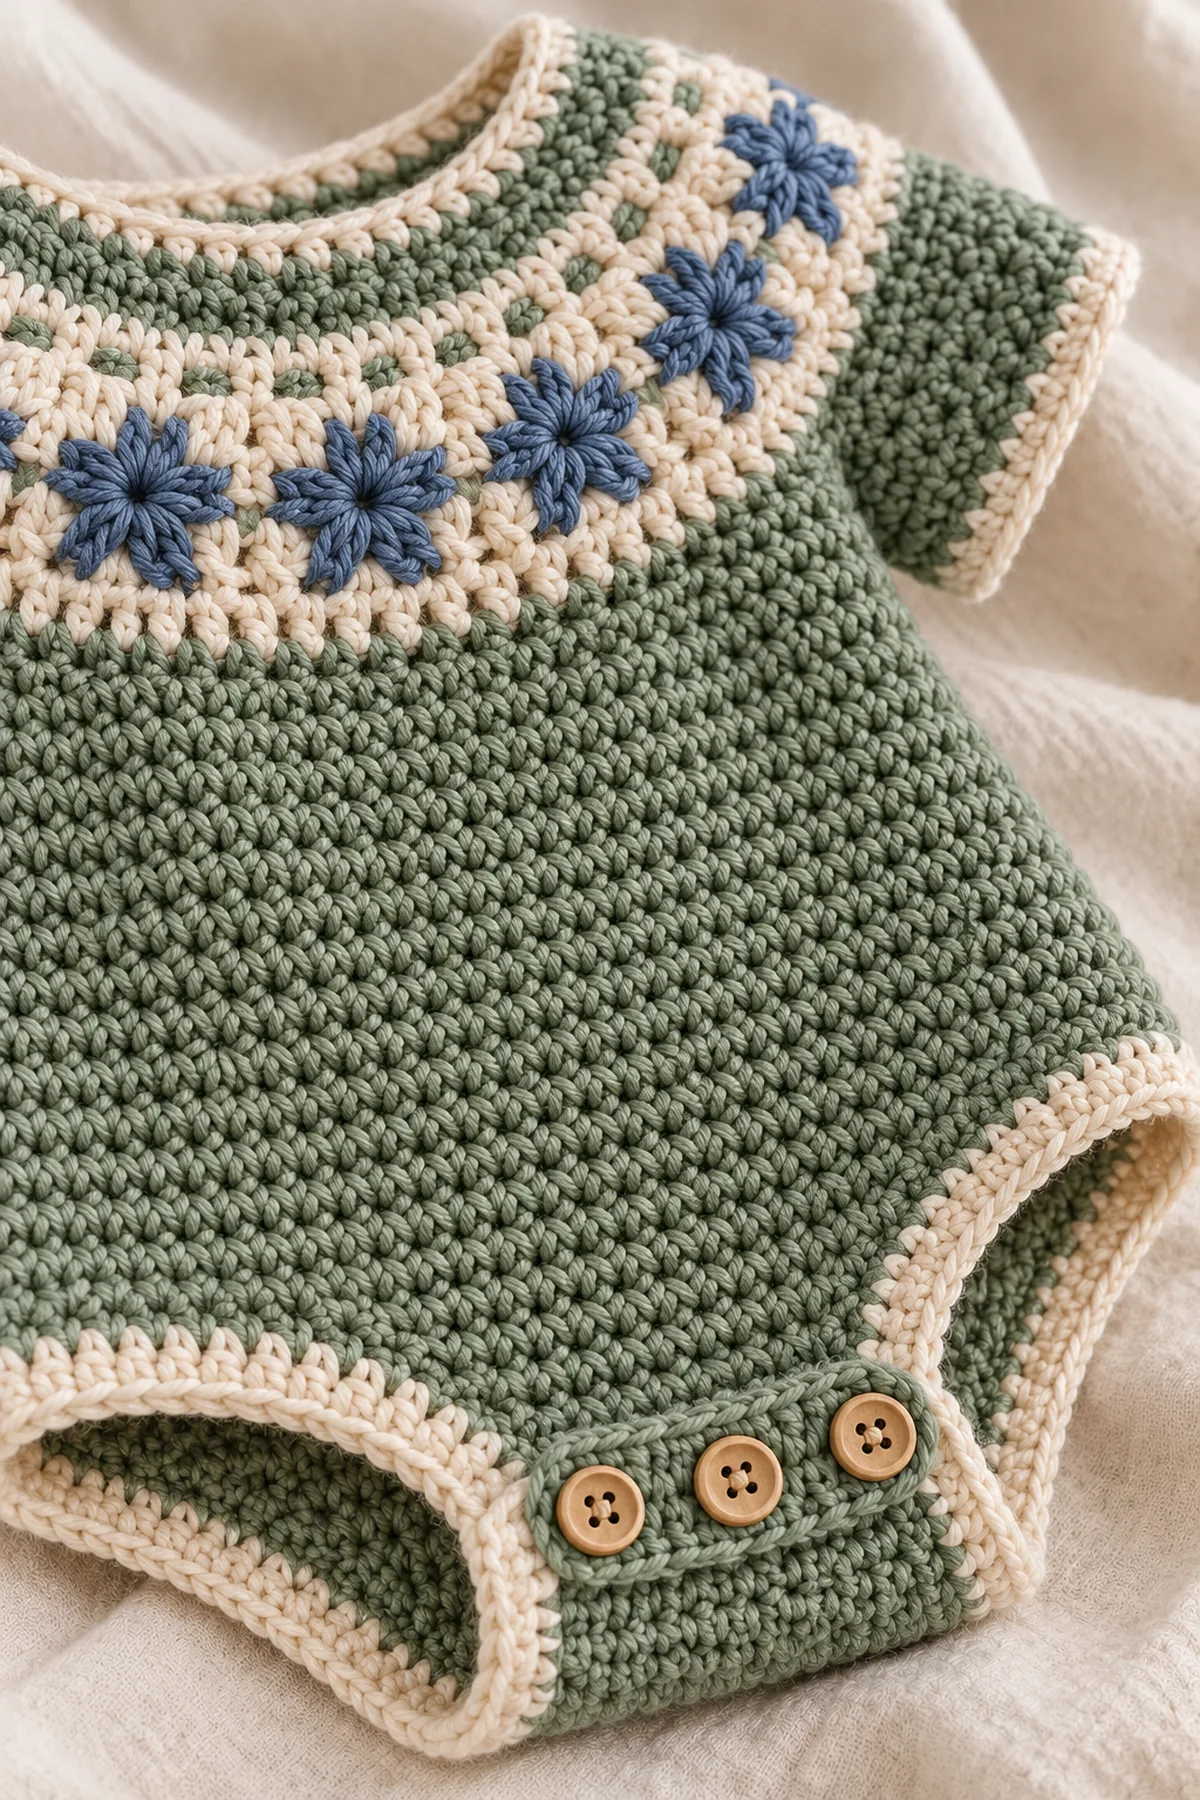
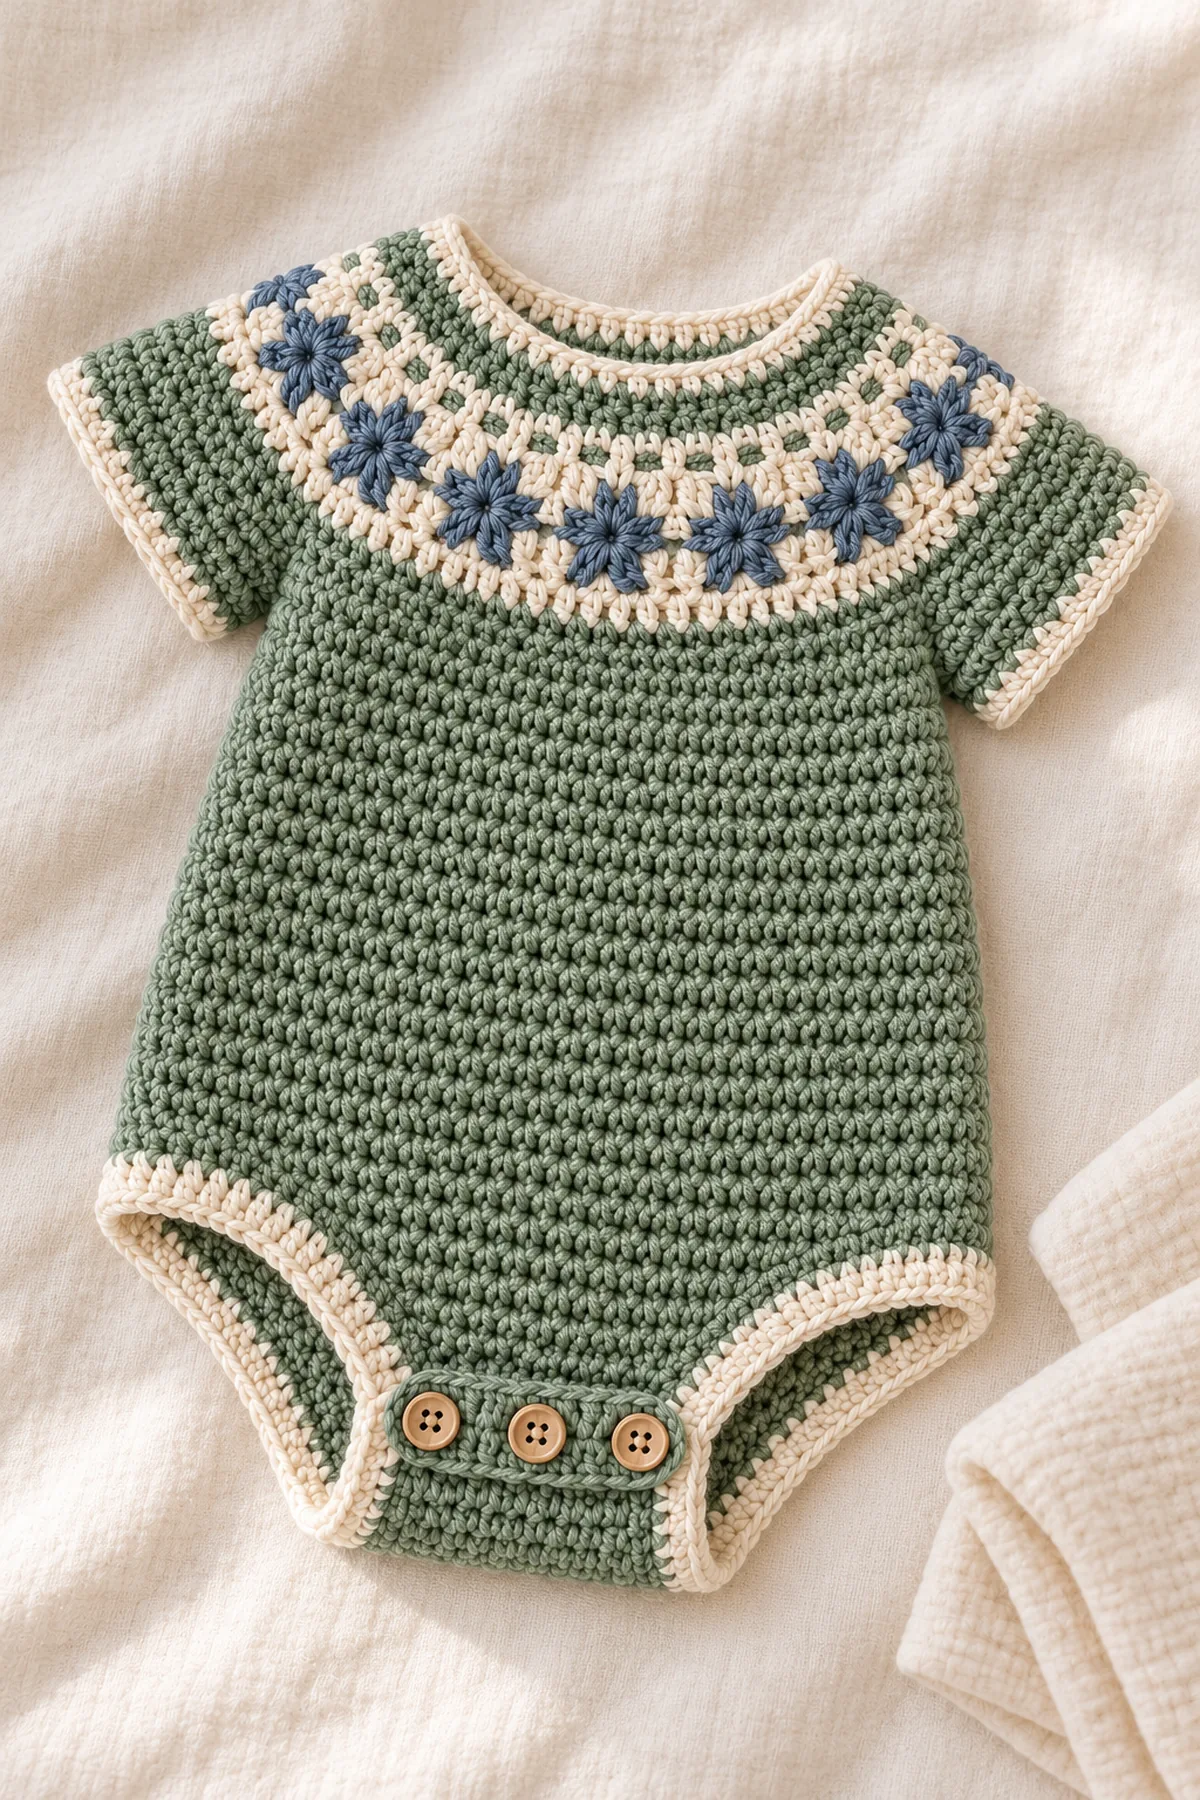
This crochet baby romper pattern is a one-piece garment worked from the neckline down. A compact oatmeal-and-blue star band sits on a sage circular yoke, with short sleeves and a plain body. The lower edge separates into two shaped legs and a buttoned gusset for dressing and diaper changes. The four size counts are given independently; no physical fit test is claimed.
Pattern Details
- Sizes 0–3, 3–6, 6–12 and 12–24 months; finished chest 17.6 (19.2, 20.8, 22.4) inches.
- Gauge: 20 hdc and 16 joined rounds = 4 inches after washing and drying.
- Short sleeves, top-down joined yoke, two leg tubes and a front gusset with four sewn buttons.
- Intermediate level, US terms; choose by the actual chest and torso measurements.
Why Make This Romper?
The one-piece construction avoids a separate waistband, and the colorwork is limited to a compact yoke band so the garment stays soft and flexible. The crotch opening is designed as a front gusset rather than a row of buttons across the full torso. Measure the baby clothing already in use and compare its chest, torso length and leg opening to the finished measurements before beginning. The pattern is a written design with stitch-count checks, not a lab or wear test.
Materials
- DK washable cotton/acrylic: 280 (330, 390, 460) yards sage, 30 yards oatmeal, 20 yards slate blue.
- 3.5 mm hook for fabric, 3 mm hook for ribbing, eight locking stitch markers.
- Four small flat sew-through buttons, sewing needle, yarn needle, tape measure and scissors.
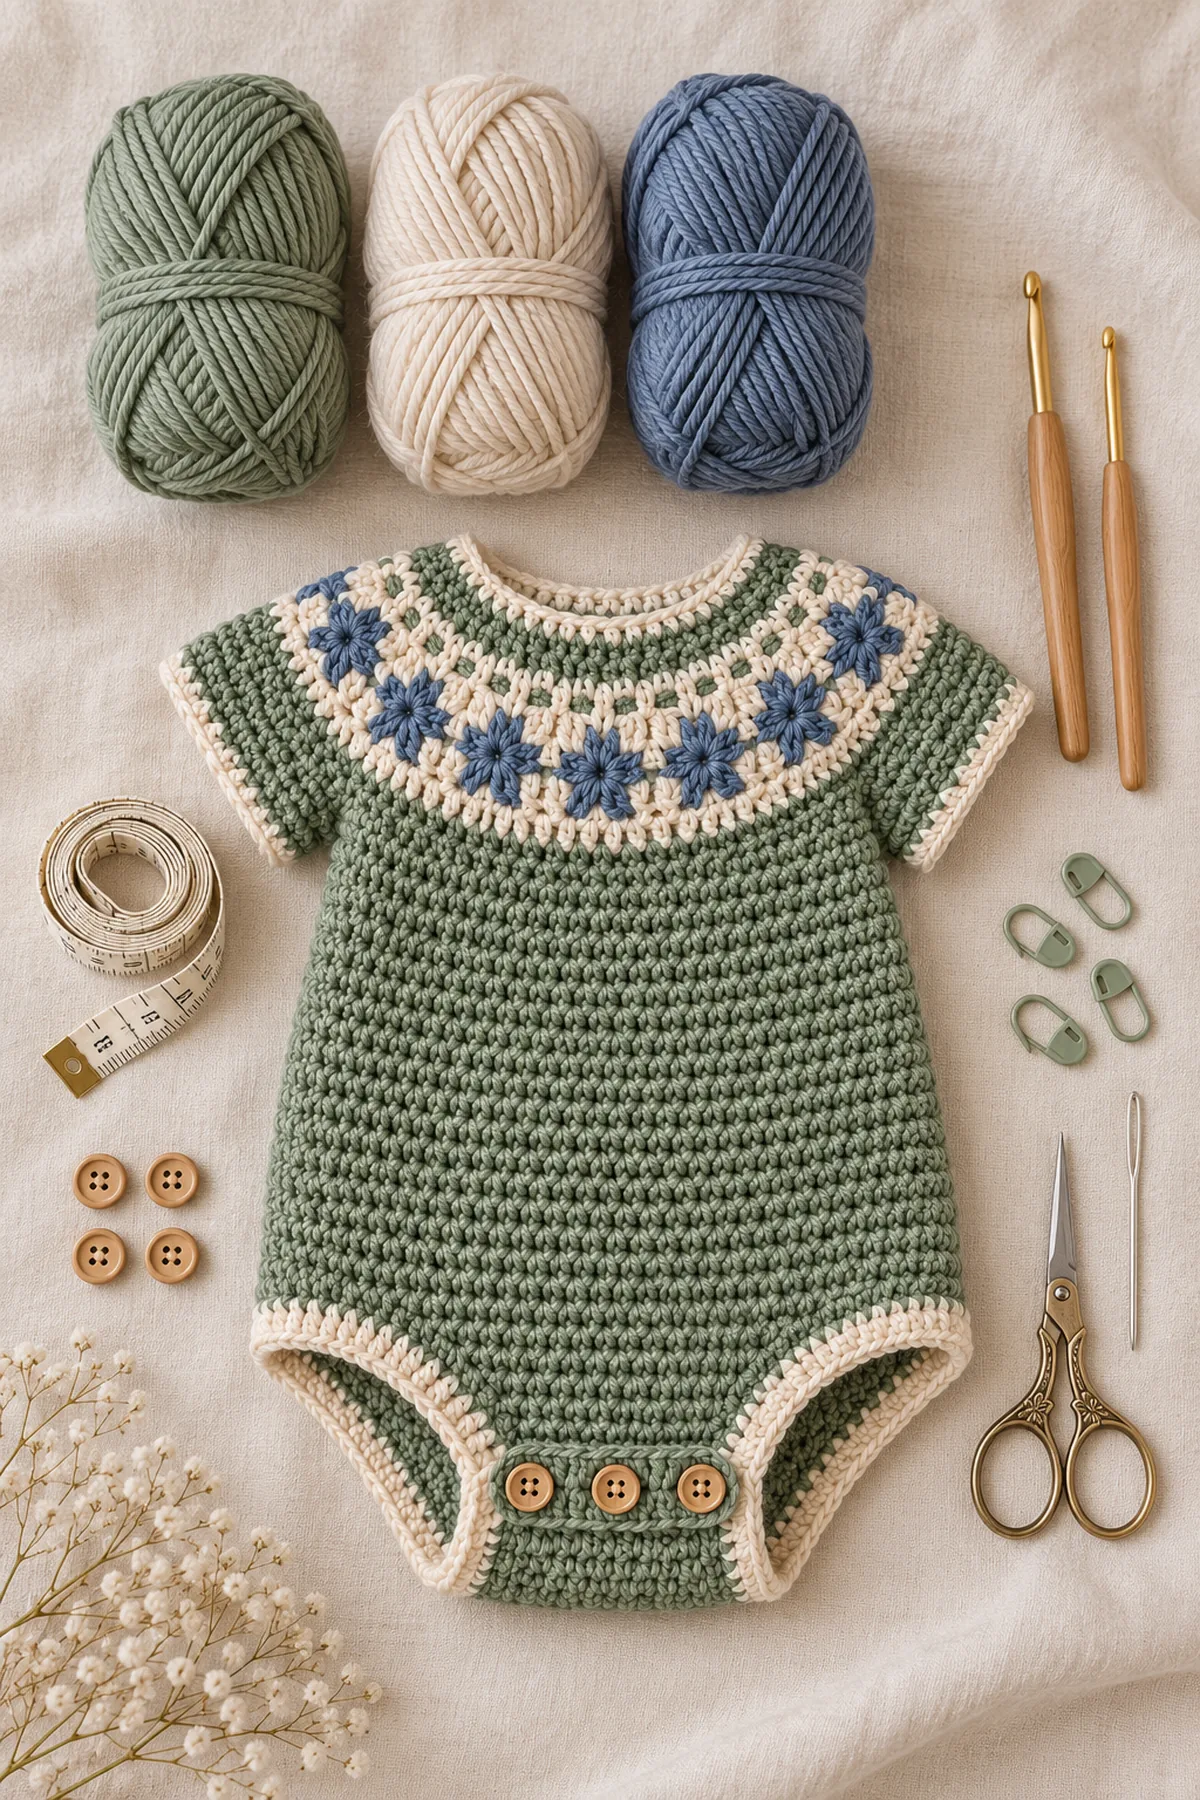
Gauge, Measurements, and Planning
Work a 6-inch hdc swatch, wash and dry it, and measure the center. The target is 20 stitches and 16 joined rounds in 4 inches. The chest counts are 88 (96, 104, 112) stitches after underarms, which measure about 17.6 (19.2, 20.8, 22.4) inches at gauge. The torso length from underarm to crotch is 6 (6.5, 7, 8) inches. Check fit over a diaper and a light layer. If the swatch is too wide, change hook size rather than changing the number of yoke increases.
Abbreviations and Colorwork
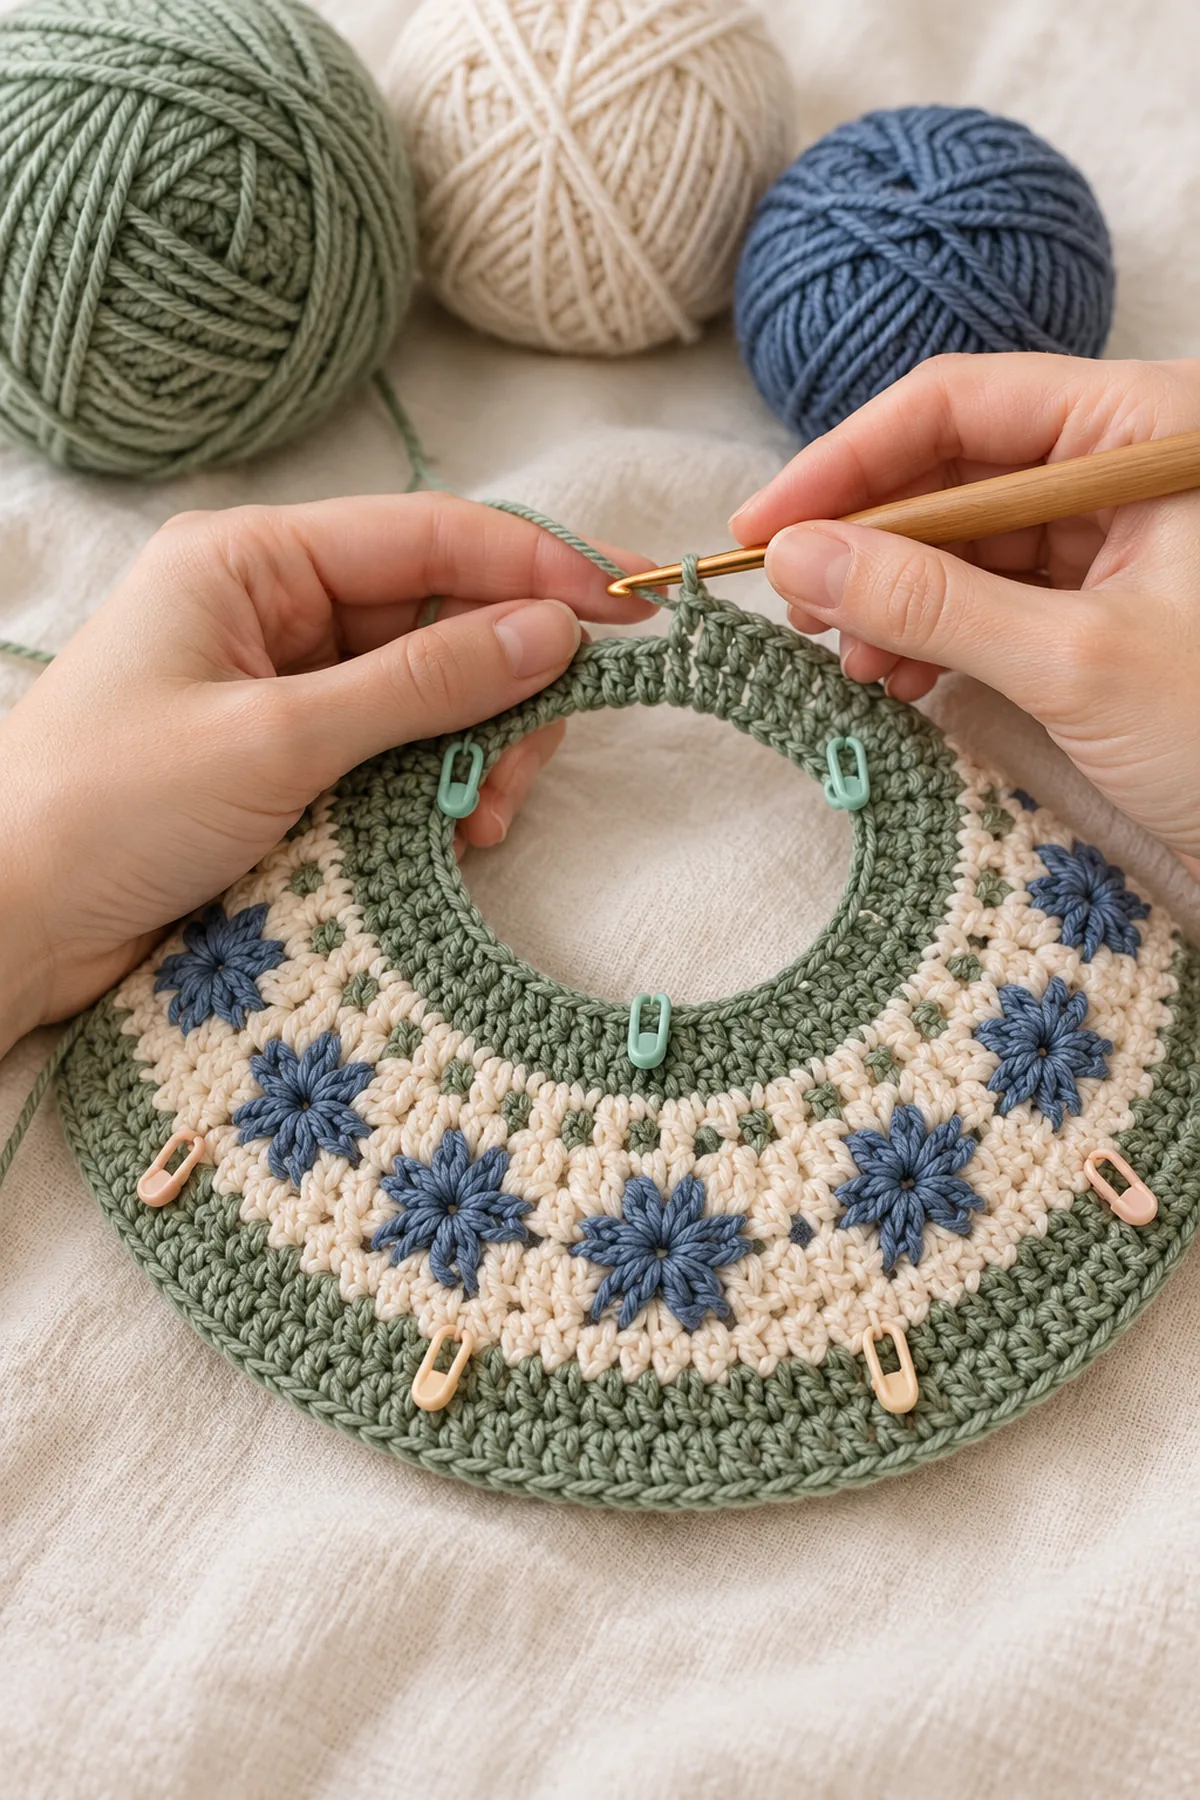
Ch is chain, hdc is half double crochet, sc is single crochet, sl st is slip stitch, and rnd is round. The beginning chain does not count. Put eight markers evenly around the yoke and work 2 hdc in each marked stitch on an increase round, adding eight stitches. O means oatmeal, B means slate blue, and S means sage. Each chart repeat is eight stitches and is worked around in joined rounds. Chart: Rnd 1 O O O B O O O O; Rnd 2 O O B B B O O O; Rnd 3 O B B B B B O O; Rnd 4 O O B B B O O O; Rnd 5 O O O B O O O O; Rnd 6 O S S S S S S O. Repeat 15 (17, 19, 21) times at the final yoke count, catch floats every four stitches, and keep them loose enough to stretch.
Instructions
Neck and yoke
- With sage and the 3.5 mm hook, ch 64. Join without twisting, hdc in each chain and mark the first stitch: (64 sts).
- Place eight evenly spaced markers. Work 2 hdc in each marker stitch on alternate rounds and one hdc in every other stitch. Increase totals progress by eight: (72 sts), (80 sts), (88 sts), (96 sts), (104 sts), (112 sts), (120 sts), (128 sts), (136 sts), (144 sts), (152 sts), (160 sts), (168 sts).
- Stop at 120 (136, 152, 168) stitches for the selected size. Work the six-round color chart at this count, then resume sage. Yoke depth should be 5 (6, 7, 8) inches at gauge; add plain rounds only if the neckline sits high.
- At the final yoke round mark front 40 (44, 48, 52), sleeve 20 (24, 28, 32), back 40 (44, 48, 52), sleeve 20 (24, 28, 32). Confirm each set totals 120 (136, 152, 168) before moving on.
Sleeves and torso
- Work the front, chain 4, skip the first sleeve and hold those stitches on waste yarn; work the back, chain 4, skip and hold the second sleeve, then join. The torso has 88 (96, 104, 112) stitches.
- Work 9 (10, 11, 13) joined hdc rounds for short sleeves, including the four underarm chains. Change to the 3 mm hook and work 3 rounds of back-loop hdc. Fasten off. Repeat for the second sleeve with the same round count.
- At the body, join sage and work even in hdc for 21 (23, 25, 28) rounds, measuring 6 (6.5, 7, 8) inches from the underarm. Keep the center front and center back markers aligned.
Divide and shape the legs
- At the lower body, divide the 88 (96, 104, 112) stitches into two equal groups of 44 (48, 52, 56). Each group becomes one leg opening. For each leg, work half the front group, ch 4 across the inner crotch, work the matching half of the back group, then ch 4 across the outer side and join. Leg rounds contain 52 (56, 60, 64) stitches.
- Work 8 (9, 10, 11) hdc rounds even. Change to the 3 mm hook and work 3 rounds of back-loop hdc. Fasten off; make the second leg with the same stitch and round counts.
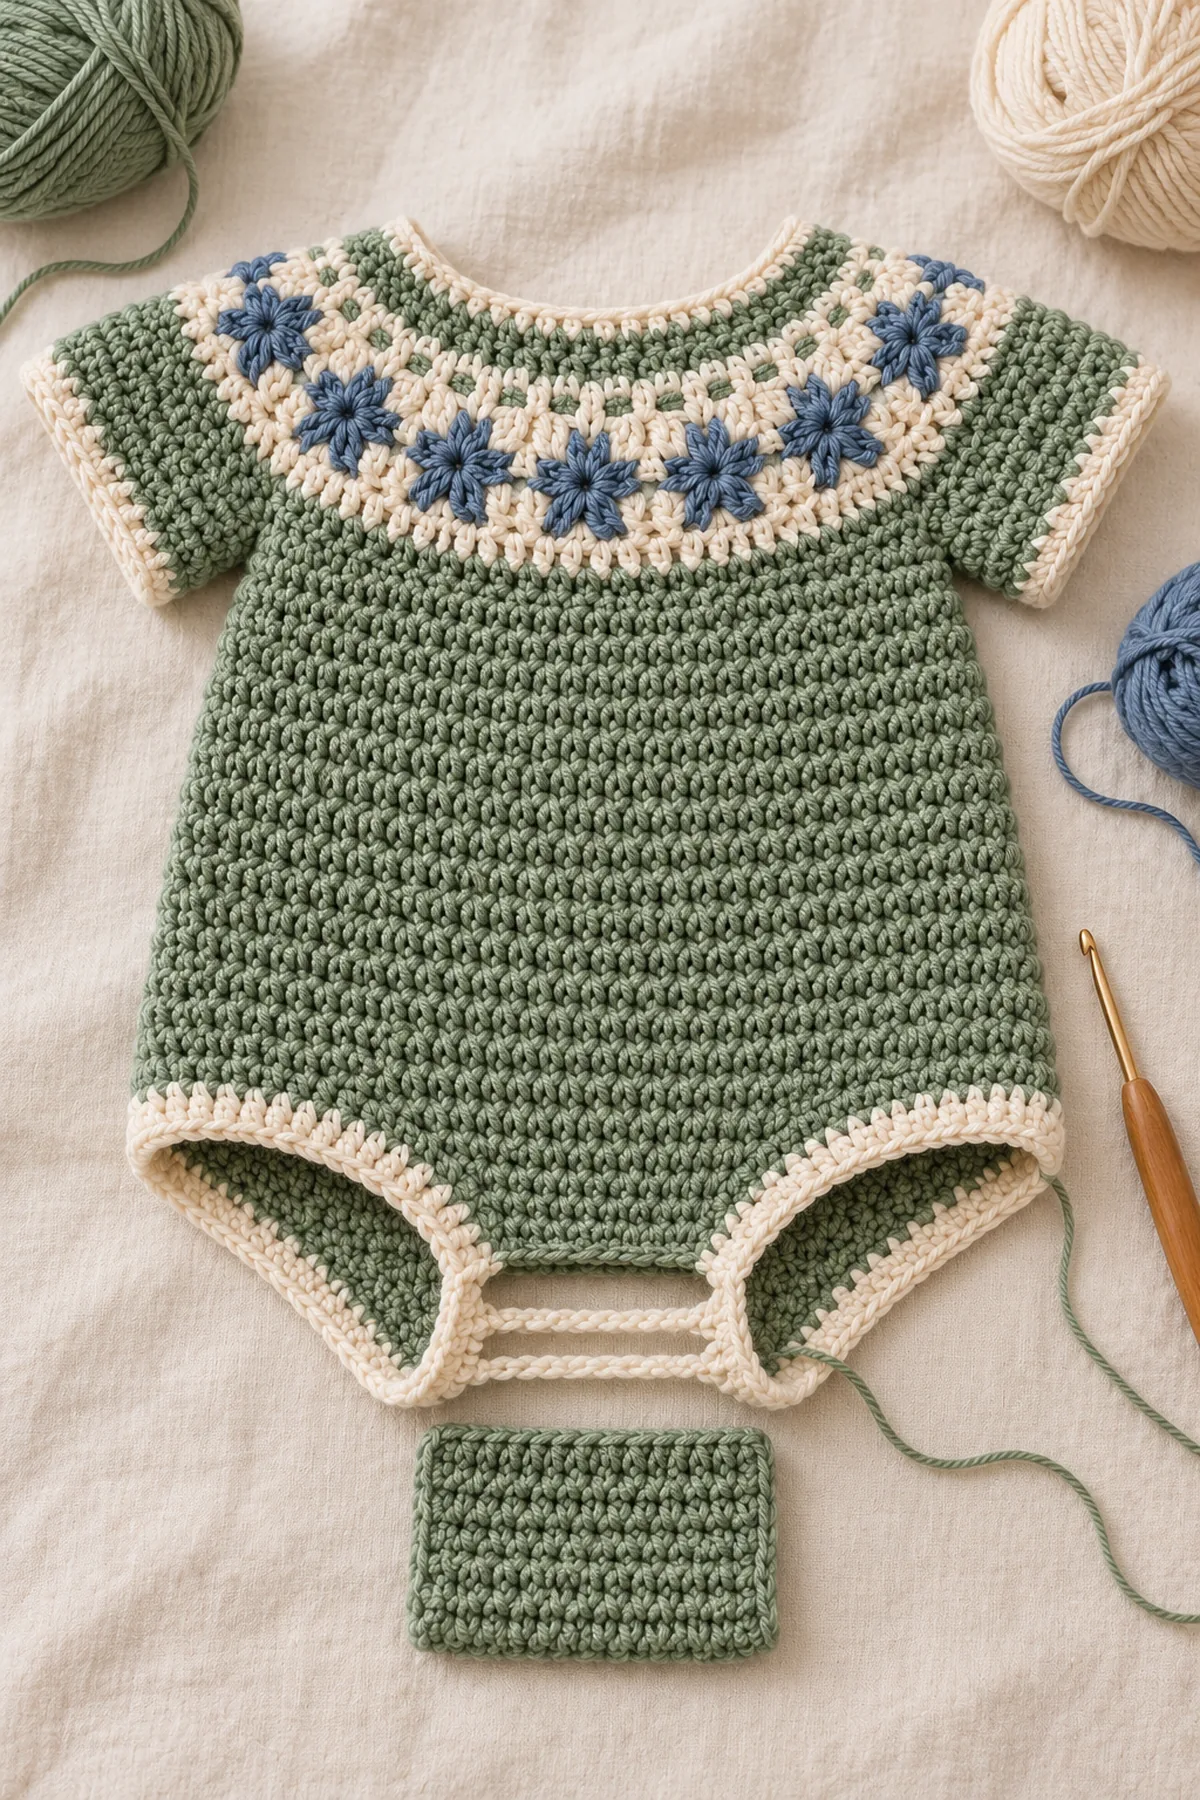
- For the gusset flap, ch 13. Row 1: sc in the second chain and across (12 sts). Ch 1, turn and work 12 sc for 5 more rows. Fasten off, leaving a sewing tail. The flap is 12 stitches wide by 6 rows long.
Attach the opening gusset
- Pin the gusset between the two inner leg bridges with the right side facing out. Sew one short end securely to the front bridge, passing through both layers twice; leave the opposite short end free to close over the back bridge.
- Sew four flat buttons firmly to the free end of the gusset, evenly spaced across its width. On the opposite bridge, crochet four button loops with ch 6, sl st at the base, and reinforce each loop by sewing through its base twice.
- Test each loop over its button, then pull firmly on every button and seam. If the closure loosens, remove it and replace it with a sewn closed seam; never leave a loose button on a baby garment.
Assembly and Shaping
Check that both legs have equal stitch counts and length, the gusset lies flat, and no chain bridge twists. The small blue band belongs at the upper yoke only. Avoid extra ties, beads, appliques or plastic pieces. Smooth the underarms with a short yarn tail rather than adding a knot on the inside of the fabric.
Finishing
- Weave in ends on the wrong side through several stitches and reverse direction once.
- Wash according to the yarn label and dry flat. Shape the chest and leg openings without stretching them.
- Inspect the gusset, every button, every loop and all seams before each use. Replace a closure that shows wear.
- Keep garment fit roomy enough for diaper movement; compare the finished torso to a well-fitting garment.
Tips
- Put a stitch marker at the first stitch and all eight yoke increase positions.
- Count after every increase round; each must add exactly eight stitches.
- Use a contrasting waste yarn for held sleeves so it cannot be mistaken for the active sage yarn.
- Wash and block before measuring because cotton blends can relax after the first wash.
Frequently Asked Questions
Can I make the romper without colorwork?
Yes. Work all six chart rounds in sage. The stitch count and yoke depth stay the same.
Can I adjust the torso length?
Yes. Add or remove joined rounds before splitting the legs, then keep both leg openings and cuffs even.
Are the buttons safe for every baby?
No crocheted button closure is universally safe. Sew them firmly, inspect frequently, supervise dressing and use, and replace with a sewn seam if the garment will be used by a child who may mouth or pull the closure.
Conclusion
This one-piece romper pairs a compact Nordic yoke with short sleeves, a measured torso, two leg openings and a functional gusset. Match gauge and finished measurements first, and inspect the closure each time before dressing or wearing the garment.
Printable Pattern Card
Baby sizes 0–3 through 12–24 months. Ch 64, increase at eight markers to 120 (136, 152, 168) yoke stitches, split sleeves with four underarm chains, work torso to the stated length, make two 52 (56, 60, 64)-stitch legs, and attach a 12-by-6-row button gusset. Gauge is 20 hdc and 16 rounds per 4 inches.