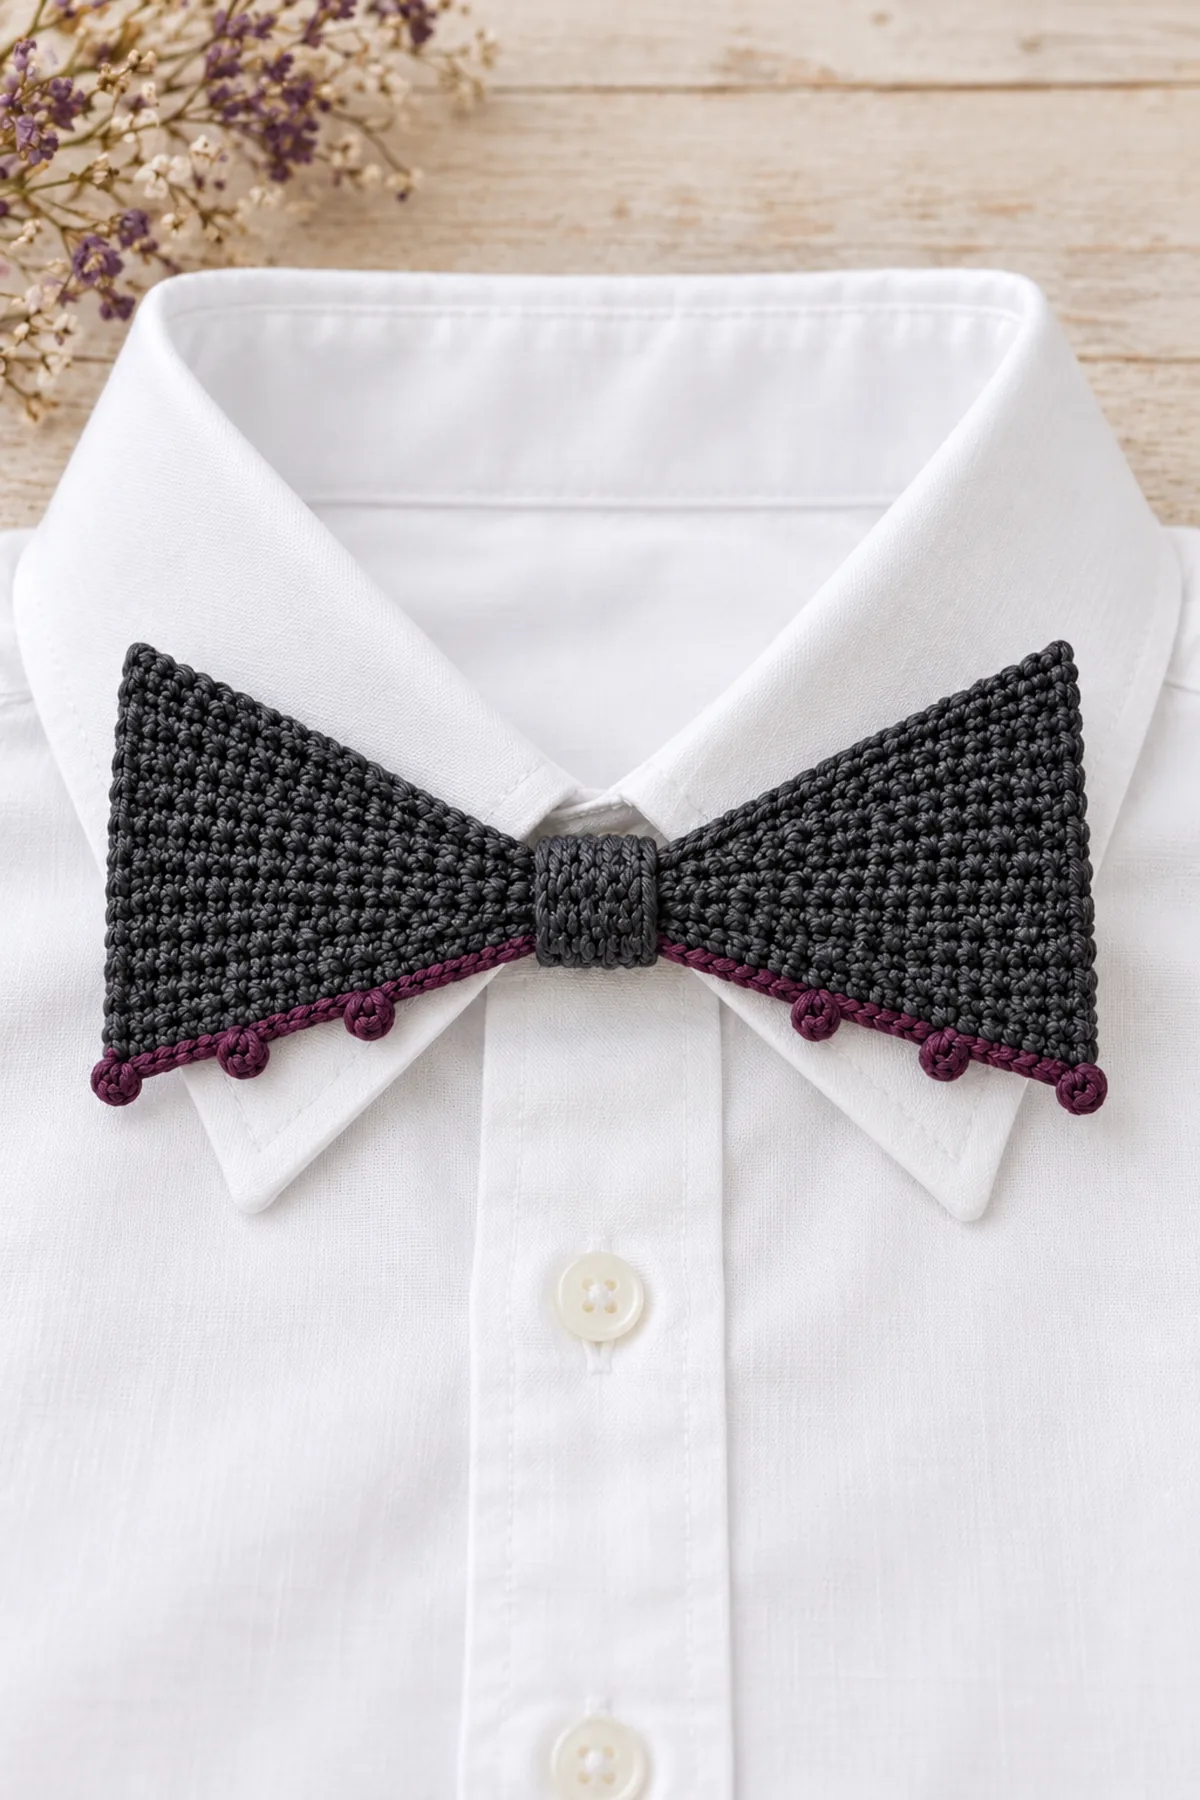
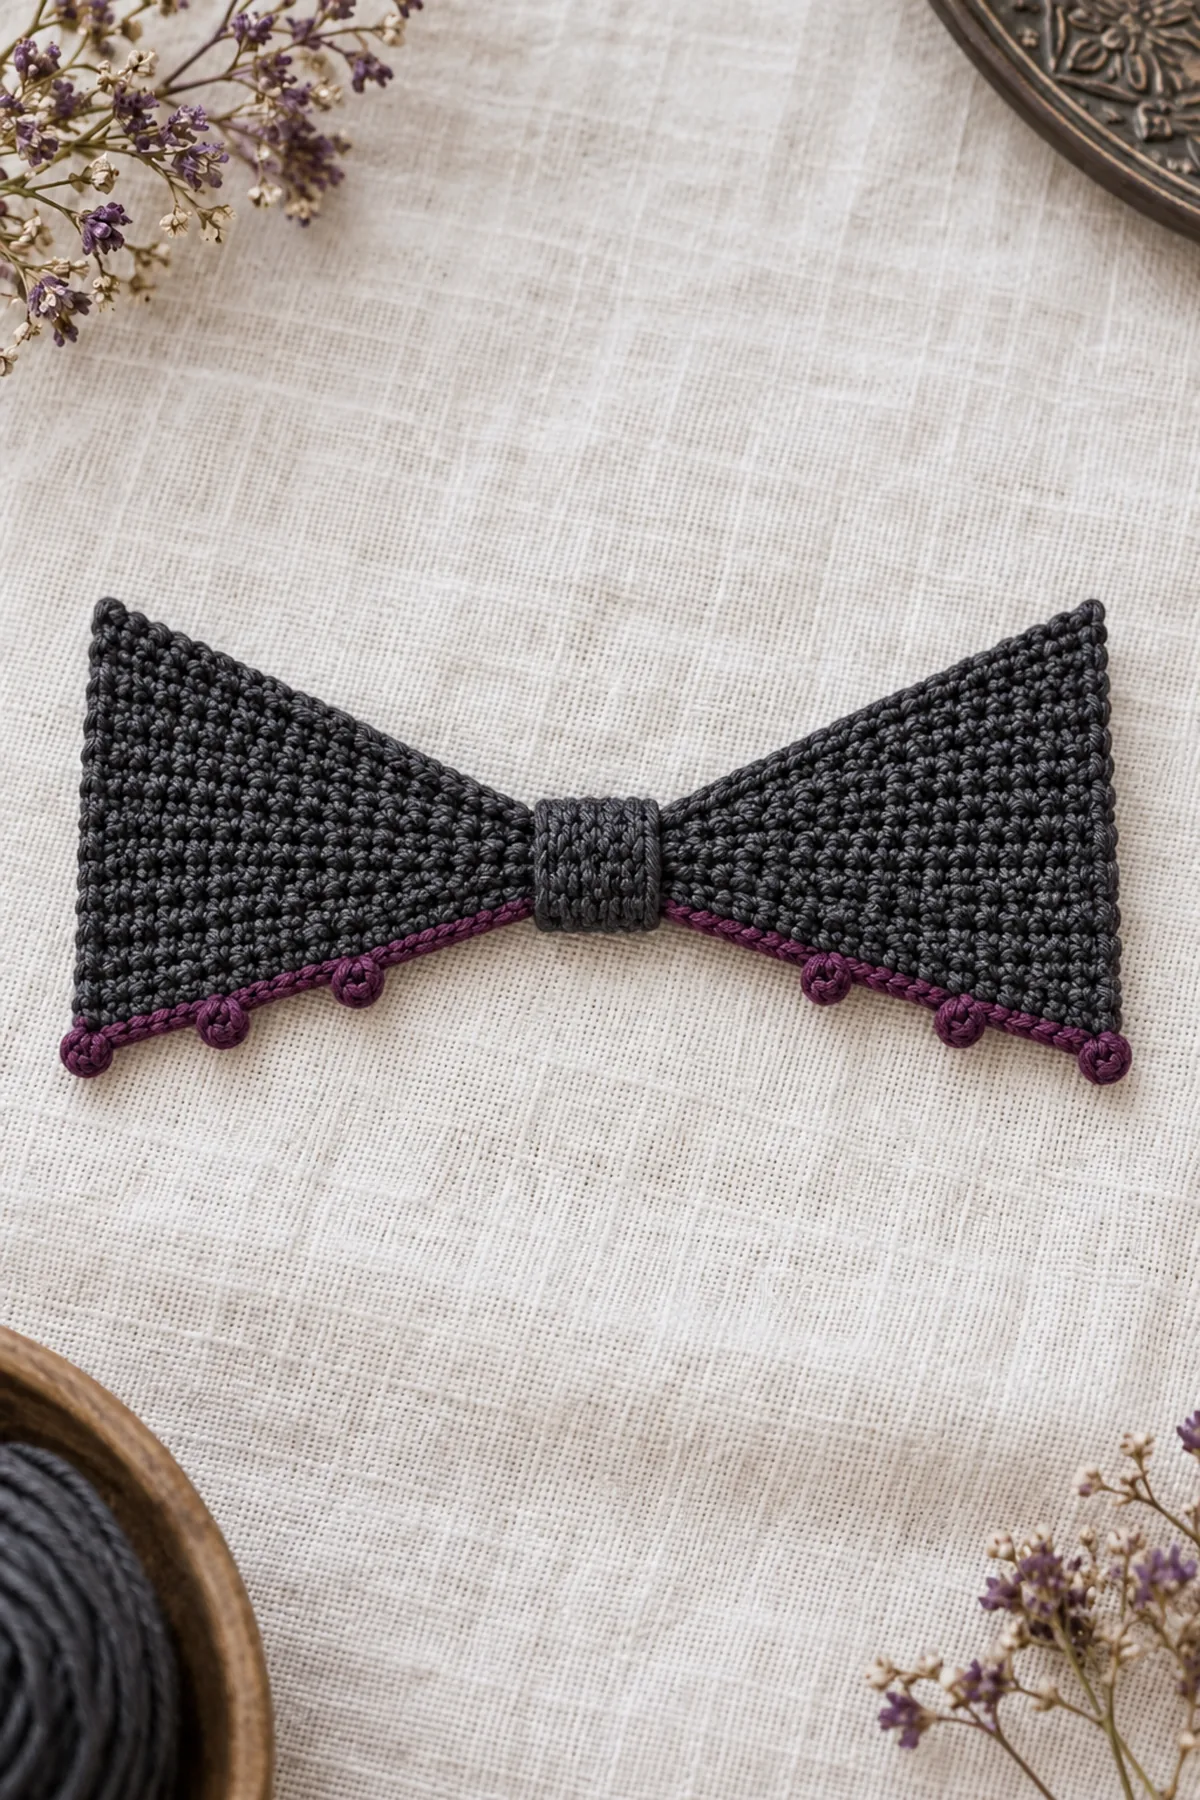
This crochet bat bow tie brings a practical handmade detail to Halloween. Adult clip-on charcoal cotton bow with two mirrored flat tapered triangular wings, plum raised lower-edge points and a narrow charcoal center wrap. No stuffed bat body, eyes, hanging chain or neck cord. The instructions below describe the construction in US crochet terms. Choose yarn for the fabric structure rather than color alone, and compare each checkpoint with your own swatch before continuing.
Make two flat charcoal wedges from narrow inner tips to wider outer ends. Plum single-crochet trim with three tiny picots traces the lower sloping edge of each wing. A narrow center wrap hides the join, and a sewn commercial clip makes the bow wearable without a neck cord. This is an adult costume accessory.
Pattern Details
- Hook Size: 3.5 mm starting point, adjust to firm sc gauge
- Finished Size: Planning target about 4.3 inches wingtip-to-wingtip and 2 inches tall, excluding small picots
- Gauge: 20 sc and 24 rows = 4 inches, washed
- Estimated Time: 2-3 hours
- Construction: Two 13-row flat wedges, mirrored picot lower edges, 3-stitch center wrap, sewn adult bow-tie clip
- Skill level: Intermediate
Why You’ll Love This Project
Two mirrored wedges create a winged silhouette without a stuffed bat body, plastic eyes or dangling keychain. The small contrasting points make the lower edge visible on a white collar. The clip is attached only after the crochet is blocked and dry.
Materials
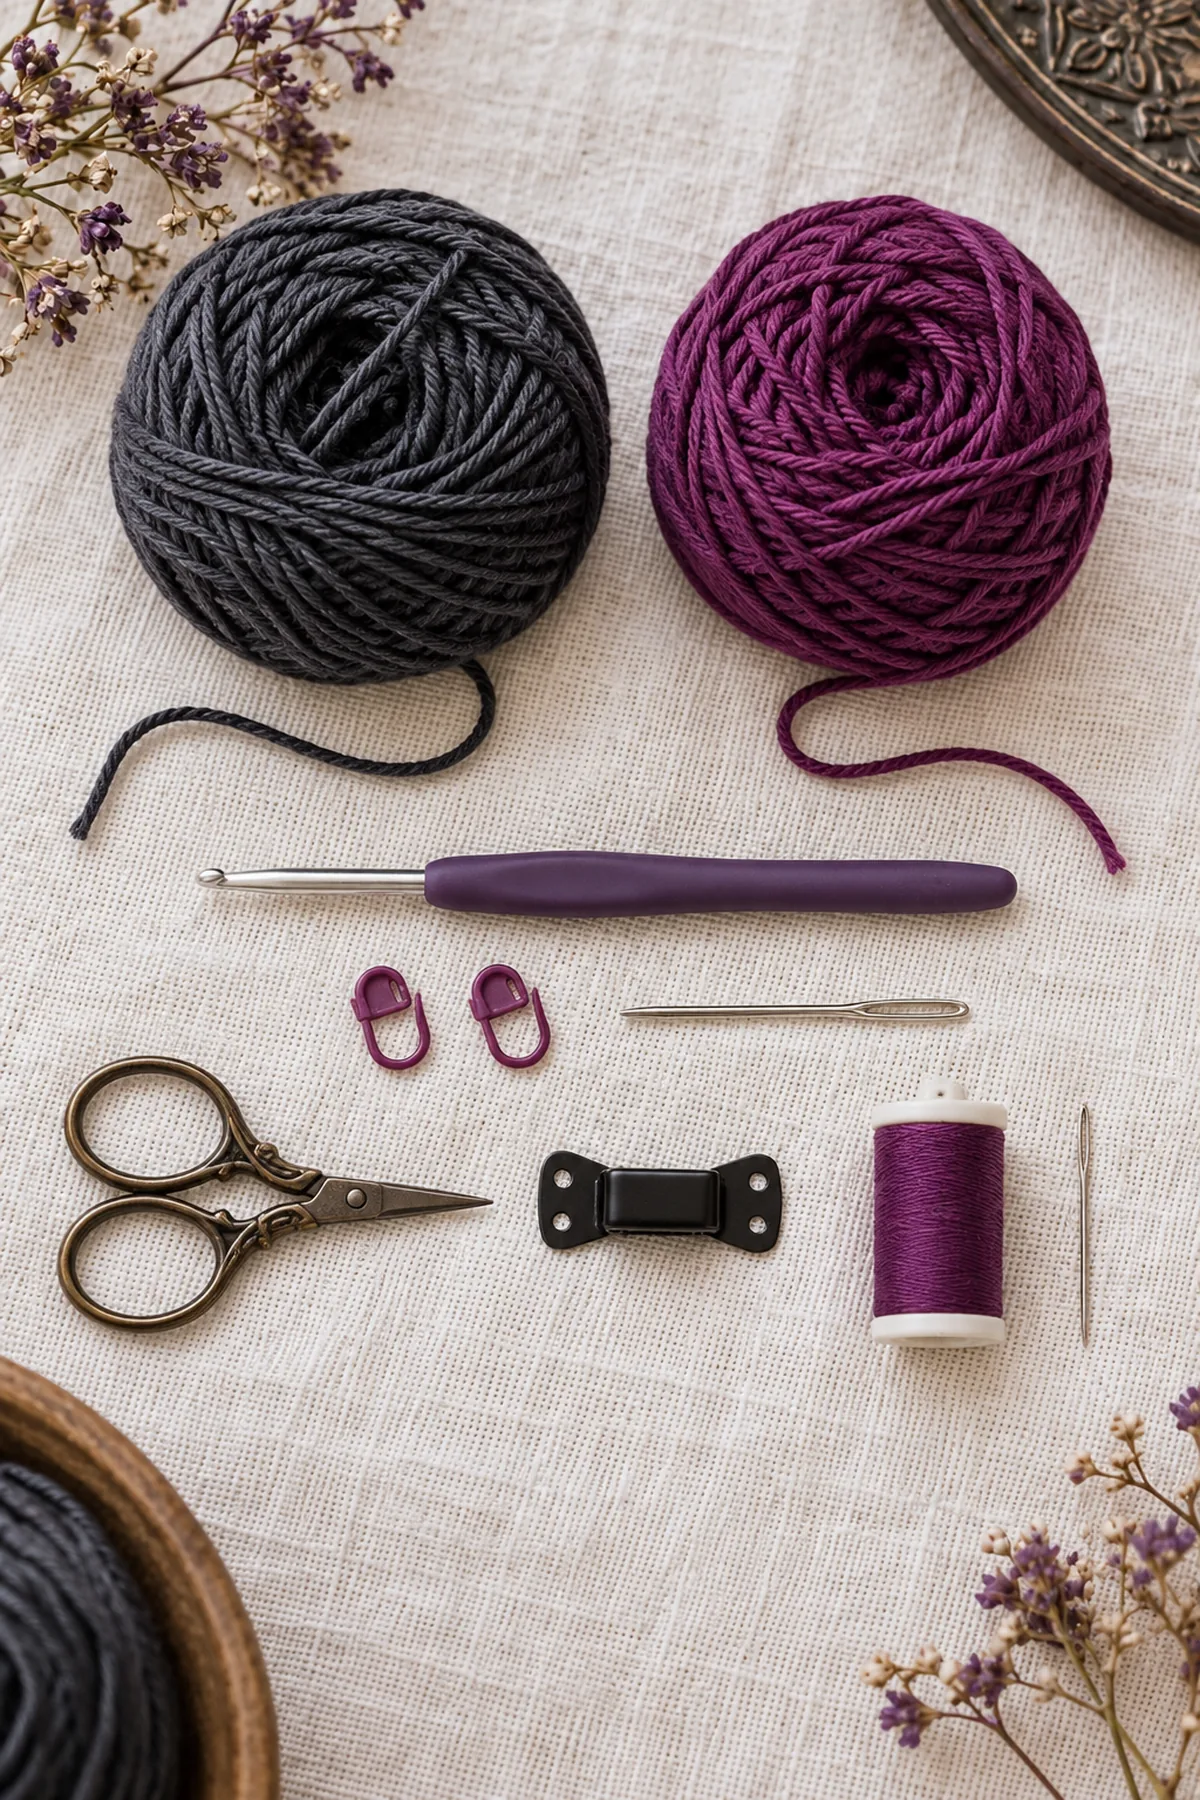
- Planning allowance: 35 yards charcoal DK cotton and 10 yards plum matching cotton
- 3.5 mm hook, markers, yarn needle, scissors, measuring tape; one small commercial sew-on bow-tie clip with sewing holes, strong matching sewing thread and sewing needle
Gauge, Measurements, and Planning
At five stitches per inch, the final ten-stitch edge is about two inches tall. Thirteen rows at six rows per inch give each wing about 2.2 inches from the inner narrow end to its broad outer edge. The paired bow is around 4.3 inches wide before a little central overlap. These are planning dimensions. Swatch with cotton firm enough for the tips to hold their shape; avoid stiffening sprays on clothing. Make both wings with the same hook and tension and block them to matching outlines before assembly. The clip must sit behind the center without protruding beyond the fabric or showing sharp edges.
Make and wash a gauge swatch before beginning. Measure only after the swatch is completely dry. If the stitch width differs, change hook size rather than pulling the working yarn tighter. Keep a written count at the end of every section so the finished edges remain balanced and the assembly points line up.
Abbreviations and Special Stitches
- ch: chain
- sc: single crochet
- hdc: half double crochet
- dc: double crochet
- sl st: slip stitch
- st(s): stitch(es)
- rnd: round
- BLO: back loop only
- inc: 2 stitches in one stitch
- sc2tog: single crochet two stitches together
- RS: right side
- WS: wrong side
- sp: space
Special stitch guidance: Increase = 2 sc in one stitch. An increase row works two increases, one in the first stitch and one in the last, with one sc in every intervening stitch. The narrow two-stitch row therefore has only the two increases. Picot = ch 3, then sl st through both top loops of the sc immediately below the chain; this creates a tiny point without using another base position. The trim has 13 counted sc per wing; picots are embellishments, not extra edge sc.
Important Notes
- Pattern development note: stitch arithmetic and written construction have been reviewed computationally; this design has not been physically sample-tested. Gauge, yardage and finished measurements are planning targets, not a tested guarantee. Swatch and check fit before making a gift.
- Beginning ch 1 or ch 2 and joining slip stitches never count as stitches. Mark the first counted stitch of each round and move the marker after completing the round.
- On flat rows, turn after each row and work the first stitch into the last stitch of the previous row. On joined rounds, join to the first counted stitch and do not turn unless specifically instructed.
- Change color on the final yarn-over of the stitch before the new color is needed. Leave a 6-inch tail and weave it back and forth through same-color stitches after construction.
- Use the written stitch counts for structure and your washed gauge for dimensions. Do not silently add shaping increases to correct a measurement; make a fresh swatch with a different hook first.
- Images are AI-generated design illustrations, not stitch charts or photographs of a physically tested sample. Follow the written counts and your measured gauge.
Complete Instructions for Crochet Bat Wing Bow Tie
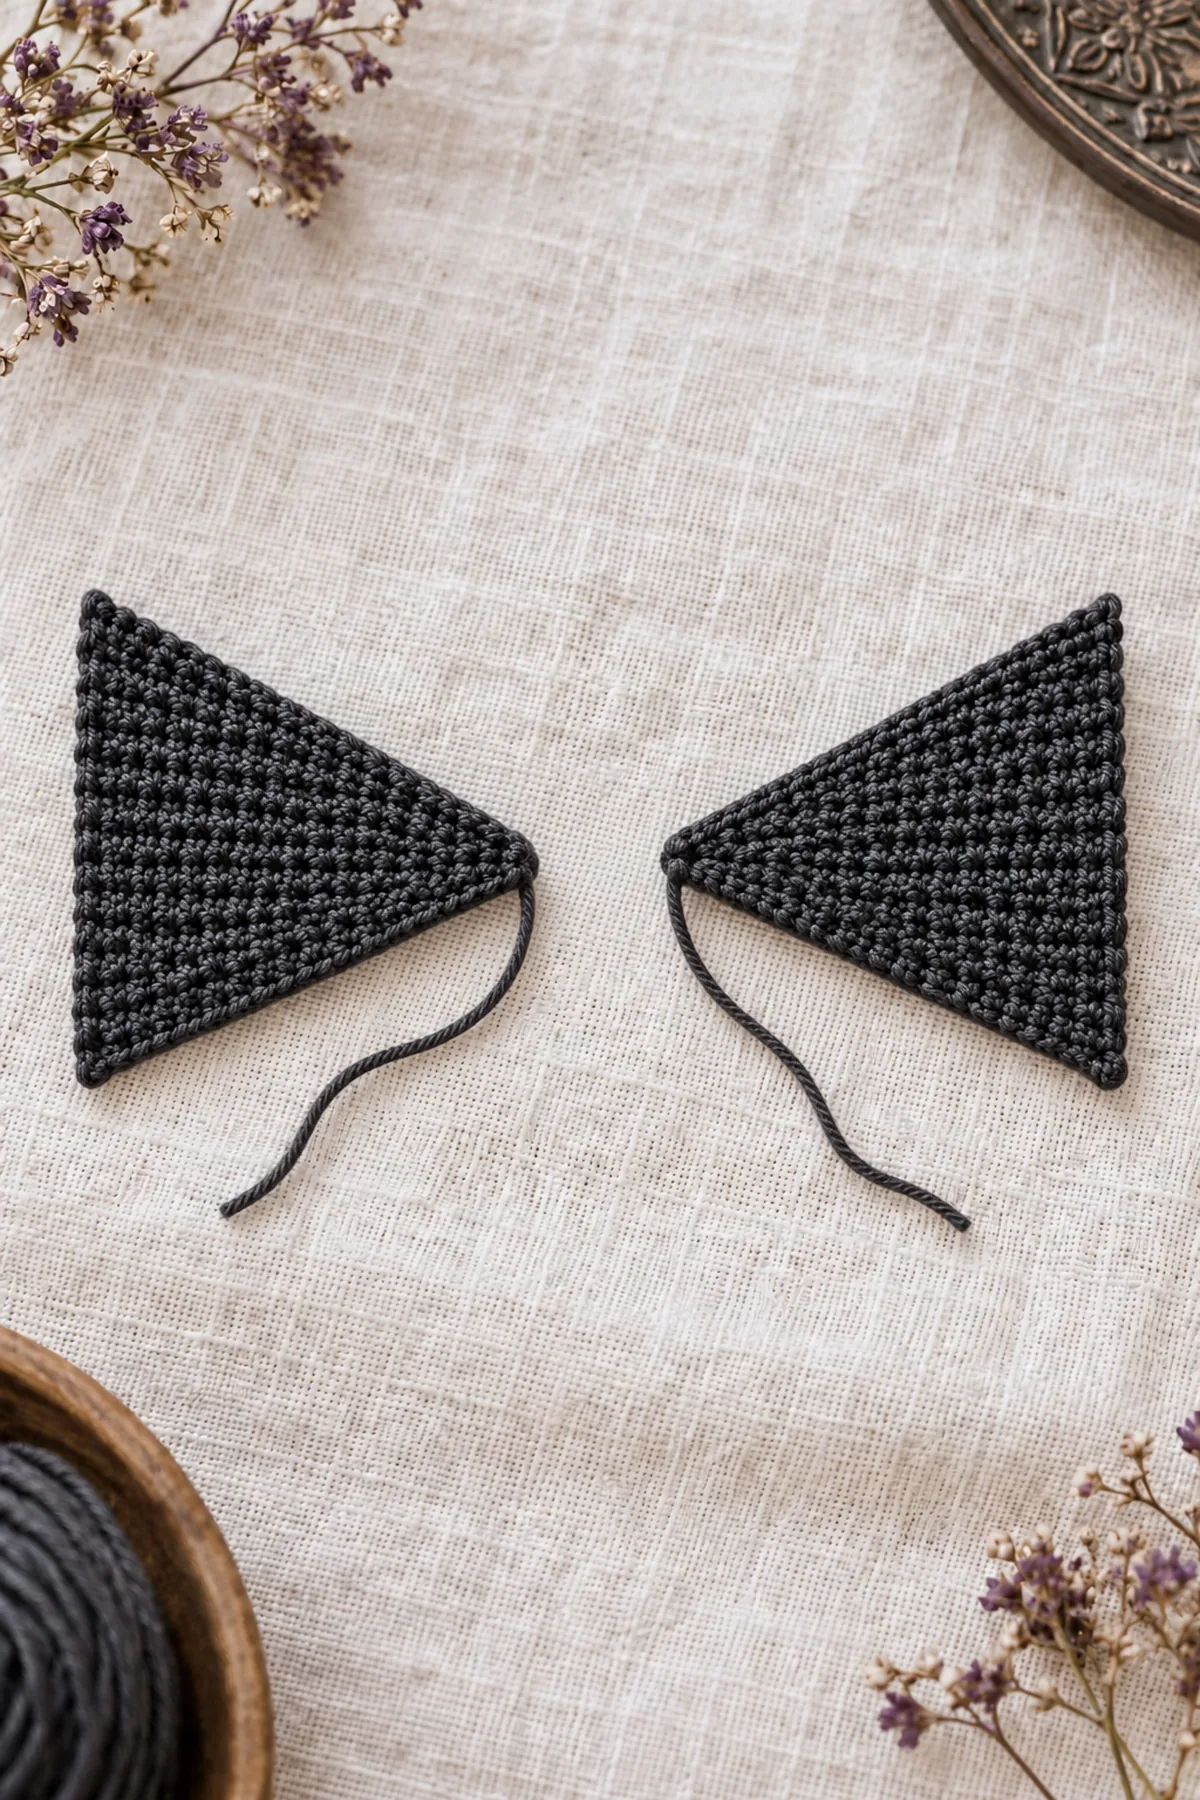
Crochet Two Matching Wing Wedges
- Wing 1: with charcoal ch 3. Row 1: sc in second chain and final chain. Ch 1, turn. (2 sts)
- Row 2: 2 sc in each of the two stitches. Ch 1, turn. (4 sts)
- Rows 3-4: sc in every stitch, ch 1 and turn. (4 sts)
- Row 5: 2 sc in first, sc in next 2, 2 sc in last; ch 1 and turn. (6 sts)
- Rows 6-7: sc in every stitch, ch 1 and turn. (6 sts)
- Row 8: 2 sc in first, sc in next 4, 2 sc in last; ch 1 and turn. (8 sts)
- Rows 9-10: sc in every stitch, ch 1 and turn. (8 sts)
- Row 11: 2 sc in first, sc in next 6, 2 sc in last; ch 1 and turn. (10 sts)
- Rows 12-13: sc in every stitch. Ch 1 and turn after Row 12 only; fasten off after Row 13. (10 sts) Leave a 10-inch tail at the narrow starting end for joining.
- Wing 2: repeat all thirteen rows exactly. The untrimmed wedges are identical; their lower borders will be mirrored during layout. Do not join their broad ends together.
Add Mirrored Plum Lower Edges
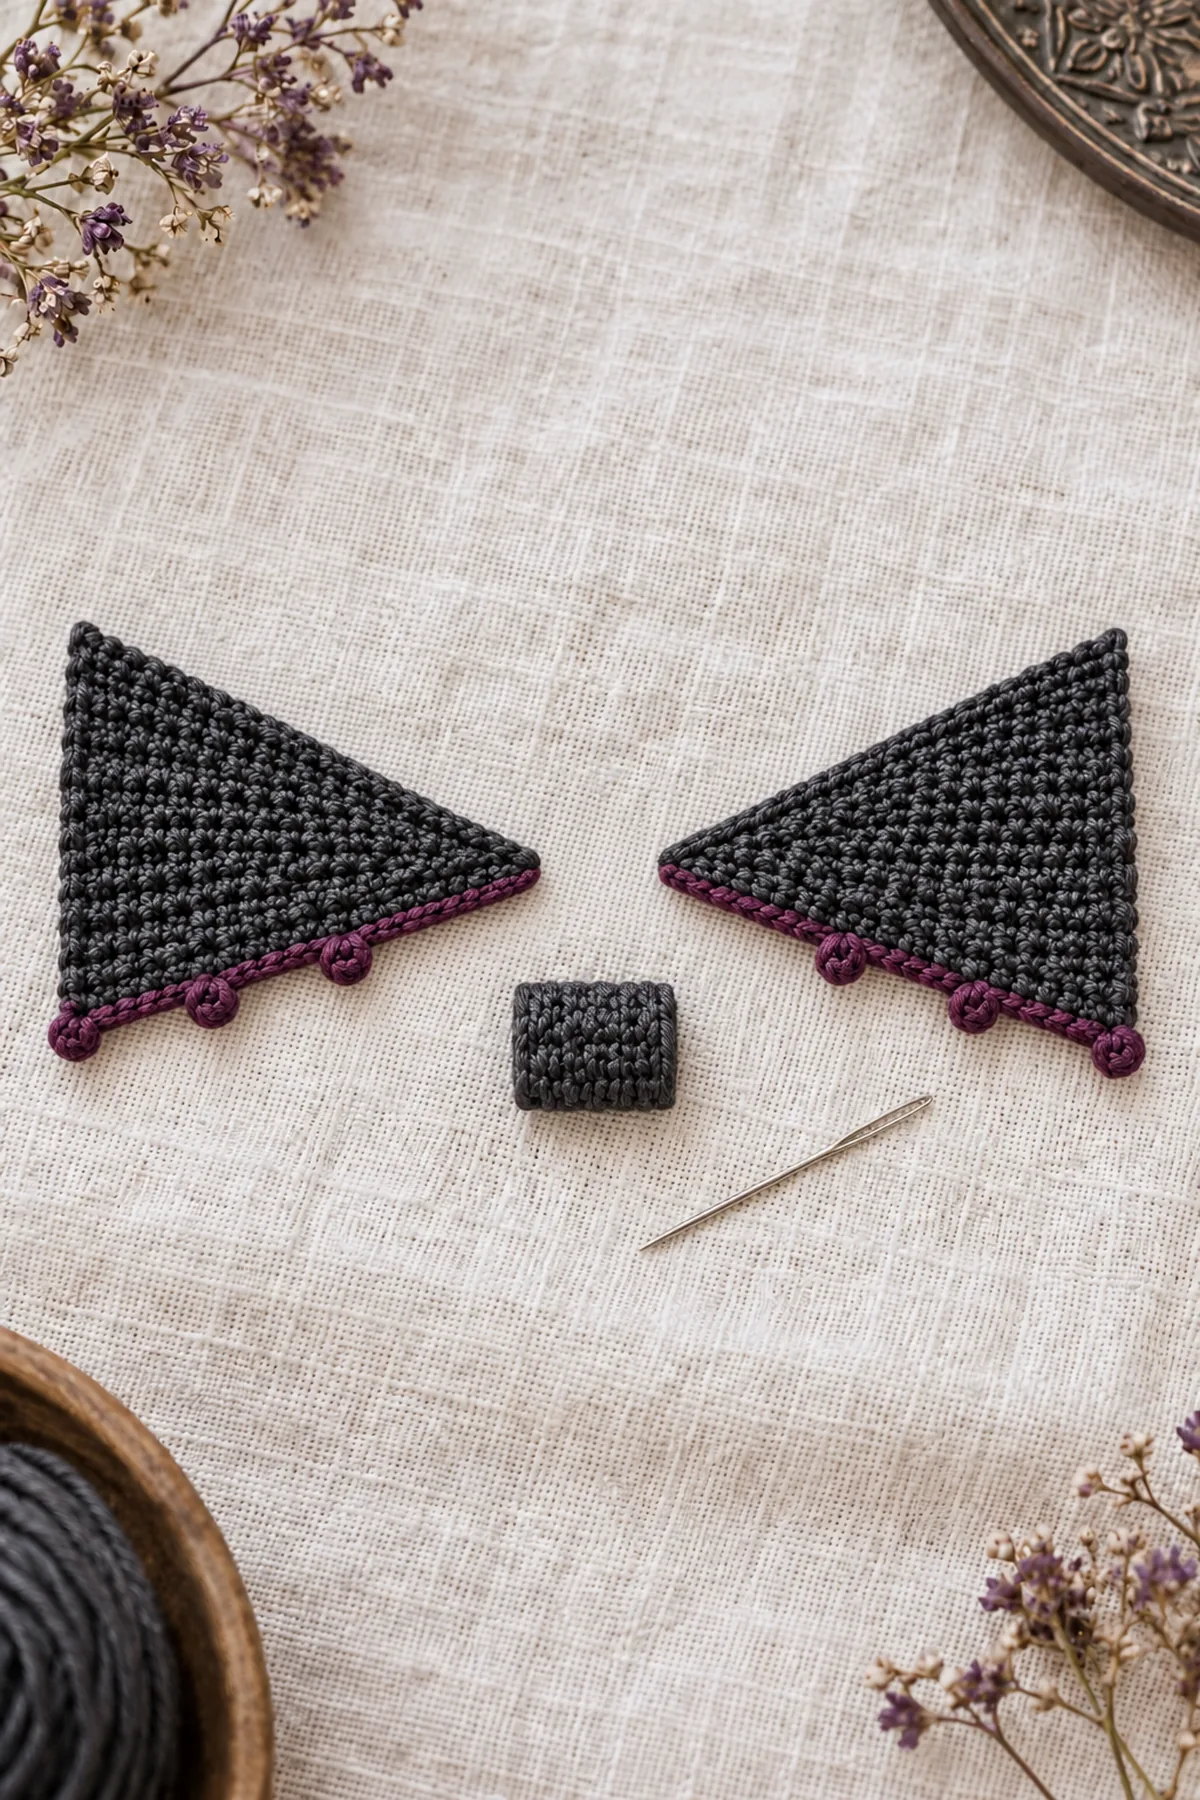
- Lay both wedges on the table with their narrow Row-1 ends touching and broad Row-13 ends outward. Rotate one wedge, and flip it if necessary, until both form a matched left/right silhouette. Choose one face as the front and mark the lower sloping row-end edge of each wing; leave the upper edges and broad ends plain.
- On each marked lower edge, join plum at the narrow end beside Row 1. Ch 1, work one sc in each successive row-end from Row 1 through Row 13. After the sc at row-end 3, 7 and 11, add one picot: ch 3, sl st through both top loops of that same sc. Continue into the next row-end. Fasten off after the thirteenth sc. Each wing has 13 trim sc and exactly three picots.
- Work both borders from their own narrow end toward their own broad end; turn the loose piece in your hand to reach it, keeping the marked lower edge. Check the pair again on the table before weaving plum tails. Both sets of three points must lie below the wings, never one above and one below.
- Dampen and block both pieces into matching wedges without stretching the picots into long loops. Let them dry fully before attaching any metal hardware.
Join, Wrap and Attach the Clip
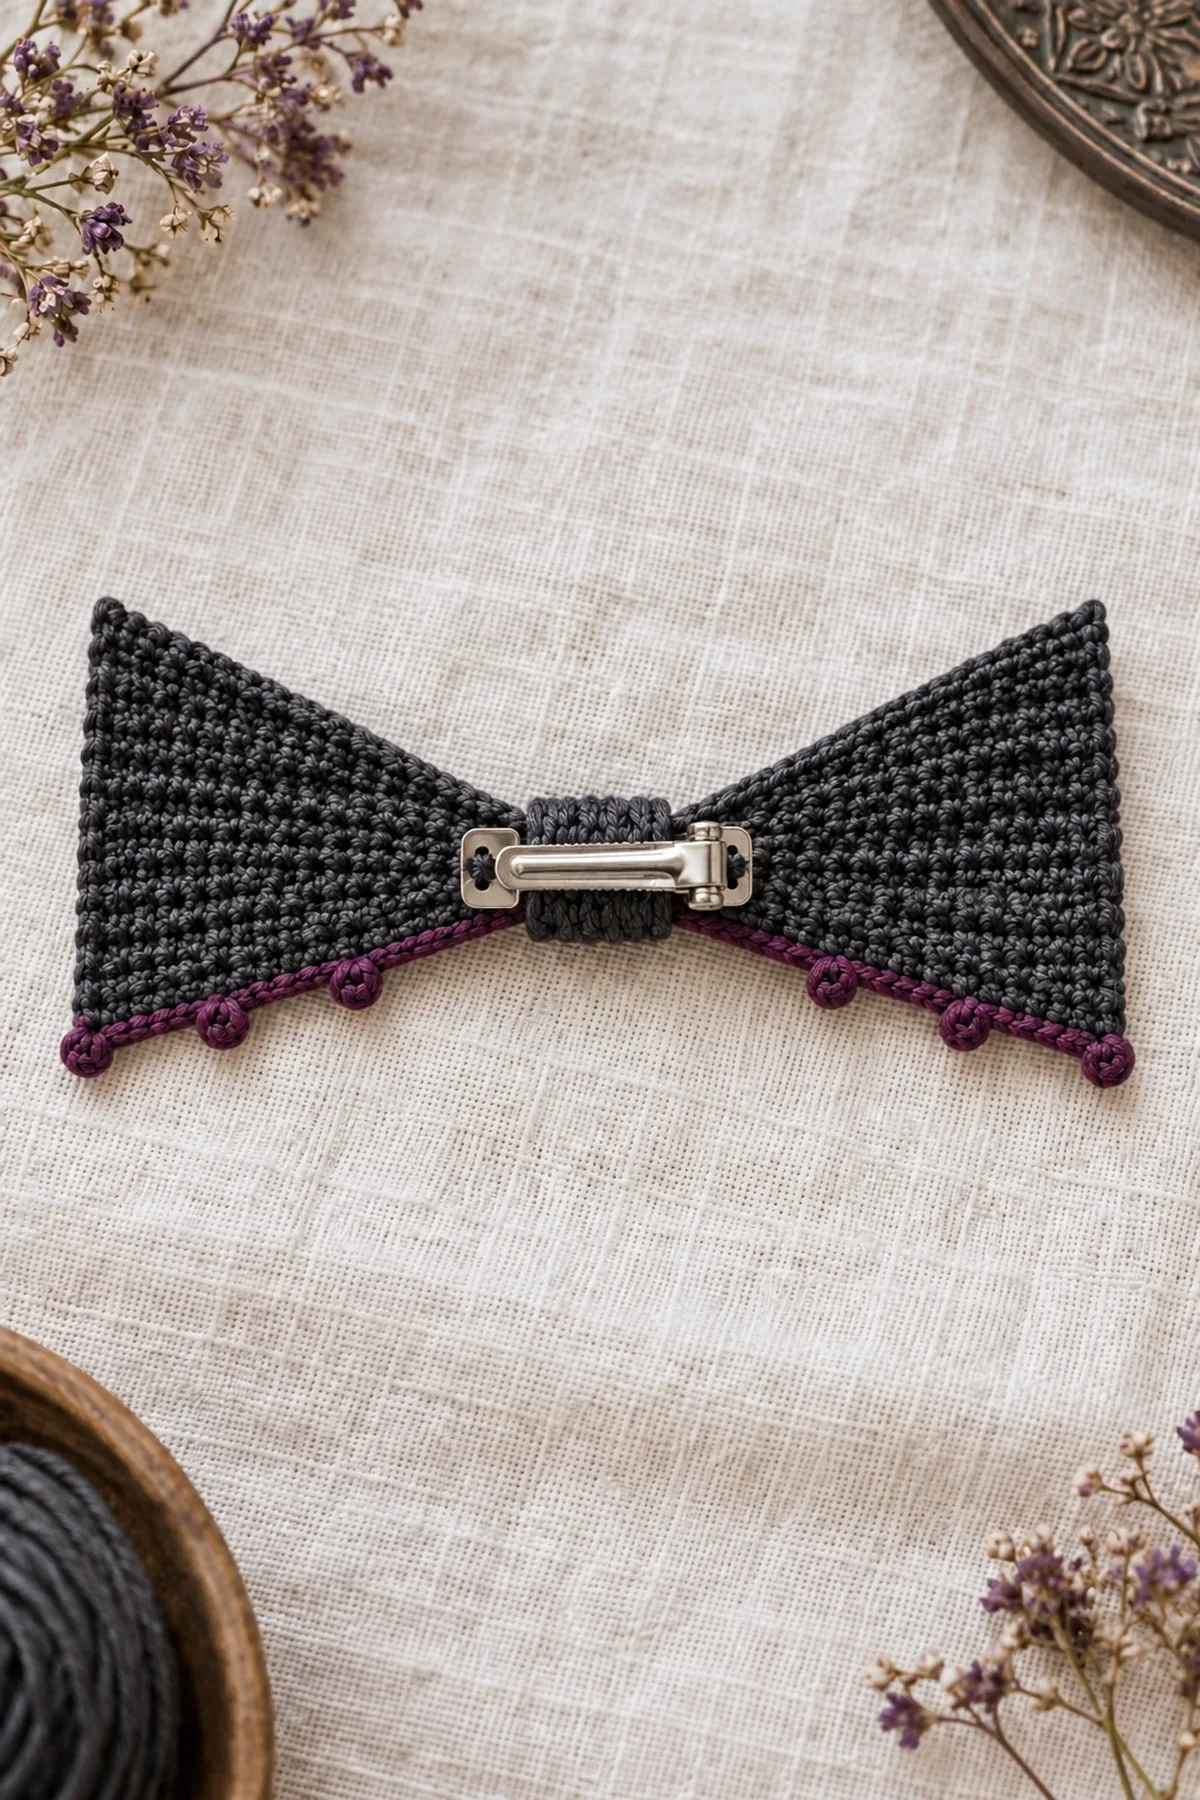
- With the wings front-up, overlap the narrow ends by no more than one row. Whipstitch the two matching Row-1 positions securely with charcoal, passing twice through each pair. Keep the broad outer ends apart and both picot edges down.
- Center wrap: with charcoal ch 4. Row 1: sc in second chain and the next two chains. (3 sts) Rows 2-8: ch 1, turn and sc in each stitch. (3 sts) This makes a flat strip approximately 0.6 inches wide and 1.3 inches long. Fasten off with a 12-inch tail.
- Place the strip vertically across the front center join. Bring its short ends around to the back and whipstitch the three paired positions together. It should hold the wings flat without bunching them. If it does not reach comfortably around the join, add rows before sewing and record the revised total; do not squeeze the bow into a knot.
- Position a commercial bow-tie clip horizontally behind the center wrap, so its gripping jaws face the garment and remain accessible. With doubled sewing thread, pass through each sewing hole and the wrap at least four times; tie off securely on the back fabric. Keep stitches clear of the hinge and spring. Use a clip with purpose-made sewing holes, not glue or a sharp safety pin.
- Open and close the mechanism several times, gently tug the attachment, and test on a spare collar before wearing. This is for adults only, not baby clothing, toys or pets. Remove for sleep and vigorous activity. Check hardware and threads before every wear; detach the clip before washing if its care instructions require it.
Assembly and Shaping
Lay the two wedges flat as a mirror pair with narrow tips together, broad ten-stitch edges pointing out, and both plum picot borders facing downward. Join only the two-stitch inner ends. Wrap the separate small charcoal rectangle around that center join and sew the wrap closed on the back. Stitch the commercial clip to the back wrap through its sewing holes with strong thread, keeping the mechanism free.
Follow the specific assembly for this project above. Do not sew closed an opening that is meant to remain open, and do not add attachments absent from the written construction.
Finishing
- Fasten off with a 6-inch tail; weave through three separate groups of stitches, changing direction twice.
- Damp-block gently according to the fiber label, check the intended shape, and dry fully before assembly or use.
- Inspect both sides, all joins, and every decorative attachment; resecure a loose stitch before gifting.
- Include the fiber content and washing instructions with the finished item. Keep the item away from candles and other heat sources.
For a polished result, weave each tail through several same-color stitches, reverse direction once, and trim only after the fabric has been gently stretched. Block to the listed dimensions without flattening textured stitches. Inspect joins, borders, straps, and decorative pieces before the project is used or gifted.
Helpful Tips
- Count in small marked sections instead of counting an entire dark-colored edge repeatedly.
- Use a pale working surface behind black yarn so both loops of the stitch remain visible.
- Keep a row tally and record your swatch measurements beside the size you selected.
- If shaping ripples or pulls, stop at that checkpoint and compare counts and gauge before progressing.
Good lighting and a contrasting stitch marker make counting much easier. If a section looks uneven, compare the current count with the previous checkpoint before continuing. Fixing one missed stitch early is faster than compensating later, and it preserves the measurements used by the assembly instructions.
Frequently Asked Questions
Can I change the colors?
Yes. Keep the yarn weight and fiber behavior consistent and use enough contrast for the decorative detail. Make a washed swatch with every major yarn substitution.
Is this pattern physically tested?
No physical sample test is claimed. The stitch counts are computationally checked and the written construction is reviewed. Make a gauge swatch, use the measurement checkpoints, and test fit or assembly before gifting.
Can I add a neck tie instead of a clip?
This design specifies a sewn adult clip and has no neck cord. Do not add long ties for babies, children or pets. Choose suitable purpose-made hardware and check it before each wear.
Conclusion
Keep the completed measurements and your yarn details with your pattern notes. The finished piece should match the described construction before it is styled or gifted. If a checkpoint does not match, correct the underlying count or gauge instead of concealing the difference during finishing.
BabyYarnie Printable Crochet Pattern Card
BabyYarnie — easy-to-follow crochet for everyday makers.
Project: Crochet Bat Wing Bow Tie
Skill level: Intermediate Hook: 3.5 mm starting point, adjust to firm sc gauge Yarn: DK
Finished size: Planning target about 4.3 inches wingtip-to-wingtip and 2 inches tall, excluding small picots
Card Materials
- Planning allowance: 35 yards charcoal DK cotton and 10 yards plum matching cotton
- 3.5 mm hook, markers, yarn needle, scissors, measuring tape; one small commercial sew-on bow-tie clip with sewing holes, strong matching sewing thread and sewing needle
Card Instructions
- Crochet Two Matching Wing Wedges: Per wing, row counts: 2, 4, 4, 4, 6, 6, 6, 8, 8, 8, 10, 10, 10.
- Add Mirrored Plum Lower Edges: One sc per lower row-end, with picots after positions 3, 7 and 11; mirror the pair.
- Join, Wrap and Attach the Clip: Join two narrow ends, add a 3-sc x 8-row center wrap, then sew on an adult bow-tie clip.
Finish: Check every count, weave in all ends, block to measurement, and inspect each join.