This original BabyYarnie pocket pony crochet pattern is designed independently as a practical crochet baby project with explicit stitch counts, measured checkpoints, and clear finishing. The instructions use US terms and keep every construction decision visible so the finished piece can be checked before use or gifting.
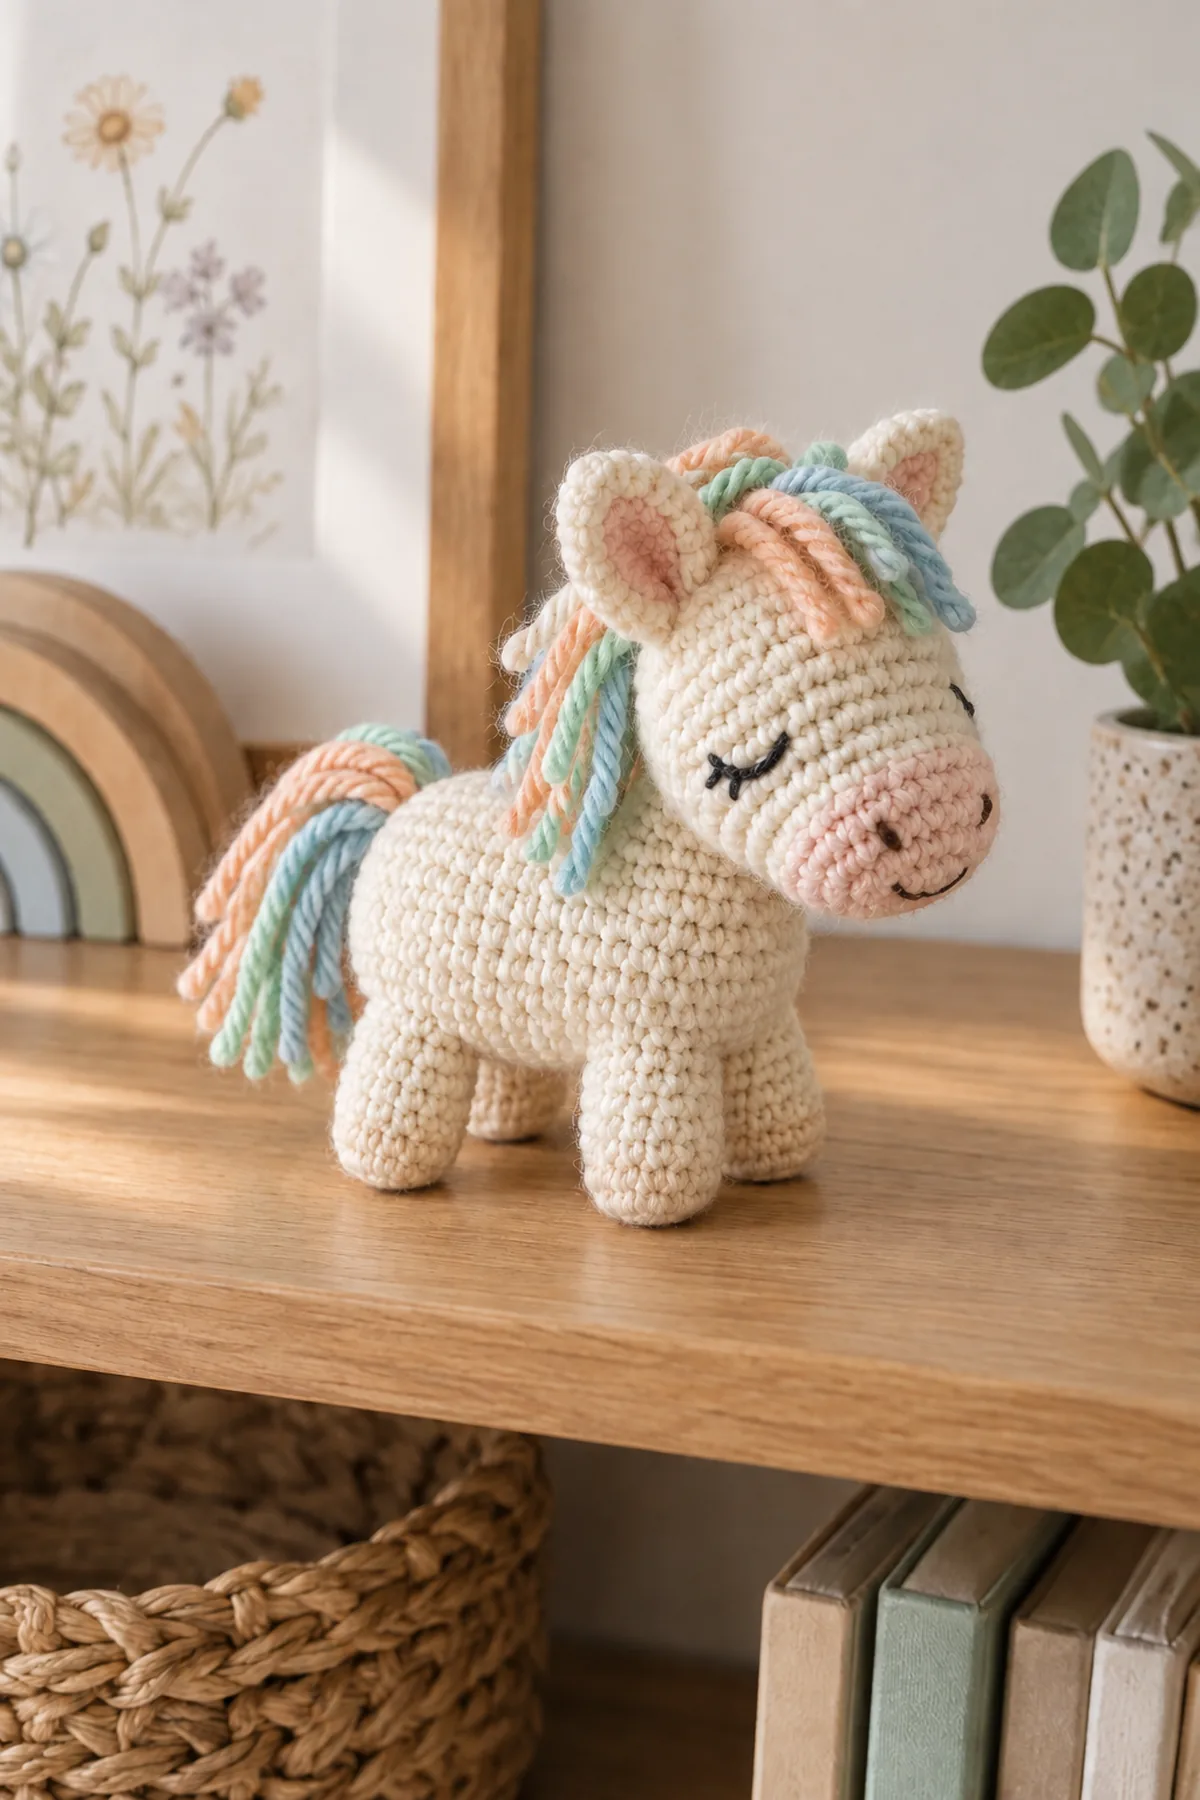
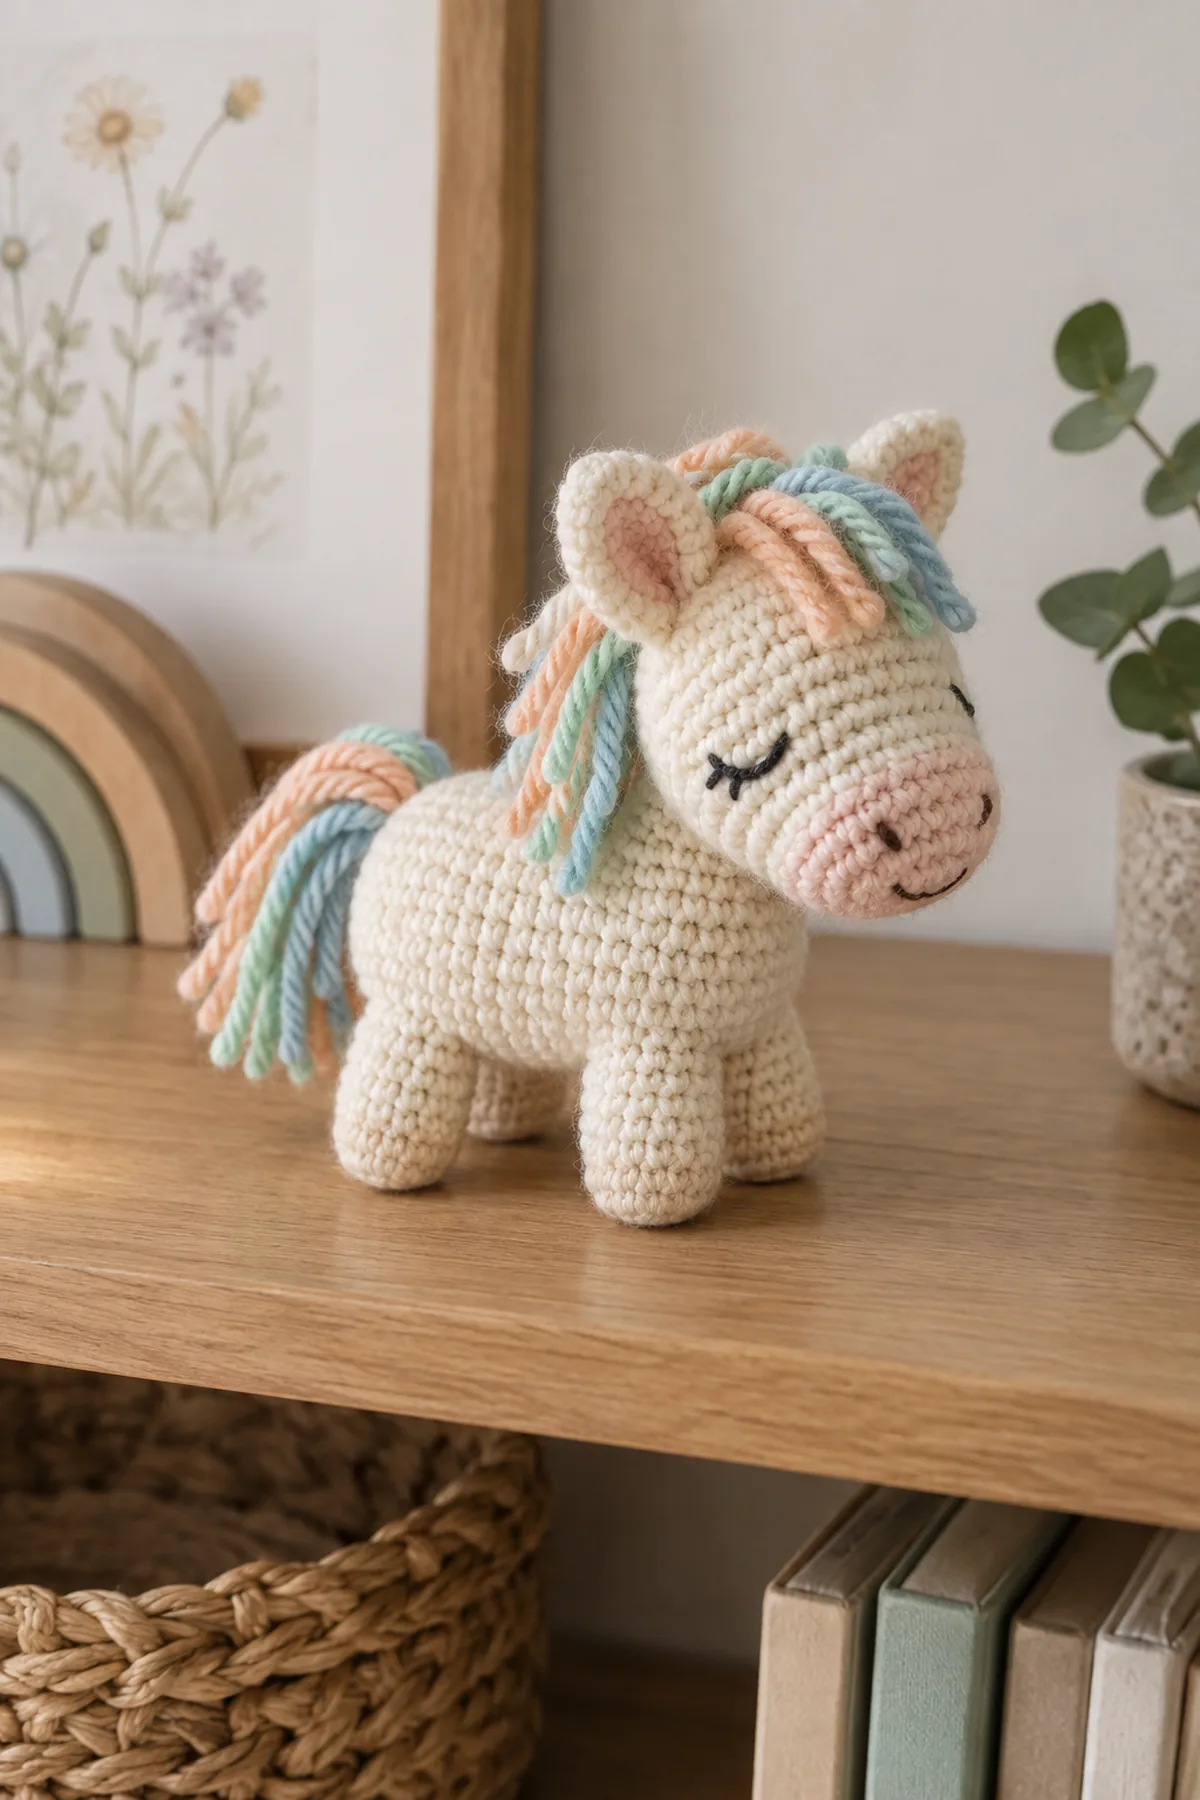
The pony uses a 30-stitch horizontal body, a 24-stitch head, a flat oval muzzle, four identical 12-stitch legs, and securely knotted-free surface embroidery for the mane and tail. The construction is compact, balanced, and distinct from the supplied visual reference.
Pattern Details
- Hook Size: 3 mm
- Finished Size: Approximately 4.75 inches tall × 5 inches long
- Gauge: 22 sc and 24 rounds = 4 inches in firm single crochet
- Terminology: US
- Estimated Time: 5–6 hours
- Construction: One stuffed body, one stuffed head, one flat muzzle, two lined ears, four stubby legs, and anchored pastel yarn mane and tail.
- Skill level: Intermediate
Why You’ll Love This Project
The construction is repetitive enough for a relaxed crochet session while the measured checkpoints help prevent size drift. A washable, smooth yarn keeps the stitches easy to inspect and gives the finished baby project a soft, tidy appearance.
Materials
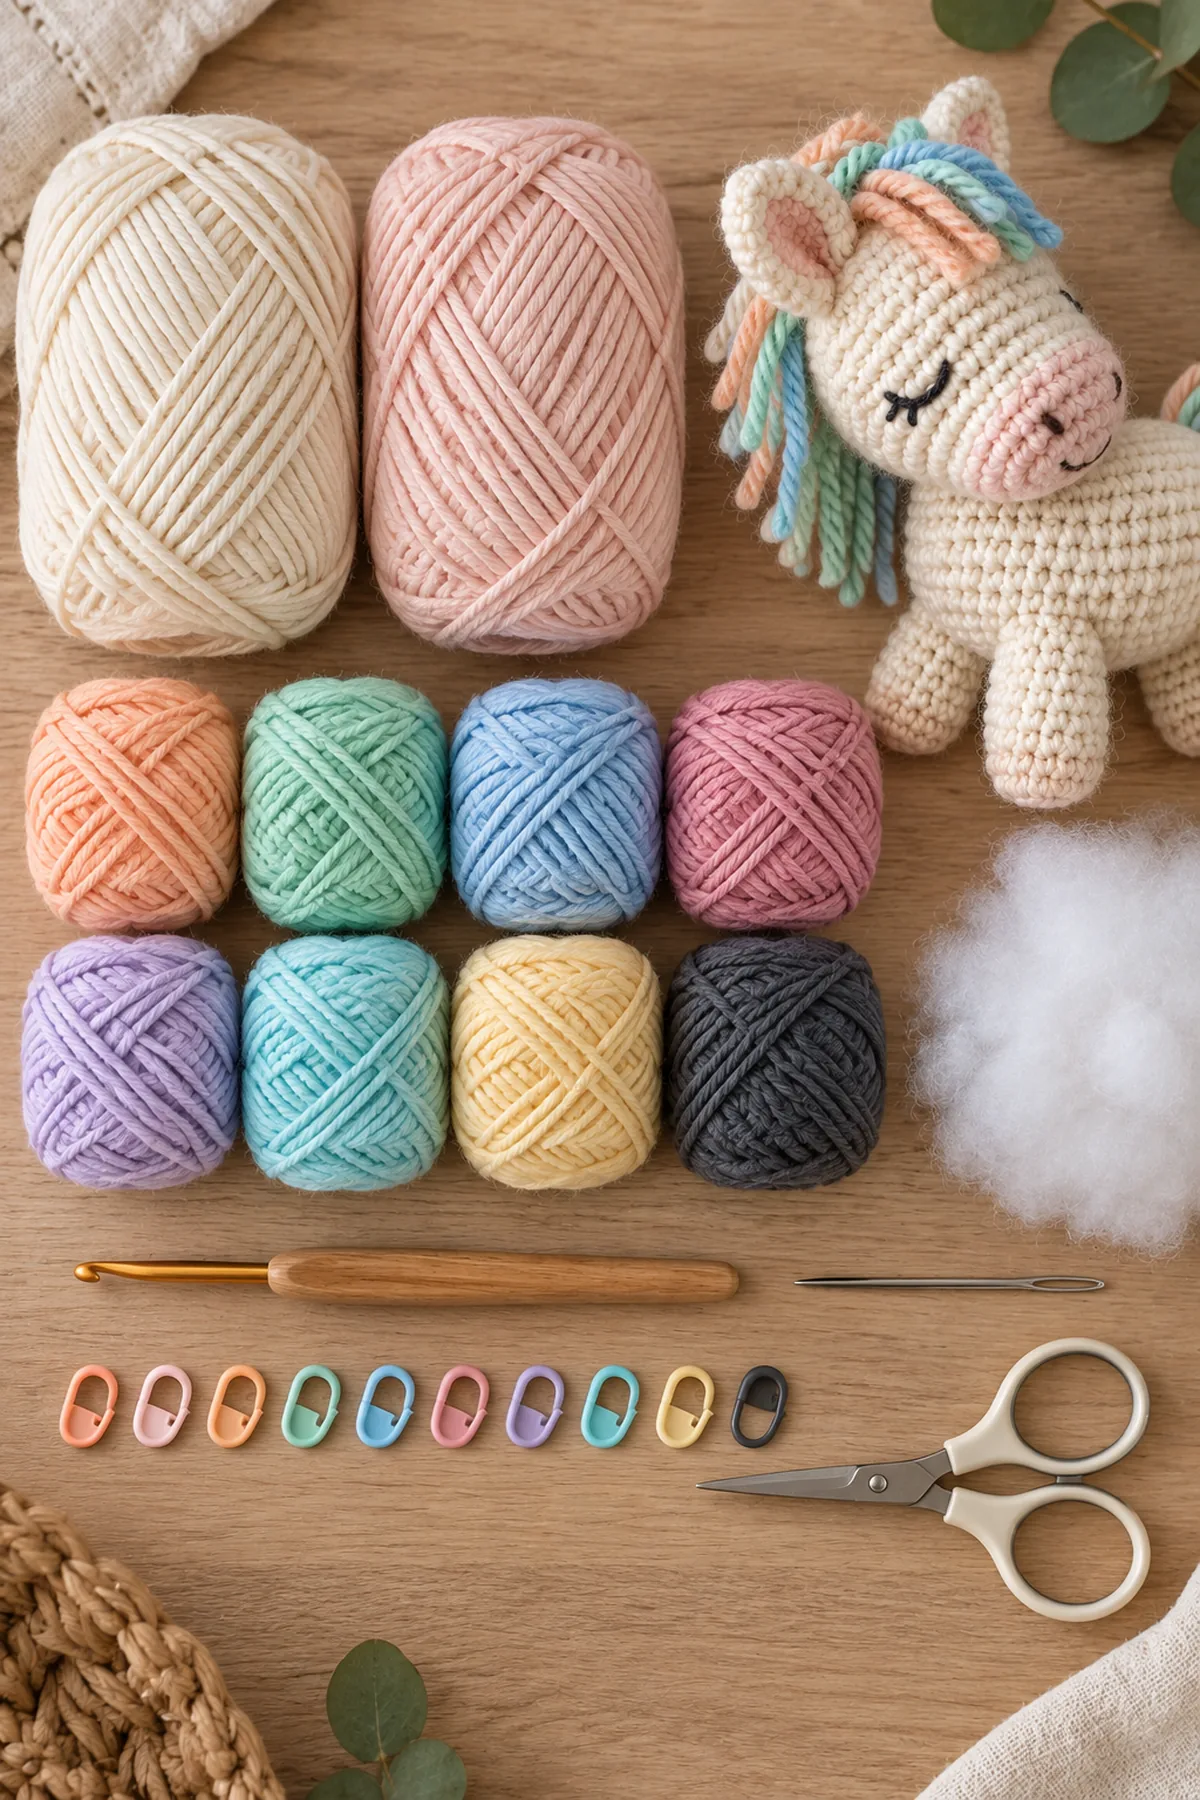
- Approximately 120 yards cream sport-weight washable cotton yarn
- Approximately 15 yards blush sport-weight yarn for muzzle and inner ears
- Small amounts of three pastel sport-weight yarn colors for mane and tail
- Small amount charcoal yarn for embroidery
- 3 mm crochet hook
- Washable polyester stuffing
- Ten locking stitch markers
- Yarn needle and scissors
Gauge, Measurements, and Planning
A 30-stitch body round should measure about 5.5 inches around. Keep all four 12-stitch legs the same length and use yarn strands no longer than 2 inches for the finished mane or tail.
Make and wash a gauge swatch before beginning. Measure only after the swatch is completely dry. If the stitch width differs, change hook size rather than pulling the working yarn tighter. Keep a written count at the end of every section so the finished edges remain balanced and the assembly points line up.
Abbreviations and Special Stitches
- ch: chain
- sc: single crochet
- hdc: half double crochet
- sl st: slip stitch
- st(s): stitch(es)
- rnd: round
- inc: work 2 sc in one stitch
- dec: single crochet two together
- BLO: back loop only
Special stitch guidance: Anchored mane stitch: bring a doubled yarn strand through two adjacent head stitches, pass both ends through the folded loop, tighten flat against the fabric, then split and trim the ends evenly. For under-3 use, replace strands with short surface-slip-stitch stripes.
Important Notes
- Work in continuous rounds and mark the first stitch.
- Embroider eyes, nostrils, and mouth; do not use plastic eyes, buttons, beads, wire, or glue.
- For children under age 3, use short surface-slip-stitch mane and tail details instead of cut strands so no loose fiber ends remain.
- Sew the head, muzzle, ears, and all four legs around their complete contact edges in two passes.
- Pull-test every seam and pastel detail before supervised play.
Complete Instructions for Pocket Pony Crochet Pattern
Crochet the Rounded Pony Body
Work in cream and stuff as the opening narrows.
- Body Rnd 1: Make 6 sc in a magic ring. (6 sts)
- Body Rnd 2: Inc in every stitch. (12 sts)
- Body Rnd 3: Repeat [sc, inc] 6 times. (18 sts)
- Body Rnd 4: Repeat [sc in next 2 stitches, inc] 6 times. (24 sts)
- Body Rnd 5: Repeat [sc in next 3 stitches, inc] 6 times. (30 sts)
- Body Rnds 6–14: Sc in every stitch. (30 sts)
- Body Rnd 15: Repeat [sc in next 3 stitches, dec] 6 times. (24 sts)
- Body Rnd 16: Repeat [sc in next 2 stitches, dec] 6 times. (18 sts)
- Body Rnd 17: Repeat [sc, dec] 6 times. Stuff firmly. (12 sts)
- Body Rnd 18: Dec around, close, and bury the tail. (6 sts)
Make the Head, Muzzle, and Ears
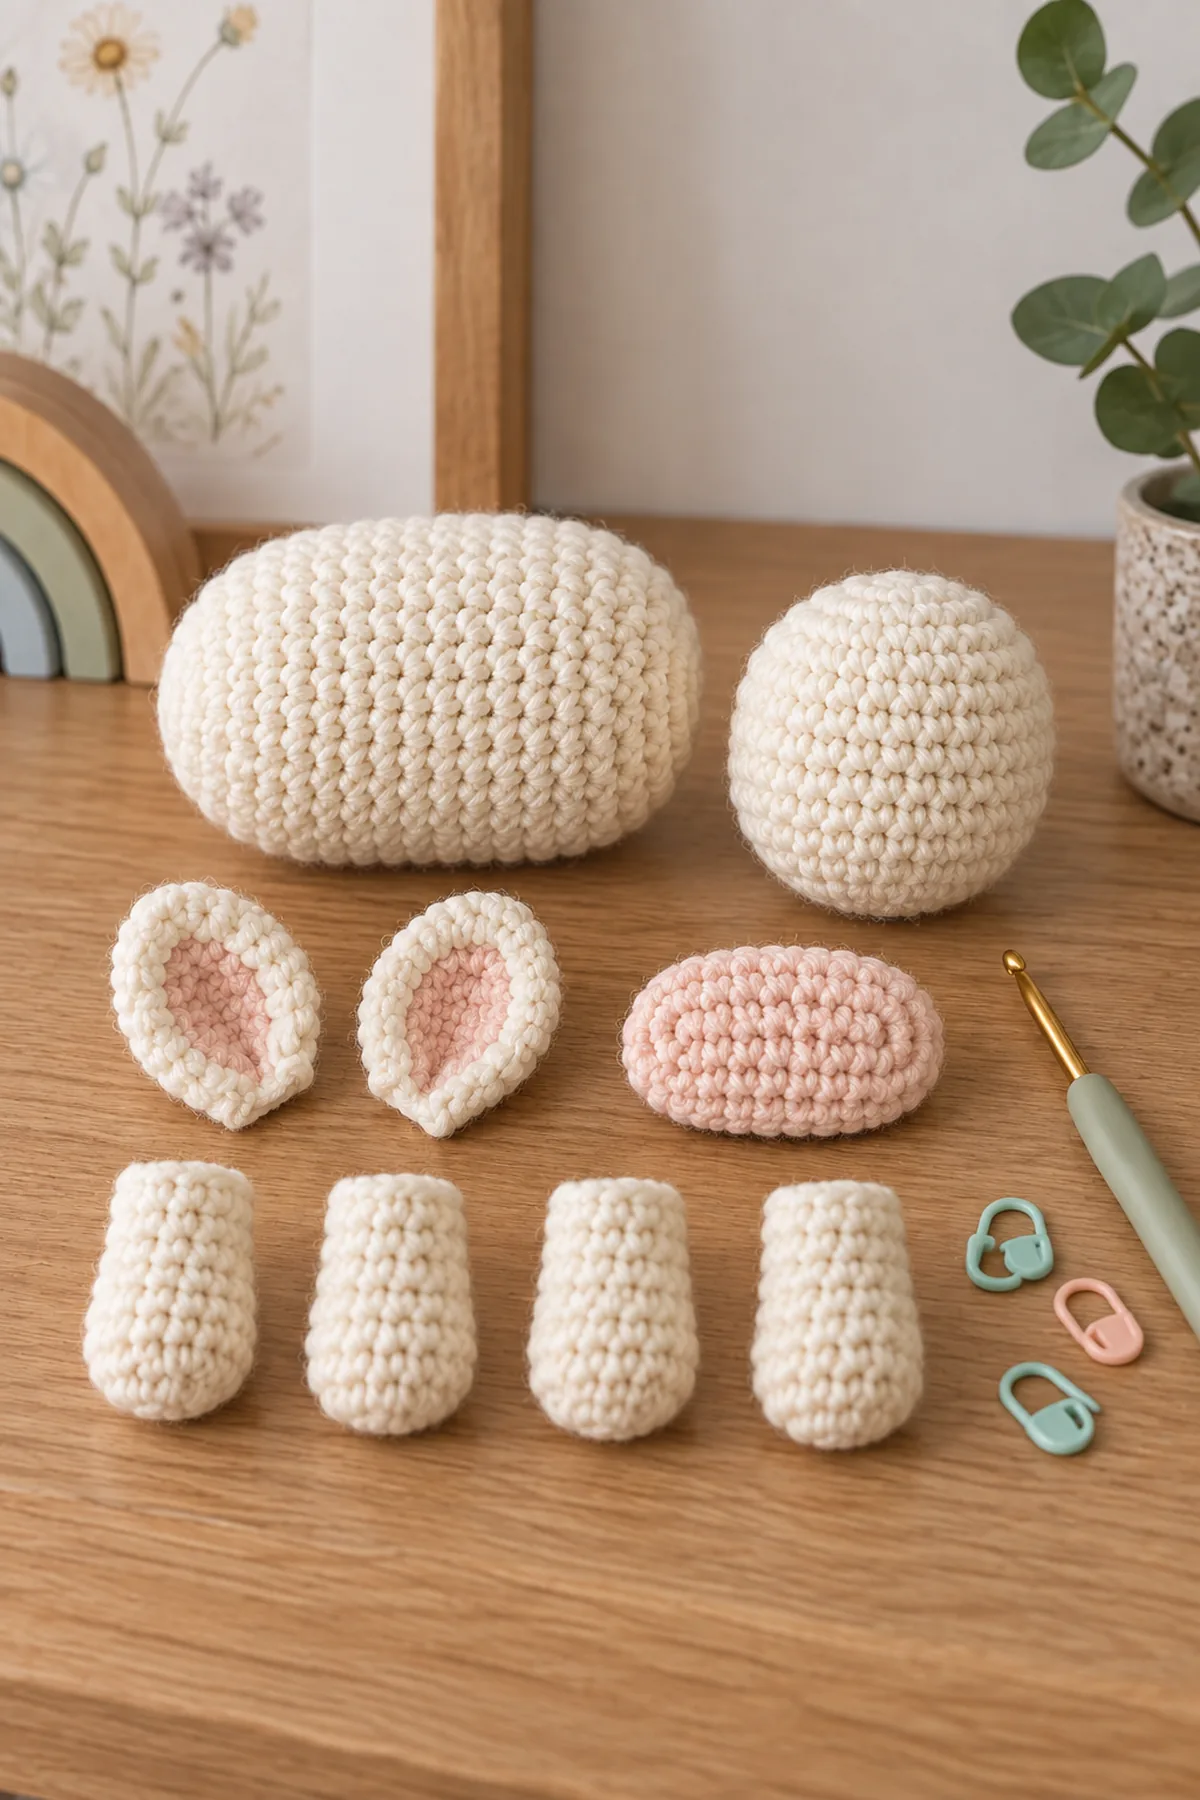
Keep the muzzle lightly padded and both ears identical.
- Head: In cream, increase from 6 to 24 stitches over four rounds, work 7 rounds even, then decrease to 18 and 12 stitches. Stuff and leave a sewing tail.
- Muzzle: With blush, ch 6. Work around both sides with 4 sc on each straight side and 3 sc at each end. (14 sts) Work one round even, add a pinch of stuffing, and flatten the back.
- Outer ears, make 2: Ch 7; from second chain work sl st, sc, hdc in next 2, sc, and 3 sc in final chain; mirror along the opposite side.
- Make two smaller blush inner-ear pieces with ch 5 and the same graduated stitch sequence. Sew each inner piece around its complete edge, then fold and secure each ear base.
- Embroider two closed charcoal eyes, two tiny nostrils, and a short mouth with all ends buried inside.
Crochet Four Matching Legs
Use four equal measured stuffing portions and mark every leg opening.
- Leg Rnd 1: Make 6 sc in a magic ring. (6 sts)
- Rnd 2: Inc in every stitch. (12 sts)
- Rnds 3–7: Sc in every stitch. (12 sts)
- Stuff the lower two-thirds, flatten the opening across 6 stitches, and leave a long sewing tail.
- Make four legs. Pair them by length and stuffing before pinning two at the front and two at the rear of the horizontal body.
Add Pastel Mane and Tail Variations
Choose one coordinated three-color palette and keep every detail short.
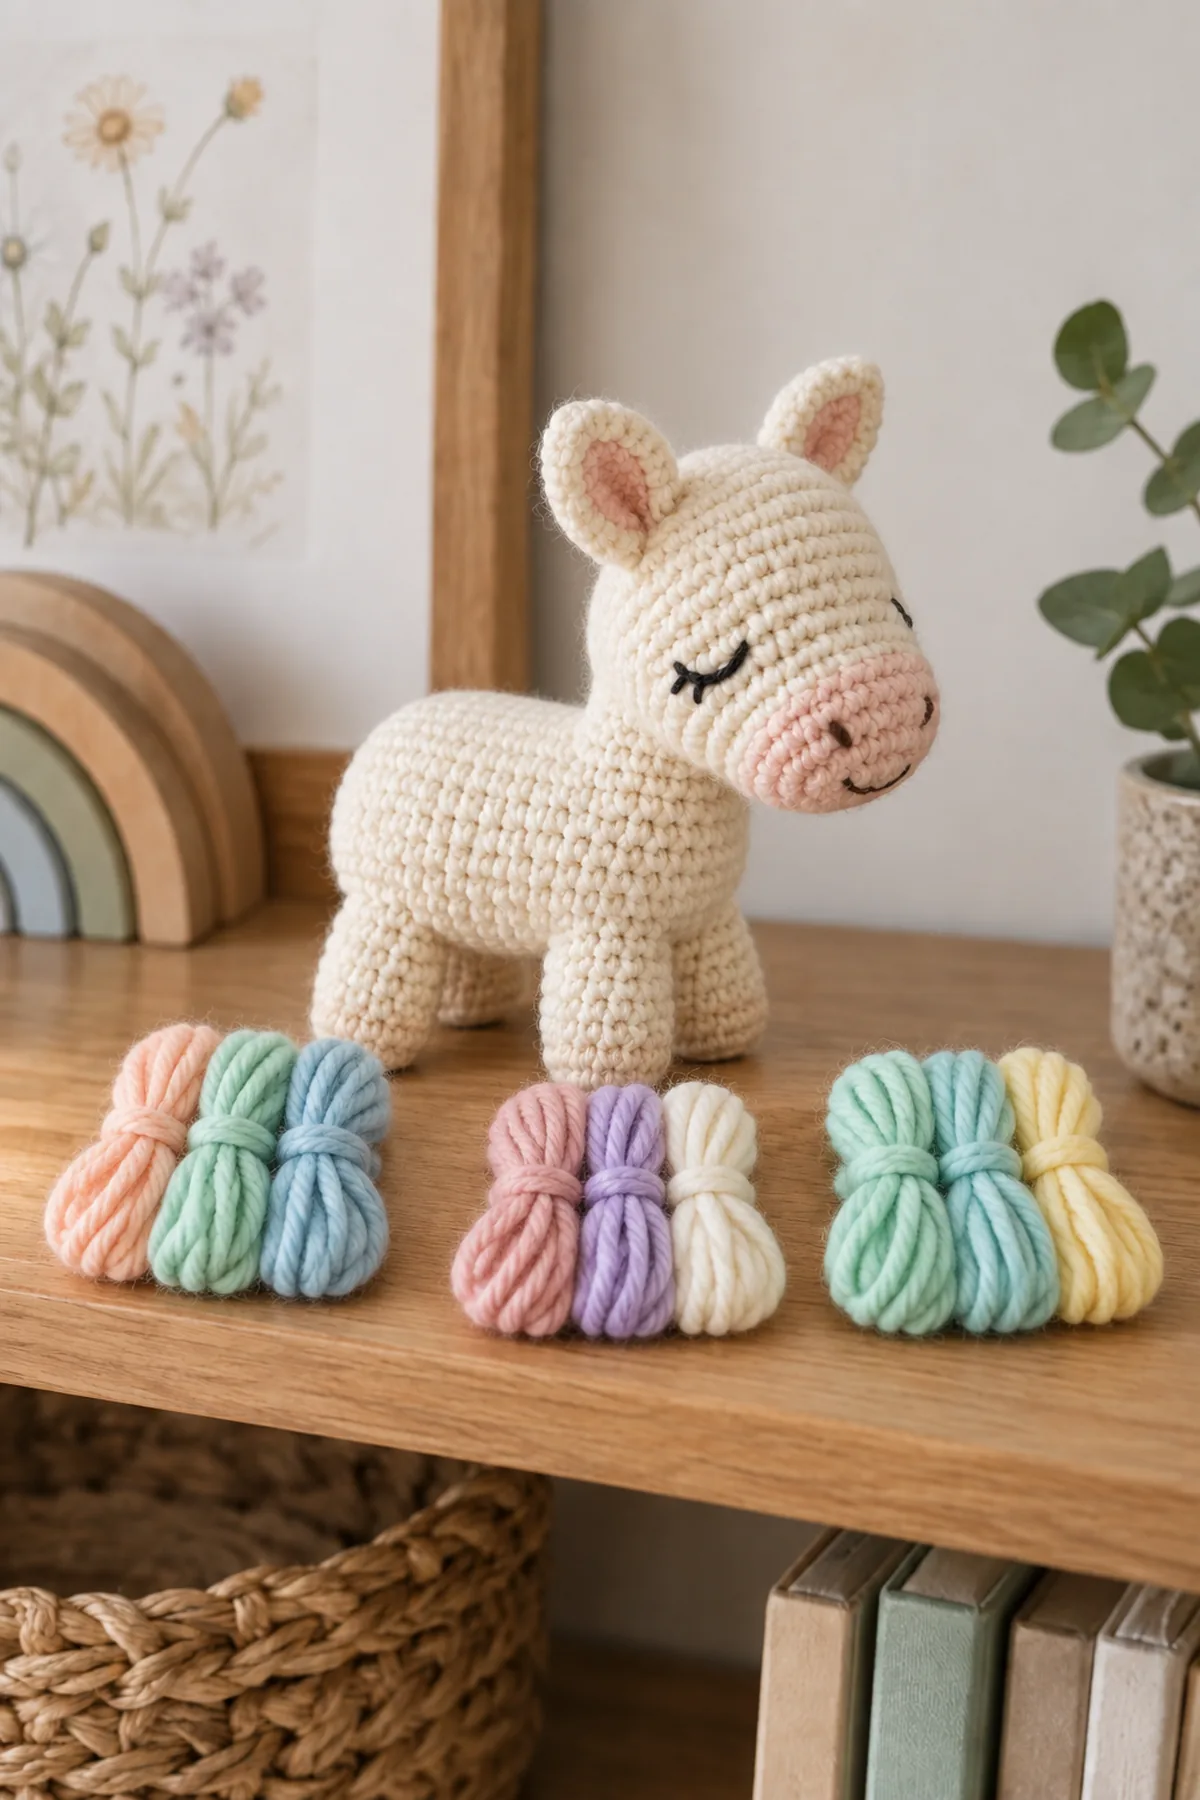
- Choose sherbet rainbow (peach, mint, sky), rose-lilac (blush, lilac, cream), or mint-sky (mint, aqua, pale yellow).
- For an ages-3+ display pony, add 10 anchored doubled mane stitches from between the ears down the rear of the head; split and trim every end to 1 inch.
- For the tail, braid six 8-inch strands into a 2-inch cord, sew the complete folded base through multiple rear body stitches twice, and trim the free end to 1.5 inches.
- For under-3 use, replace both cut-strand features with three short rows of surface slip stitches for the mane and one firmly crocheted ch-8/sl-st-back tail sewn around its complete base.
Assemble, Balance, and Finish
Pin every part before sewing so the tiny pony stands evenly.
- Sew the muzzle around its complete edge to the lower head, keeping the embroidered nostrils level.
- Sew the ears symmetrically, then attach the head to the front upper body around its complete base twice.
- Double-sew all four flattened leg openings to marked body rounds. Set the pony down after each leg to correct its angle before knotting and burying the tail.
- Add the chosen mane and tail, weave and reverse every yarn end, shape the stuffing, and pull-test the muzzle, ears, head, legs, mane, and tail.
Assembly and Shaping
The oval body sits horizontally on four matching stubby legs. A separately stuffed head carries a lightly padded flat muzzle and two lined ears; the chosen pastel mane and tail are added only after all structural seams pass inspection.
Lay every component on a flat surface before joining. Match the marked centers first, then divide each remaining edge into equal sections. Work through both layers with consistent tension and pause after each section to check that the fabric lies flat. This measured approach prevents twisting and keeps decorative details facing the intended direction.
Finishing
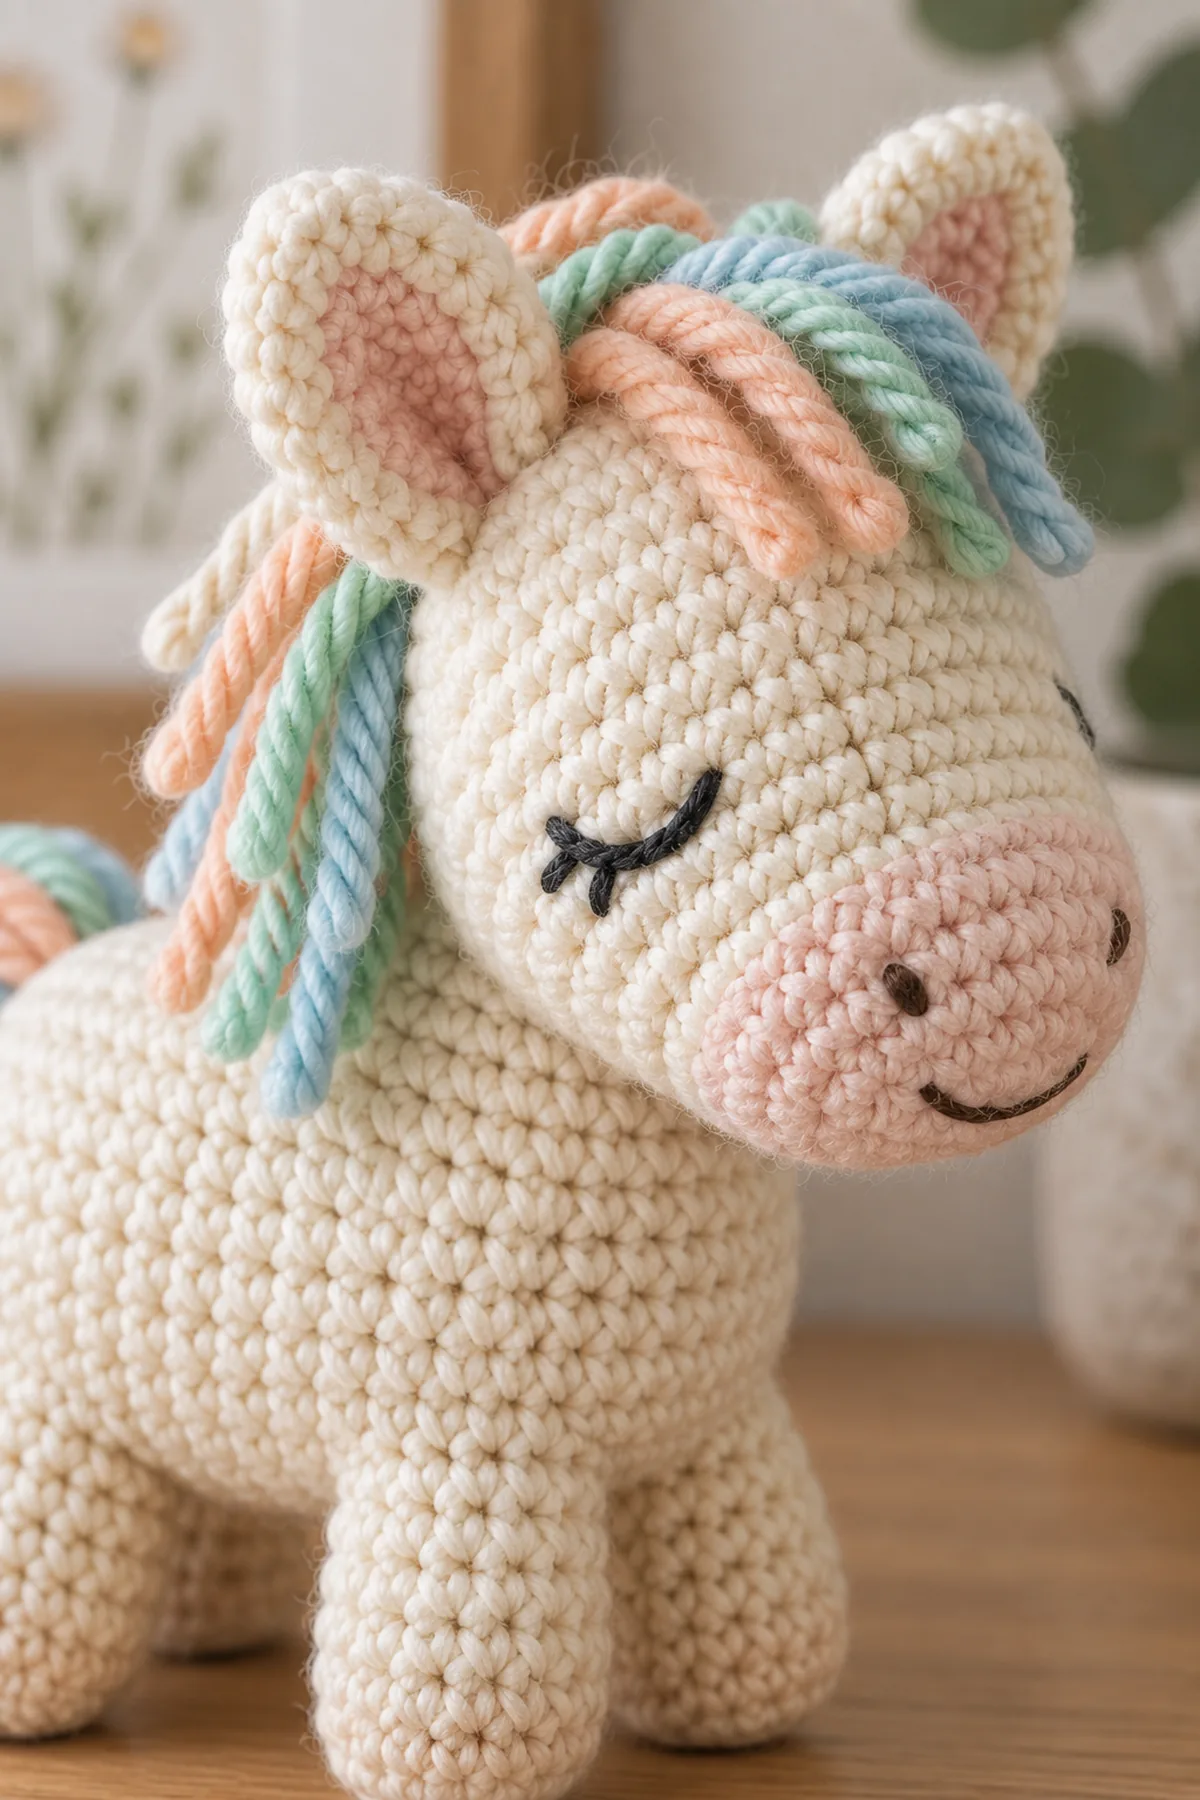
- Weave and reverse all structural tails.
- Shape the body and head without stretching stitches.
- Trim ages-3+ pastel strands to the listed short lengths.
- For under-3 use, choose only integrated surface-crochet mane and tail details.
For a polished result, weave each tail through several same-color stitches, reverse direction once, and trim only after the fabric has been gently stretched. Block to the listed dimensions without flattening textured stitches. Inspect joins, borders, straps, and decorative pieces before the project is used or gifted.
Helpful Tips
- Use a ruler to match all four legs.
- Pin the head and legs while the body rests on a table.
- Choose three pastel colors with similar yarn thickness.
- Embroider the face before attaching the head.
Good lighting and a contrasting stitch marker make counting much easier. If a section looks uneven, compare the current count with the previous checkpoint before continuing. Fixing one missed stitch early is faster than compensating later, and it preserves the measurements used by the assembly instructions.
Frequently Asked Questions
Can I use safety eyes?
No for under-3 use; embroidered eyes are recommended for every version because they remain soft and washable.
Which mane is safest for a young child?
Use short surface-slip-stitch stripes and the firmly crocheted tail option so there are no cut yarn strands.
How do I keep the pony standing?
Match all four leg counts and stuffing amounts, then pin and test the leg angles on a flat surface before final sewing.
Conclusion
The finished pocket pony combines a compact original body, balanced four-leg stance, softly embroidered face, lined ears, and three cheerful pastel styling options. The integrated-detail option provides a strand-free finish for younger recipients.
BabyYarnie Printable Crochet Pattern Card
BabyYarnie — easy-to-follow baby crochet for everyday makers.
Project: Pocket Pony Crochet Pattern
Skill level: Intermediate Hook: 3 mm Yarn: Sport
Finished size: Approximately 4.75 inches tall × 5 inches long
Card Materials
- Approximately 120 yards cream sport-weight washable cotton yarn
- Approximately 15 yards blush sport-weight yarn for muzzle and inner ears
- Small amounts of three pastel sport-weight yarn colors for mane and tail
- Small amount charcoal yarn for embroidery
- 3 mm crochet hook
- Washable polyester stuffing
- Ten locking stitch markers
- Yarn needle and scissors
Card Instructions
- Crochet the Rounded Pony Body: Increase the cream body from 6 to 30 stitches, work nine even rounds, then stuff and decrease closed.
- Make the Head, Muzzle, and Ears: Shape a 24-stitch head, lightly padded 14-stitch oval muzzle, two lined ears, and a completely embroidered face.
- Crochet Four Matching Legs: Make four identical 12-stitch legs for seven rounds, stuff the lower sections, and flatten the six-stitch openings.
- Add Pastel Mane and Tail Variations: Choose one three-color pastel palette and add either short anchored ages-3+ strands or fully integrated under-3 surface details.
- Assemble, Balance, and Finish: Fully sew the muzzle and ears, double-sew the head and four balanced legs, add the chosen pastel details, and pull-test every join.
Finish: Check every count, weave in all ends, block to measurement, and inspect each join.