This original crochet three-point hanging fruit hammock answers the crochet fruit hammock pattern search with a complete construction rather than a decorative idea alone. The written instructions use US crochet terms and explicitly name shaping, assembly and fit checks. Gauge and measurements are planning targets; make a washed swatch before committing to a size.
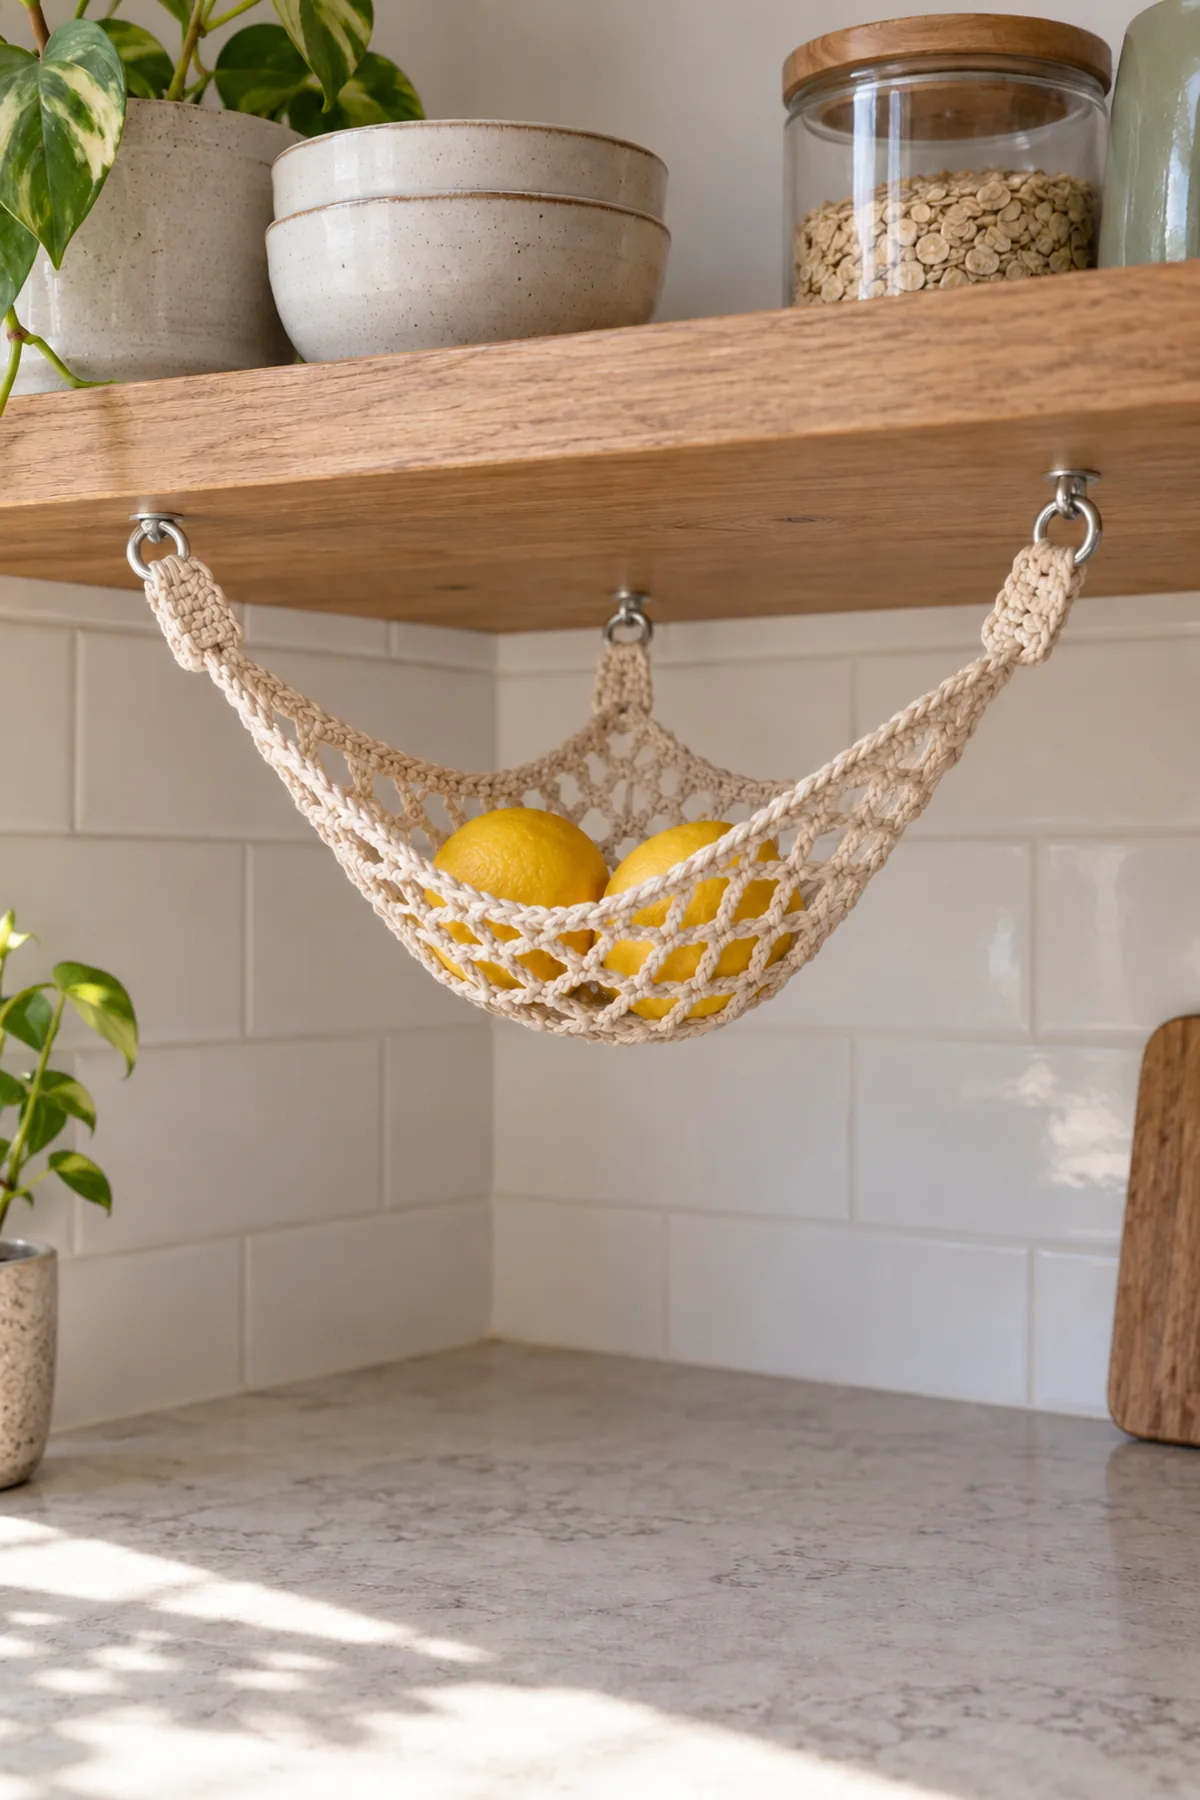
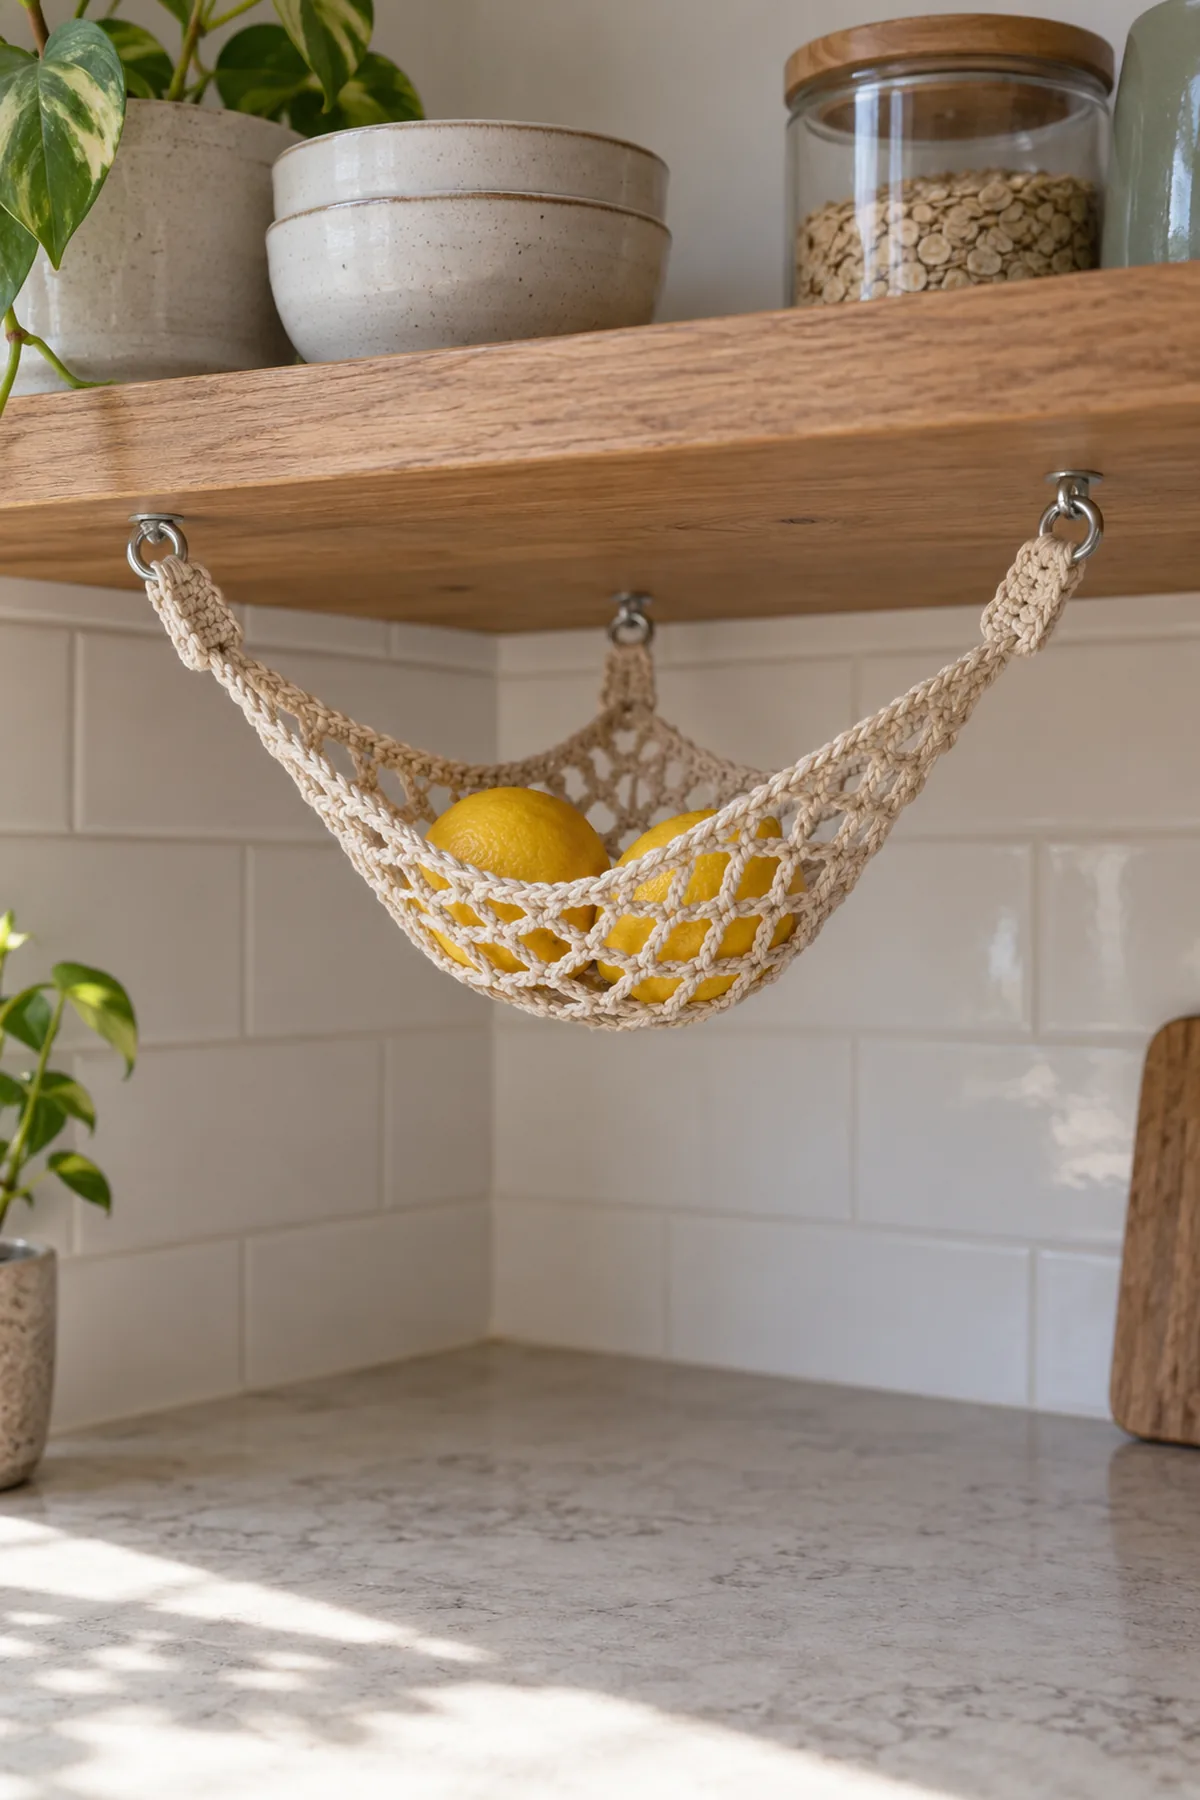
An oat cotton triangular chain-mesh net hangs from three reinforced corners. A two-round solid border spreads the pull along the edges, and three short doubled flat loops connect it to suitable closed mounting hardware. It is for a small quantity of lightweight produce, never for people, pets or heavy storage.
Pattern Details
- Hook Size: 4 mm, adjusted for firm cotton mesh
- Finished Size: Planning target about14-15 inches across final mesh row and8-9 inches to tip before hanging; depth changes under load
- Gauge: Border target20 sc=4 inches; mesh18 arches across roughly14-15 inches, washed
- Estimated Time: 5-7 hours
- Construction: Increasing flat chain-mesh triangle, two reinforcing border rounds and three sewn doubled loops
- Skill level: Intermediate
Why You’ll Love This Project
The project has a practical use and a recognizable silhouette. Each component has its own checkpoint so you can compare the count and size before joining. The stitch choices and finishing are intended to give the object a distinctive handmade texture without relying on another pattern or image.
Materials
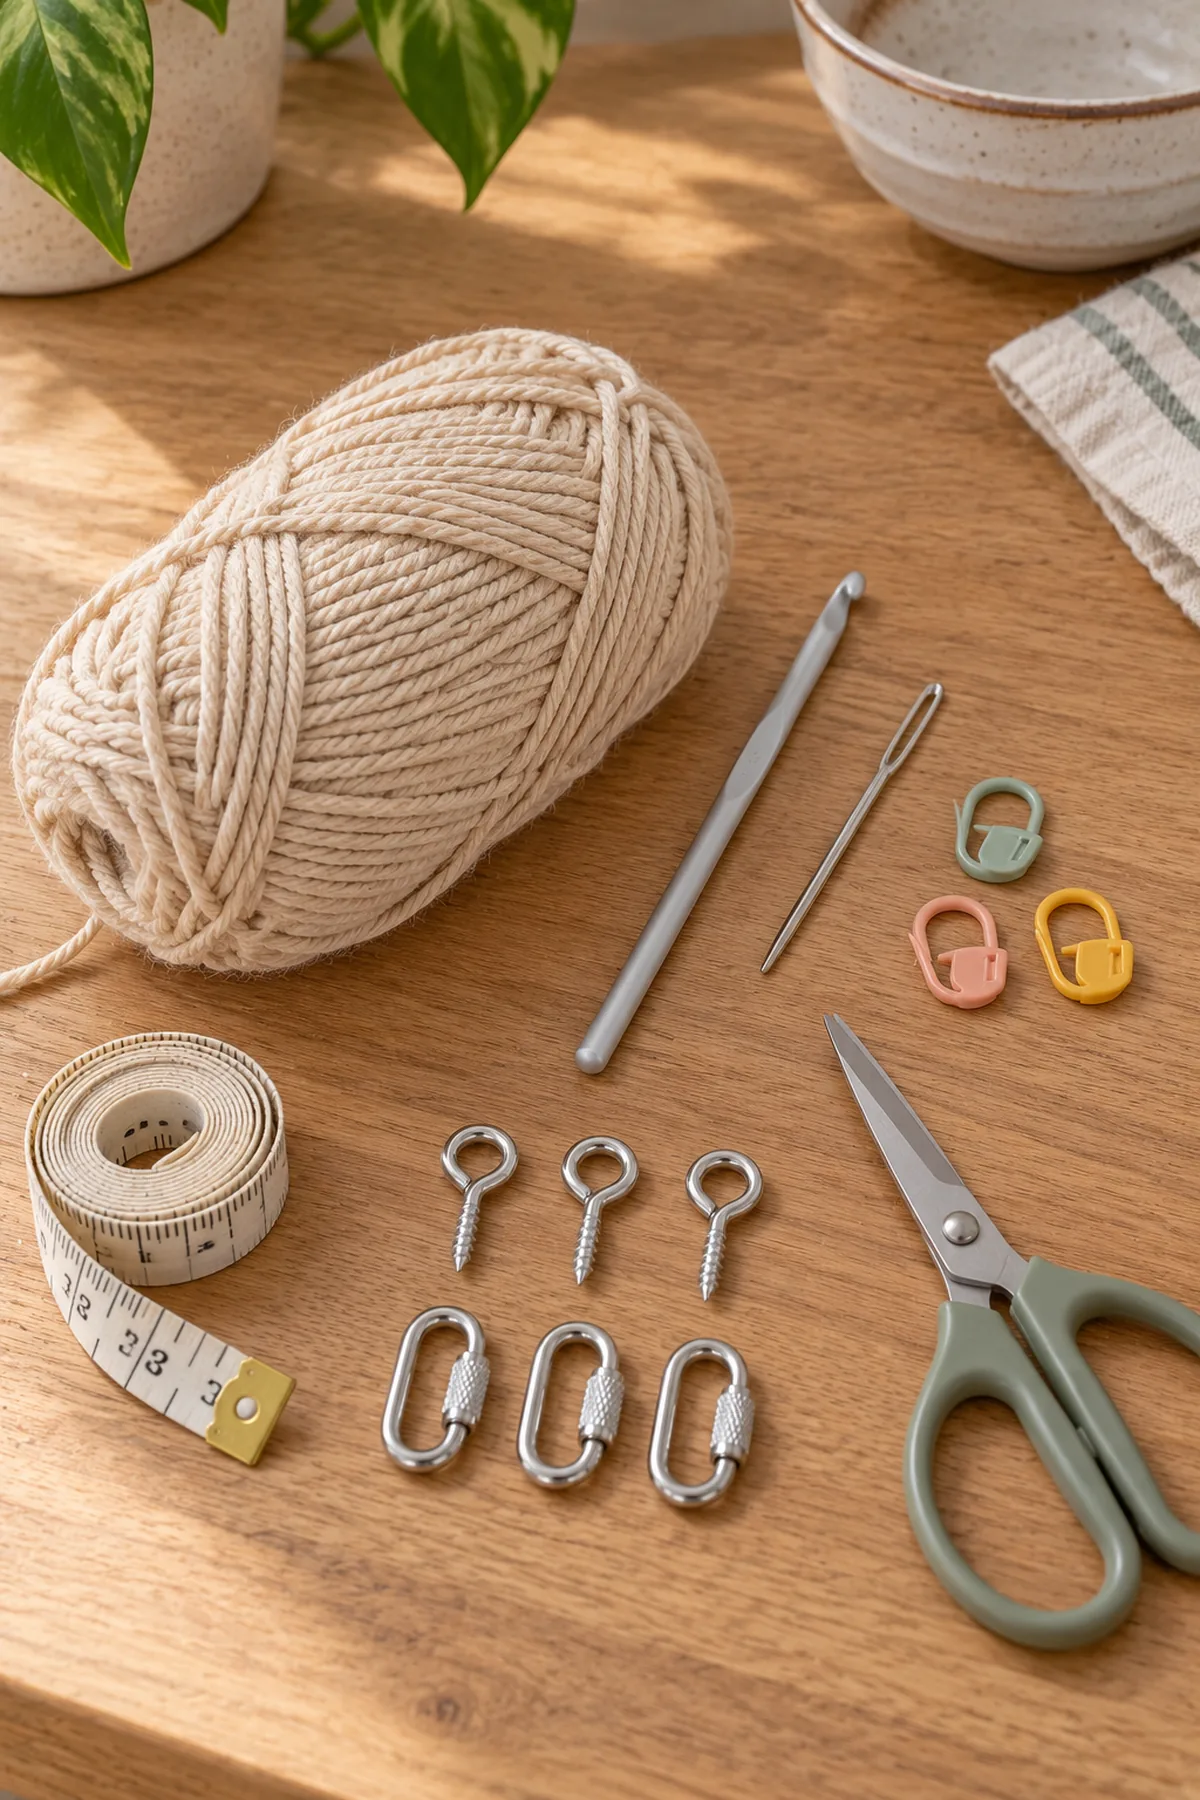
- Approximately200 yards smooth non-stretch worsted cotton in oat; no chenille or elastic yarn
- 4 mm hook, blunt needle, three corner markers, scissors and tape measure
- Three appropriate closed screw-eyes or rings and substrate-specific fixings, plus three screw-lock quick links sized for the sewn loops and selected for the actual combined load; follow all hardware manufacturer instructions
Gauge, Measurements, and Planning
Work a small mesh triangle through Row6 before committing to the full piece. Each row adds one ch3 arch. Chain tension controls width while sc row height controls depth, so measure the complete washed mesh, not only a solid swatch. Make sure the border can follow the outline without gathers; it may gently cup when hung but must not fold sharply at the edging. The crochet, seams and mount are not load-rated. Do not assign a maximum safe weight from yarn thickness alone.
Make and wash a gauge swatch before beginning. Measure only after the swatch is completely dry. If the stitch width differs, change hook size rather than pulling the working yarn tighter. Keep a written count at the end of every section so the finished edges remain balanced and the assembly points line up.
Abbreviations and Special Stitches
- ch: chain
- sc: single crochet
- hdc: half double crochet
- dc: double crochet
- sl st: slip stitch
- st(s): stitch(es)
- rnd: round
- BLO: back loop only
- inc: two stitches in one stitch
- sc2tog: single-crochet two stitches together
- hdc2tog: half-double-crochet two stitches together
Special stitch guidance: A mesh arch is ch3 between adjacent sc anchors. On the next row, work sc around an entire arch rather than through its three separate chain links. Old interior sc anchors are skipped. Ch1 at a turn is never counted. For arithmetic only, every chain is one position: Row n has n arches and n+1sc, or4n+1 total positions.
Important Notes
- Images are AI-generated illustrations of the intended design, not photographs of a physically tested sample. Follow the written stitch counts and construction instructions rather than counting stitches in an image.
- Development note: the written stitch arithmetic has been checked computationally, but this design has not been physically sample-tested. Gauge, yardage, fit and dimensions are planning targets. Make a swatch and a trial fit or assembly before gifting.
- Turning chains and joining slip stitches are not counted unless a step explicitly says otherwise. Mark the first counted stitch of each round or the first and last stitches of a flat row.
- Use the washed gauge to check dimensions at each named checkpoint. If the count is right but the measurement is wrong, change hook or yarn and reswatch rather than adding unplanned stitches.
- Keep all yarn tails on the wrong side and weave them through three different stitch paths before trimming. Do not use glue for structural joints.
Complete Instructions for Crochet Three-Point Hanging Fruit Hammock
Grow the Triangular Mesh
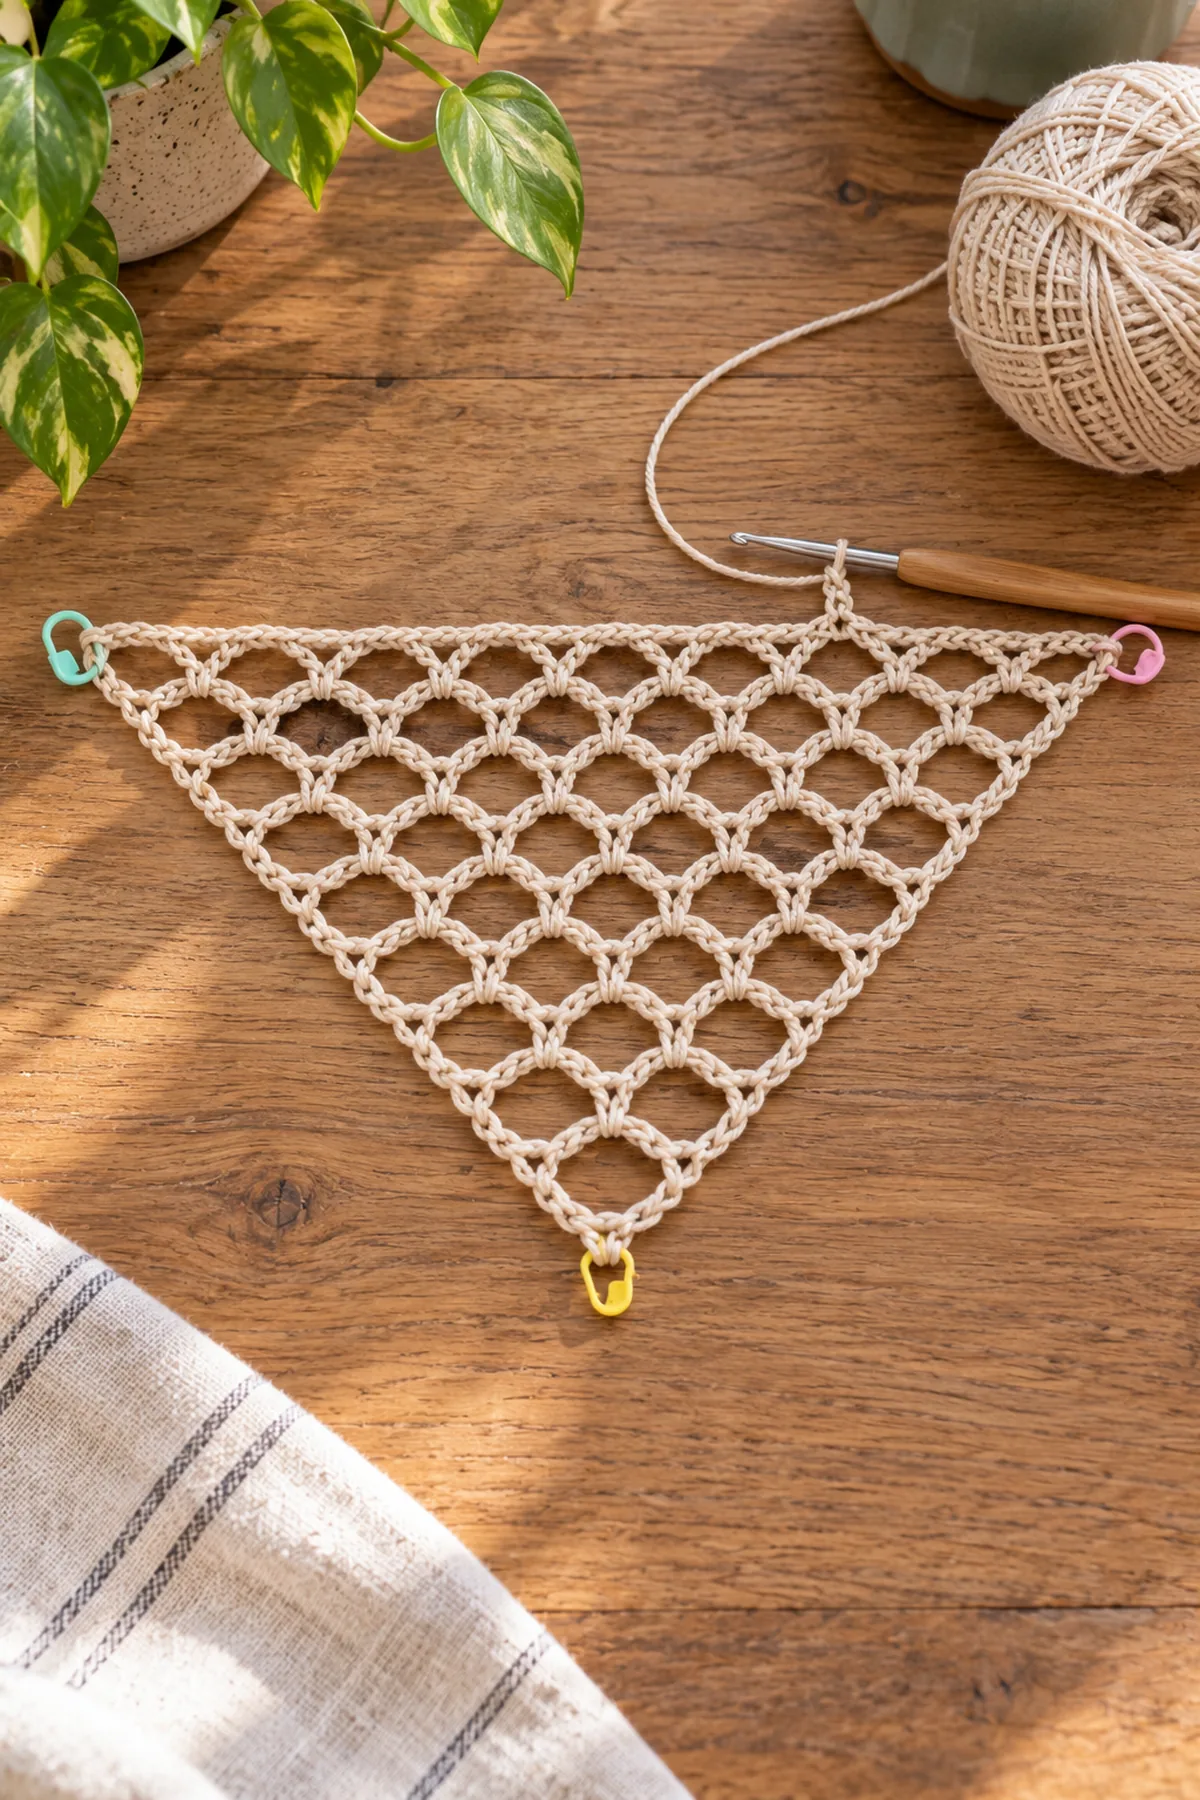
- In oat make a small adjustable ring. Row1: ch1, sc in ring, ch3, sc in ring. (5 sts) Close ring securely and weave its starting tail back through the base stitches. Ch1 and turn. There is one arch between two sc anchors.
- Row2: sc in first sc, ch3, sc around the single old ch3 arch, ch3, sc in last sc. (9 sts) Ch1 and turn. There are two arches and three sc.
- Rows3-18: sc in first old sc; [ch3, sc around the next old ch3 arch] once for EVERY old arch, skipping each old interior sc; ch3, sc in last old sc. Ch1 and turn except after18. The extra final ch3 adds exactly one arch per row. Never place an extra sc in an old interior anchor.
- Row n has n arches and n+1 sc. Check6 arches/7sc at Row6;12 arches/13sc at Row12;18 arches/19sc at Row18. For counted positions these are(25 sts),(49 sts),(73 sts). Mark both ends of Row18 and the initial ring as the three corners. Do not fasten off.
- Position-count checkpoint Row3: 3 arches plus4 sc gives(13 sts).
- Position-count checkpoint Row4: 4 arches plus5 sc gives(17 sts).
- Position-count checkpoint Row5: 5 arches plus6 sc gives(21 sts).
- Position-count checkpoint Row7: 7 arches plus8 sc gives(29 sts).
- Position-count checkpoint Row8: 8 arches plus9 sc gives(33 sts).
- Position-count checkpoint Row9: 9 arches plus10 sc gives(37 sts).
- Position-count checkpoint Row10: 10 arches plus11 sc gives(41 sts).
- Position-count checkpoint Row11: 11 arches plus12 sc gives(45 sts).
- Position-count checkpoint Row13: 13 arches plus14 sc gives(53 sts).
- Position-count checkpoint Row14: 14 arches plus15 sc gives(57 sts).
- Position-count checkpoint Row15: 15 arches plus16 sc gives(61 sts).
- Position-count checkpoint Row16: 16 arches plus17 sc gives(65 sts).
- Position-count checkpoint Row17: 17 arches plus18 sc gives(69 sts).
Reinforce All Three Edges
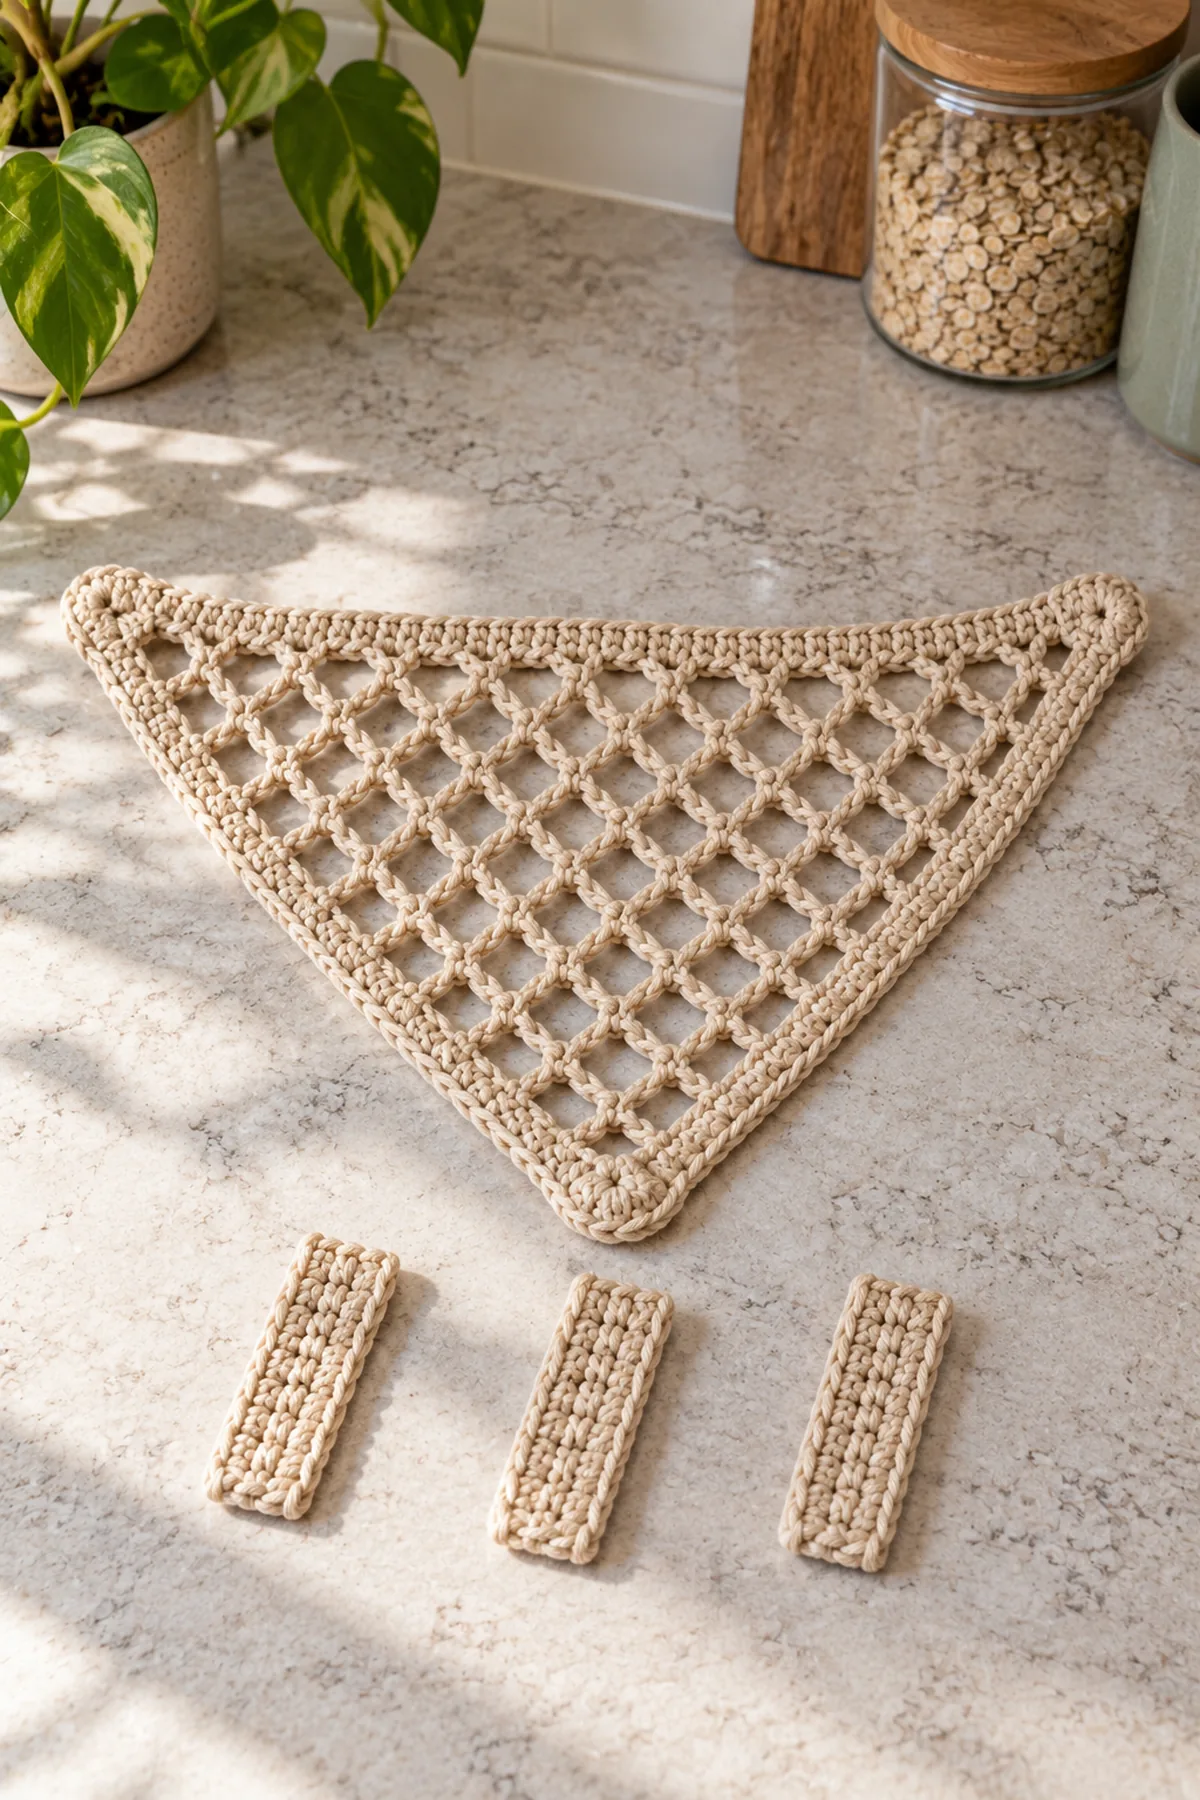
- Border Round1: ch1 and turn to work across Row18. Work3sc in the first endpoint sc and mark the middle stitch. For the first seventeen arches, work3sc around arch then1sc in following anchor. Work3sc around the final eighteenth arch and3sc into the final endpoint, marking the middle stitch. Top edge total is77sc: two three-stitch corners,54 arch stitches and17 interior-anchor stitches.
- Continue down the first sloping side, working3sc around the edge of each of the eighteen mesh rows, not into the top corner stitches already worked. At the original starting ring work3sc and mark the middle stitch as bottom corner. Work3sc around each of the eighteen row ends up the other slope. Join first sc, do not turn. Total77+54+3+54=(188 sts). Keep the three corner markers.
- Border Round2: ch1, sc in each old stitch except work3sc in each of the three marked middle corner stitches. Mark the middle of each new three-stitch group. Join first sc and fasten off. (194 sts) Neither joining sl st nor lifting ch1 is counted. Weave ends back along the border, not through an open mesh arch.
- Lay the net flat and measure all three edges. If the border forms hard pleats or ruffles, do not hide them with stretching: redo it with a hook that makes the same counted edging follow the actual mesh outline. Wash and dry flat before making mounting measurements.
Make and Attach Three Doubled Loops
- Make three identical straps in oat. Ch5. Row1: sc in second chain and across. (4 sts) Ch1 and turn. Rows2-12: sc through both loops in all4 stitches, ch1 and turn except after12. (4 sts) Fasten off leaving a long sewing tail. Each strap should be about0.8 inch wide and2-2.5 inches long; keep loops short.
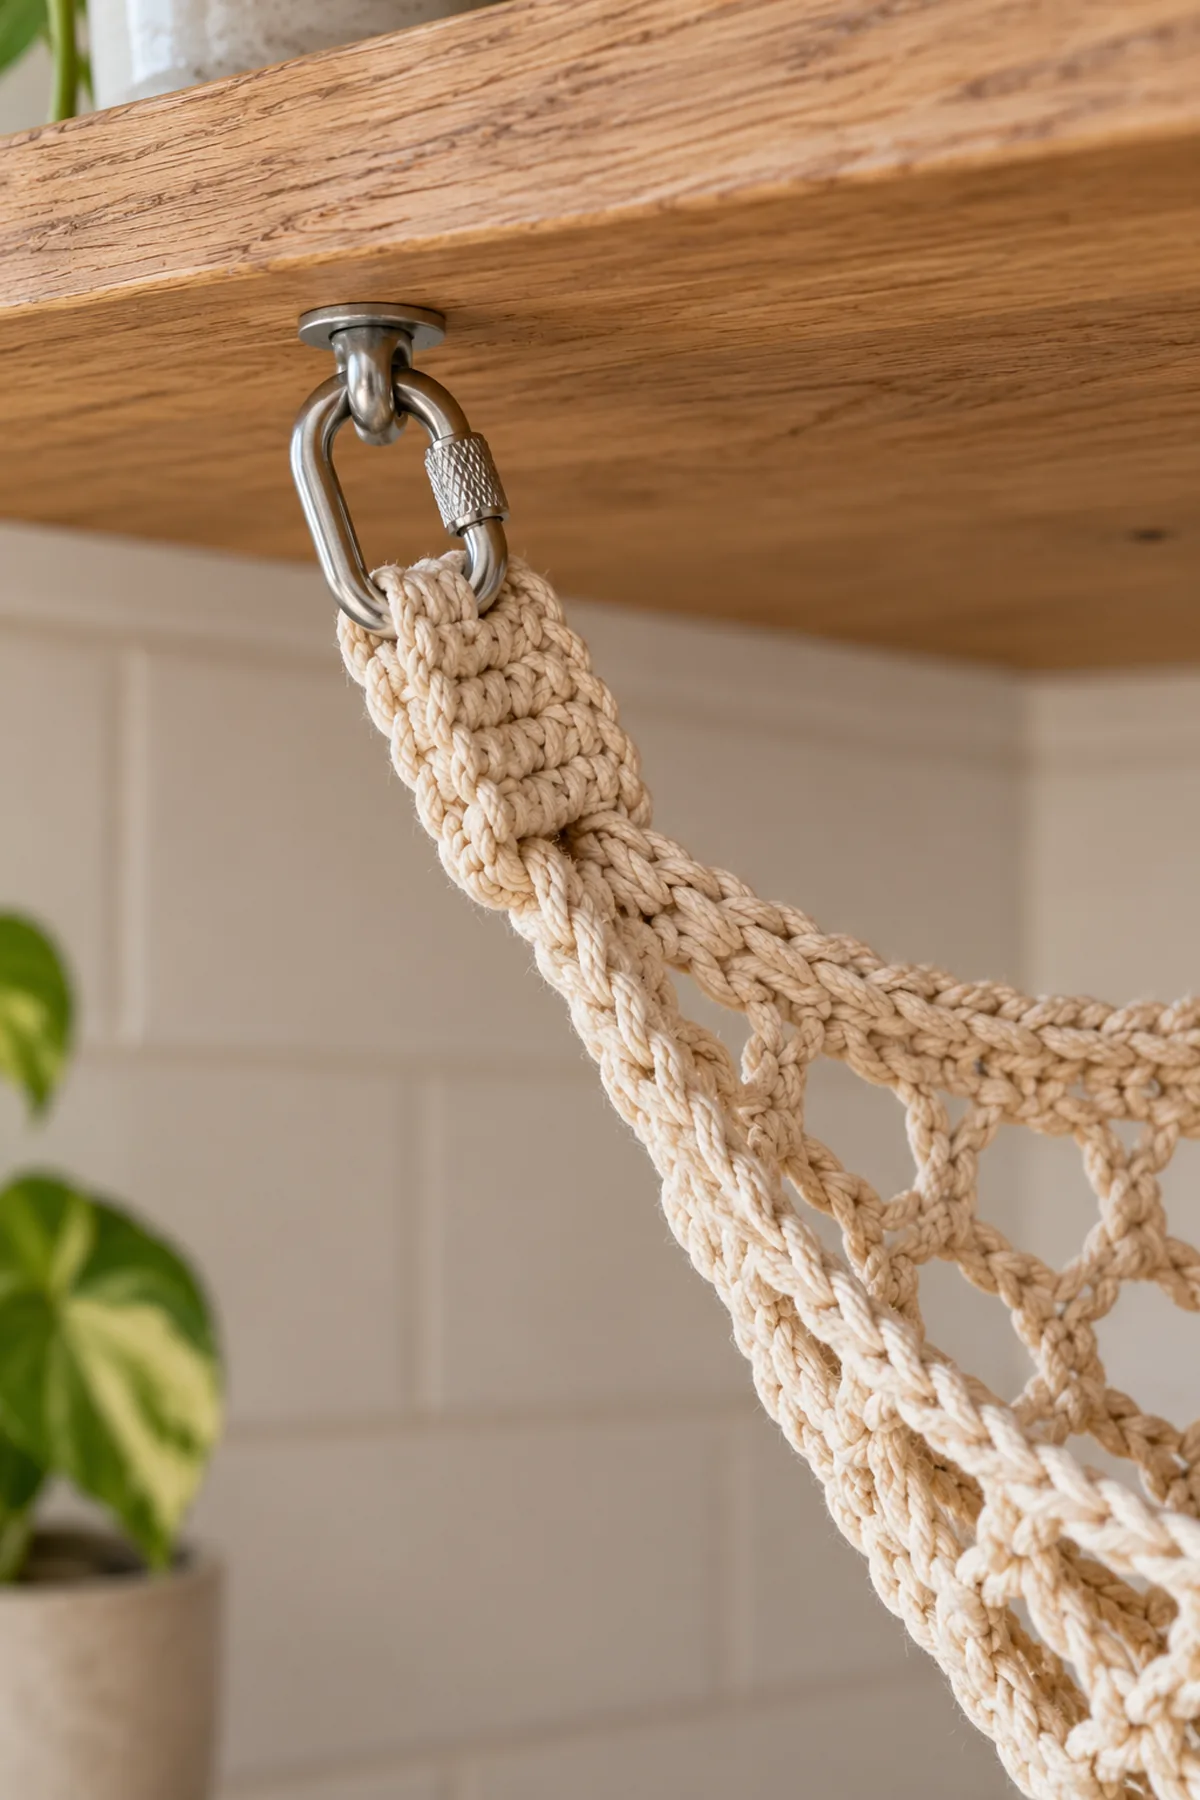
- Fold a strap in half without twisting. Place both four-stitch short ends together over the inside of one marked corner, extending half an inch down onto the reinforced border. The folded bend projects beyond the corner. Sew both layers down with a small box of backstitches through the last three strap rows and several full border stitches, then add a diagonal seam across that box. Do not attach only by the four endpoint stitches or by one mesh arch.
- Repeat at the other two corners. Inspect from both sides and distribute the sewn attachment across the corner and adjacent border. Tug each empty loop gently while holding the border; if any stitch elongates or a tail moves, redo the seam before mounting. There are exactly three loops and no tassels.
Install and Trial With a Light Load
- Select three closed screw-eyes or rings, three screw-lock quick links, and substrate-specific fixings according to their manufacturer instructions. A shelf underside is not automatically strong enough: do not use adhesive-only hooks, loose open hooks, thin unsupported shelf skins or uncertain fixings. If you cannot establish suitable mounting, keep the net uninstalled until a competent installer checks it.
- Hold the empty net beneath the shelf and mark the three corner positions as a shallow triangle; spacing must leave a shallow sag rather than pulling the net taut. Install fixed supports as directed. Open each screw-lock quick link, pass it through one sewn crochet loop and its corresponding fixed support, then close and tighten its sleeve according to its manufacturer instructions. Do not force a sewn loop through a permanently closed ring or leave a connector open. Keep well away from hobs, flames, steam, electrical equipment, walkways and children. No loose cords hang below it.
- First test near floor level or over a clear padded surface, adding one small light piece of produce at a time. Inspect border, loops, seams and hardware immediately and again after thirty minutes for slip or stretching; remove the contents at any sign of movement. Two small lemons are a styling example, not a certified capacity. Do not add canned goods, glass jars or heavy produce.
- Inspect before every use and unload before washing. Wash as cotton label directs, dry fully and repeat the empty and light-load checks. Never use as a baby hammock, climbing support, pet bed or overhead storage above a person. Crochet mesh and hand-sewn loops can fail; mount low and keep the area beneath clear.
Assembly and Shaping
Mark the two ends of the final mesh row and the starting ring as three corners. Work a continuous two-round solid border, then sew each doubled flat loop across a broad section of its corner. Mount all three points in a shallow triangle under an adult kitchen shelf, with nothing breakable below during testing.
Lay every component on a flat surface before joining. Match the marked centers first, then divide each remaining edge into equal sections. Work through both layers with consistent tension and pause after each section to check that the fabric lies flat. This measured approach prevents twisting and keeps decorative details facing the intended direction.
Finishing
- Weave each yarn tail through several same-color stitches, reverse direction twice and stretch the fabric gently before trimming.
- Block to the stated shape according to the yarn label and let every component dry fully before final assembly.
- Inspect the first and last row, joins, edges, and any sewn attachment from both sides; repair loose stitches before use.
- Include the fiber content, finished dimensions and care instructions when gifting. Keep yarn projects away from open flames and direct heat.
For a polished result, weave each tail through several same-color stitches, reverse direction once, and trim only after the fabric has been gently stretched. Block to the listed dimensions without flattening textured stitches. Inspect joins, borders, straps, and decorative pieces before the project is used or gifted.
Helpful Tips
- Place removable markers at each shaping repeat and record the count before beginning the next row.
- Use a contrasting cloth behind dark yarn so it is easier to see both loops of every stitch.
- Lay the piece flat and compare opposite sides at each measurement checkpoint rather than pulling one side to match.
- If an edge ripples or cups unexpectedly, stop and check stitch count and washed gauge before adding a border.
Good lighting and a contrasting stitch marker make counting much easier. If a section looks uneven, compare the current count with the previous checkpoint before continuing. Fixing one missed stitch early is faster than compensating later, and it preserves the measurements used by the assembly instructions.
Frequently Asked Questions
Is this pattern physically tested?
No physical sample test is claimed. The stitch counts were checked computationally. Swatch, measure and trial-fit the piece before relying on the suggested dimensions.
Can I substitute another yarn?
Yes, if a washed swatch matches both stitch and row gauge and the resulting fabric has the required structure. Recalculate yardage and recheck every measurement checkpoint.
Can I change the colors?
Yes. Preserve yarn weight and contrast where a shaping or decorative feature must remain visible, and make a new swatch for the substitute yarn.
Conclusion
Keep the measured dimensions and yarn details with your pattern notes. Check the construction and safety guidance before styling or gifting the finished crochet project.
BabyYarnie Printable Crochet Pattern Card
BabyYarnie — easy-to-follow crochet for everyday makers.
Project: Crochet Three-Point Hanging Fruit Hammock
Skill level: Intermediate Hook: 4 mm, adjusted for firm cotton mesh Yarn: Worsted
Finished size: Planning target about14-15 inches across final mesh row and8-9 inches to tip before hanging; depth changes under load
Card Materials
- Approximately200 yards smooth non-stretch worsted cotton in oat; no chenille or elastic yarn
- 4 mm hook, blunt needle, three corner markers, scissors and tape measure
- Three appropriate closed screw-eyes or rings and substrate-specific fixings, plus three screw-lock quick links sized for the sewn loops and selected for the actual combined load; follow all hardware manufacturer instructions
Card Instructions
- Grow the Triangular Mesh: Row n has n arches and n+1 anchors; work eighteen rows without extra interior-anchor stitches.
- Reinforce All Three Edges: First border188sc; second194sc with three marked corners; check edging lies smoothly.
- Make and Attach Three Doubled Loops: Three4-stitch by12-row straps folded and broadly box-stitched into the reinforced corners.
- Install and Trial With a Light Load: Use suitable closed hardware, shallow sag and cautious light-load checks; no rated capacity or life-support use.
Finish: Check every count, weave in all ends, block to measurement, and inspect each join.