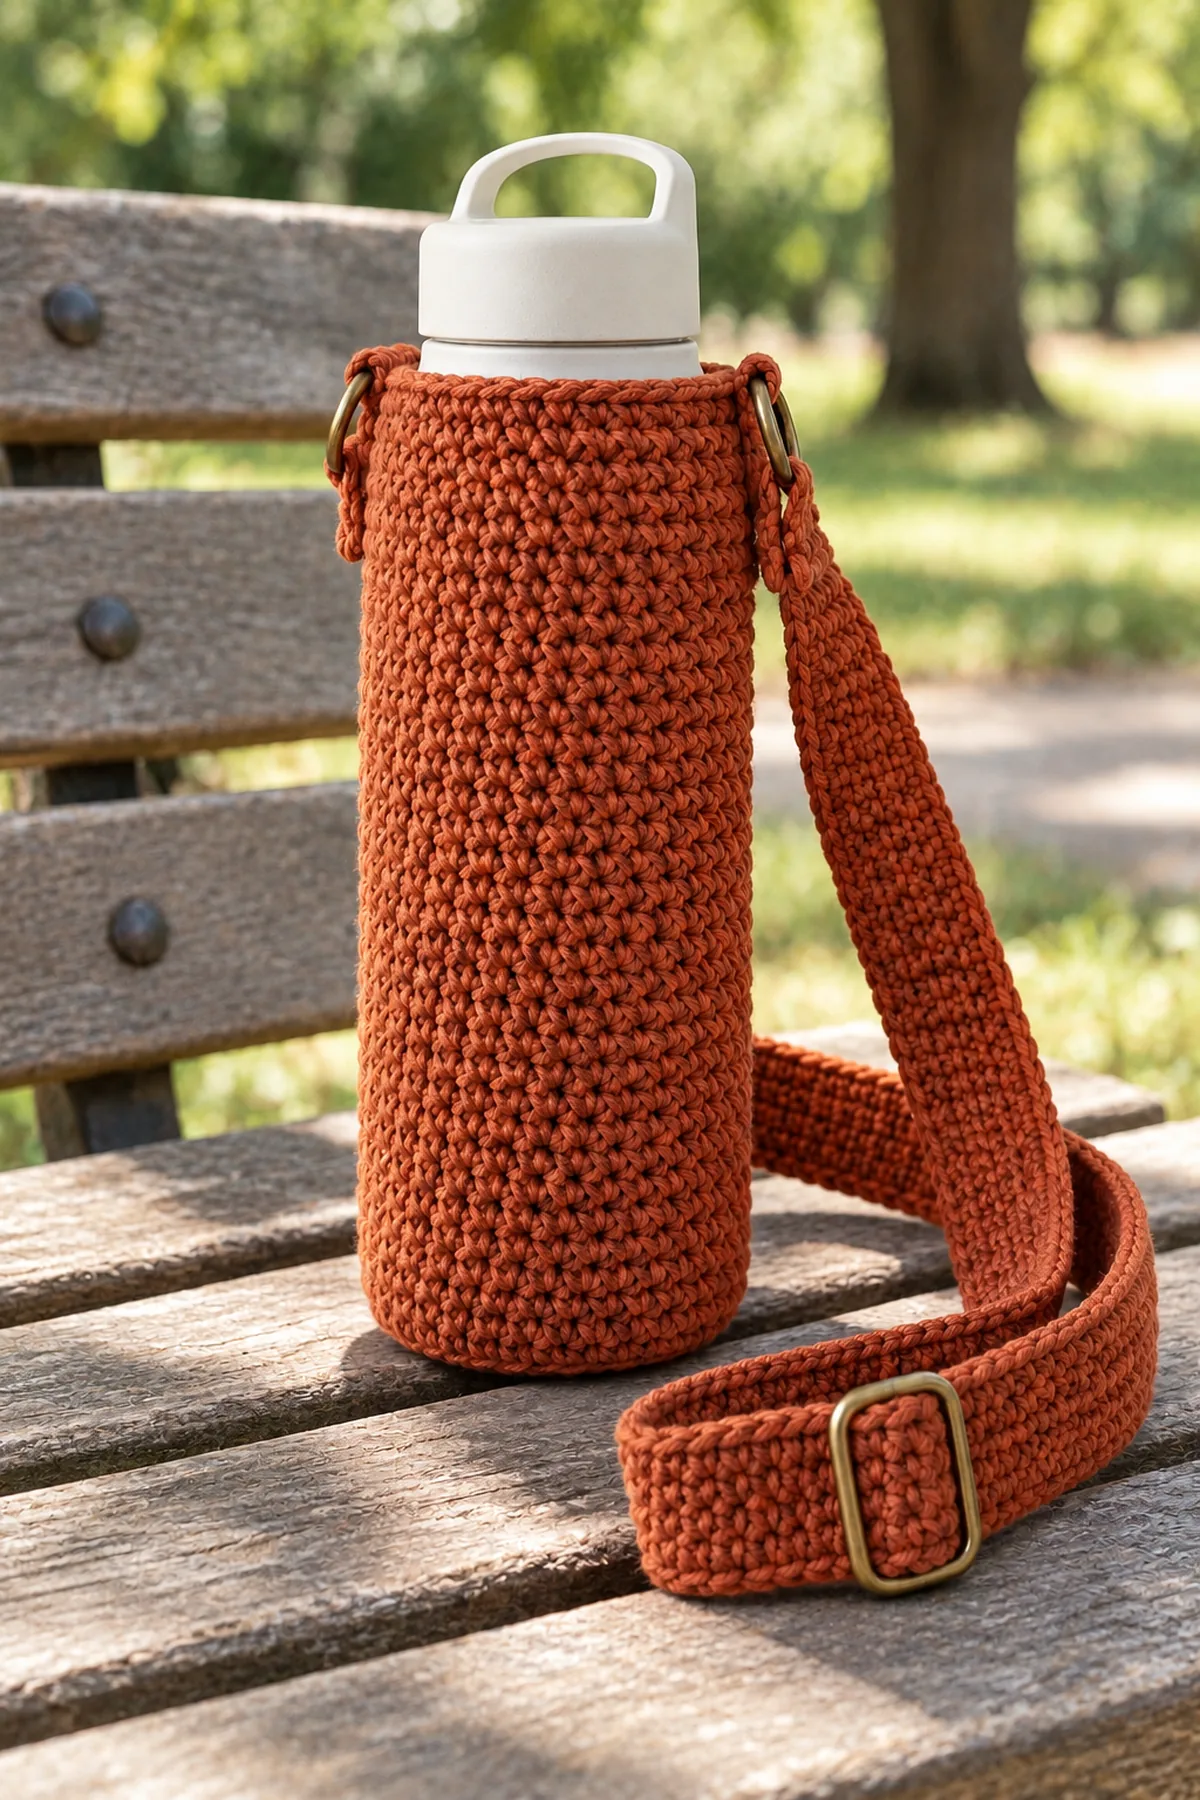
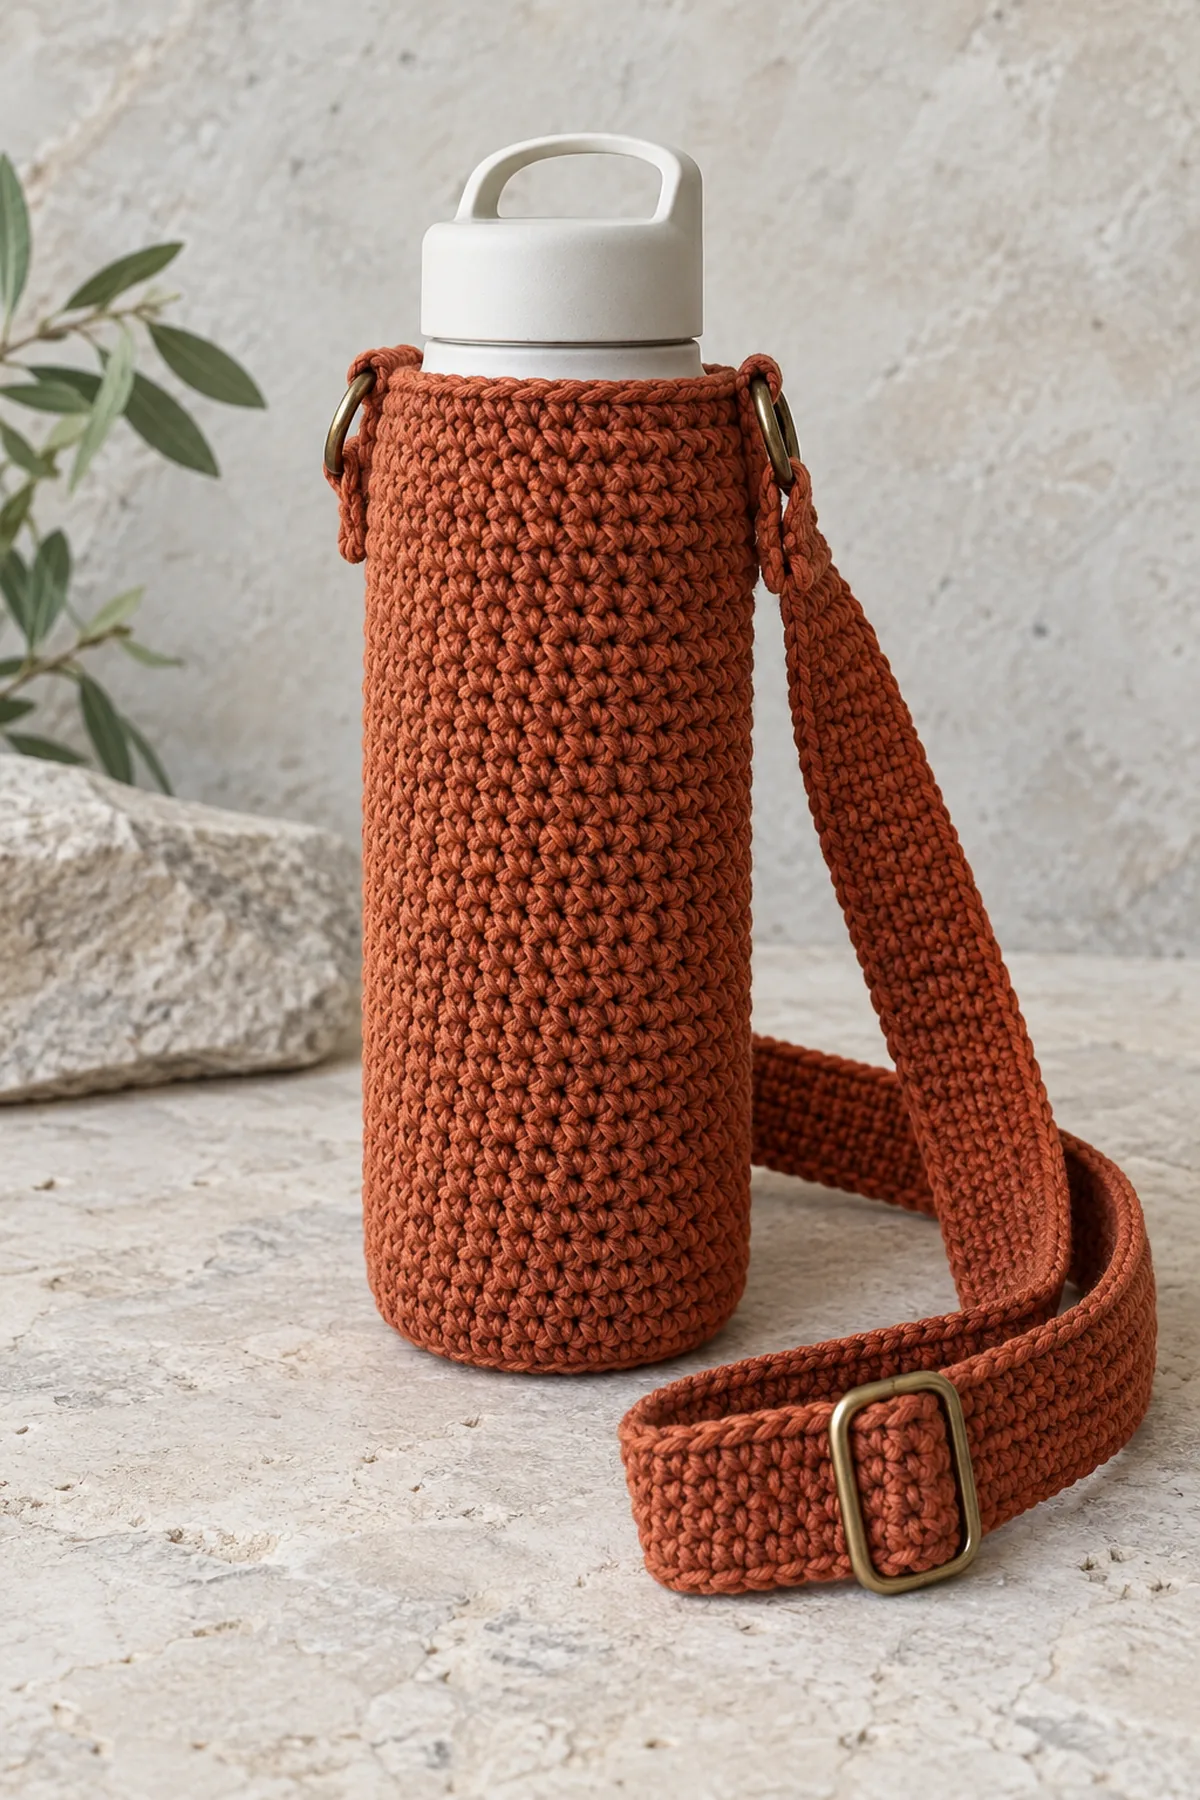
This crochet water bottle carrier is a practical general-crochet project. Rust cotton round-bottom bottle sleeve with dense linked-dc walls, an adjustable flat shoulder strap and two short reinforced attachment tabs. Follow the original US instructions below and check the fabric against your own washed swatch before assembly.
A rust cotton circular base supports a dense linked-double-crochet cylinder. Four single-crochet rim rounds stabilize its mouth. Two short doubled crochet tabs hold metal D-rings at opposite sides. A broad single-crochet shoulder strap routes through a matching slide adjuster and those rings. This is an adult carrier for one lightweight capped bottle, not a safety-rated carrying system.
Pattern Details
- Hook Size: 3.5 mm starting point; adjust to gauge
- Finished Size: Planning base about 3 inches across; wall about 6.7 inches; strap adjustable after fitting
- Gauge: 20 linked dc and 10 rounds = 4 inches; 20 sc and 24 rows = 4 inches for strap
- Estimated Time: 7-10 hours
- Construction: 48-sc circle, 15 linked-dc wall rounds, four-sc-round rim and hardware-adjusted flat strap
- Skill level: Intermediate
Why You’ll Love This Project
Each component has a defined job and a counted construction. The compact palette makes the texture readable, while assembly checkpoints let you correct measurements before sewing. Keep a record of your actual gauge and materials for a repeatable second project.
Materials
- Planning allowance: 380 yards firm rust DK cotton plus swatch allowance
- 3.5 mm hook, eight markers, yarn needle, scissors and tape
- Two smooth closed D-rings and one three-bar strap slide with matching 2-inch internal width; sturdy hardware intended for textile straps
- One lightweight capped reusable bottle with measured diameter about 2.75-2.9 inches; no glass or hot liquid
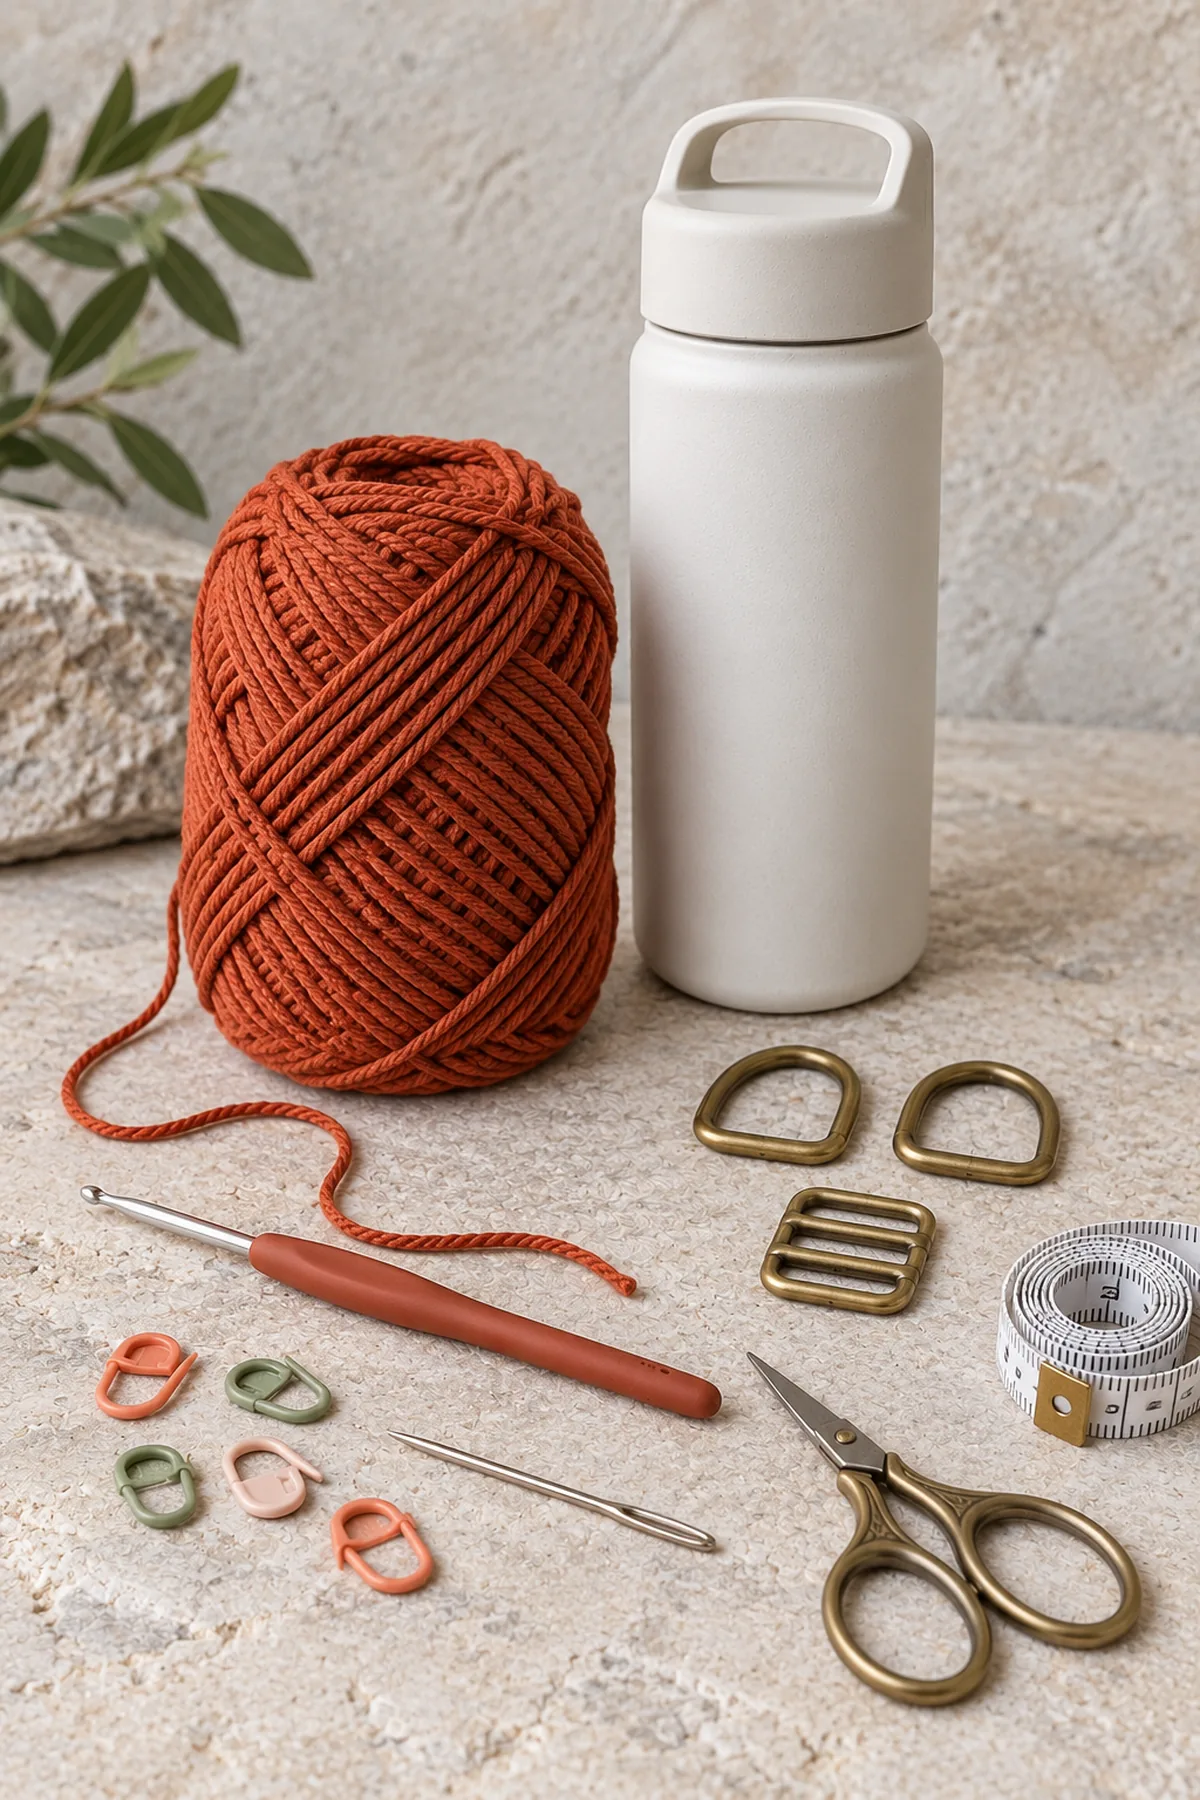
Gauge, Measurements, and Planning
Swatch both linked dc and sc, wash and dry before measuring. The 48-stitch wall at five stitches per inch has a 9.6-inch circumference, equivalent to about a 3.05-inch circular diameter. Compare with the actual capped bottle, not its advertised capacity. Target a small positive circumference ease of about 0.3-0.7 inch. The base must lie flat and fit just beyond the bottle bottom; adjust the hook and remake the base if it cups or ruffles. Fifteen linked-dc rounds at 2.5 per inch give six inches, plus four sc rim rounds about 0.7 inch. The wall must stay below the cap and allow removal. These are untested planning dimensions, not a rated load or guaranteed fit.
Make and wash a gauge swatch before beginning. Measure only after the swatch is completely dry. If the stitch width differs, change hook size rather than pulling the working yarn tighter. Keep a written count at the end of every section so the finished edges remain balanced and the assembly points line up.
Abbreviations and Special Stitches
- ch: chain
- sc: single crochet
- hdc: half double crochet
- dc: double crochet
- sl st: slip stitch
- st(s): stitch(es)
- rnd: round
- BLO: back loop only
- inc: 2 stitches in one stitch
- sc2tog: single crochet two stitches together
- RS: right side
- WS: wrong side
- sp: space
- ldc: linked double crochet
Special stitch guidance: Linked dc (ldc): insert hook under the middle horizontal bar of the preceding dc or ldc and draw up a loop; insert hook in next base stitch and draw up a loop; yarn over, pull through two loops, yarn over and pull through two. At each new round ch 2 without counting it, work one ordinary dc in the first old stitch, then link the next ldc to that dc and continue linking. Join with sl st to the first dc, do not turn. This deliberate small unlinked start seam avoids inventing a hidden closing link.
Important Notes
- Pattern development note: stitch arithmetic and written construction have been reviewed computationally; this design has not been physically sample-tested. Gauge, yardage and finished measurements are planning targets, not a tested guarantee. Swatch and check fit before making a gift.
- US terminology. Follow this project’s specific turning, chain and joining conventions; chain positions count only where explicitly stated.
- On flat rows, turn after each row and work the first stitch into the last stitch of the previous row. On joined rounds, join to the first counted stitch and do not turn unless specifically instructed.
- Change color on the final yarn-over of the stitch before the new color is needed. Leave a 6-inch tail and weave it back and forth through same-color stitches after construction.
- Use the written stitch counts for structure and your washed gauge for dimensions. Do not silently add shaping increases to correct a measurement; make a fresh swatch with a different hook first.
- Images are AI-generated design illustrations, not stitch charts or photographs of a physically tested sample. Follow the written counts and your measured gauge.
Complete Instructions for Crochet Linked Double Crochet Bottle Carrier
Crochet and Measure the Round Base
- With rust make a magic ring. Round 1: 6 sc, tighten ring, join to first sc. (6 sts) Round 2: ch 1, 2 sc in every stitch, join. (12 sts)
- Base Round 3: ch 1, [sc in next 1, 2 sc in next] six times, join. (18 sts) Move the six segment markers after the round; the joining slip stitch never counts.
- Base Round 4: ch 1, [sc in next 2, 2 sc in next] six times, join. (24 sts) Move the six segment markers after the round; the joining slip stitch never counts.
- Base Round 5: ch 1, [sc in next 3, 2 sc in next] six times, join. (30 sts) Move the six segment markers after the round; the joining slip stitch never counts.
- Base Round 6: ch 1, [sc in next 4, 2 sc in next] six times, join. (36 sts) Move the six segment markers after the round; the joining slip stitch never counts.
- Base Round 7: ch 1, [sc in next 5, 2 sc in next] six times, join. (42 sts) Move the six segment markers after the round; the joining slip stitch never counts.
- Base Round 8: ch 1, [sc in next 6, 2 sc in next] six times, join. (48 sts) Move the six segment markers after the round; the joining slip stitch never counts.
- After Round 8 you have 48 stitches. Set the actual bottle on the base and check the washed fabric lies flat, slightly wider than the bottom. If it is too small or loose, remake with a different hook and recheck the wall gauge; do not add undocumented increases. Mark stitches 1 and 25 as opposite sides.
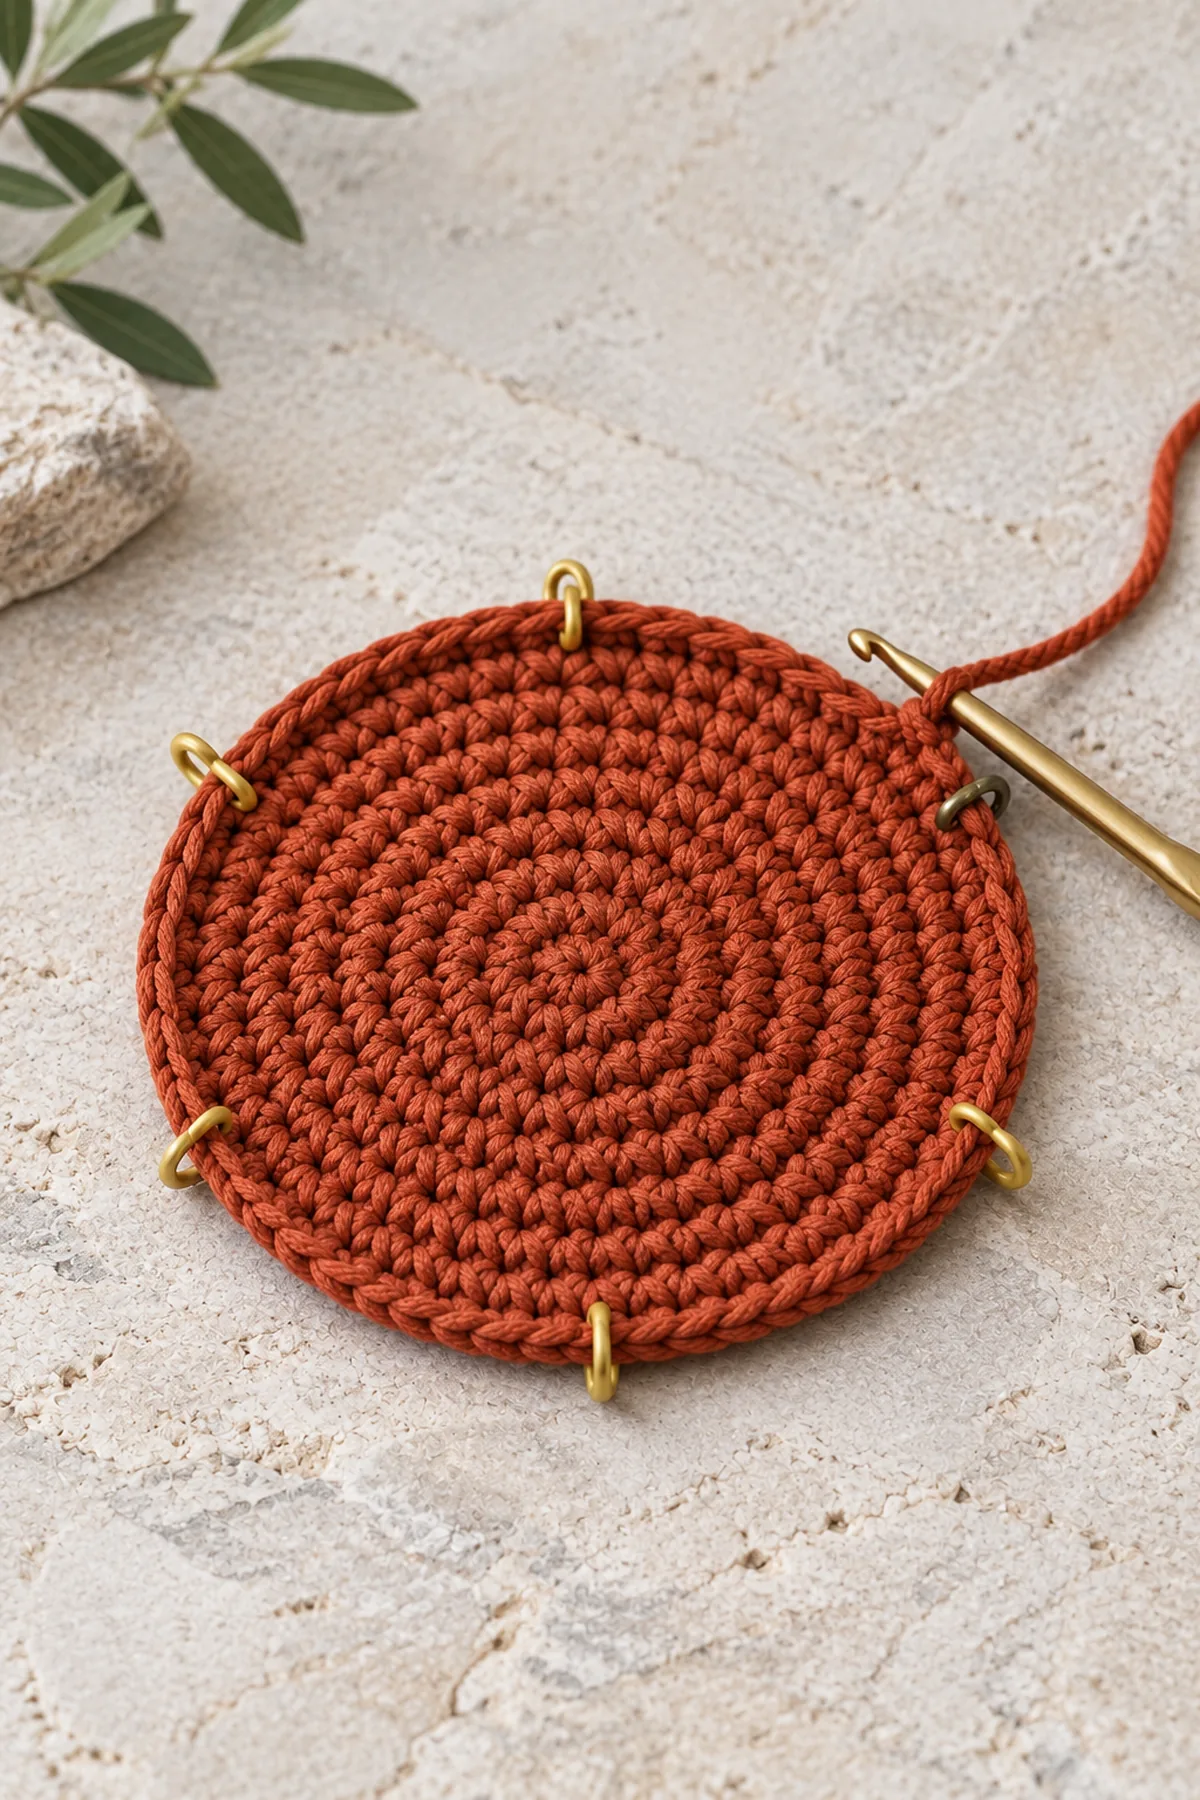
Build Dense Linked Walls and Rim
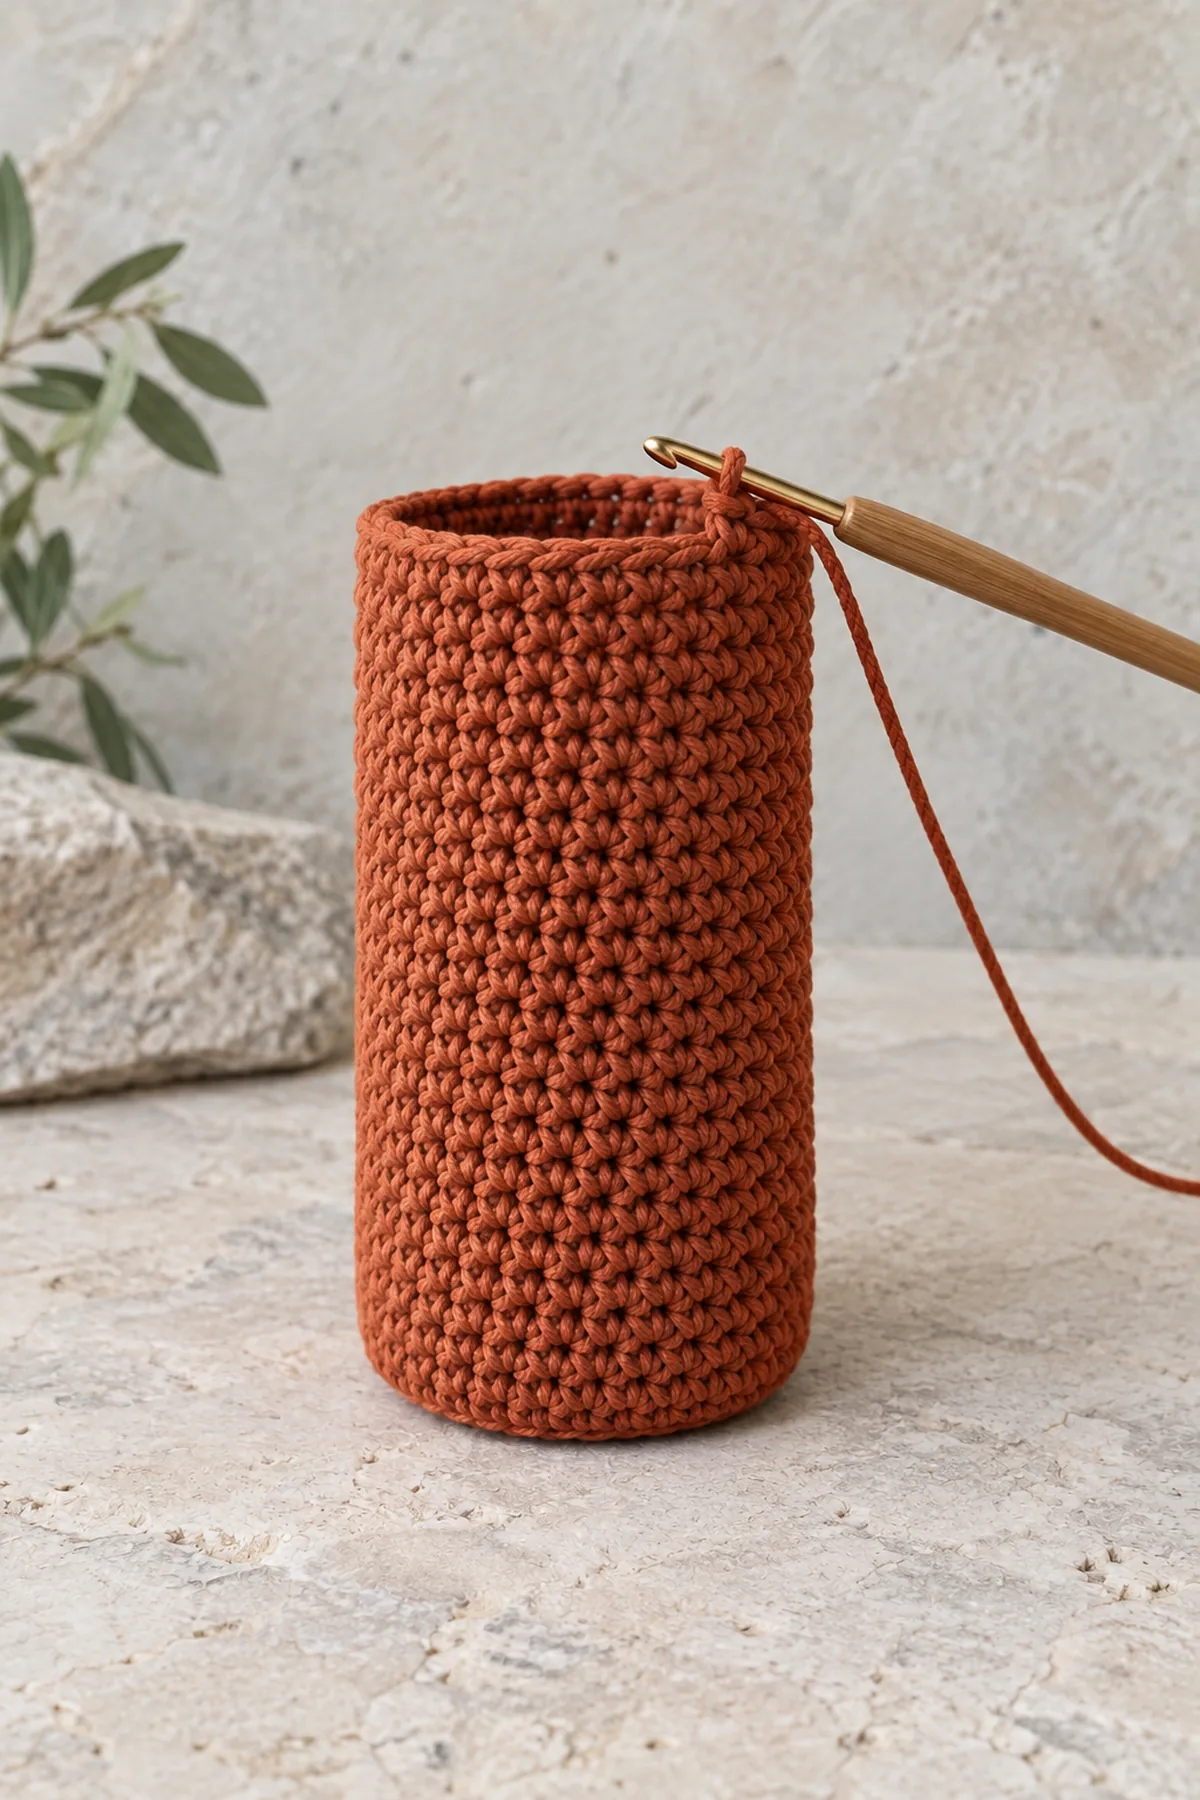
- Wall Round 1: ch 2, ordinary dc through both loops of first base stitch, then 47 ldc through both loops of the following base stitches, using the preceding stitch’s middle bar for each link. Join to first dc. (48 sts) Do not skip the stitch under the beginning chain.
- Wall Rounds 2-15: ch 2, dc in first stitch and ldc in each of the next 47, join to first dc without turning. (48 sts) Count the top V loops, not horizontal link bars. The join is a deliberate vertical seam. Mark its first dc and do not crochet into a joining slip stitch.
- Check the bottle after Wall Rounds 5 and 10. The sleeve should rise without narrowing and should slide off without tugging the cap. At Round 15 its planned height is six inches. For a shorter bottle stop at an earlier full round; for a taller one add complete 48-stitch rounds while keeping the final rim below the shoulder and cap. Record the actual round total.
- Rim Rounds 1-4: ch 1, sc in every stitch, join. (48 sts) Fasten off with a six-inch tail. No drawstring or top closure is added. The bottle must always be capped before carrying, because the crochet sleeve does not prevent leaks or retain an inverted bottle.
Make the Two Reinforced Ring Tabs
- Make two rust tabs. For each ch 9; Row 1 sc in second chain and across. (8 sts) Rows 2-24: ch 1, turn, sc in all eight. (8 sts) At target gauge each tab is approximately 1.6 by 4 inches. Leave long sewing tails, wash and dry the tabs before attaching.
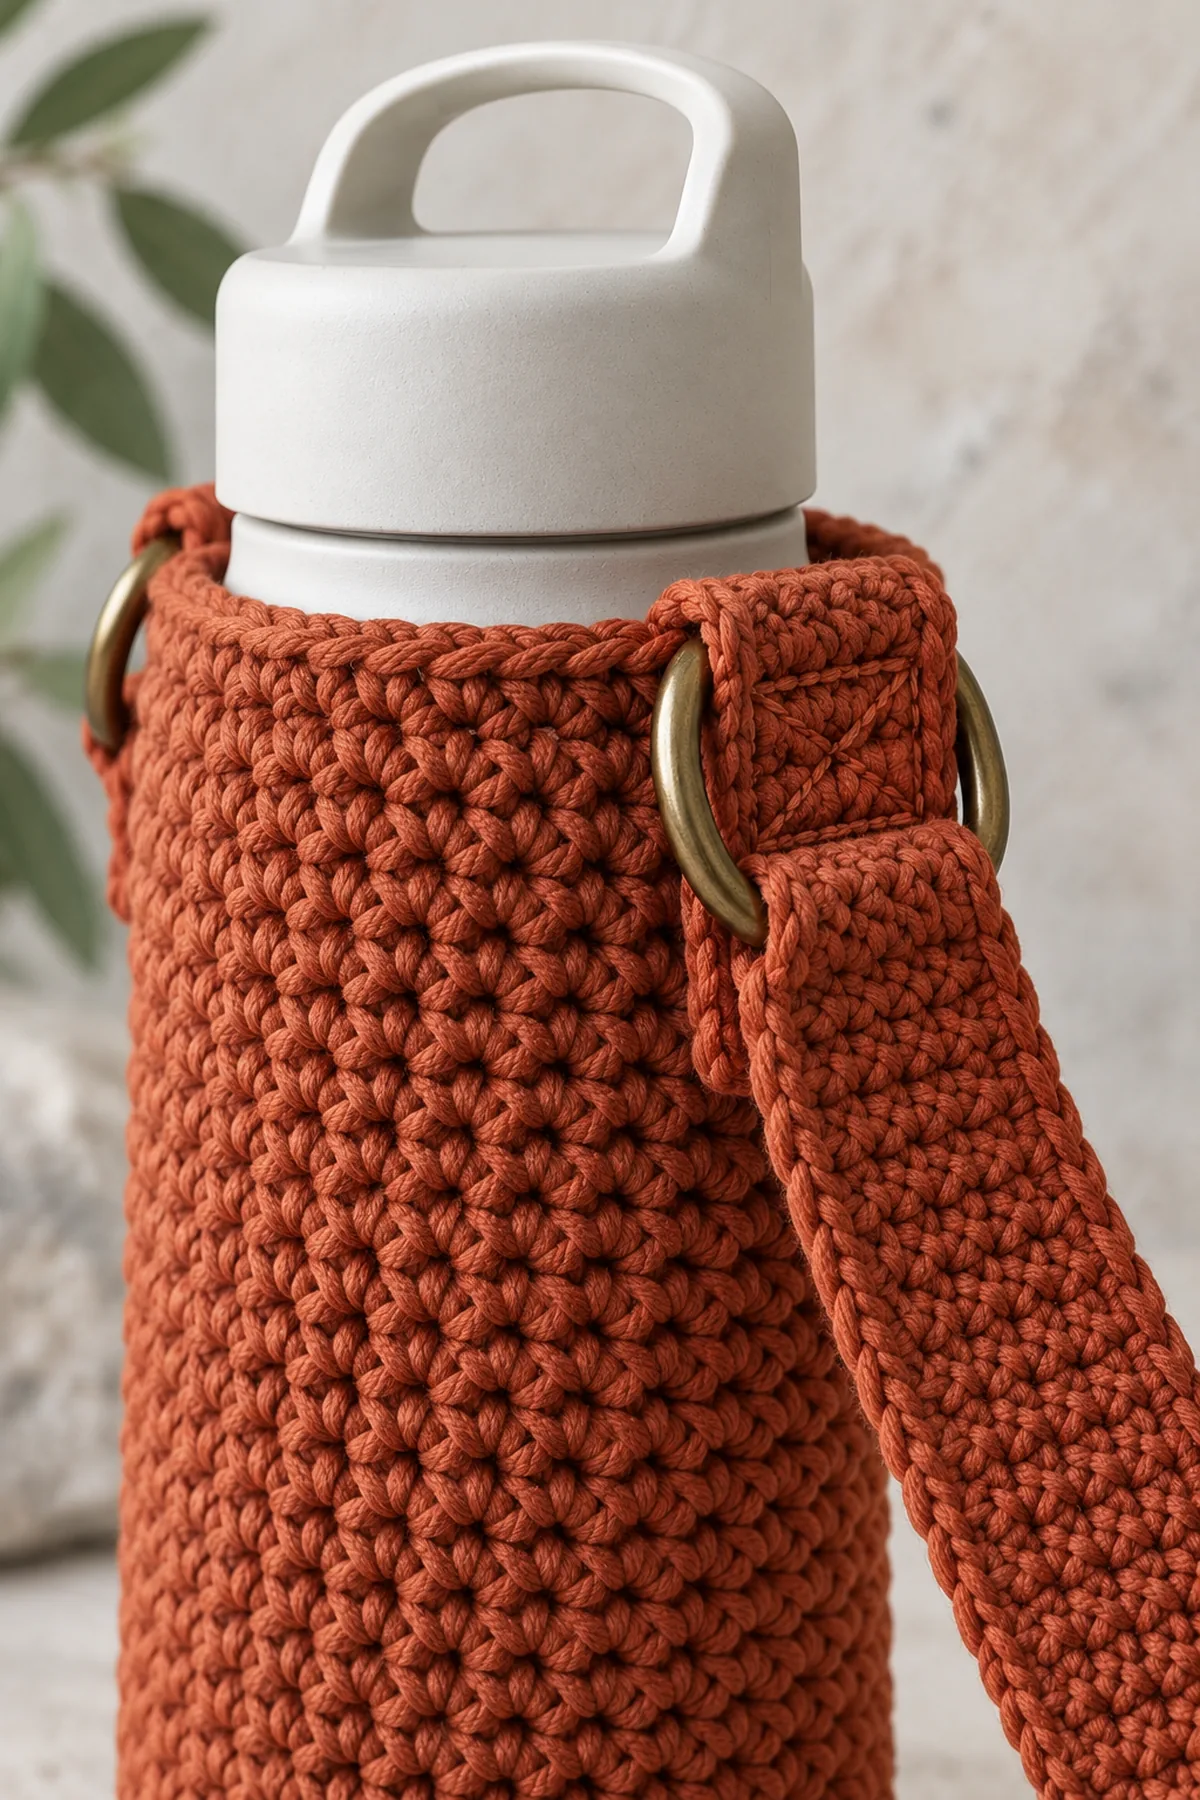
- Center one closed D-ring at the midpoint of each tab and fold the strip in half around its straight bar. The ring sits at the top of the fold, not inside the bottle cavity. The two eight-stitch ends lie together. Keep the ring’s curved edge clear for the shoulder strap.
- Place one folded tab over each opposite side of the rim, centered on the marks at stitches 1 and 25. One tab half sits inside the wall and one outside. Overlap about two inches down the wall. Make sure the ring cannot touch the cap or obstruct removal.
- With doubled matching cotton sew a rectangle through outer tab, wall and inner tab across eight stitch columns and at least six evenly spaced vertical stitch positions. Sew both diagonals twice, then weave tails in separate directions. Keep each pass snug without cinching the cylinder. Repeat on the opposite side.
- Inspect hardware for burrs and closed joints. If a ring, seam or crochet loop distorts under a gentle hand pull, stop and replace or remake it before inserting a bottle. This pattern does not provide a certified load capacity.
Route and Test the Adjustable Strap
- With rust ch 9. Strap Row 1: sc in second chain and across. (8 sts) Rows 2-288: ch 1, turn, sc in eight. (8 sts) This plans a 1.6-inch-wide,48-inch-long strip. Wash and dry before hardware fitting; cotton can lengthen when loaded.
- Name the strap ends A and B. Wrap end A around the slide adjuster’s center bar, leaving a two-inch overlap against the strap. Sew that overlap with a perimeter rectangle and two diagonals through both layers. The slide must remain exposed and movable; do not sew over its outer bars.
- Take free end B through the right-side D-ring, then back through the slide: pass under the first outer bar, over the center bar on top of the anchored strap layer, and under the other outer bar. Pull through enough length for adjustment. Finally pass B through the left-side D-ring and fold its last two inches back onto itself.
- Sew B’s two-inch overlap with the same reinforced rectangle and crossed diagonals. The right ring is inside an adjustable doubled loop; the left ring anchors the free end. Slide the adjuster to shorten or lengthen the shoulder section and test the route by pulling gently in both directions. If the slide slips freely instead of holding, the hardware/fabric combination is unsuitable.
- Test over a padded surface only a few inches high, using the capped lightweight bottle filled with at most500ml of cool water as an initial trial, not a claimed weight rating. Hold for five minutes, then check each seam, base and strap for permanent lengthening or slipping. Repeat with gentle walking at low height before wearing. Stop for distortion, loose stitching or hardware movement.
- Adult use only. Keep long straps away from children, necks, doors and machinery; remove for sleep, cycling or vigorous activity. Do not carry glass, hot drinks, electronics, pets or valuables. Hand-wash according to yarn and hardware guidance, dry fully, and inspect the support stitching before every use.
Assembly and Shaping
Fold each short tab through a D-ring and sew both ends to opposite upper wall positions. Route the long strap through the three-bar slide and two rings as described below. Reinforce every overlap with perimeter stitching and diagonals, then conduct a low-height test with the actual capped bottle before wearing.
Lay every component on a flat surface before joining. Match the marked centers first, then divide each remaining edge into equal sections. Work through both layers with consistent tension and pause after each section to check that the fabric lies flat. This measured approach prevents twisting and keeps decorative details facing the intended direction.
Finishing
- Fasten off with a 6-inch tail; weave through three separate groups of stitches, changing direction twice.
- Damp-block gently according to the fiber label, check the intended shape, and dry fully before assembly or use.
- Inspect both sides, all joins, and every decorative attachment; resecure a loose stitch before gifting.
- Include the fiber content and washing instructions with the finished item. Keep the item away from candles and other heat sources.
For a polished result, weave each tail through several same-color stitches, reverse direction once, and trim only after the fabric has been gently stretched. Block to the listed dimensions without flattening textured stitches. Inspect joins, borders, straps, and decorative pieces before the project is used or gifted.
Helpful Tips
- Count in small marked sections instead of counting an entire dark-colored edge repeatedly.
- Use a contrasting removable marker at each important corner, edge or division.
- Keep a row tally and record your swatch measurements beside the size you selected.
- If shaping ripples or pulls, stop at that checkpoint and compare counts and gauge before progressing.
Good lighting and a contrasting stitch marker make counting much easier. If a section looks uneven, compare the current count with the previous checkpoint before continuing. Fixing one missed stitch early is faster than compensating later, and it preserves the measurements used by the assembly instructions.
Frequently Asked Questions
Can I change the colors?
Yes. Keep the yarn weight and fiber behavior consistent and use enough contrast for the decorative detail. Make a washed swatch with every major yarn substitution.
Is this pattern physically tested?
No physical sample test is claimed. The stitch counts are computationally checked and the written construction is reviewed. Make a gauge swatch, use the measurement checkpoints, and test fit or assembly before gifting.
Can a beginner make this?
This is an intermediate project because shaping and assembly require careful counting. Practise the named special stitches in a small swatch before working the main piece.
Conclusion
Keep the completed measurements and your yarn details with your pattern notes. The finished piece should match the described construction before it is styled or gifted. If a checkpoint does not match, correct the underlying count or gauge instead of concealing the difference during finishing.
BabyYarnie Printable Crochet Pattern Card
BabyYarnie — easy-to-follow crochet for everyday makers.
Project: Crochet Linked Double Crochet Bottle Carrier
Skill level: Intermediate Hook: 3.5 mm starting point; adjust to gauge Yarn: DK cotton
Finished size: Planning base about 3 inches across; wall about 6.7 inches; strap adjustable after fitting
Card Materials
- Planning allowance: 380 yards firm rust DK cotton plus swatch allowance
- 3.5 mm hook, eight markers, yarn needle, scissors and tape
- Two smooth closed D-rings and one three-bar strap slide with matching 2-inch internal width; sturdy hardware intended for textile straps
- One lightweight capped reusable bottle with measured diameter about 2.75-2.9 inches; no glass or hot liquid
Card Instructions
- Crochet and Measure the Round Base: Joined sc base grows by six per round:6,12,18,24,30,36,42,48.
- Build Dense Linked Walls and Rim: 15 wall rounds each1dc+47ldc; four rim rounds each48sc; chain and join uncounted.
- Make the Two Reinforced Ring Tabs: Two8-sc by24-row tabs fold around2-inch D-rings; sandwich wall and sew reinforced rectangles.
- Route and Test the Adjustable Strap: 8-sc strap,288rows planning length; A anchors slide, B passes right ring/back through slide/anchors left ring; low-height load trial.
Finish: Check every count, weave in all ends, block to measurement, and inspect each join.