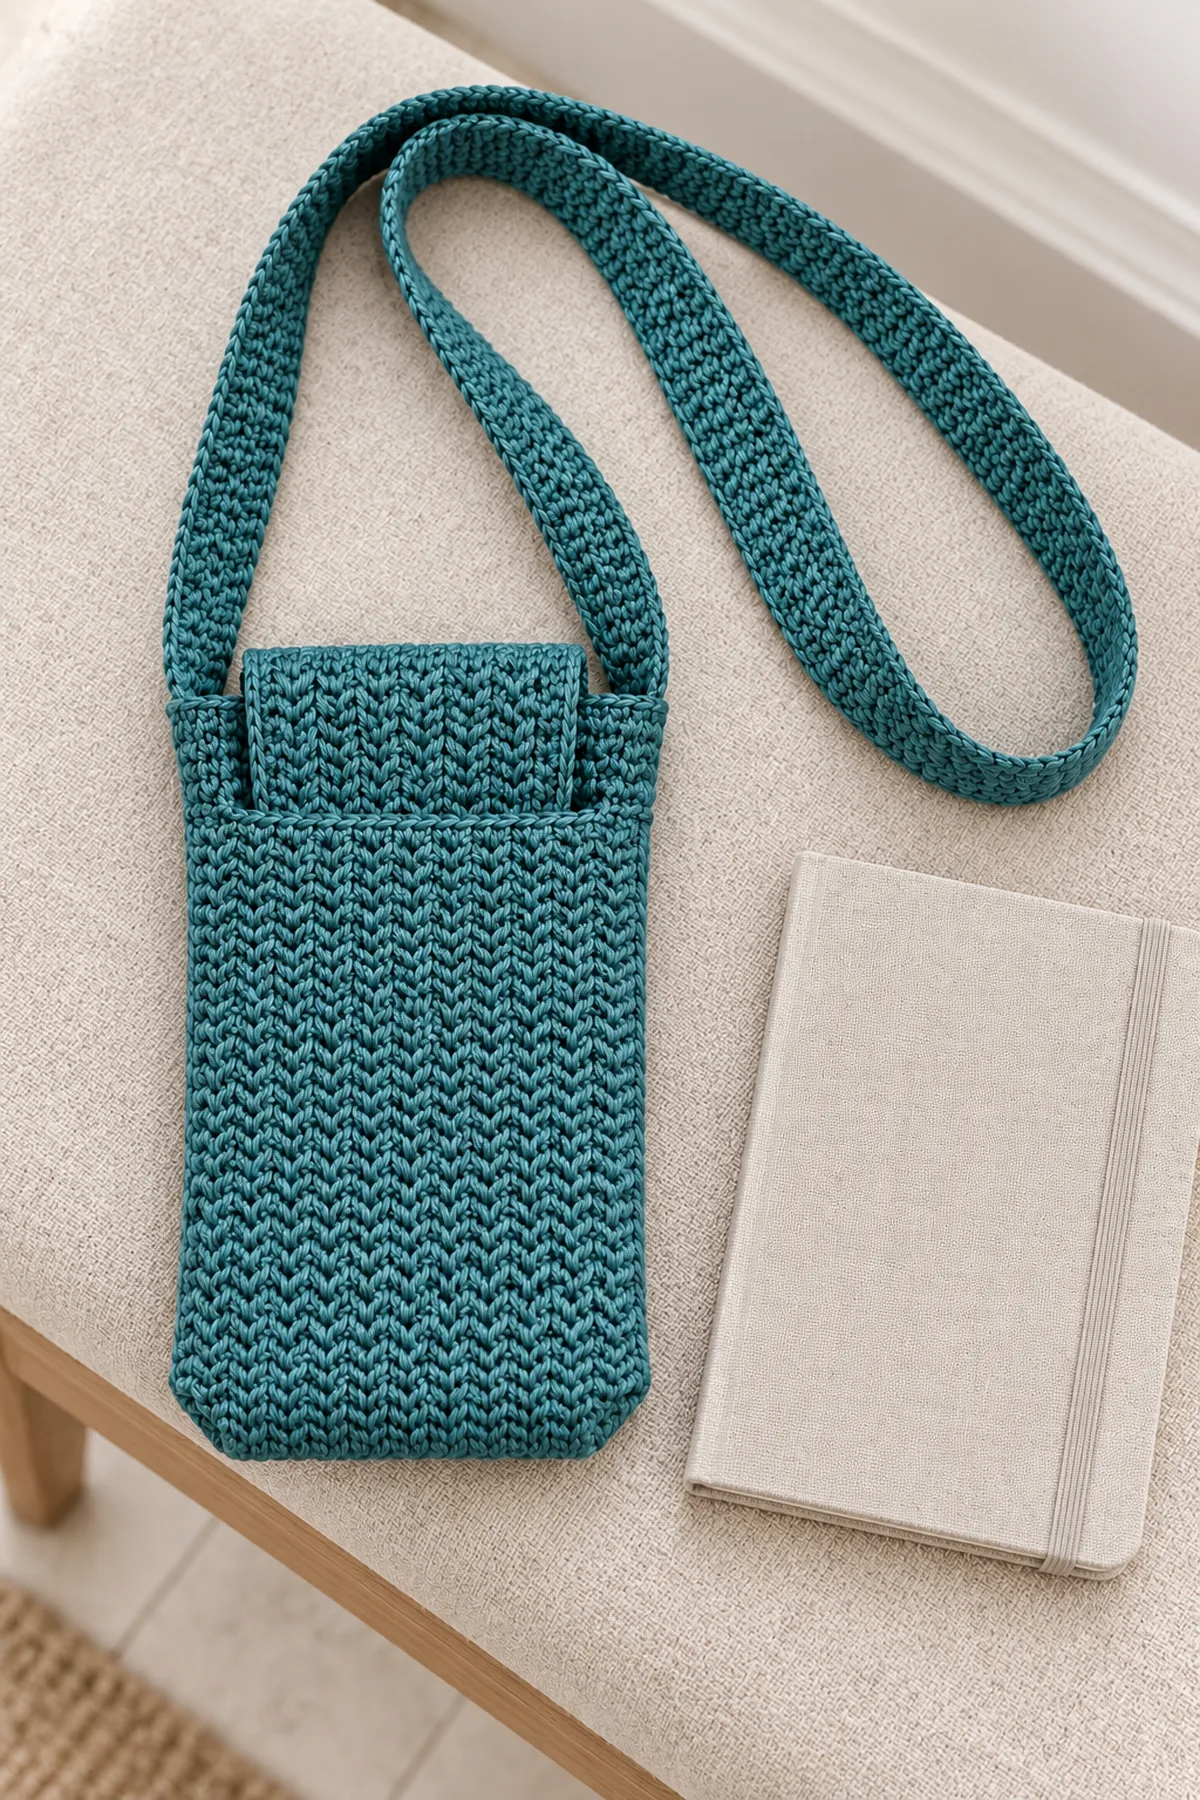
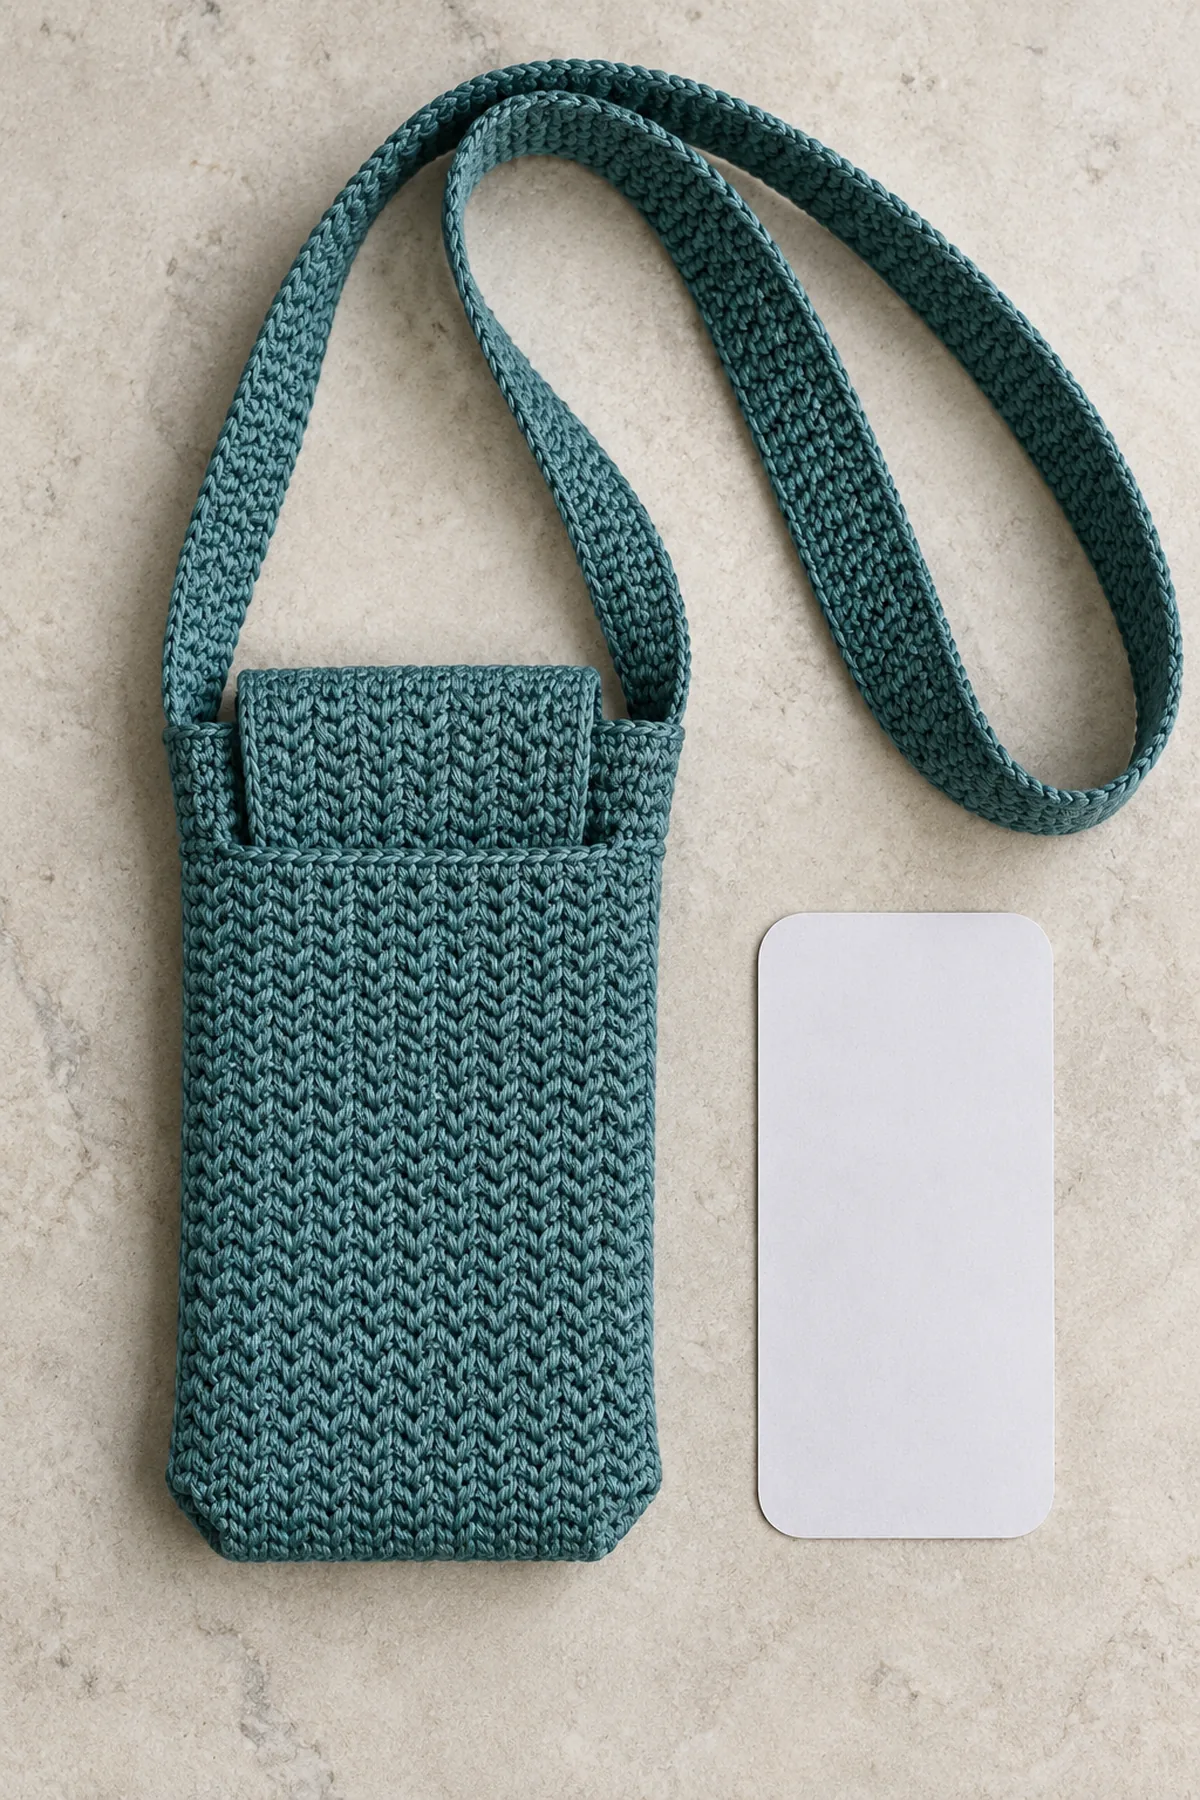
This crochet phone sling pattern is an original practical crochet project. Adult teal close-textured herringbone-hdc phone sleeve with boxed lower corners, broad flat strap and integral tuck flap; no hardware or fringe. Follow the complete US-terminology instructions below, beginning with a washed swatch and the measurement checkpoints.
Two teal herringbone-half-double-crochet rectangles form the phone pocket. The back extends into a plain integral tuck flap. Two tiny boxed corners give depth at the bottom. A wide single-crochet strap is sewn to the upper side seams and reinforced with cotton tape on its underside. No hardware, button or fringe is used.
Pattern Details
- Hook Size: 3.5 mm starting point; adjust after washing
- Finished Size: Planning pocket about 3.9 inches wide x 7.6 inches tall x 0.5 inch deep; strap 1.6 inches wide, length chosen on wearer
- Gauge: 20 herringbone hdc and 20 rows = 4 inches; strap 20 sc and 24 rows = 4 inches
- Estimated Time: 6-9 hours
- Construction: Two 22-stitch panels, 12-row back flap, three-edge seam, boxed corners and reinforced strap
- Skill level: Intermediate
Why You’ll Love This Project
The decoration is part of a useful, deliberately shaped project rather than a generic motif added to an unrelated pattern. Separate construction stages make counting manageable, while the limited palette keeps the silhouette readable. You can pause between components and check the measurements before committing to final assembly.
Materials
- Planning allowance: 300 yards teal DK cotton, plus swatching allowance
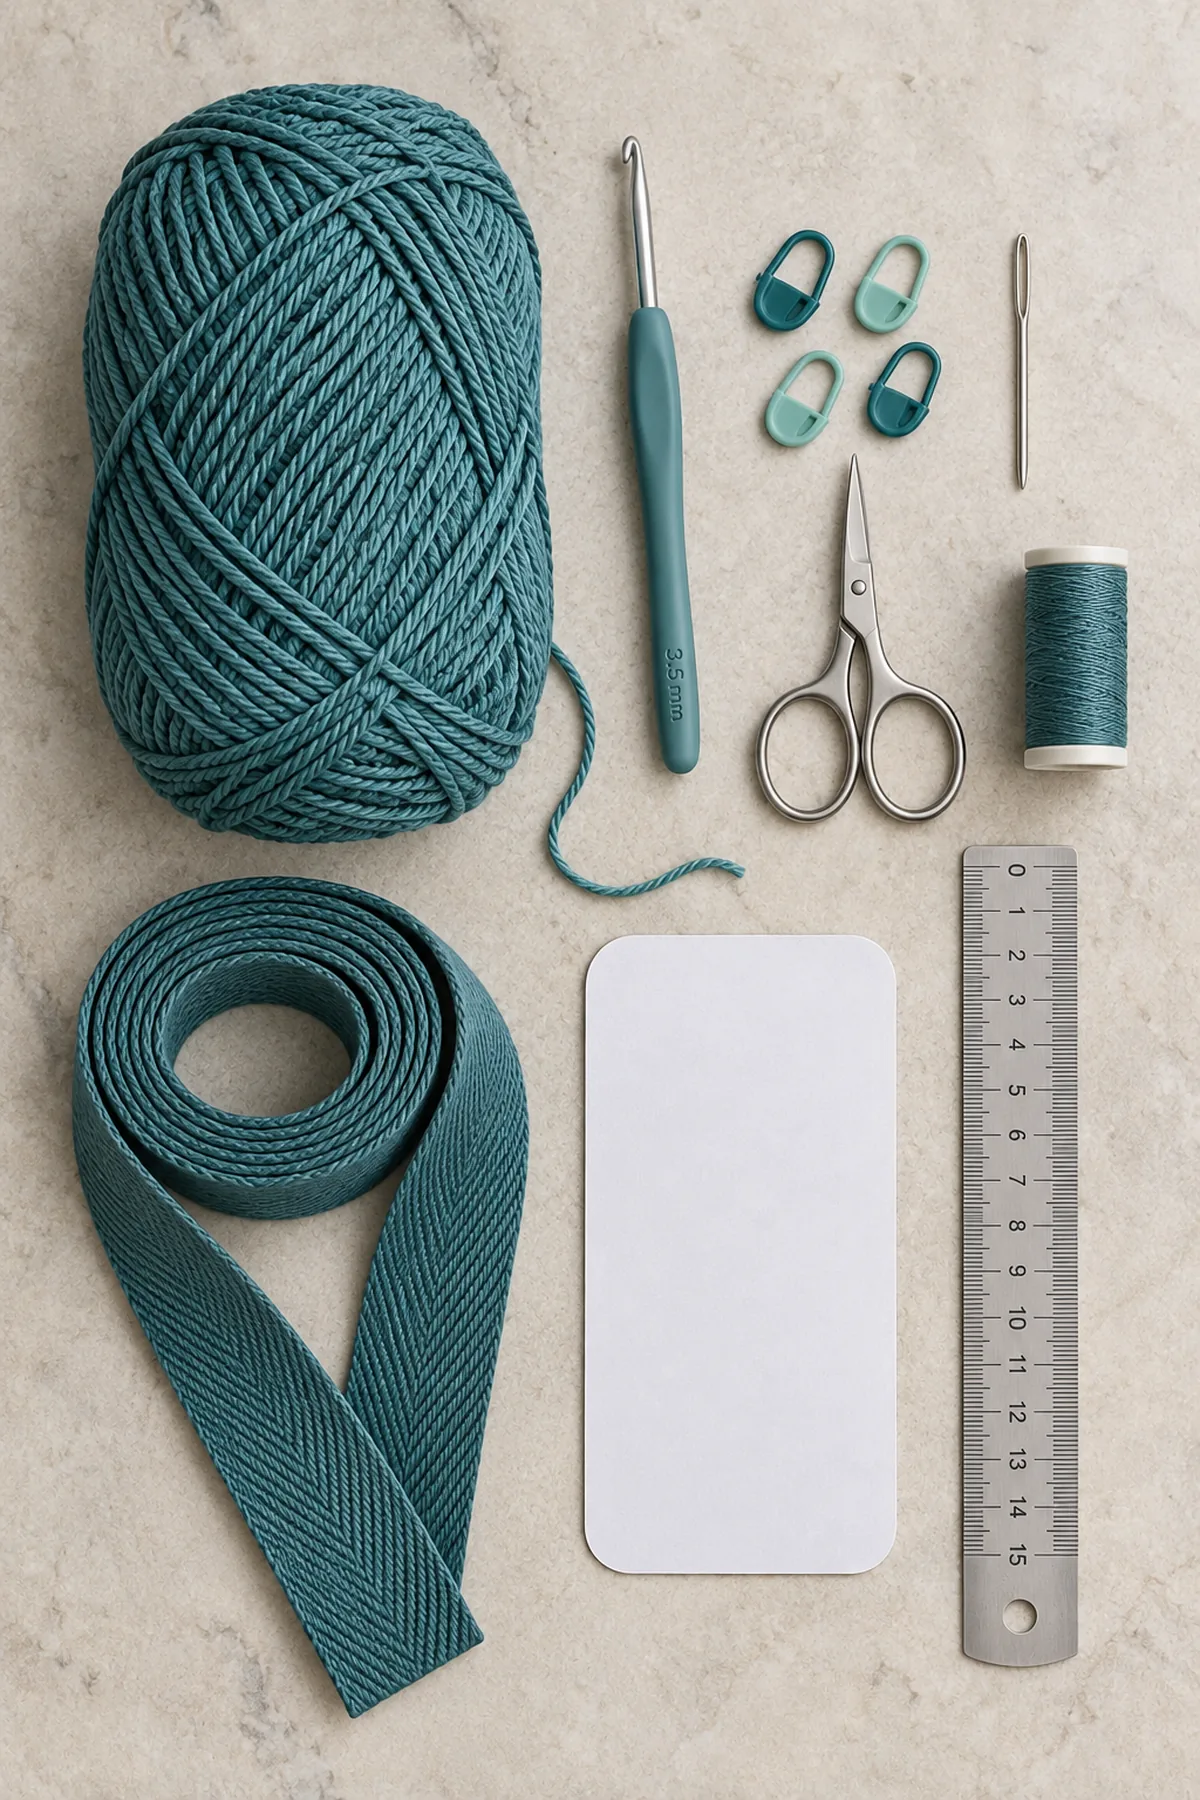
- 3.5 mm hook, blunt yarn needle, markers, ruler and scissors
- 1.5-inch-wide washable cotton twill tape, measured strap length plus 1 inch; matching strong sewing thread and needle
- Actual phone in its usual case, or an accurate cardboard substitute for fitting
Gauge, Measurements, and Planning
Measure cased device width W, height H and thickness T in inches. Flat panel width should be W+T+0.9; choose N=ceiling(5*(W+T+0.9)). Panel height should be H+T/2+0.8; choose R=ceiling(5*(H+T/2+0.8)). For W=3, H=6.5, T=0.5, N=22 and R=38. Each unseamed panel is 4.4 x 7.6 inches. Side seams and half-inch boxing use some ease. Begin with these counts, but fit the real device before reinforcing the strap. At a different washed gauge replace each factor 5 with your stitches or rows per inch. Do not make this a tight compression case. Crochet is not impact protection or waterproofing.
Make and wash a gauge swatch before beginning. Measure only after the swatch is completely dry. If the stitch width differs, change hook size rather than pulling the working yarn tighter. Keep a written count at the end of every section so the finished edges remain balanced and the assembly points line up.
Abbreviations and Special Stitches
- ch: chain
- sc: single crochet
- hdc: half double crochet
- dc: double crochet
- sl st: slip stitch
- st(s): stitch(es)
- rnd: round
- BLO: back loop only
- inc: 2 stitches in one stitch
- sc2tog: single crochet two stitches together
- RS: right side
- WS: wrong side
- sp: space
- hhdc: herringbone half double crochet
Special stitch guidance: Herringbone hdc (hhdc): yarn over, insert hook into next stitch, yarn over and draw up a loop THROUGH both the stitch and the first loop already on the hook in one motion; two loops remain. Yarn over and draw through the first loop only, then yarn over and draw through both remaining loops. This makes one stitch. Practise slowly: ordinary hdc instead pulls through three loops at once and does not make the same slant. Work hhdc through both top loops. Ch 2 to turn never counts. Strap sc uses an uncounted ch 1.
Important Notes
- Pattern development note: stitch arithmetic and written construction have been reviewed computationally; this design has not been physically sample-tested. Gauge, yardage and finished measurements are planning targets, not a tested guarantee. Swatch and check fit before making a gift.
- Beginning ch 1 or ch 2 and joining slip stitches never count as stitches. Mark the first counted stitch of each round and move the marker after completing the round.
- On flat rows, turn after each row and work the first stitch into the last stitch of the previous row. On joined rounds, join to the first counted stitch and do not turn unless specifically instructed.
- Change color on the final yarn-over of the stitch before the new color is needed. Leave a 6-inch tail and weave it back and forth through same-color stitches after construction.
- Use the written stitch counts for structure and your washed gauge for dimensions. Do not silently add shaping increases to correct a measurement; make a fresh swatch with a different hook first.
- Images are AI-generated design illustrations, not stitch charts or photographs of a physically tested sample. Follow the written counts and your measured gauge.
Complete Instructions for Crochet Herringbone Phone Sling with Wide Strap
Measure and Crochet the Two Panels
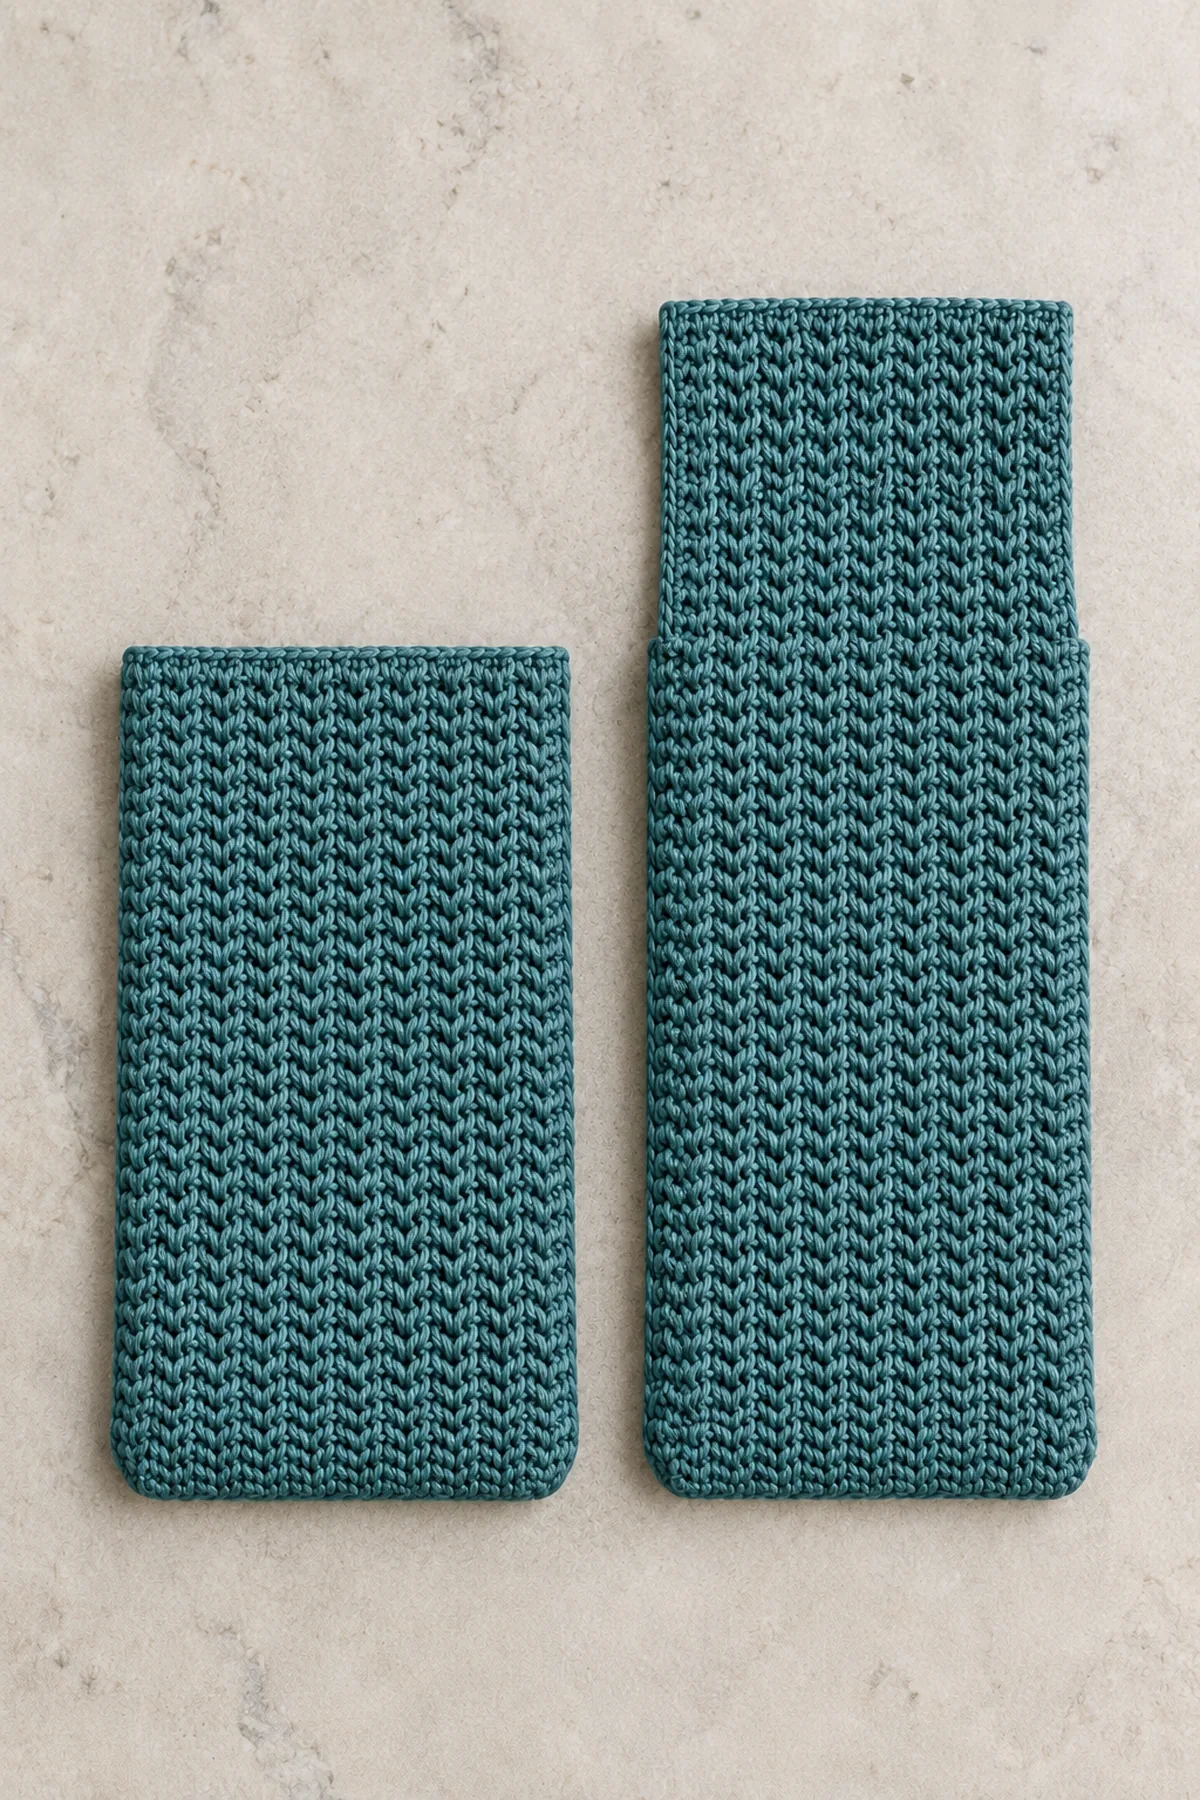
- Front: with teal ch 24. Row 1: hhdc in third chain from hook and each remaining chain. (22 sts) Mark both end stitches. Ch 2 and turn.
- Rows 2-38: hhdc in each of the 22 stitches, ch 2 and turn between rows. Do not work into the turning chain. (22 sts) Fasten off. For a custom size use N+2 starting chains and R total rows.
- Back: repeat the front through Row 38, but keep the yarn attached. Flap Rows 1-12: ch 2, turn, hhdc in all 22 stitches. (22 sts) Fasten off with a sewing tail. Custom flap: make about 2.4 inches in the same stitch count.
- Wash both pieces, dry flat and measure. Mark the back at the boundary between body Row 38 and flap Row 1. Front and back below that mark must match exactly. Count each row-end position before seaming.
Seam and Box the Base
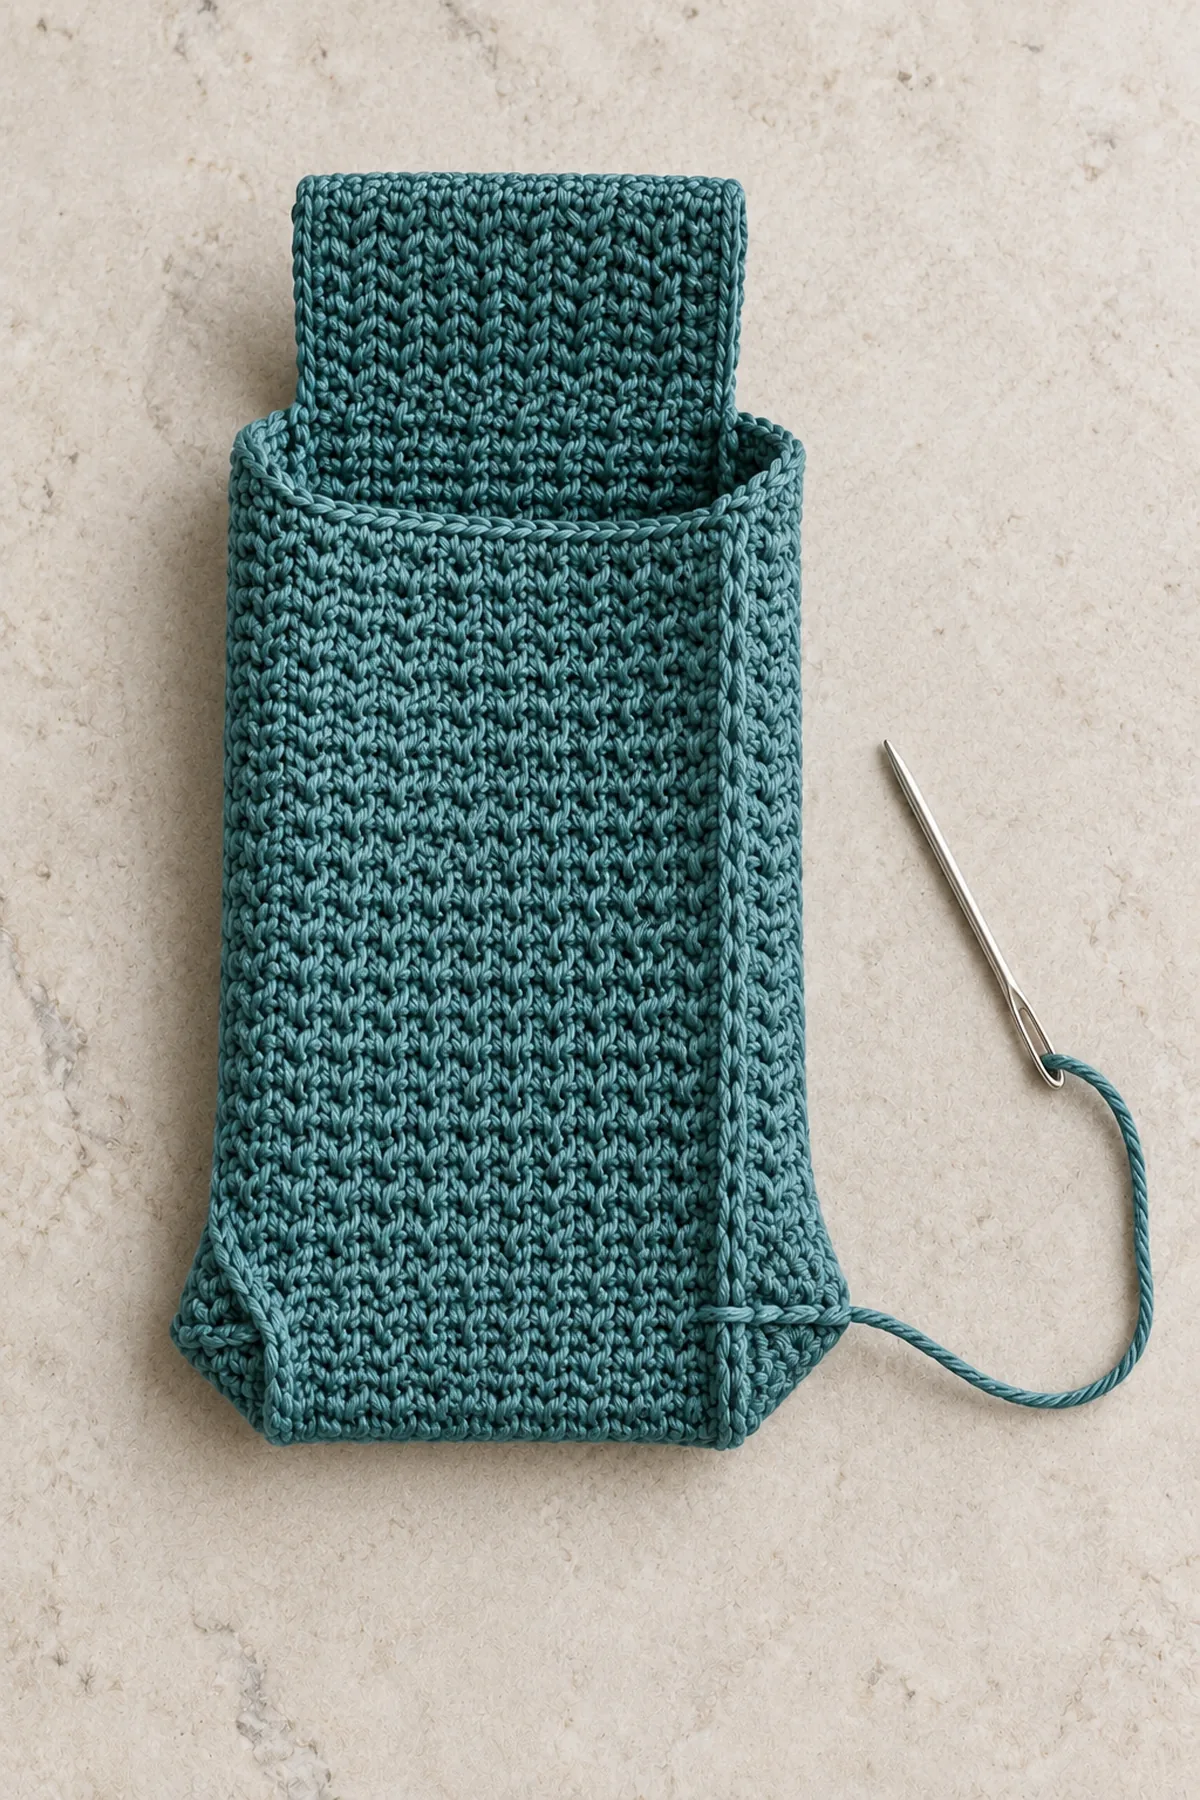
- Place WS together, matching foundation edges and the 38-row body sides. Whipstitch one side with 38 matching row-end pairs, across 22 corresponding foundation positions, then up the other side with 38 pairs. Do not catch the flap in either seam. Keep seams narrow and flexible.
- Turn inside out. Flatten one lower corner so its side seam lies directly over its bottom seam, forming a small triangular point. Mark a line perpendicular to those aligned seams, 0.25 inch from the corner tip along the center seam. The line should span about 0.5 inch across the flattened triangle. Sew across both layers twice with small backstitches. Repeat at the other corner. Do not cut off the triangles.
- Turn right side out and test with the cardboard device first, then the phone. The boxed base should open without pulling the side seams. Fold the flap forward and tuck at least 1 inch behind the front panel. If it bunches, check ease and panel widths; do not stretch the phone into a small pouch. Undo seams and correct the panel size before proceeding.
Make and Reinforce the Wide Strap
- Drape a tape measure from one upper side seam position over the intended adult shoulder to the other side, at the desired crossbody drop. Record the free strap length L. Add 3 inches for two 1.5-inch attachment overlaps. Example: L=40 inches means 43 inches total strip length.
- With teal ch 9. Row 1: sc in second chain and each remaining chain. (8 sts) Rows 2-258 for the 43-inch example: ch 1, turn, sc in all eight stitches. (8 sts) For custom length use round((L+3)*your washed sc rows per inch). Fasten off and wash the strap before measuring again.
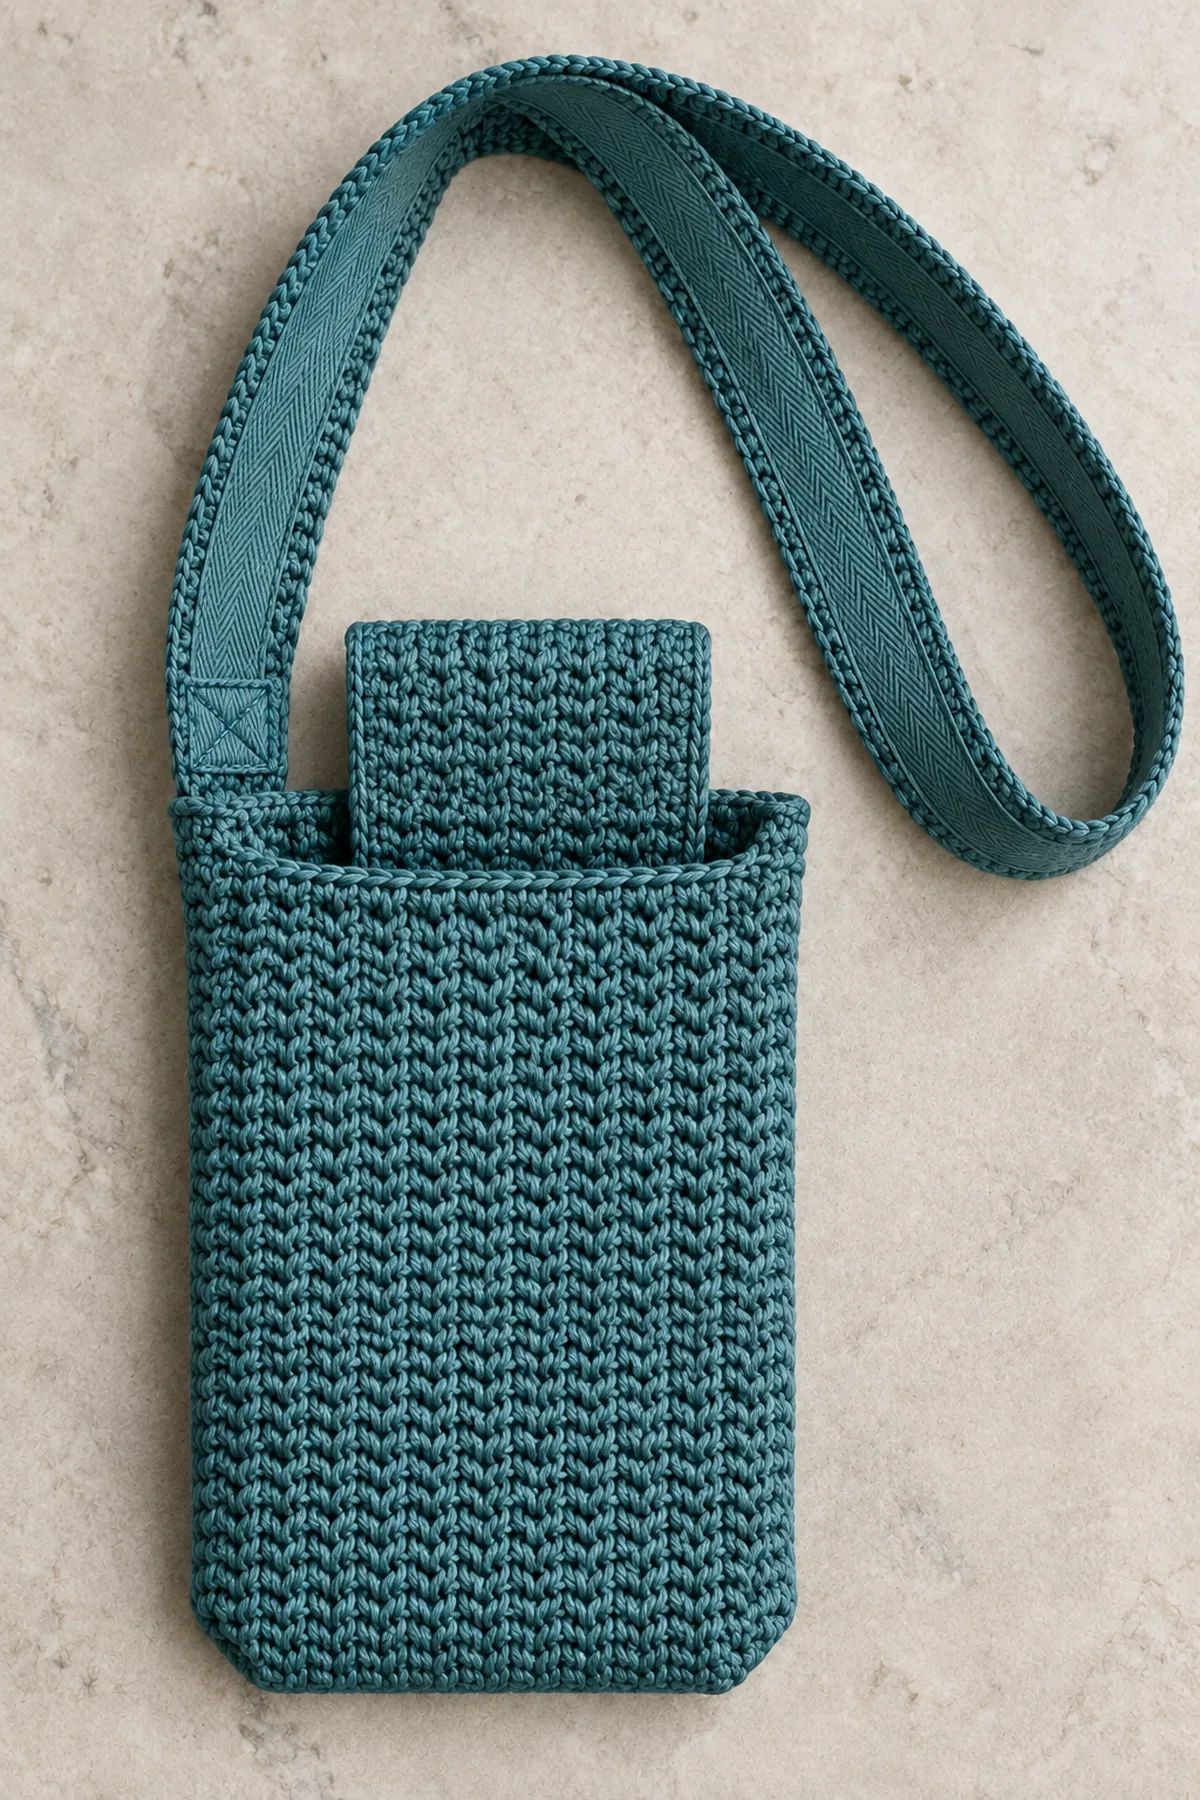
- Cut cotton tape to the final washed strip length plus 1 inch. Fold each tape end under 0.5 inch. Center tape on the strap WS, leaving about 0.05 inch of crochet at each long edge. Using matching sewing thread, backstitch both long tape edges to crochet every 0.25 inch and stitch both folded ends. Catch secure yarn bars without splitting them; the tape now matches strip length and limits stretching.
- Overlap one strap end 1.5 inches down the outside of each upper side seam, with tape facing the body and strap untwisted. Sew a rectangle and two crossing diagonals through strap, tape and both pocket panels in each overlap. Keep the main pocket opening and flap free. Use two passes of strong thread, burying knots between strap and pouch.
- Test above a padded surface with the actual phone, holding the pouch lightly while checking that no seam stretches or slips. Recheck after ten minutes of wear. If the tape wrinkles, attachments pull or the phone can fall out, stop use and correct fit. This is for one adult phone only, not heavy valuables, a child neck pouch or climbing equipment. Remove near machinery, during sports and for sleep. Remove electronics before laundering; dry completely.
Assembly and Shaping
Join panels wrong sides together along sides and bottom, stopping at the front opening. Turn inside out to box the two lower corners, then turn right side out. The flap folds from the back over the phone and tucks inside the front; it has no fastener. Attach each strap end over the upper side seam across both panels, but keep the flap and pocket opening free.
Lay every component on a flat surface before joining. Match the marked centers first, then divide each remaining edge into equal sections. Work through both layers with consistent tension and pause after each section to check that the fabric lies flat. This measured approach prevents twisting and keeps decorative details facing the intended direction.
Finishing
- Fasten off with a 6-inch tail; weave through three separate groups of stitches, changing direction twice.
- Damp-block gently according to the fiber label, check the intended shape, and dry fully before assembly or use.
- Inspect both sides, all joins, and every decorative attachment; resecure a loose stitch before gifting.
- Include the fiber content and washing instructions with the finished item. Keep the item away from candles and other heat sources.
For a polished result, weave each tail through several same-color stitches, reverse direction once, and trim only after the fabric has been gently stretched. Block to the listed dimensions without flattening textured stitches. Inspect joins, borders, straps, and decorative pieces before the project is used or gifted.
Helpful Tips
- Mark both end stitches and keep a row tally.
- Wash the swatch before choosing a hook or final measurements.
- Inspect the reverse side and joins before hiding the tails.
- Record your own yarn use; the listed amounts are planning allowances.
Good lighting and a contrasting stitch marker make counting much easier. If a section looks uneven, compare the current count with the previous checkpoint before continuing. Fixing one missed stitch early is faster than compensating later, and it preserves the measurements used by the assembly instructions.
Frequently Asked Questions
Can I change the colors?
Yes. Keep the yarn weight and fiber behavior consistent and use enough contrast for the decorative detail. Make a washed swatch with every major yarn substitution.
Is this pattern physically tested?
No physical sample test is claimed. The stitch counts are computationally checked and the written construction is reviewed. Make a gauge swatch, use the measurement checkpoints, and test fit or assembly before gifting.
Can a beginner make this?
This is an intermediate project because shaping and assembly require careful counting. Practise the named special stitches in a small swatch before working the main piece.
Conclusion
Keep the completed measurements and your yarn details with your pattern notes. The finished piece should match the described construction before it is styled or gifted. If a checkpoint does not match, correct the underlying count or gauge instead of concealing the difference during finishing.
BabyYarnie Printable Crochet Pattern Card
BabyYarnie — easy-to-follow crochet for everyday makers.
Project: Crochet Herringbone Phone Sling with Wide Strap
Skill level: Intermediate Hook: 3.5 mm starting point; adjust after washing Yarn: DK
Finished size: Planning pocket about 3.9 inches wide x 7.6 inches tall x 0.5 inch deep; strap 1.6 inches wide, length chosen on wearer
Card Materials
- Planning allowance: 300 yards teal DK cotton, plus swatching allowance
- 3.5 mm hook, blunt yarn needle, markers, ruler and scissors
- 1.5-inch-wide washable cotton twill tape, measured strap length plus 1 inch; matching strong sewing thread and needle
- Actual phone in its usual case, or an accurate cardboard substitute for fitting
Card Instructions
- Measure and Crochet the Two Panels: Two 22-hhdc x 38-row panels; back continues another 12 rows for integral flap.
- Seam and Box the Base: Join three edges, then box both corners with a half-inch seam; leave top and tuck flap free.
- Make and Reinforce the Wide Strap: 8-sc strap to measured length; tape backing; two 1.5-inch rectangle-and-X attachments; check loaded fit.
Finish: Check every count, weave in all ends, block to measurement, and inspect each join.