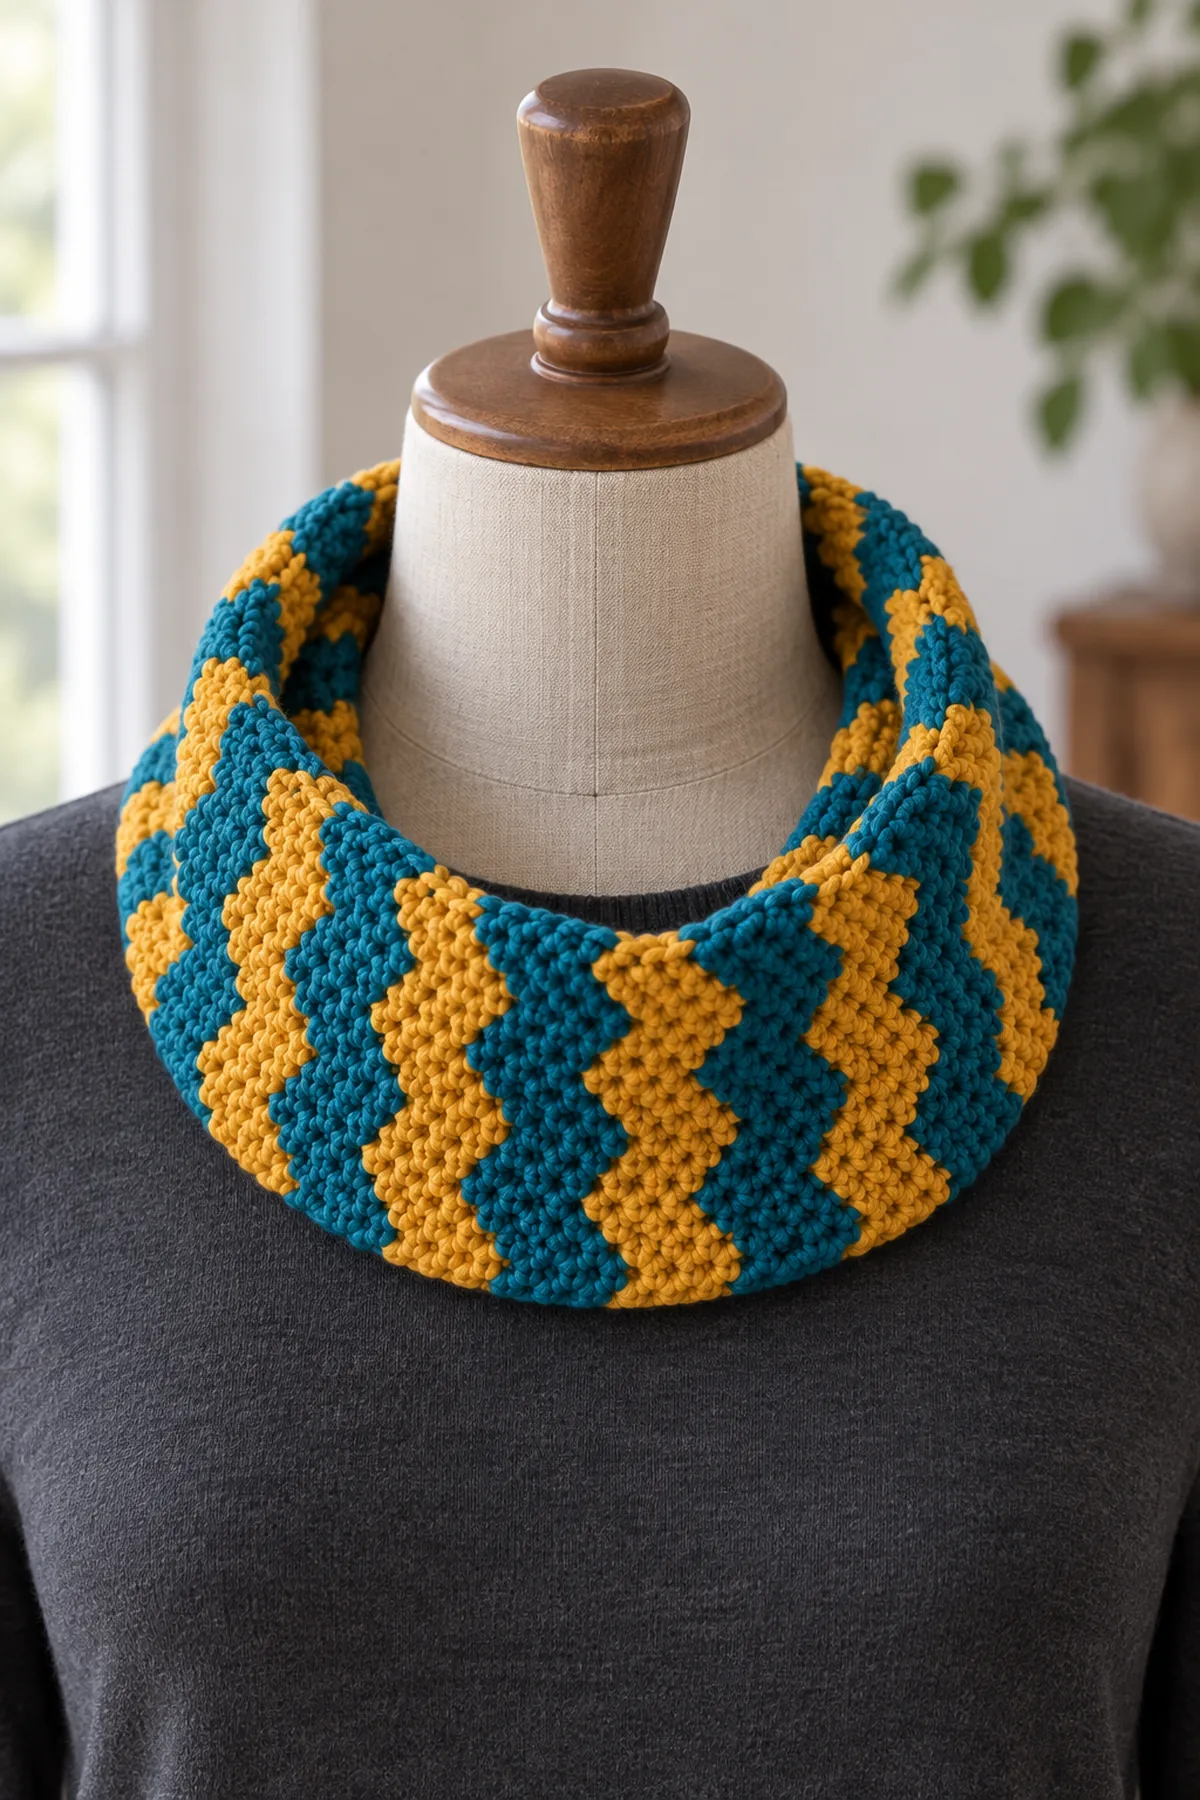
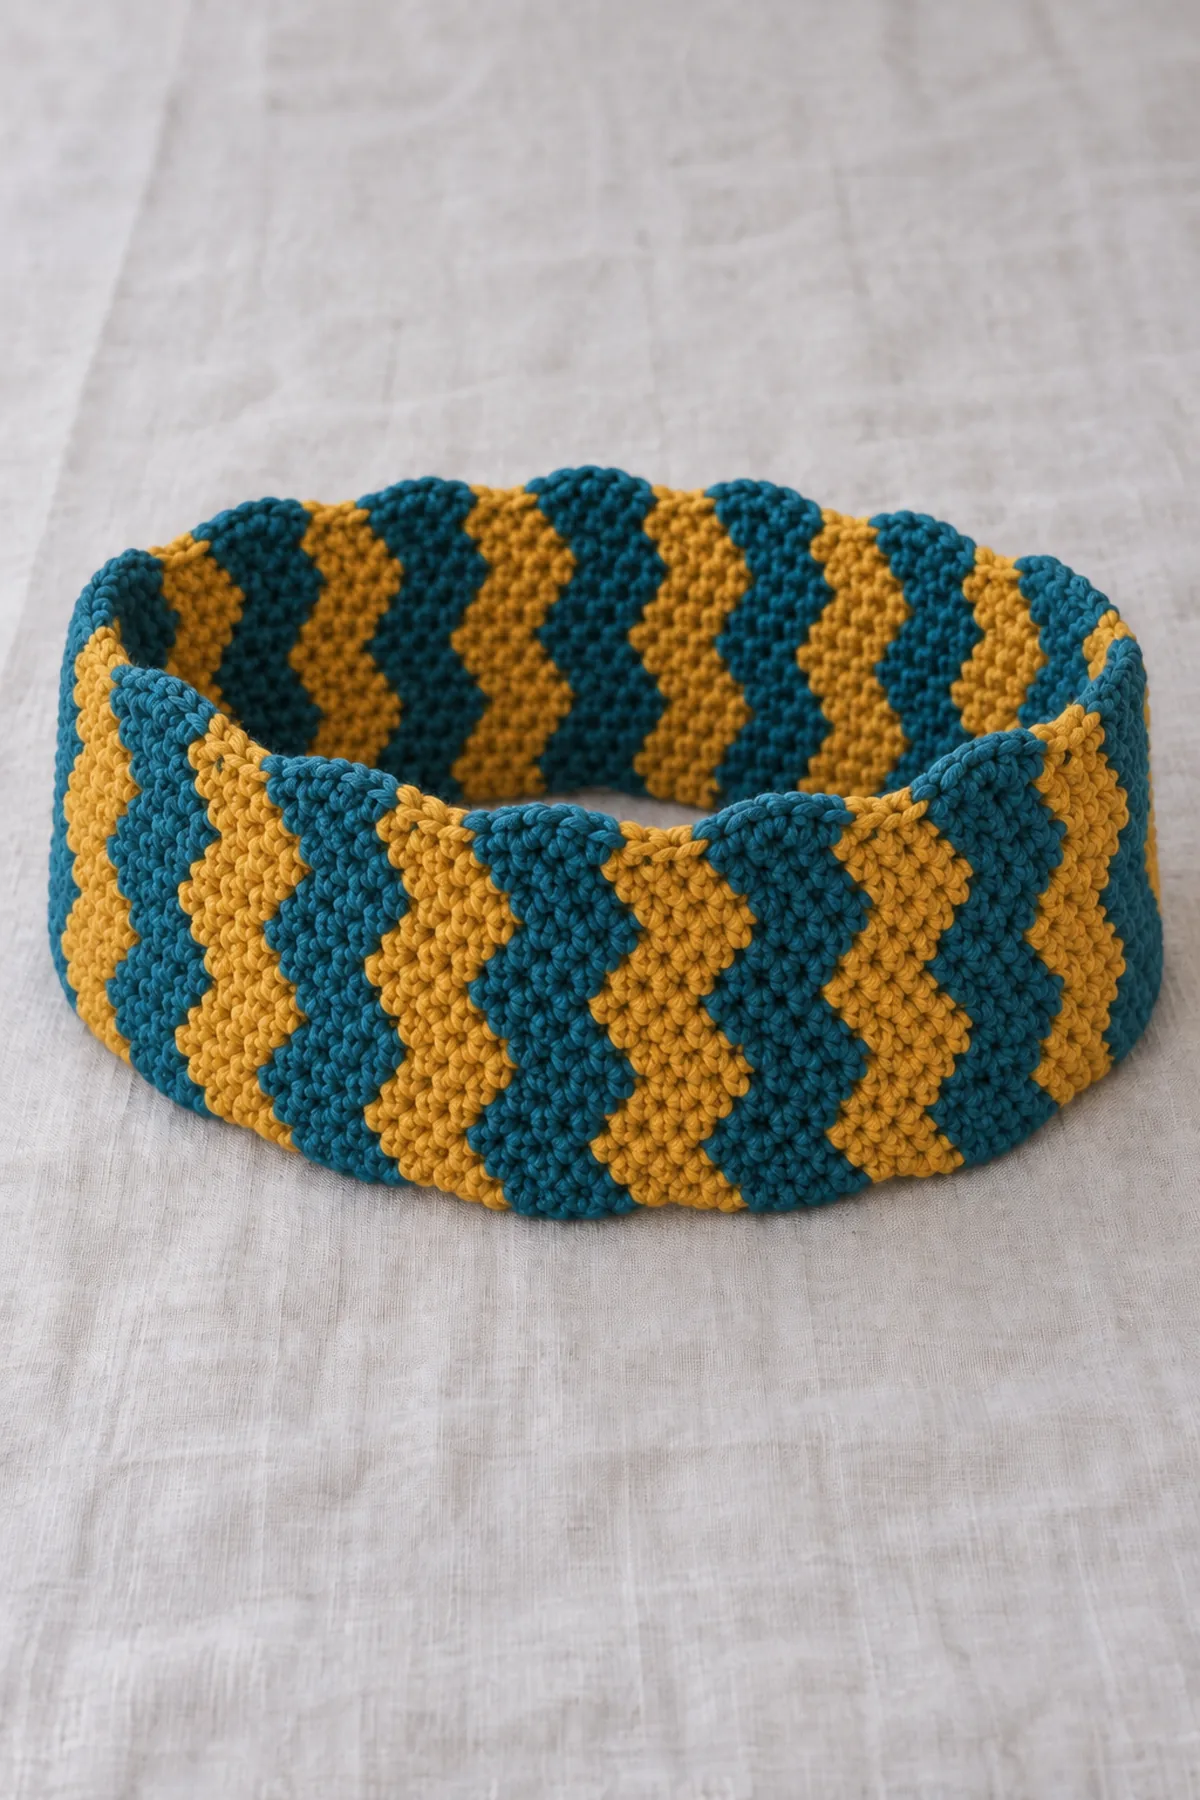
Two soft zigzags repeat around this teal and mustard crochet infinity scarf. If you are looking for a crochet infinity scarf free pattern, this tutorial makes a single loose loop, not a long scarf intended to wrap twice. The fabric is worked flat with paired increases and decreases, then the two shaped short ends are joined without adding a twist.
The same 29-stitch ripple row begins in the foundation chain and continues for 144 rows. Each row has two three-sc peaks, one central sc3tog valley and a sc2tog at each outer edge. Six-row teal bands alternate with six-row mustard bands. Matching the first and last rows completes the loop.
Pattern Details
- Hook Size: 5 mm, adjusted to gauge
- Finished Size: Adult single loop target approximately 29-inch circumference and 6-7-inch projected height; not a double-wrap scarf
- Gauge: Target 16 sc along a slope and 20 rows = 4 inches, washed
- Estimated Time: 7-10 hours
- Construction: 29-stitch two-peak flat ripple strip, 144 rows, shaped-end seam without twist
- Skill level: Intermediate
Why You’ll Love This Project
A compact two-peak repeat makes the zigzags clear in a cowl-sized accessory. Single crochet gives the bands definition, while a loose single loop leaves room at the neck. The seam can sit at the back and follows the same ripple as the rest of the fabric.
Materials
- Planning allowance: 220 yards teal and 220 yards mustard matching soft worsted yarn
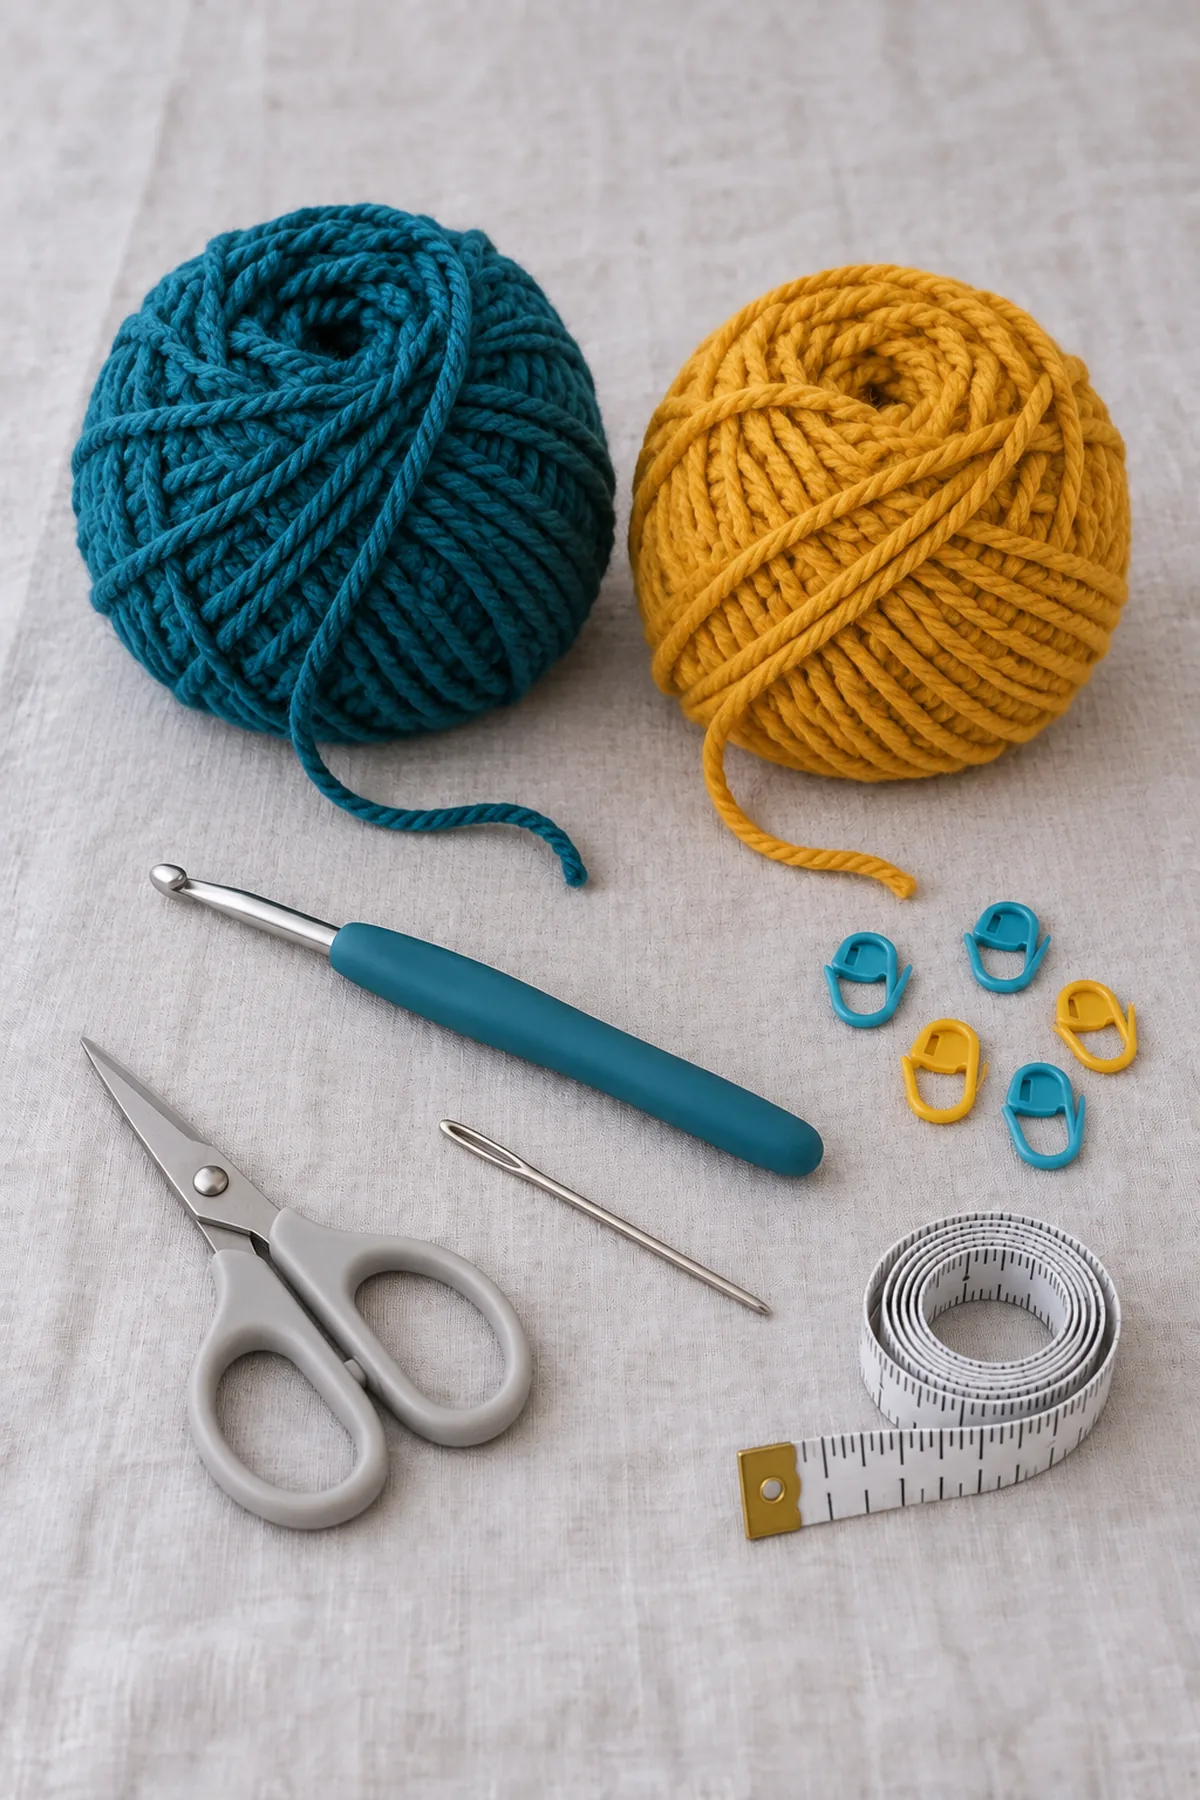
- 5 mm hook; five markers; tapestry needle; scissors; tape measure
Gauge, Measurements, and Planning
Measure row gauge down the length of a ripple swatch, not along a zigzag edge. At five rows per inch, 144 rows give 28.8 inches before the small seam allowance. The 29 stitches measure about 7.25 inches along the ripple contour, so the straight projected height is shorter, approximately 6-7 inches. Make at least twelve full rows and block before choosing hook size. Check that the planned circumference passes comfortably over your head. Add complete twelve-row teal/mustard cycles for approximately 2.4 inches more circumference; do not force a snug loop over the head.
Make and wash a gauge swatch before beginning. Measure only after the swatch is completely dry. If the stitch width differs, change hook size rather than pulling the working yarn tighter. Keep a written count at the end of every section so the finished edges remain balanced and the assembly points line up.
Abbreviations and Special Stitches
- ch: chain
- sc: single crochet
- hdc: half double crochet
- dc: double crochet
- sl st: slip stitch
- st(s): stitch(es)
- rnd: round
- BLO: back loop only
- inc: 2 stitches in one stitch
- sc2tog: single crochet two stitches together
- sp: space
- RS: right side
- WS: wrong side
- dc3tog: double crochet three together
- sc3tog: single crochet three together
Special stitch guidance: Sc2tog: insert in next stitch, yarn over and draw up a loop; repeat in next stitch, yarn over and pull through all three loops. Sc3tog: draw up one loop in each of the next three stitches, yarn over and pull through all four loops. Peak = 3 sc in one stitch. Turning ch 1 does not count. Work through both loops after the foundation, with no chain spaces at the peaks or valley.
Important Notes
- Pattern development note: stitch arithmetic and written construction have been reviewed computationally; this design has not been physically sample-tested. Gauge, yardage and finished measurements are planning targets, not a tested guarantee. Swatch and check fit before making a gift.
- Use US crochet terms. The stitch and turning-chain conventions in the instructions for this project take precedence over generic conventions.
- Turn after every flat row unless the instructions explicitly say otherwise. Mark both end stitches and count before beginning the next row.
- Change color on the final yarn-over of the preceding stitch, leaving 6-inch tails. Weave ends into their own color on the wrong side.
- Images are AI-generated design illustrations, not stitch charts or photographs of a physically tested sample. Follow the written stitch counts and measurements.
- These are adult accessories. Remove scarves for sleeping, machinery, vigorous activity or any situation in which fabric could catch; do not adapt the long wraps for babies.
Complete Instructions for Crochet Chevron Stripe Infinity Scarf
Work the First Two-Peak Ripple
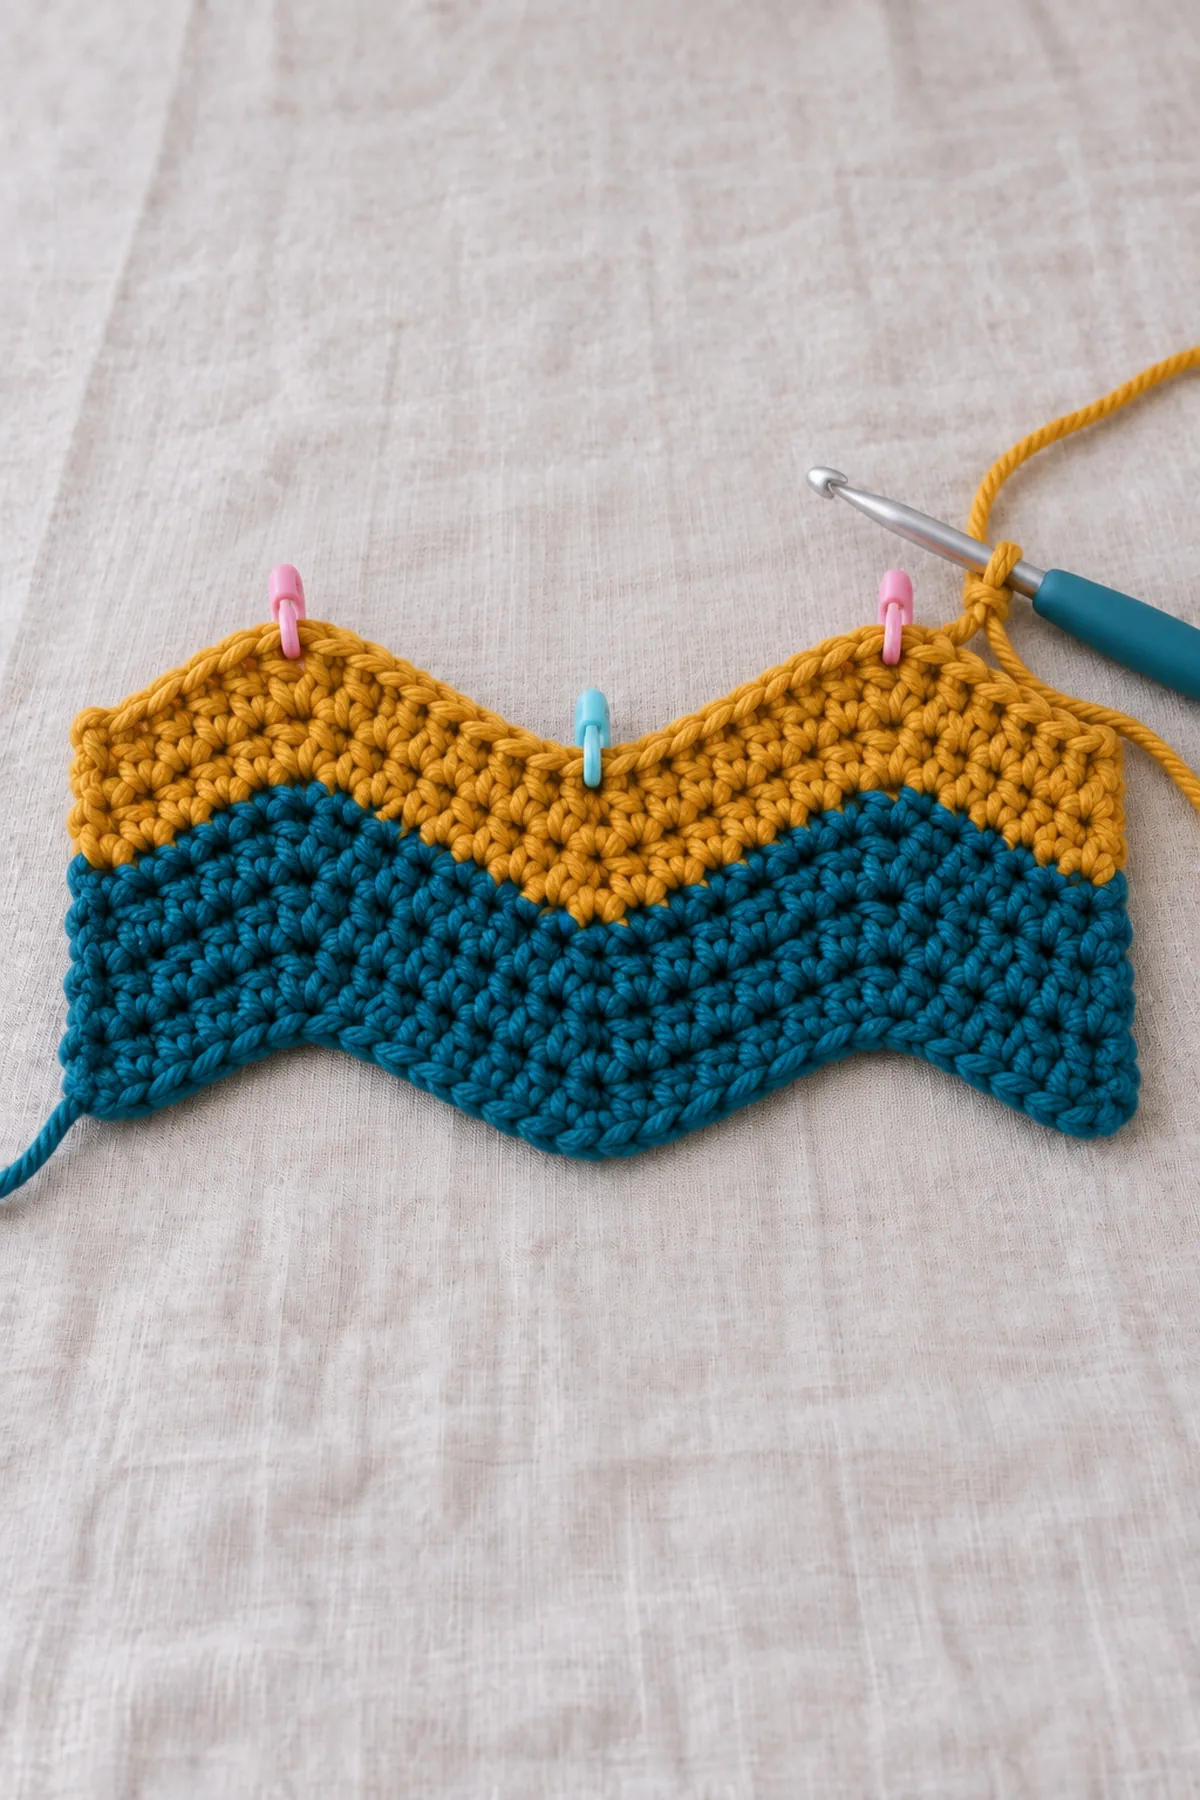
- With teal, ch 30. Row 1: beginning in second chain, sc2tog over first two positions, sc in next 5, 3 sc in next position, sc in next 5, sc3tog over next 3, sc in next 5, 3 sc in next position, sc in next 5, sc2tog over final 2. Ch 1 and turn. (29 sts)
- Foundation arithmetic: 2+5+1+5+3+5+1+5+2 = 29 chains consumed. Output: 1+5+3+5+1+5+3+5+1 = 29 sc. The initial skipped chain is the thirtieth chain and is not a stitch.
- Mark the first and last sc, the middle stitch of both three-sc peaks (positions 8 and 22), and the central valley sc (position 15). Keep those five markers aligned from row to row.
Repeat the Ripple and Six-Row Bands
- Rows 2-144: sc2tog over first two positions, sc in next 5, 3 sc in next position, sc in next 5, sc3tog over next 3, sc in next 5, 3 sc in next position, sc in next 5, sc2tog over final 2. Ch 1 and turn except after Row 144. (29 sts)
- Move peak markers to the middle new sc of each three-sc group. The valley decrease consumes the stitch immediately before the old valley, the old valley itself and the stitch immediately after it. Both edge decreases consume two stitches, never the turning chain.
- Each row adds four stitches at two peaks and removes four at the central valley and two ends: plus 4 minus 2 minus 1 minus 1 equals zero. Count 29 after every row.
-
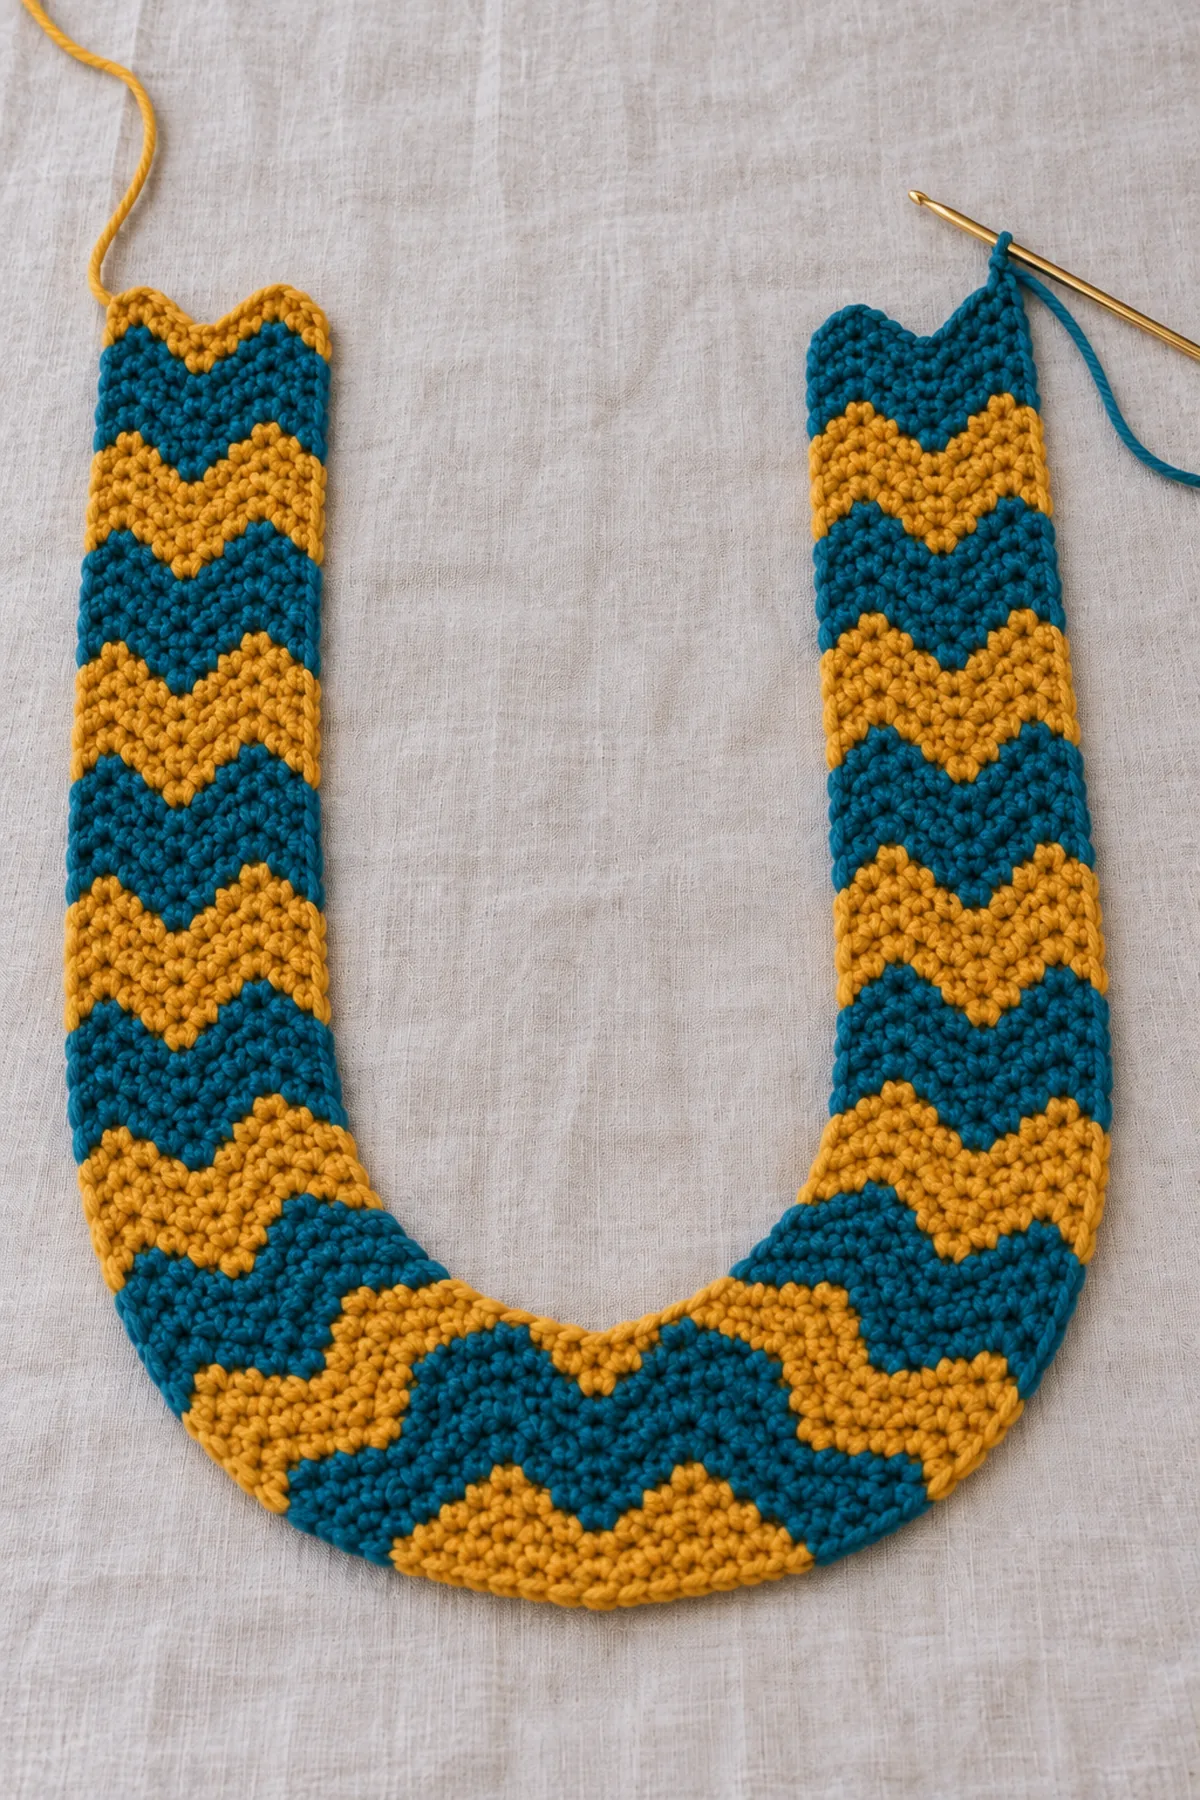
Cycle Teal rows Mustard rows 1 1-6 7-12 2 13-18 19-24 3 25-30 31-36 4 37-42 43-48 5 49-54 55-60 6 61-66 67-72 7 73-78 79-84 8 85-90 91-96 9 97-102 103-108 10 109-114 115-120 11 121-126 127-132 12 133-138 139-144 - Change color on the final yarn-over of the last decrease before each new band. Cut and weave old colors into their own bands. After Row 144, leave a 24-inch mustard sewing tail. Do not add a straightening row or a twist.
Join a Single Untwisted Loop
- Wash and block the strip lightly before seaming. Keep the ripple shape at both short ends instead of stretching them into straight lines.
- Lay the entire strip RS up. Bring its two short ends together, keeping both long edges on their own side, as if curling a sheet of paper into a cylinder. Pin the five matching markers. No half turn is introduced.
- Use the long tail to sew 29 matching positions, working under one available foundation-chain loop and one corresponding final-row loop per position. Keep the seam flexible. Walk a finger along each long edge: each must return to its starting point without switching edges.
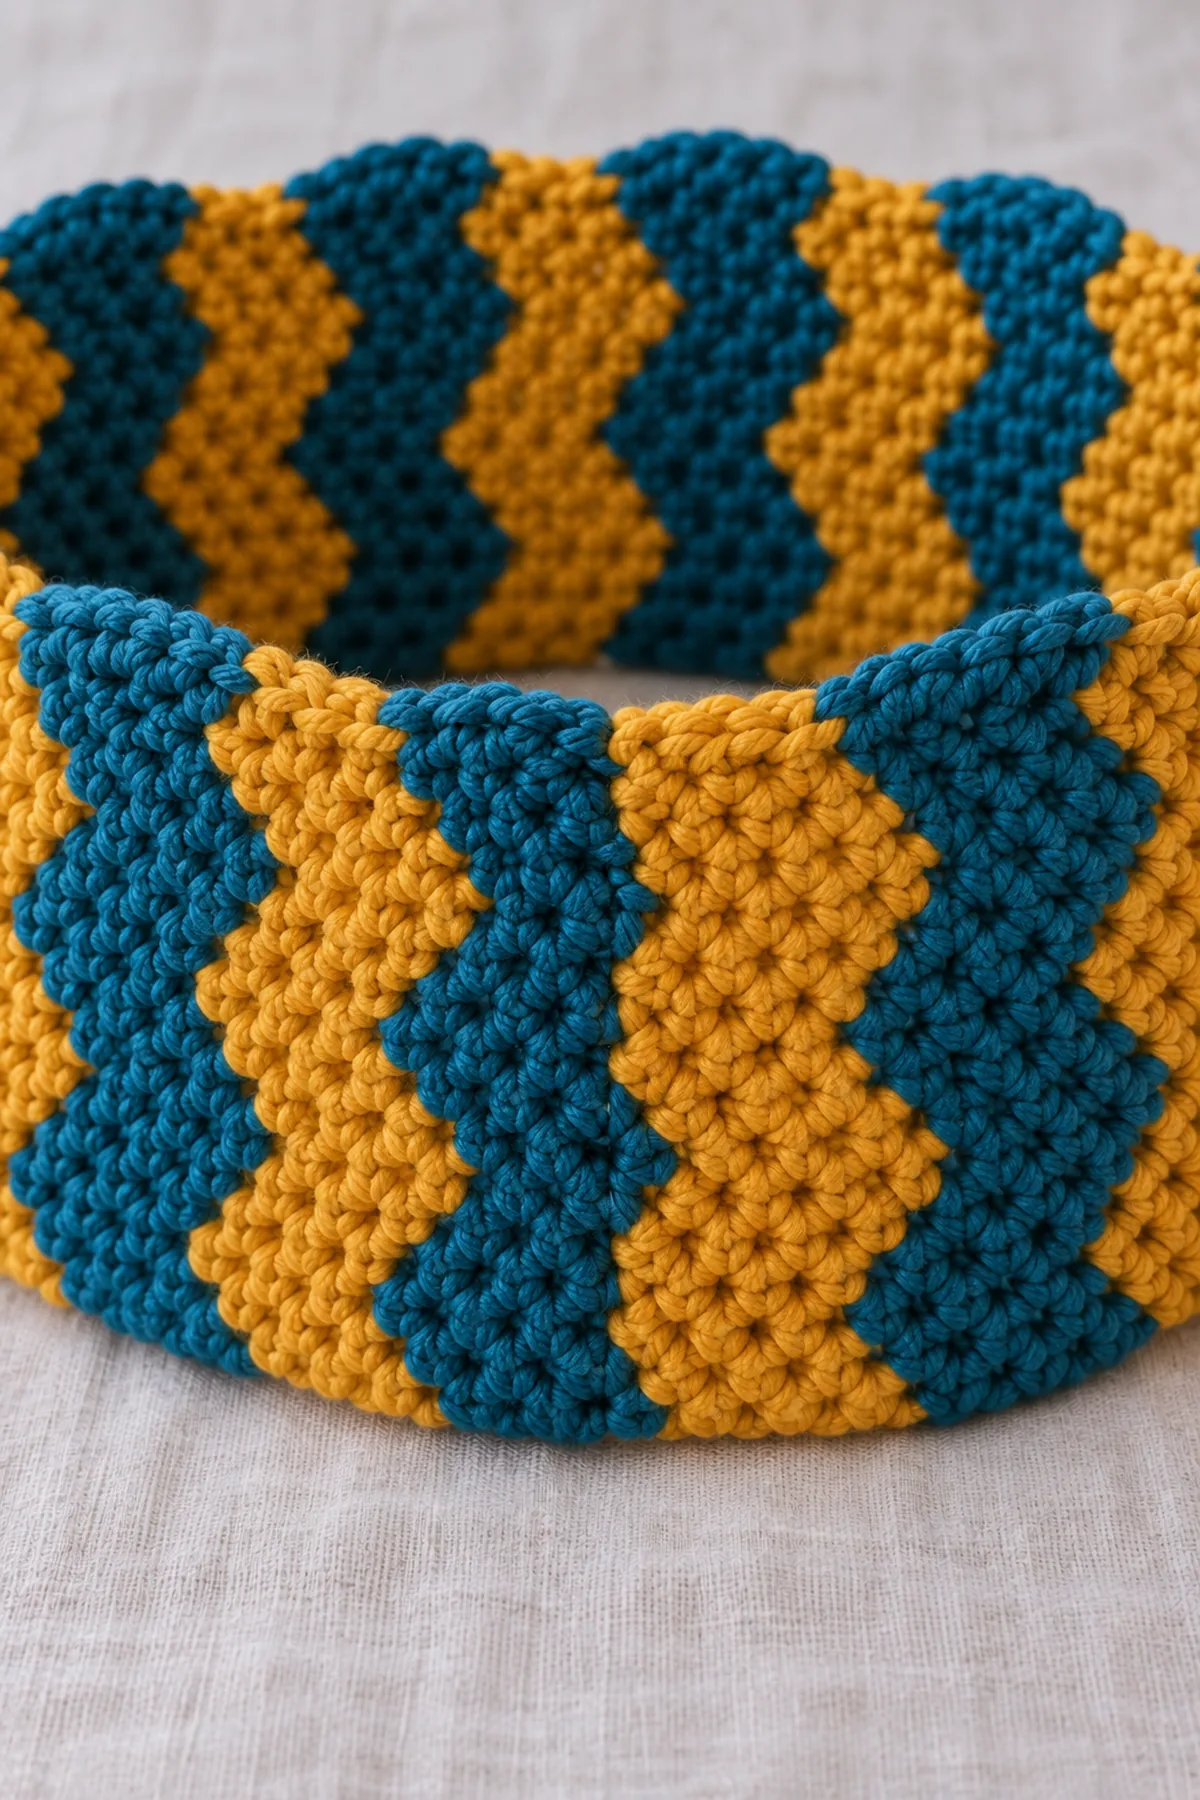
- Try the loop gently over the head before hiding the tail. If it is too small, unseam and add a complete twelve-row color cycle; allow additional yarn. Wear as one loose loop and remove for sleep or activity.
Assembly and Shaping
With RS facing out, bring the two short ripple ends together without rotating either end. Match the first edge, both peak markers, the central valley and the final edge. Whipstitch one foundation-chain position to the corresponding final-row top for all 29 positions, with a relaxed seam. Check the loop lies as an untwisted cylinder before securing the tail.
Use the project-specific finishing above. Do not join a scarf that is meant to stay open; only the infinity-loop and sleeve-wrap designs have the explicitly described seams.
Finishing
- Fasten off with a 6-inch tail; weave through three separate groups of stitches, changing direction twice.
- Damp-block gently according to the fiber label, check the intended shape, and dry fully before assembly or use.
- Inspect both sides, all joins, and every decorative attachment; resecure a loose stitch before gifting.
- Include the fiber content and washing instructions with the finished item. Keep the item away from candles and other heat sources.
For a polished result, weave each tail through several same-color stitches, reverse direction once, and trim only after the fabric has been gently stretched. Block to the listed dimensions without flattening textured stitches. Inspect joins, borders, straps, and decorative pieces before the project is used or gifted.
Helpful Tips
- Wash and dry the swatch before measuring; fiber and tension affect the drape.
- Use removable markers at both ends and a row tally for each color block.
- Check the shape on a flat surface after every color change rather than pulling an uneven edge into place.
- Keep the yarn label and your actual measurements with the finished project.
Good lighting and a contrasting stitch marker make counting much easier. If a section looks uneven, compare the current count with the previous checkpoint before continuing. Fixing one missed stitch early is faster than compensating later, and it preserves the measurements used by the assembly instructions.
Frequently Asked Questions
Can I change the colors?
Yes. Keep the yarn weight and fiber behavior consistent and use enough contrast for the decorative detail. Make a washed swatch with every major yarn substitution.
Is this pattern physically tested?
No physical sample test is claimed. The stitch counts are computationally checked and the written construction is reviewed. Make a gauge swatch, use the measurement checkpoints, and test fit or assembly before gifting.
Can I make this a double-wrap infinity scarf?
This pattern is sized as a single loop. A double-wrap version needs a separately planned circumference and more yarn; do not tighten or stretch this short loop into two wraps.
Conclusion
Keep the completed measurements and your yarn details with your pattern notes. The finished piece should match the described construction before it is styled or gifted. If a checkpoint does not match, correct the underlying count or gauge instead of concealing the difference during finishing.
BabyYarnie Printable Crochet Pattern Card
BabyYarnie — easy-to-follow crochet for everyday makers.
Project: Crochet Chevron Stripe Infinity Scarf
Skill level: Intermediate Hook: 5 mm, adjusted to gauge Yarn: Worsted
Finished size: Adult single loop target approximately 29-inch circumference and 6-7-inch projected height; not a double-wrap scarf
Card Materials
- Planning allowance: 220 yards teal and 220 yards mustard matching soft worsted yarn
- 5 mm hook; five markers; tapestry needle; scissors; tape measure
Card Instructions
- Work the First Two-Peak Ripple: Ch 30; shaped first row consumes 29 chains and produces 29 sc in two peaks.
- Repeat the Ripple and Six-Row Bands: Repeat the same 29-stitch ripple for 144 rows; alternate six teal and six mustard rows twelve times.
- Join a Single Untwisted Loop: Match 29 shaped positions and sew without twisting; confirm comfortable head clearance.
Finish: Check every count, weave in all ends, block to measurement, and inspect each join.