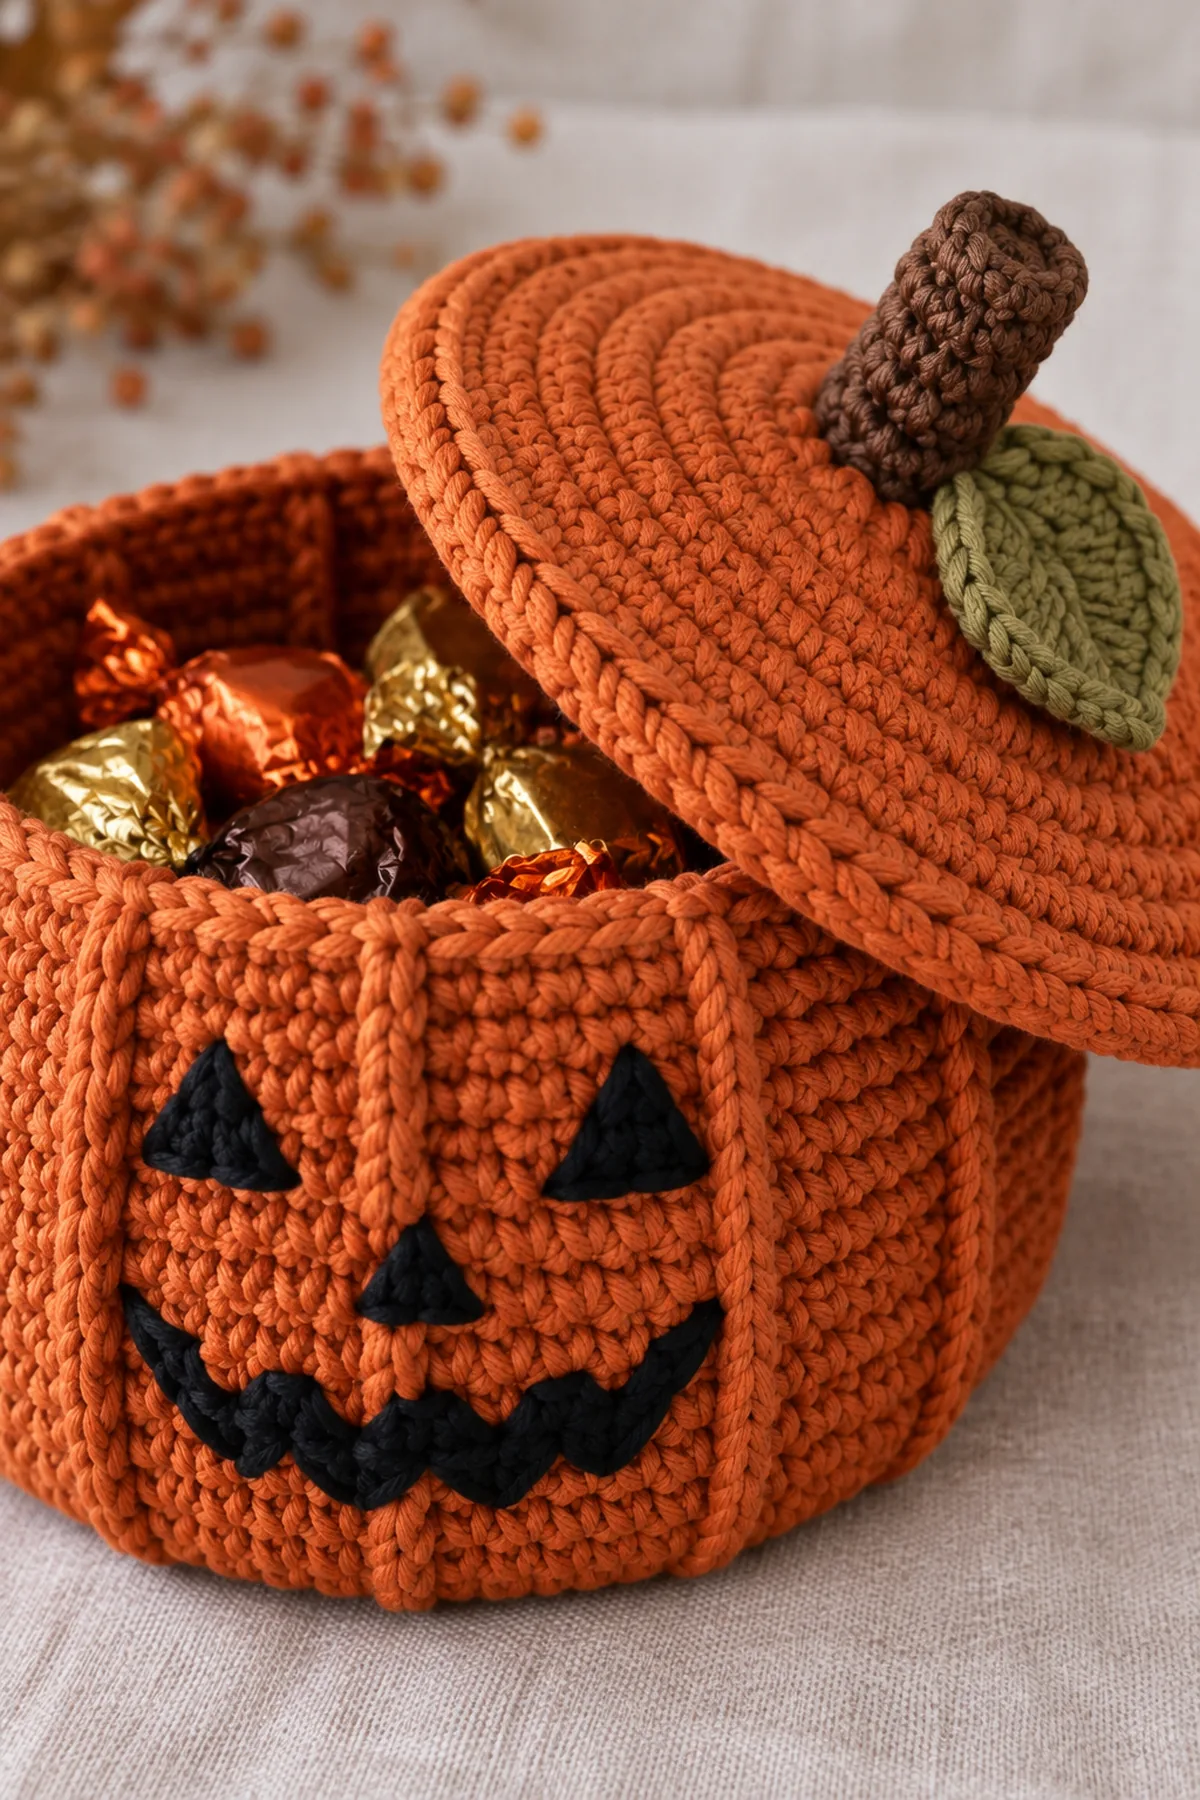
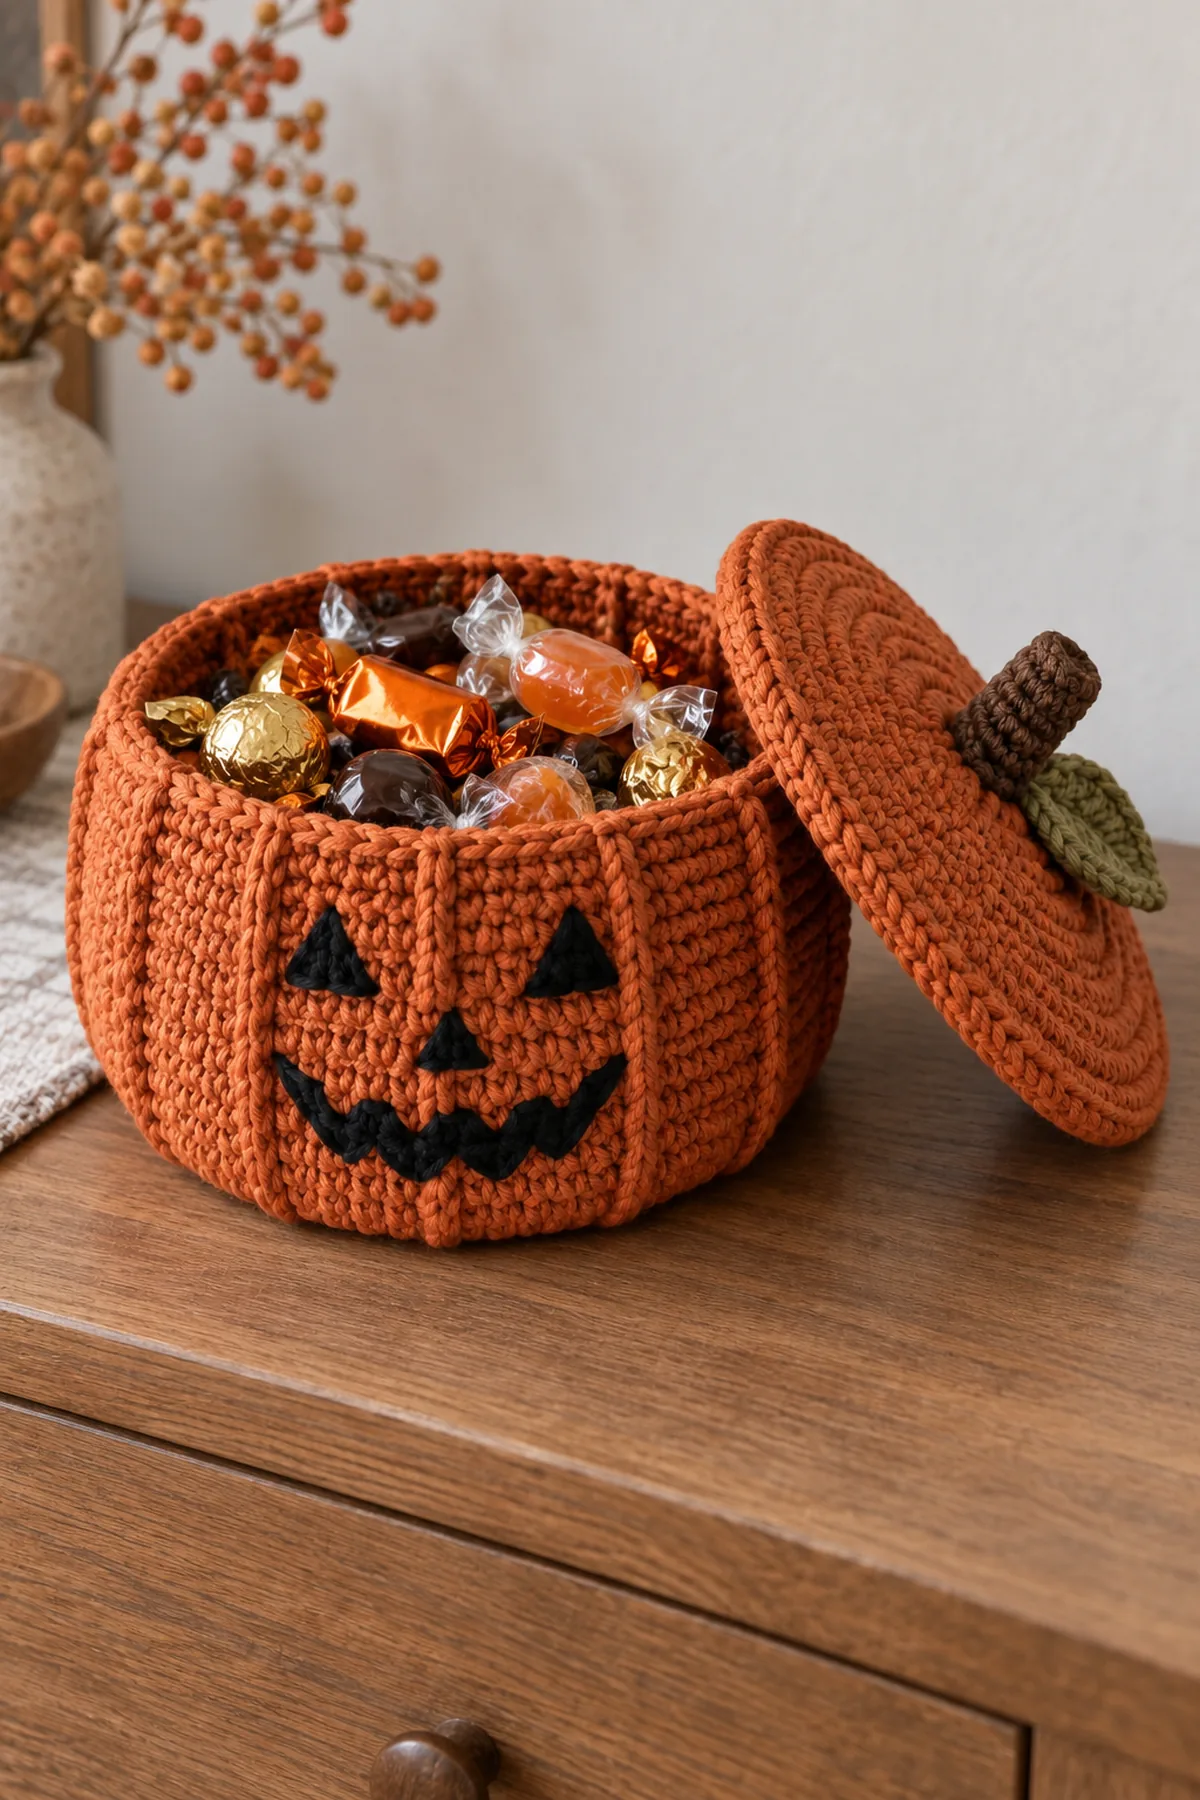
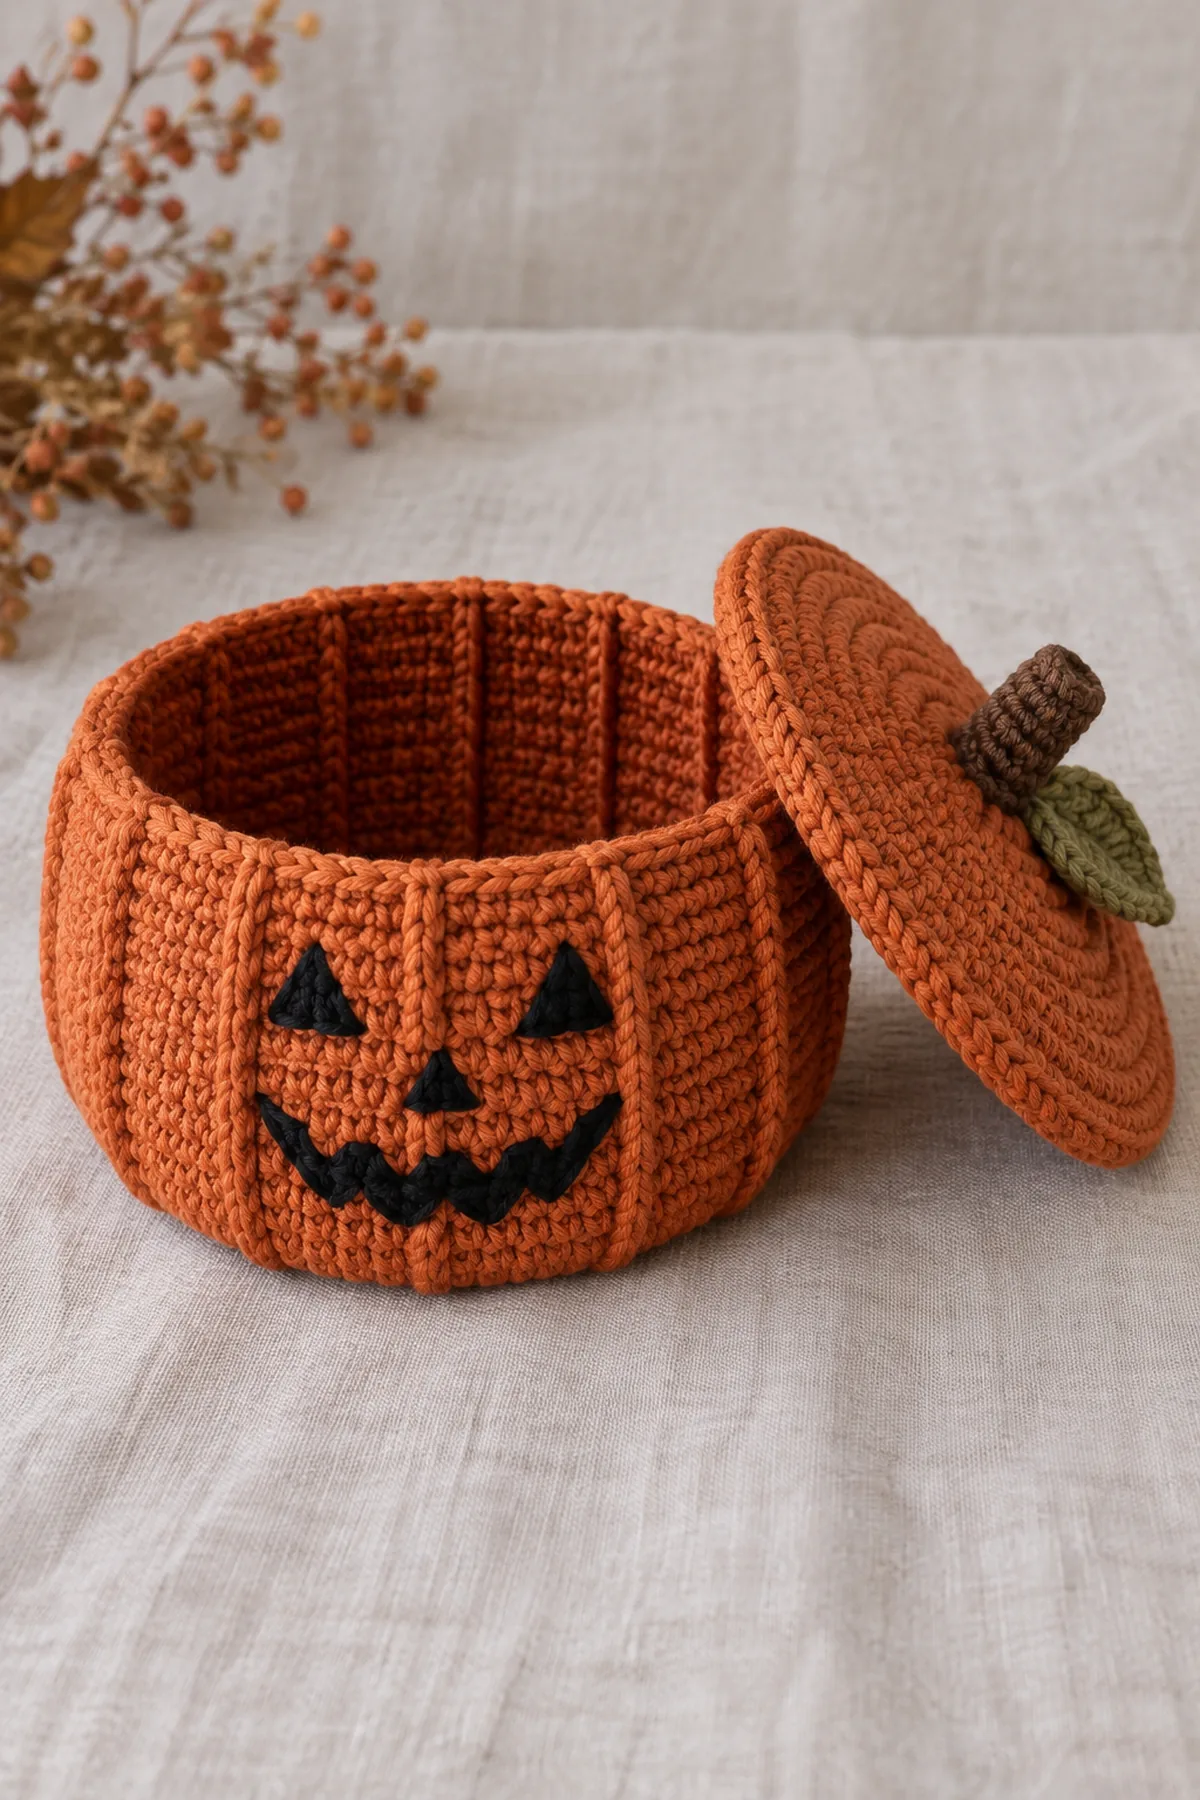
This crochet jack o lantern basket brings a practical handmade detail to Halloween. Squat hollow burnt-orange cotton basket with vertical post-stitch ribs, stitched angular face and separate fitted leaf-and-stem lid; use wrapped treats only. The instructions below describe the construction in US crochet terms. Choose yarn for the fabric structure rather than color alone, and compare each checkpoint with your own swatch before continuing.
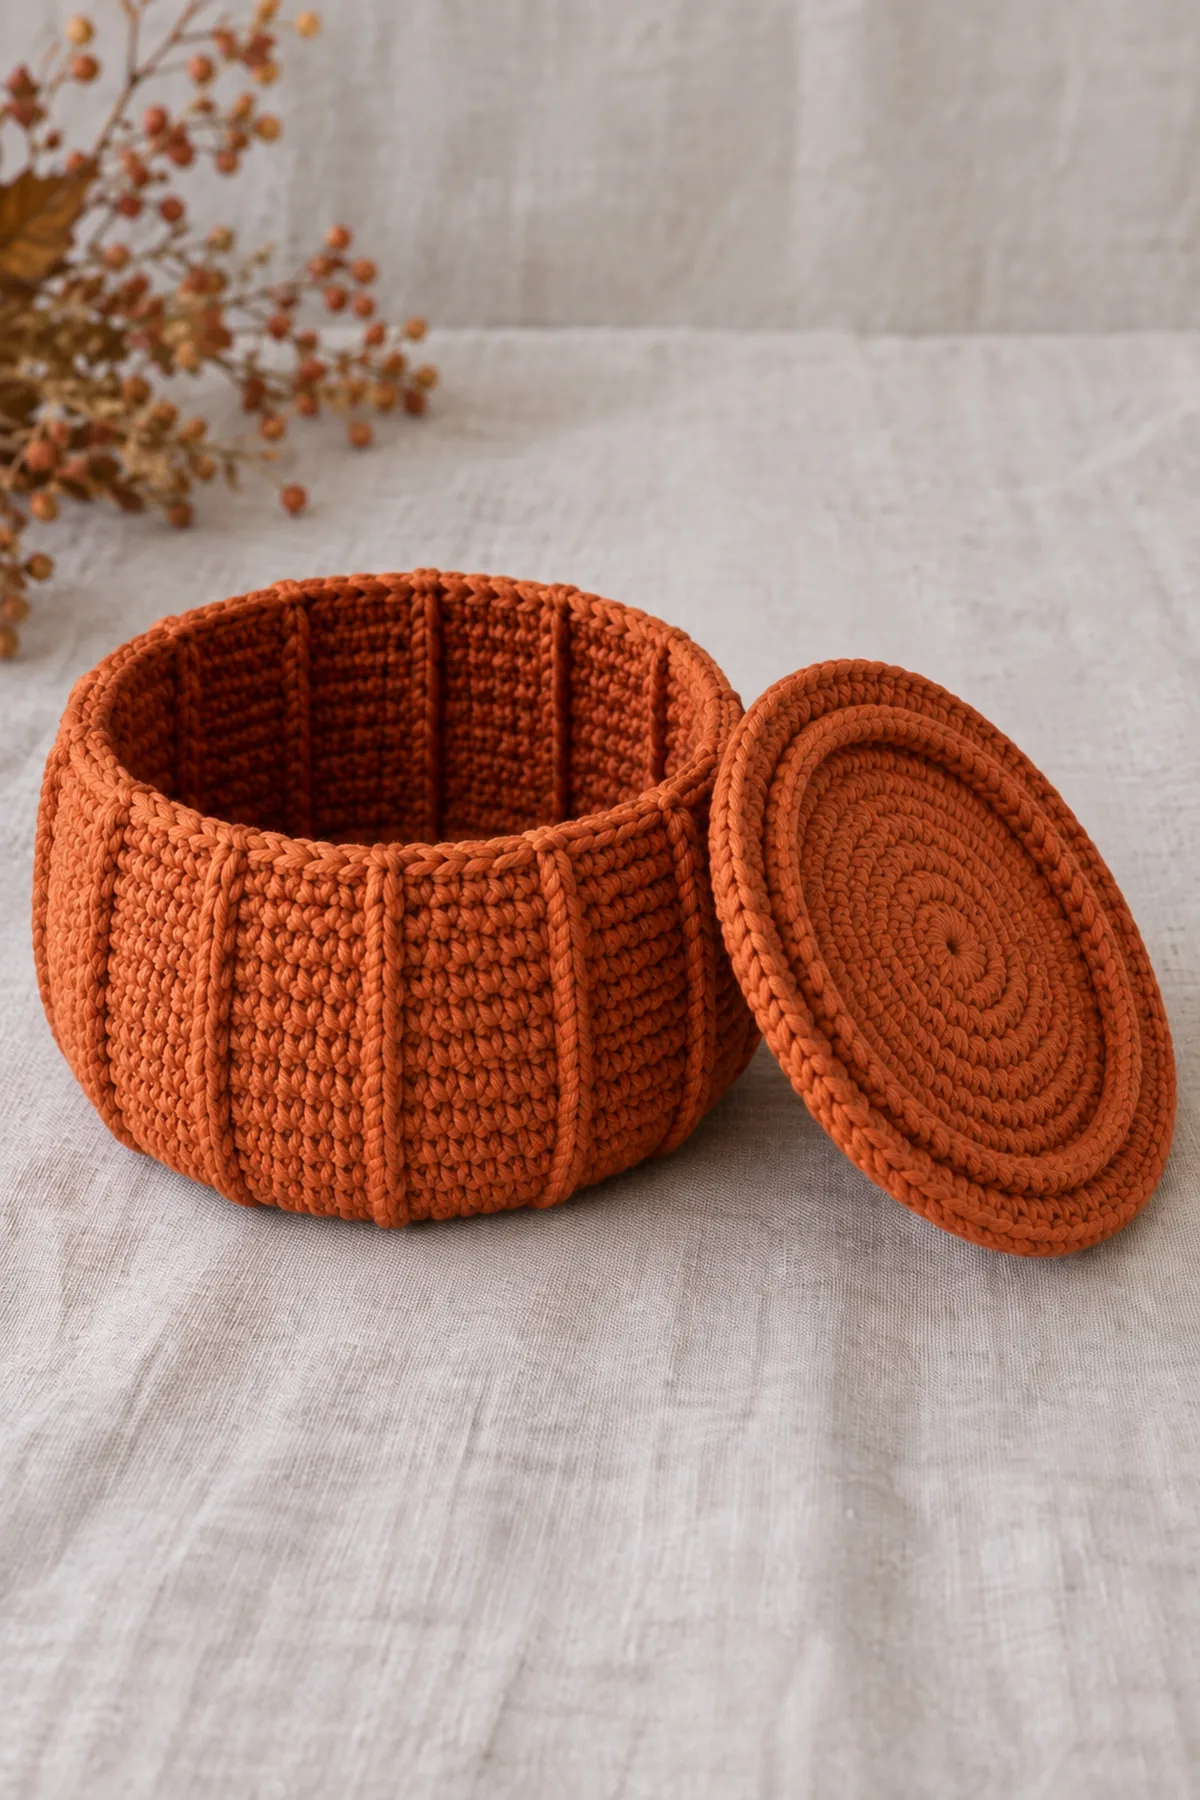
The basket is a hollow double-crochet cylinder with twelve raised post-stitch ribs. A separate flat lid overhangs the opening; a smaller inner lip keeps it centered. The face is embroidered, while the stem and leaf are permanently sewn to the lid. This is a decorative holder for wrapped treats, not a food-safe bowl.
Pattern Details
- Hook Size: 4.5 mm for body/lid; 4 mm for stem and leaf
- Finished Size: Target: basket about 6.5 inches across and 4 inches high; lid about 7.6 inches across excluding stem
- Gauge: Target: 14 dc and 8 rounds = 4 inches; sc approximately 16 stitches = 4 inches
- Estimated Time: 5-7 hours
- Construction: Circular base, post-stitch walls, separate overhanging lid with inner lip
- Skill level: Intermediate
Why You’ll Love This Project
The decoration is part of a useful, deliberately shaped project rather than a generic motif added to an unrelated pattern. Separate construction stages make counting manageable, while the limited palette keeps the silhouette readable. You can pause between components and check the measurements before committing to final assembly.
Materials
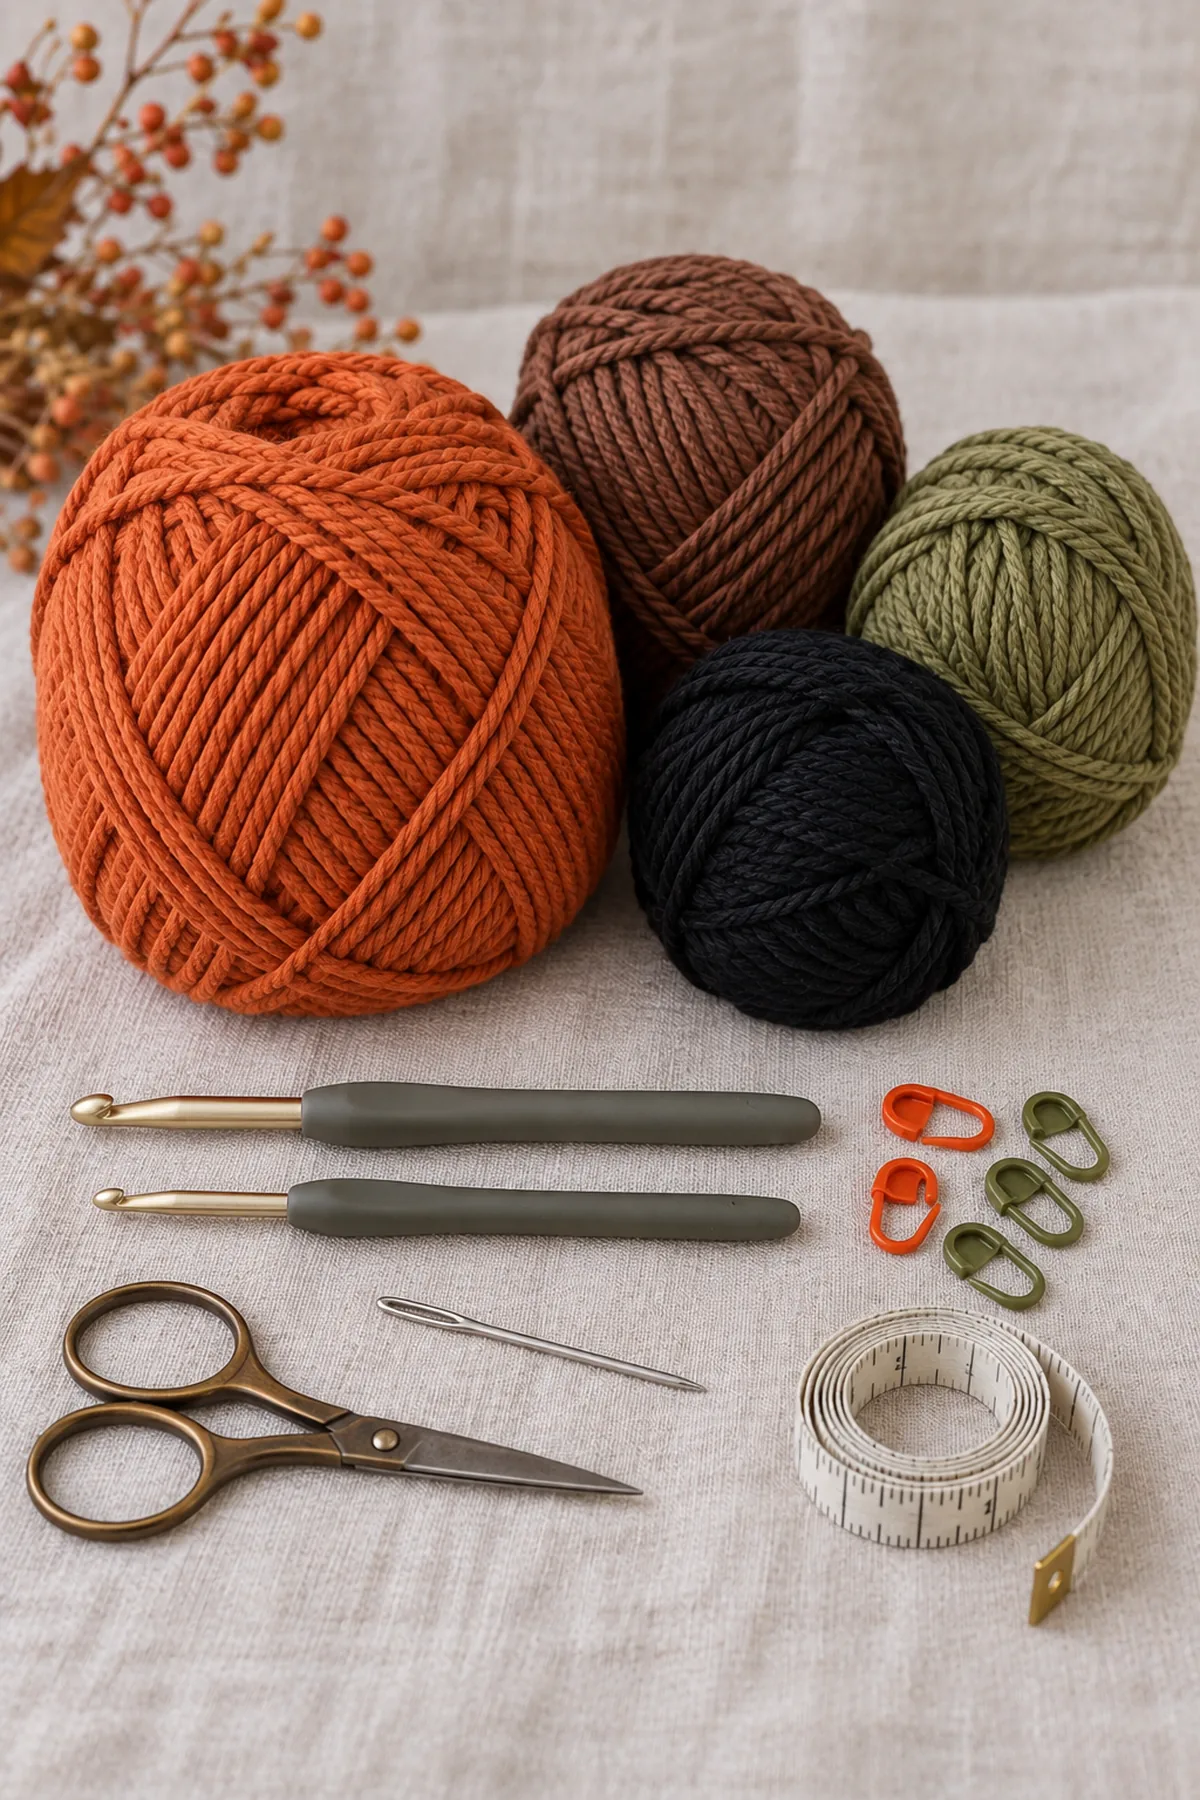
- Estimated 260 yards firm worsted cotton in burnt orange
- Estimated 25 yards brown, 20 yards olive and 12 yards black matching cotton
- 4.5 mm and 4 mm hooks, markers, yarn needle, scissors, tape measure and a small scrap of yarn for stem stuffing
Gauge, Measurements, and Planning
The 72-stitch wall gives a target circumference of 72 divided by 3.5, or approximately 20.6 inches; the corresponding diameter is about 6.5 inches. Measure the base before turning up the walls. The lid grows to 84 stitches for an overhang, while its separate inner lip decreases to 66 sc. Test the lip in your own basket before sewing the stem on; differences between dc and sc gauge affect the fit.
Make and wash a gauge swatch before beginning. Measure only after the swatch is completely dry. If the stitch width differs, change hook size rather than pulling the working yarn tighter. Keep a written count at the end of every section so the finished edges remain balanced and the assembly points line up.
Abbreviations and Special Stitches
- ch: chain
- sc: single crochet
- hdc: half double crochet
- dc: double crochet
- sl st: slip stitch
- st(s): stitch(es)
- rnd: round
- BLO: back loop only
- inc: 2 stitches in one stitch
- sc2tog: single crochet two stitches together
Special stitch guidance: Fpdc (front-post double crochet): yarn over, insert hook front-to-back-to-front around the post of the next stitch, yarn over and draw up a loop, then complete a dc. The fpdc replaces the ordinary stitch at that position; do not also work into its top. Sc2tog draws up a loop in each of two successive stitches and closes all three loops together.
Important Notes
- Pattern development note: stitch arithmetic and written construction have been reviewed computationally; this design has not been physically sample-tested. Gauge, yardage and finished measurements are planning targets, not a tested guarantee. Swatch and check fit before making a gift.
- Beginning ch 1 or ch 2 and joining slip stitches never count as stitches. Mark the first counted stitch of each round and move the marker after completing the round.
- On flat rows, turn after each row and work the first stitch into the last stitch of the previous row. On joined rounds, join to the first counted stitch and do not turn unless specifically instructed.
- Change color on the final yarn-over of the stitch before the new color is needed. Leave a 6-inch tail and weave it back and forth through same-color stitches after construction.
- Use the written stitch counts for structure and your washed gauge for dimensions. Do not silently add shaping increases to correct a measurement; make a fresh swatch with a different hook first.
Complete Instructions for Crochet Jack-o-Lantern Lidded Candy Basket
Make the Flat Basket Base
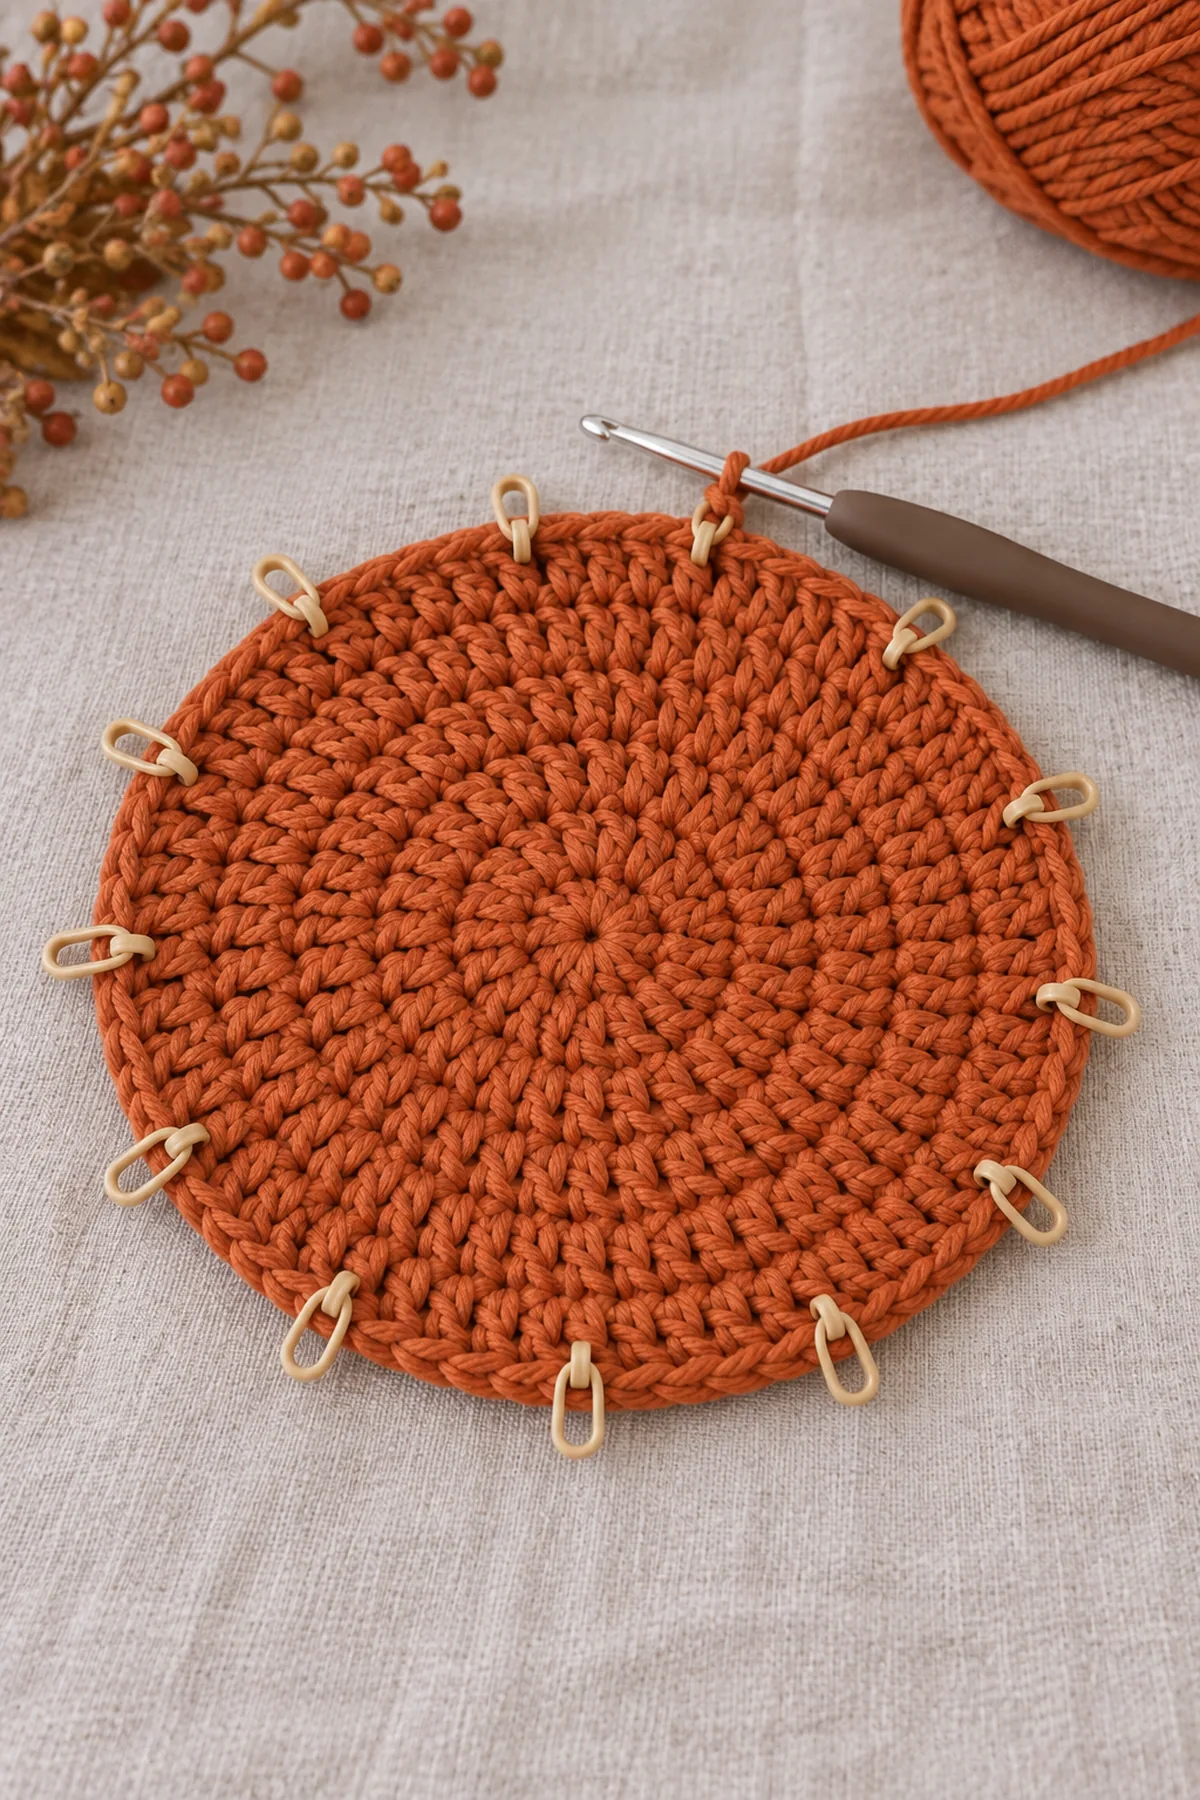
- Basket Rnd 1: make magic ring, ch 2 (not counted), work 12 dc into ring; join first dc and close ring. Do not turn. (12 sts)
- Basket Rnd 2: ch 2; [dc in next 0 stitches, 2 dc in next] twelve times, omitting plain dc if zero. Join first dc; do not turn. (24 sts)
- Basket Rnd 3: ch 2; [dc in next 1 stitches, 2 dc in next] twelve times, omitting plain dc if zero. Join first dc; do not turn. (36 sts)
- Basket Rnd 4: ch 2; [dc in next 2 stitches, 2 dc in next] twelve times, omitting plain dc if zero. Join first dc; do not turn. (48 sts)
- Basket Rnd 5: ch 2; [dc in next 3 stitches, 2 dc in next] twelve times, omitting plain dc if zero. Join first dc; do not turn. (60 sts)
- Basket Rnd 6: ch 2; [dc in next 4 stitches, 2 dc in next] twelve times, omitting plain dc if zero. Join first dc; do not turn. (72 sts)
Build the Ribbed Walls
- Rnd 7: ch 2; dc BLO in all 72 stitches, join without turning. This makes the base-to-wall fold. (72 sts)
- Rnds 8-14: ch 2; [fpdc around next post, dc in next five stitches] twelve times. Join first fpdc and do not turn. The post stitch in each repeat stacks on the previous post stitch. (72 sts)
- Rnds 15-16: ch 1; sc in each stitch, join first sc without turning. Fasten off after Rnd 16. (72 sts)
- Check that the bottom lies flat and the twelve ribs are vertical. Wash/block over a suitable bowl only if your yarn care label allows it; let it dry and remove the support before use.
Crochet the Overhanging Lid and Inner Lip
- Lid Rnds 1-6: repeat the six base rounds exactly, using orange yarn and 4.5 mm hook. End with 72 dc. (72 sts)
- Lid Rnd 7: ch 2; in BLO [dc in next five stitches, 2 dc in next] twelve times; join first dc. Leave the unused front loops of Round 6 accessible beneath the lid edge. (84 sts)
- Lid Rnd 8: ch 1; sc in every stitch; join and fasten off. (84 sts)
- Turn lid underside toward you. Attach orange to an unused Round-6 front loop. Lip Rnd 1: ch 1; [sc in next ten unused loops, sc2tog over next two unused loops] six times; join. These operations consume all 72 unused loops and make 66 stitches. (66 sts)
- Lip Rnd 2: ch 1; sc in every lip stitch, join and fasten off. (66 sts)
- Fold the small lip down into the basket opening. It should sit inside without buckling the lid. If it is too loose or too tight, redo only the two lip rounds with a larger or smaller hook, then retest; keep the stated stitch counts. Do not stretch the basket rim to force a fit.
Stem, Leaf and Jack-o-Lantern Face
- Stem with brown and 4 mm hook: make 6 sc in a magic ring. (6 sts) Work three further continuous rounds of 6 sc. Put a small yarn scrap inside, leave the bottom open and fasten off with a sewing tail. Sew the open bottom to the lid center, catching all six bottom stitches twice.
- Leaf with olive and 4 mm hook: ch 7. Starting in second chain: sc, hdc, dc, dc, hdc, then 3 sc in the final chain. Rotate to the unused underside of the chain: hdc, dc, dc, hdc, then 2 sc into the same chain as the first sc. Join to the first sc; fasten off. (14 sts)
- Sew the leaf base beside the stem with three small stitches, leaving the leaf tip free. Embroider the black face as described under Assembly, securing every yarn end on the inside.
- Use only individually wrapped sweets, or place a separate removable food-safe container inside. The crochet itself is not food-safe, heatproof or washable with candy inside; remove contents before cleaning.
Assembly and Shaping
Embroider the face on the empty basket so you can reach the inside and hide yarn tails. For each eye, outline a triangle three stitches wide and two wall rounds high; fill it with short satin stitches. Place the eyes symmetrically with two ribs between their centers. Add a small triangular nose and an eight-stitch-wide zigzag smile below, keeping embroidery out of the lid opening. Sew the stem and leaf to the lid center with repeated small stitches through the base, not glue.
Lay every component on a flat surface before joining. Match the marked centers first, then divide each remaining edge into equal sections. Work through both layers with consistent tension and pause after each section to check that the fabric lies flat. This measured approach prevents twisting and keeps decorative details facing the intended direction.
Finishing
- Fasten off with a 6-inch tail; weave through three separate groups of stitches, changing direction twice.
- Damp-block gently according to the fiber label, check the intended shape, and dry fully before assembly or use.
- Inspect both sides, all joins, and every decorative attachment; resecure a loose stitch before gifting.
- Include the fiber content and washing instructions with the finished item. Keep the item away from candles and other heat sources.
For a polished result, weave each tail through several same-color stitches, reverse direction once, and trim only after the fabric has been gently stretched. Block to the listed dimensions without flattening textured stitches. Inspect joins, borders, straps, and decorative pieces before the project is used or gifted.
Helpful Tips
- Count in small marked sections instead of counting an entire dark-colored edge repeatedly.
- Use a pale working surface behind black yarn so both loops of the stitch remain visible.
- Keep a row tally and record your swatch measurements beside the size you selected.
- If shaping ripples or pulls, stop at that checkpoint and compare counts and gauge before progressing.
Good lighting and a contrasting stitch marker make counting much easier. If a section looks uneven, compare the current count with the previous checkpoint before continuing. Fixing one missed stitch early is faster than compensating later, and it preserves the measurements used by the assembly instructions.
Frequently Asked Questions
Can I change the colors?
Yes. Keep the yarn weight and fiber behavior consistent and use enough contrast for the decorative detail. Make a washed swatch with every major yarn substitution.
Is this pattern physically tested?
No physical sample test is claimed. The stitch counts are computationally checked and the written construction is reviewed. Make a gauge swatch, use the measurement checkpoints, and test fit or assembly before gifting.
Can a beginner make this?
This is an intermediate project because shaping and assembly require careful counting. Practise the named special stitches in a small swatch before working the main piece.
Conclusion
Keep the completed measurements and your yarn details with your pattern notes. The finished piece should match the described construction before it is styled or gifted. If a checkpoint does not match, correct the underlying count or gauge instead of concealing the difference during finishing.
BabyYarnie Printable Crochet Pattern Card
BabyYarnie — easy-to-follow crochet for everyday makers.
Project: Crochet Jack-o-Lantern Lidded Candy Basket
Skill level: Intermediate Hook: 4.5 mm for body/lid; 4 mm for stem and leaf Yarn: Worsted
Finished size: Target: basket about 6.5 inches across and 4 inches high; lid about 7.6 inches across excluding stem
Card Materials
- Estimated 260 yards firm worsted cotton in burnt orange
- Estimated 25 yards brown, 20 yards olive and 12 yards black matching cotton
- 4.5 mm and 4 mm hooks, markers, yarn needle, scissors, tape measure and a small scrap of yarn for stem stuffing
Card Instructions
- Make the Flat Basket Base: Six joined increase rounds from 12 to 72 dc.
- Build the Ribbed Walls: Turn wall at Round 7, make seven post-rib rounds and finish with two sc rim rounds.
- Crochet the Overhanging Lid and Inner Lip: Grow separate lid to 84 stitches, then use unused loops to make a 66-stitch inner centering lip.
- Stem, Leaf and Jack-o-Lantern Face: Six-stitch stem for four rounds, fourteen-stitch leaf; sew permanently and embroider face.
Finish: Check every count, weave in all ends, block to measurement, and inspect each join.