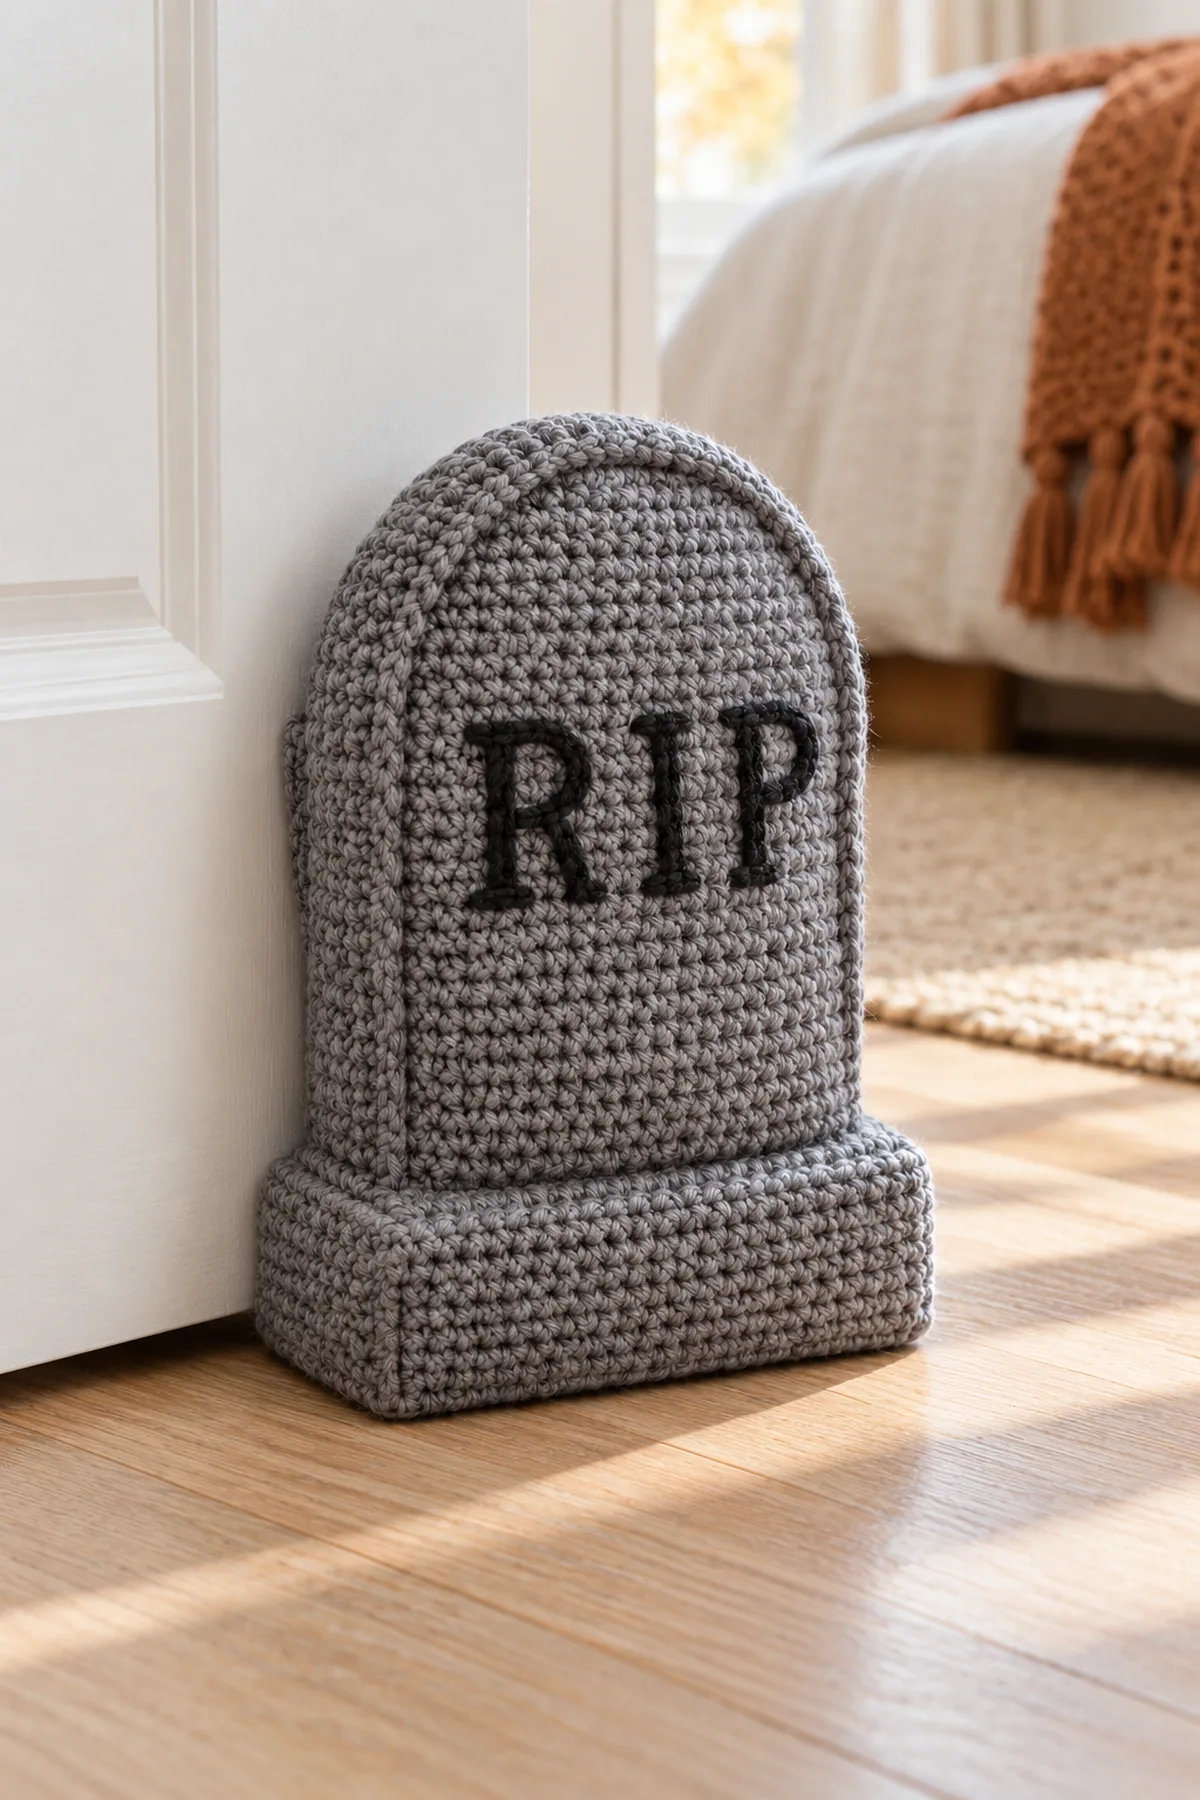
This original crochet tombstone doorstop with removable weight pouch is a crochet tombstone doorstop designed as a complete crochet project, not a motif attached to an unrelated base. The written directions use US crochet terms and name the shaping and assembly checkpoints. Work a washed swatch and compare the finished measurements with the intended use before continuing.
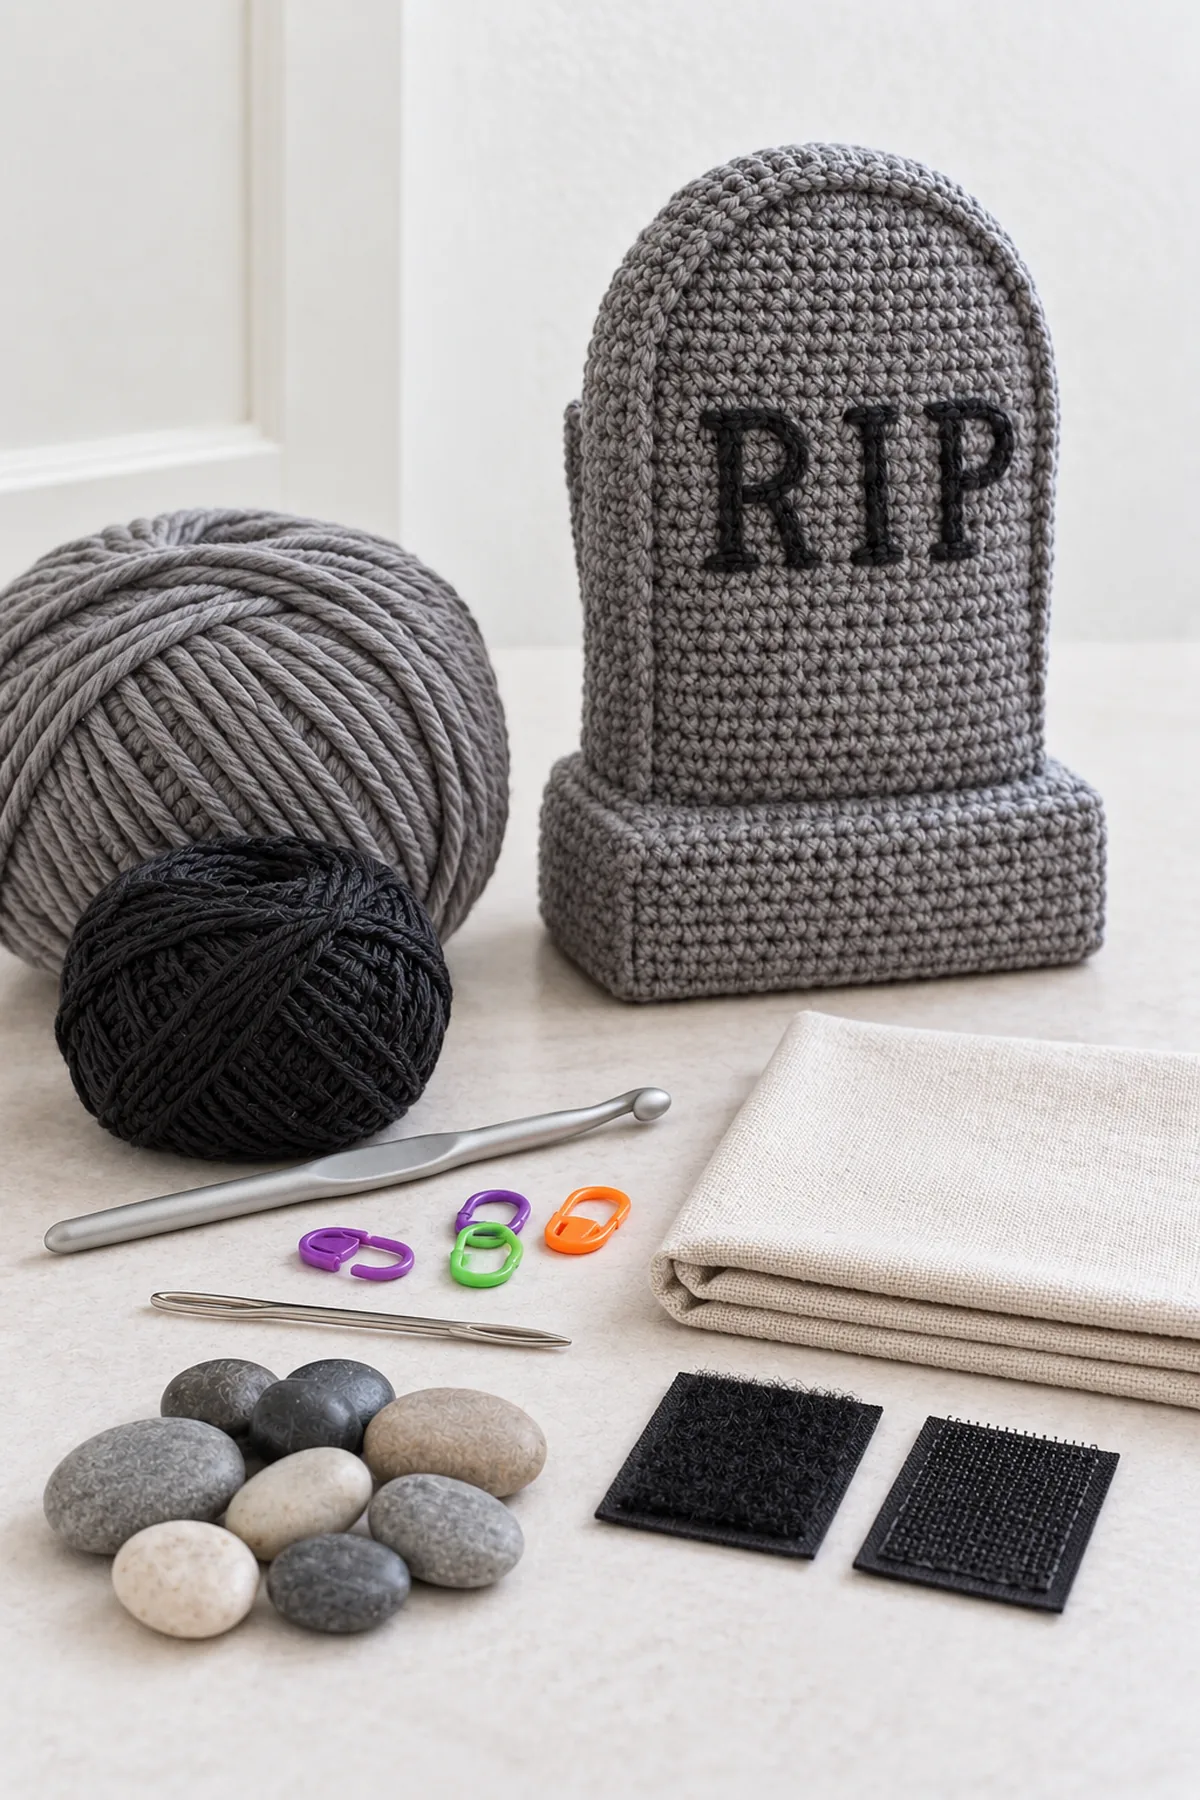
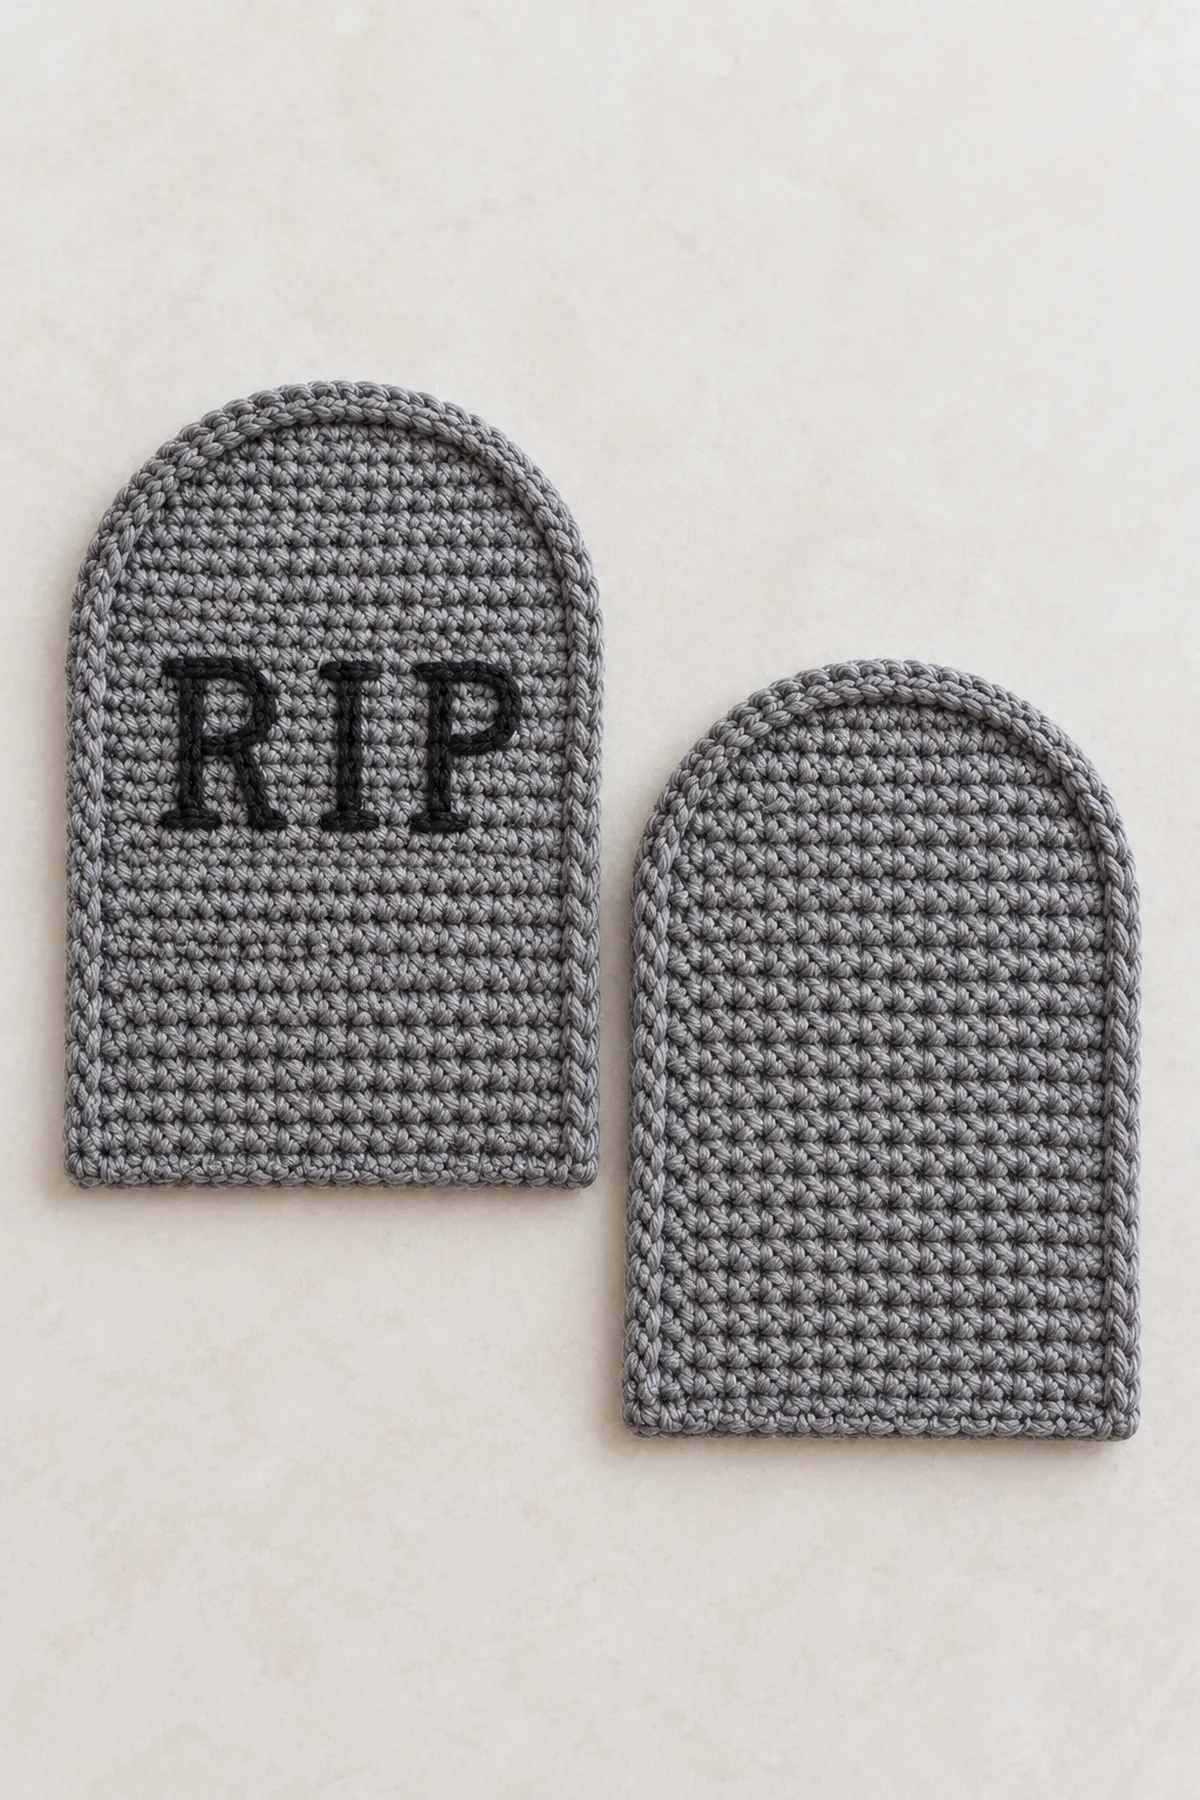
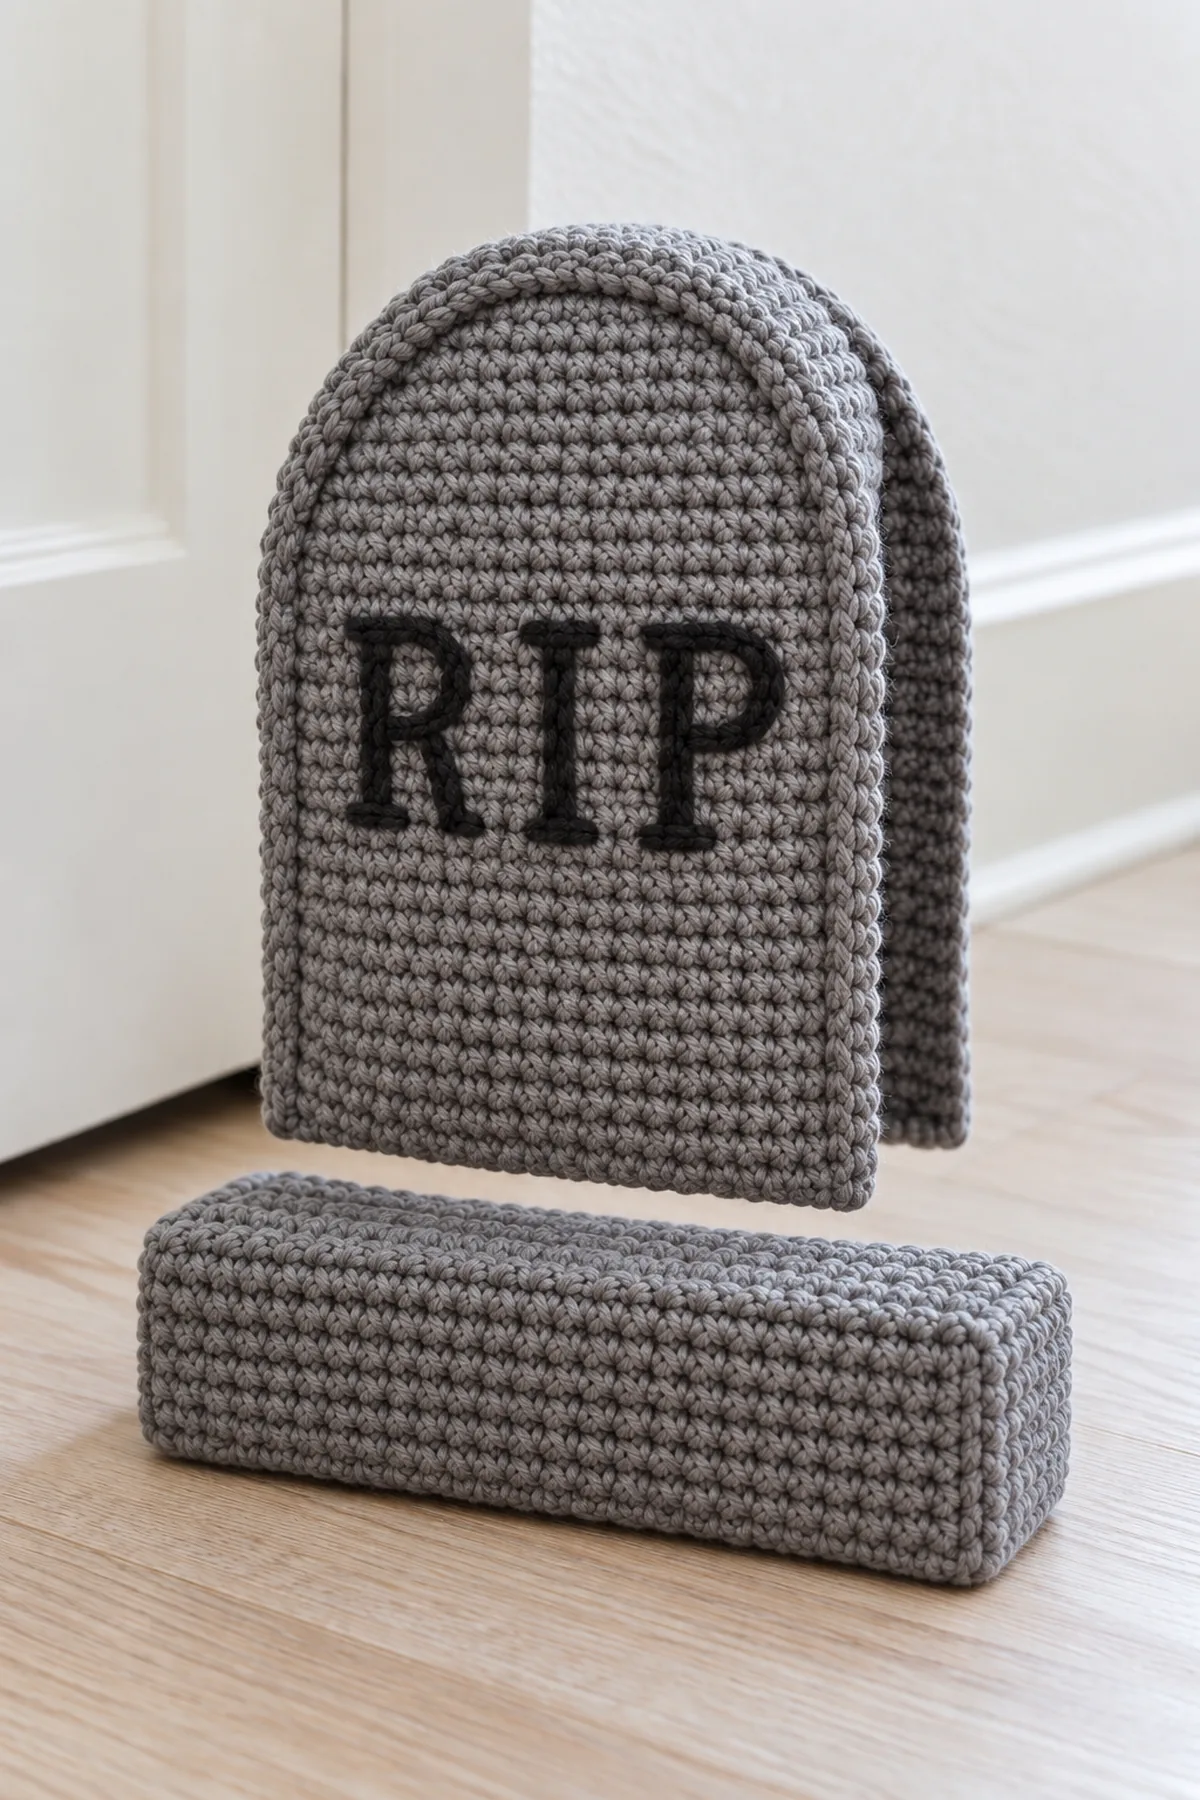
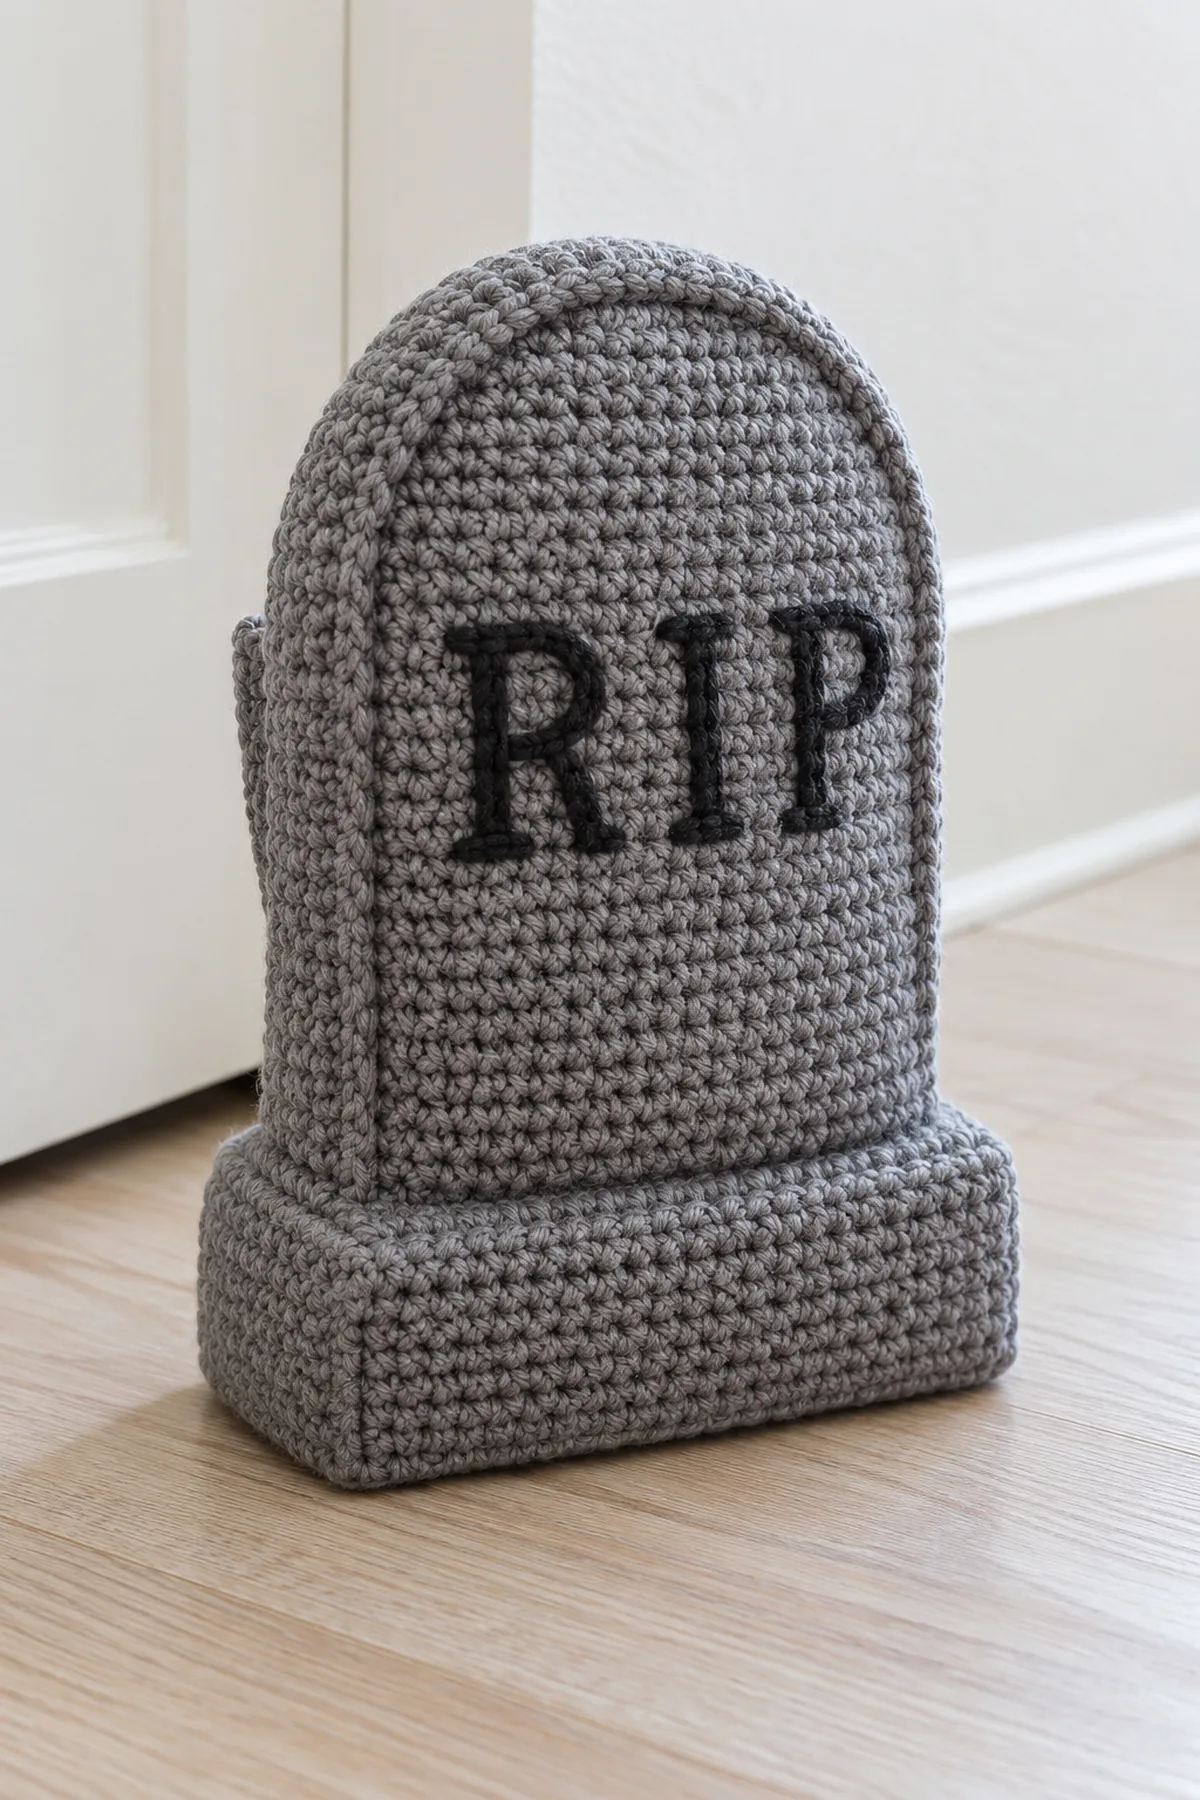
Two identical arched crochet faces join to a narrow 72-row side-and-top gusset and a flat rectangular base. Closed embroidered RIP lettering is worked before assembly. A three-sided rear crochet pocket holds a separate, double-sewn fabric pebble pouch; sewn hook-and-loop strips close the pocket.
Pattern Details
- Hook Size: 4 mm, adjusted to gauge
- Finished Size: About 6 inches wide, 6.4 inches tall and 2 inches deep
- Gauge: Target 16 sc and 20 rows = 4 inches after washing
- Estimated Time: 6-9 hours
- Construction: Two 24-stitch arched faces, 8-stitch gusset, 24-by-8 base and external closable rear pocket
- Skill level: Intermediate
Why You’ll Love This Project
The silhouette communicates the Halloween idea without relying on copied imagery or printed templates. Separate stages make it possible to inspect the shape before assembly, while the limited palette keeps the stitch texture visible. The project is designed for a complete tutorial with clear finishing and care guidance.
Materials
- Approximately 300 yards firm slate-gray worsted cotton and 10 yards charcoal cotton embroidery yarn
- 4 mm hook, markers, yarn needle, scissors, tape measure and washable polyester stuffing
- Firm cotton fabric for a 4-by-2-inch sealed weight pouch, matching sewing thread, 250-350 g smooth clean pebbles, and two 1-inch sew-on hook-and-loop strips; no loose sand or beans
Gauge, Measurements, and Planning
Each 24-stitch face is about 6 inches wide at the target gauge. Its 24 straight rows plus eight arch rows measure approximately 6.4 inches high. The eight-stitch gusset and base depth measure about 2 inches. Place the finished item against the intended door on a non-slip floor to test its stability; a written pattern cannot certify a holding force.
Make and wash a gauge swatch before beginning. Measure only after the swatch is completely dry. If the stitch width differs, change hook size rather than pulling the working yarn tighter. Keep a written count at the end of every section so the finished edges remain balanced and the assembly points line up.
Abbreviations and Special Stitches
- ch: chain
- sc: single crochet
- hdc: half double crochet
- dc: double crochet
- sl st: slip stitch
- st(s): stitch(es)
- rnd: round
- BLO: back loop only
- inc: two stitches in one stitch
- sc2tog: single-crochet two stitches together
- hdc2tog: half-double-crochet two stitches together
Special stitch guidance: For the arch, sc2tog over the first two stitches and again over the last two stitches of each row. This decreases two stitches per row and leaves a centered eight-stitch flat crown. Lettering is closed backstitch worked through the front face only before assembly.
Important Notes
- Development note: the written stitch arithmetic has been checked computationally, but this design has not been physically sample-tested. Gauge, yardage, fit and dimensions are planning targets. Make a swatch and a trial fit or assembly before gifting.
- Turning chains and joining slip stitches are not counted unless a step explicitly says otherwise. Mark the first counted stitch of each round or the first and last stitches of a flat row.
- Use the washed gauge to check dimensions at each named checkpoint. If the count is right but the measurement is wrong, change hook or yarn and reswatch rather than adding unplanned stitches.
- Keep all yarn tails on the wrong side and weave them through three different stitch paths before trimming. Do not use glue for structural joints.
Complete Instructions for Crochet Tombstone Doorstop with Removable Weight Pouch
Crochet Two Matching Arched Faces
- Front face: ch 25. Row 1: sc in second chain and each remaining chain; ch 1 and turn. (24 sts)
- Rows 2-24: sc in all 24 stitches; ch 1 and turn. (24 sts)
- Arch Row 25: sc2tog over first two stitches, sc in next 20 stitches, sc2tog over last two stitches; ch 1 and turn except after Row 32. (22 sts)
- Arch Row 26: sc2tog over first two stitches, sc in next 18 stitches, sc2tog over last two stitches; ch 1 and turn except after Row 32. (20 sts)
- Arch Row 27: sc2tog over first two stitches, sc in next 16 stitches, sc2tog over last two stitches; ch 1 and turn except after Row 32. (18 sts)
- Arch Row 28: sc2tog over first two stitches, sc in next 14 stitches, sc2tog over last two stitches; ch 1 and turn except after Row 32. (16 sts)
- Arch Row 29: sc2tog over first two stitches, sc in next 12 stitches, sc2tog over last two stitches; ch 1 and turn except after Row 32. (14 sts)
- Arch Row 30: sc2tog over first two stitches, sc in next 10 stitches, sc2tog over last two stitches; ch 1 and turn except after Row 32. (12 sts)
- Arch Row 31: sc2tog over first two stitches, sc in next 8 stitches, sc2tog over last two stitches; ch 1 and turn except after Row 32. (10 sts)
- Arch Row 32: sc2tog over first two stitches, sc in next 6 stitches, sc2tog over last two stitches; ch 1 and turn except after Row 32. (8 sts)
- Make an identical back face, repeating Rows 1-32 and ending with eight top stitches. Block both faces to equal dimensions before seaming.
- On the front only, use charcoal yarn to embroider closed block letters RIP centered below the arch: R spans columns 6-9, I columns 12-13, P columns 16-19, all within face Rows 10-17. Outline each with short backstitches through the face fabric; keep the reverse tails inside. No printed patch, beads or glued pieces.
Build the Side Gusset and Flat Base
- Gusset: ch 9; Row 1: sc in second chain and next seven chains; ch 1 and turn. (8 sts) Rows 2-72: sc in each of eight stitches; ch 1 and turn except after Row 72. (8 sts) Mark row-end positions after Rows 24, 32, 40 and 48 to divide the 72-edge run into straight side, arch shoulder, top, arch shoulder and straight side.
- Base: ch 25; Row 1: sc in second chain and remaining chains; ch 1 and turn. (24 sts) Rows 2-8: sc in all 24 stitches, turning except after Row 8. (24 sts)
- Sew one 72-row-end gusset edge to the front face outline in the precise order stated in Assembly. Sew the other gusset edge to the matching back outline. Align the 24-stitch base long edges to the face bottoms and its eight-row short ends to the gusset ends; sew most of the perimeter but leave a short back seam open for a light handful of polyester stuffing.
- Stuff the arched upper shell only until it stands upright without bulging. Keep the base flat. Close the seam securely and inspect the four base corners. The removable weight belongs in the separate external rear pocket, not loose inside the crochet shell.
Crochet and Close the Removable Rear Pocket
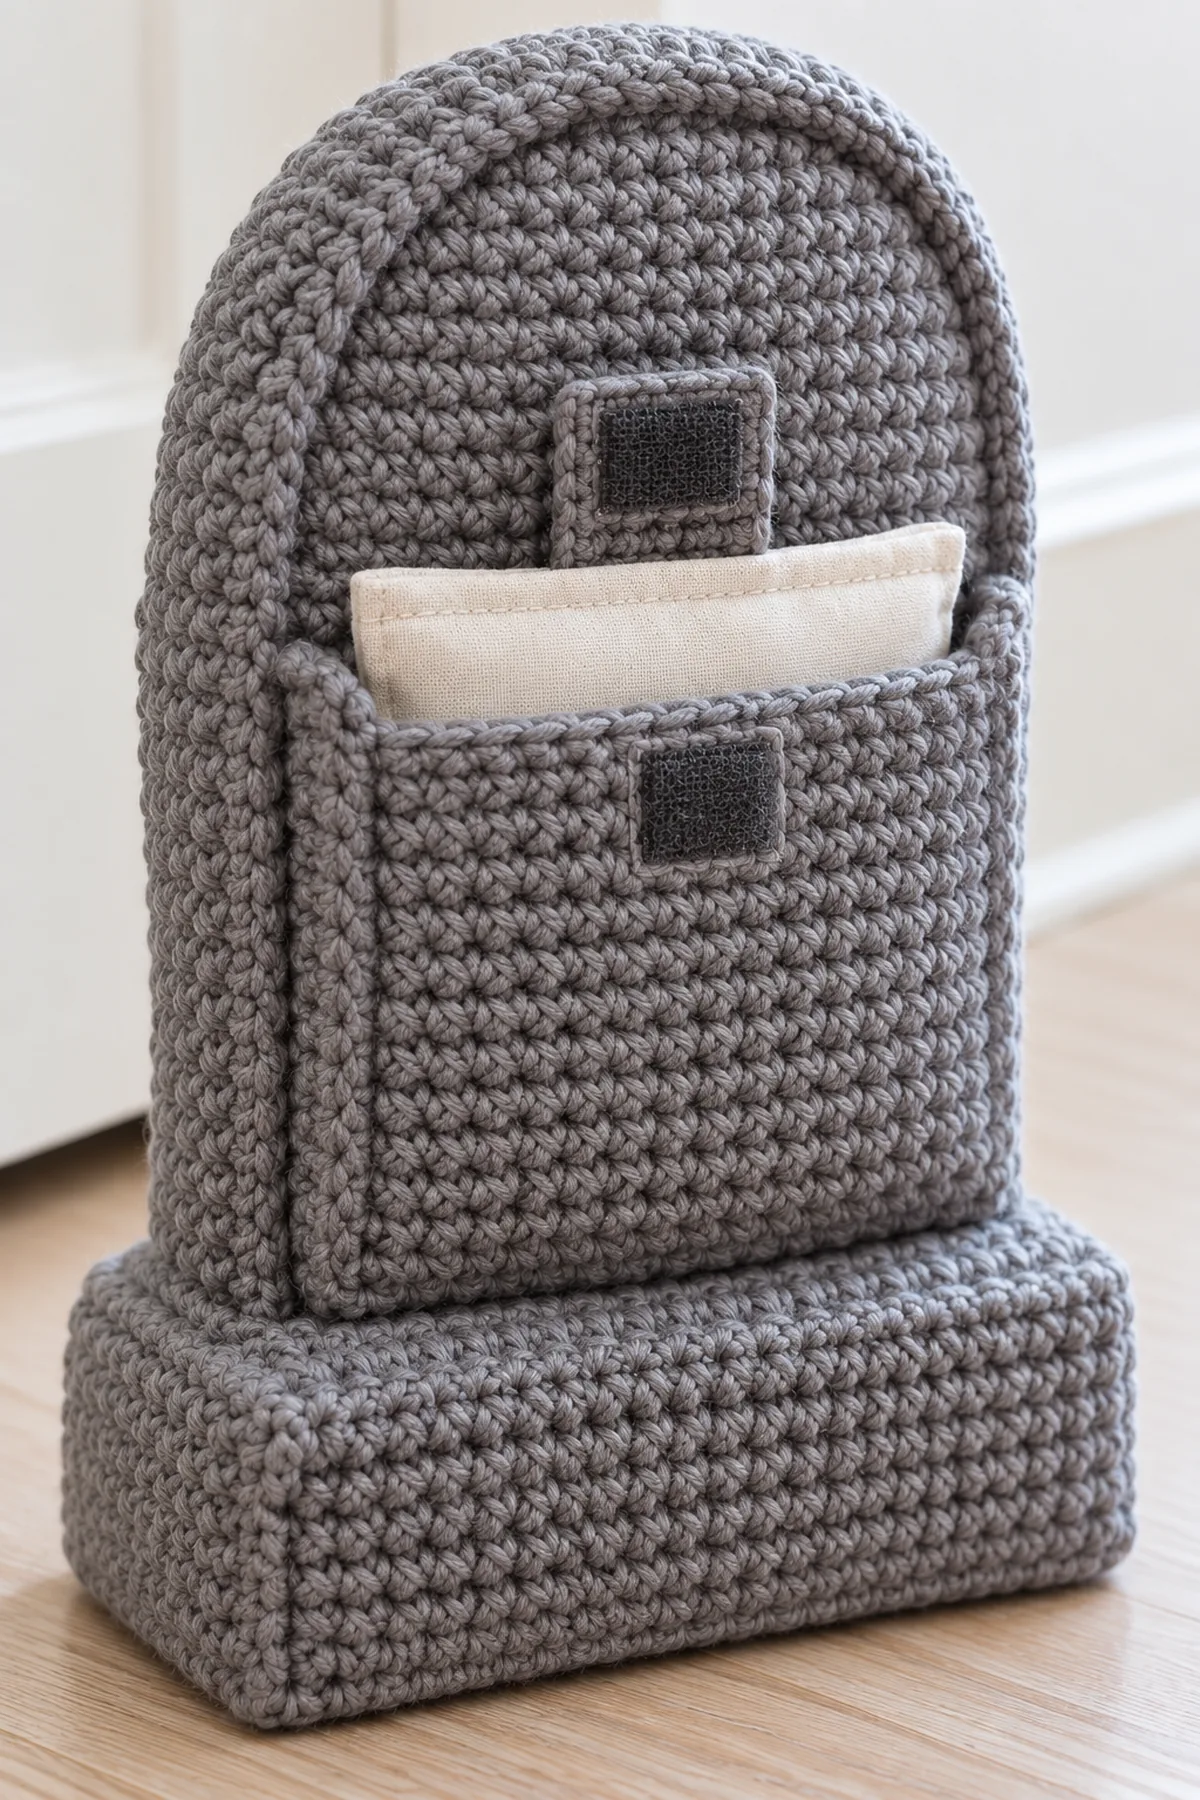
- Pocket panel: ch 25; Row 1: sc in second chain and all remaining chains; ch 1 and turn. (24 sts) Rows 2-12: sc in all 24 stitches, turning except after Row 12. (24 sts)
- Center the panel over the lower 12 straight rows of the back face. Sew its 24-stitch lower edge to the back face along Row 1 and sew both 12-row sides, leaving the 24-stitch upper edge open. Reinforce both upper corners with three extra sewn passes.
- Cut two 5-by-3-inch cotton fabric rectangles. With right sides together, machine- or hand-sew a 1/2-inch seam on three sides; turn right side out. Insert 250-350 g of clean, smooth, dry pebbles only until the pouch lies flat and no more than 1 inch thick. Fold the open allowances inward and sew the fourth side twice; then sew a second seam around all four sides. The sealed 4-by-2-inch pouch must fit within the approximately 6-by-2.4-inch rear pocket without stretching it; reduce the pebble fill if it does not.
- Sew one hook-and-loop strip to the inside upper pocket edge and the matching strip to the back face immediately above it, using small stitches through fabric or crocheted loops on all four sides of each strip. Insert the sealed fabric pouch, close the pocket and test that it cannot slide out when tipped. Remove the pouch before laundering the crochet shell.
- Adult home decoration only: keep the weighted pouch and the whole doorstop away from children and pets. Do not use it to hold a fire door or any door that must remain self-closing. Test the floor for scratches and add a separate non-slip underlay if needed.
Assembly and Shaping
Embroider the front before joining. Match the gusset’s 72 row ends to the front outline in order: 24 straight left row ends, eight sloped left row ends, eight top stitches, eight sloped right row ends, 24 straight right row ends. Repeat for the back face. Sew the 24-by-8 base to both 24-stitch face bottoms and the two eight-stitch gusset ends, leaving a hand-width gap temporarily for light stuffing. Close the gap after stuffing. Sew the pocket to the outside lower back, not into a load-bearing seam.
Lay every component on a flat surface before joining. Match the marked centers first, then divide each remaining edge into equal sections. Work through both layers with consistent tension and pause after each section to check that the fabric lies flat. This measured approach prevents twisting and keeps decorative details facing the intended direction.
Finishing
- Weave each yarn tail through several same-color stitches, reverse direction twice and stretch the fabric gently before trimming.
- Block to the stated shape according to the yarn label and let every component dry fully before final assembly.
- Inspect the first and last row, joins, edges, and any sewn attachment from both sides; repair loose stitches before use.
- Include the fiber content, finished dimensions and care instructions when gifting. Keep yarn projects away from open flames and direct heat.
For a polished result, weave each tail through several same-color stitches, reverse direction once, and trim only after the fabric has been gently stretched. Block to the listed dimensions without flattening textured stitches. Inspect joins, borders, straps, and decorative pieces before the project is used or gifted.
Helpful Tips
- Place removable markers at each shaping repeat and record the count before beginning the next row.
- Use a contrasting cloth behind dark yarn so it is easier to see both loops of every stitch.
- Lay the piece flat and compare opposite sides at each measurement checkpoint rather than pulling one side to match.
- If an edge ripples or cups unexpectedly, stop and check stitch count and washed gauge before adding a border.
Good lighting and a contrasting stitch marker make counting much easier. If a section looks uneven, compare the current count with the previous checkpoint before continuing. Fixing one missed stitch early is faster than compensating later, and it preserves the measurements used by the assembly instructions.
Frequently Asked Questions
Is this pattern physically tested?
No physical sample test is claimed. The stitch counts were checked computationally. Swatch, measure and trial-fit the piece before relying on the suggested dimensions.
Can I substitute another yarn?
Yes, if a washed swatch matches both stitch and row gauge and the resulting fabric has the required structure. Recalculate yardage and recheck every measurement checkpoint.
Can I change the colors?
Yes. Preserve yarn weight and contrast where a shaping or decorative feature must remain visible, and make a new swatch for the substitute yarn.
Conclusion
Keep the measured dimensions and yarn details with your pattern notes. Check the construction and safety guidance before styling or gifting the finished crochet project.
BabyYarnie Printable Crochet Pattern Card
BabyYarnie — easy-to-follow crochet for everyday makers.
Project: Crochet Tombstone Doorstop with Removable Weight Pouch
Skill level: Intermediate Hook: 4 mm, adjusted to gauge Yarn: Worsted
Finished size: About 6 inches wide, 6.4 inches tall and 2 inches deep
Card Materials
- Approximately 300 yards firm slate-gray worsted cotton and 10 yards charcoal cotton embroidery yarn
- 4 mm hook, markers, yarn needle, scissors, tape measure and washable polyester stuffing
- Firm cotton fabric for a 4-by-2-inch sealed weight pouch, matching sewing thread, 250-350 g smooth clean pebbles, and two 1-inch sew-on hook-and-loop strips; no loose sand or beans
Card Instructions
- Crochet Two Matching Arched Faces: Each 24-stitch face stays straight for 24 rows, then decreases two stitches over eight arch rows to eight.
- Build the Side Gusset and Flat Base: Join one 8-stitch-by-72-row gusset around both face outlines and add a separate 24-by-8 flat base.
- Crochet and Close the Removable Rear Pocket: Sew a three-sided rear pocket with hook-and-loop closure and insert a separate double-sewn pebble pouch.
Finish: Check every count, weave in all ends, block to measurement, and inspect each join.