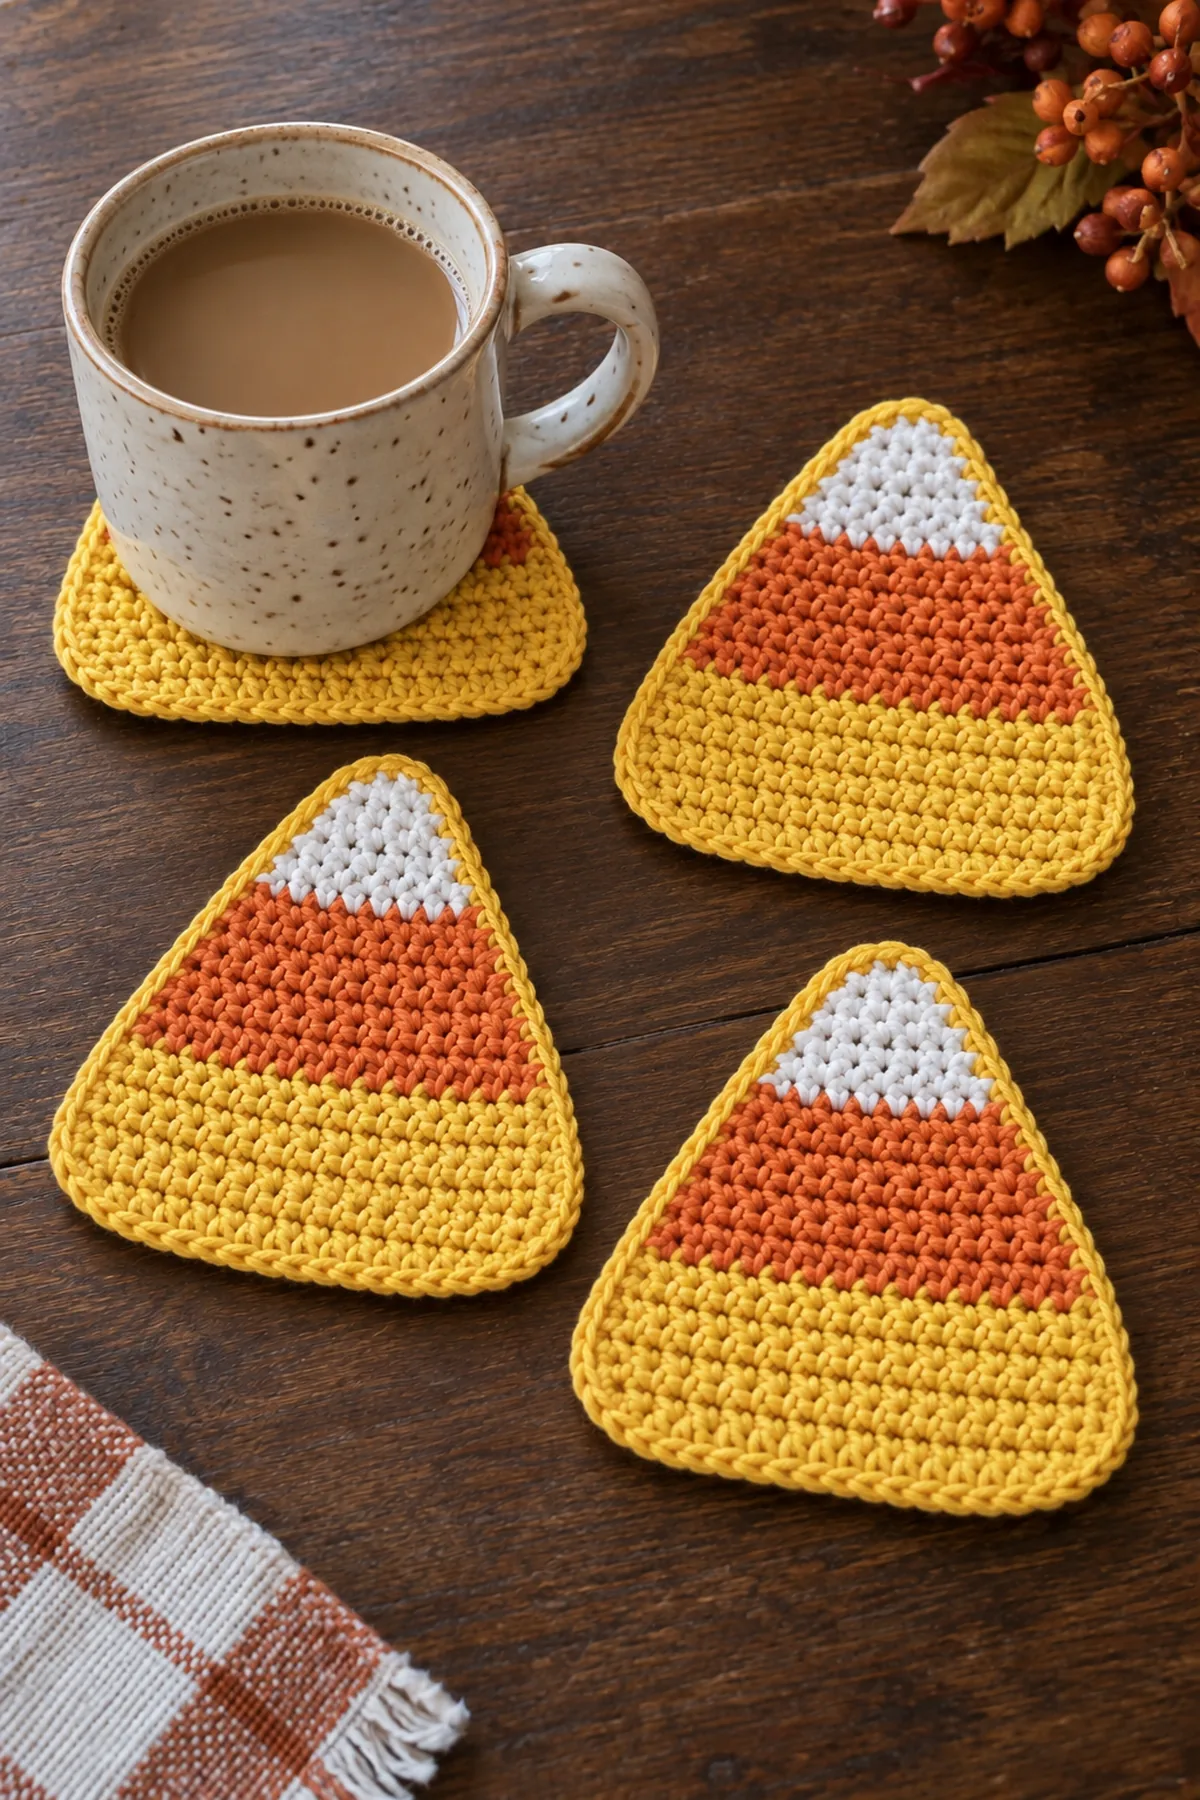
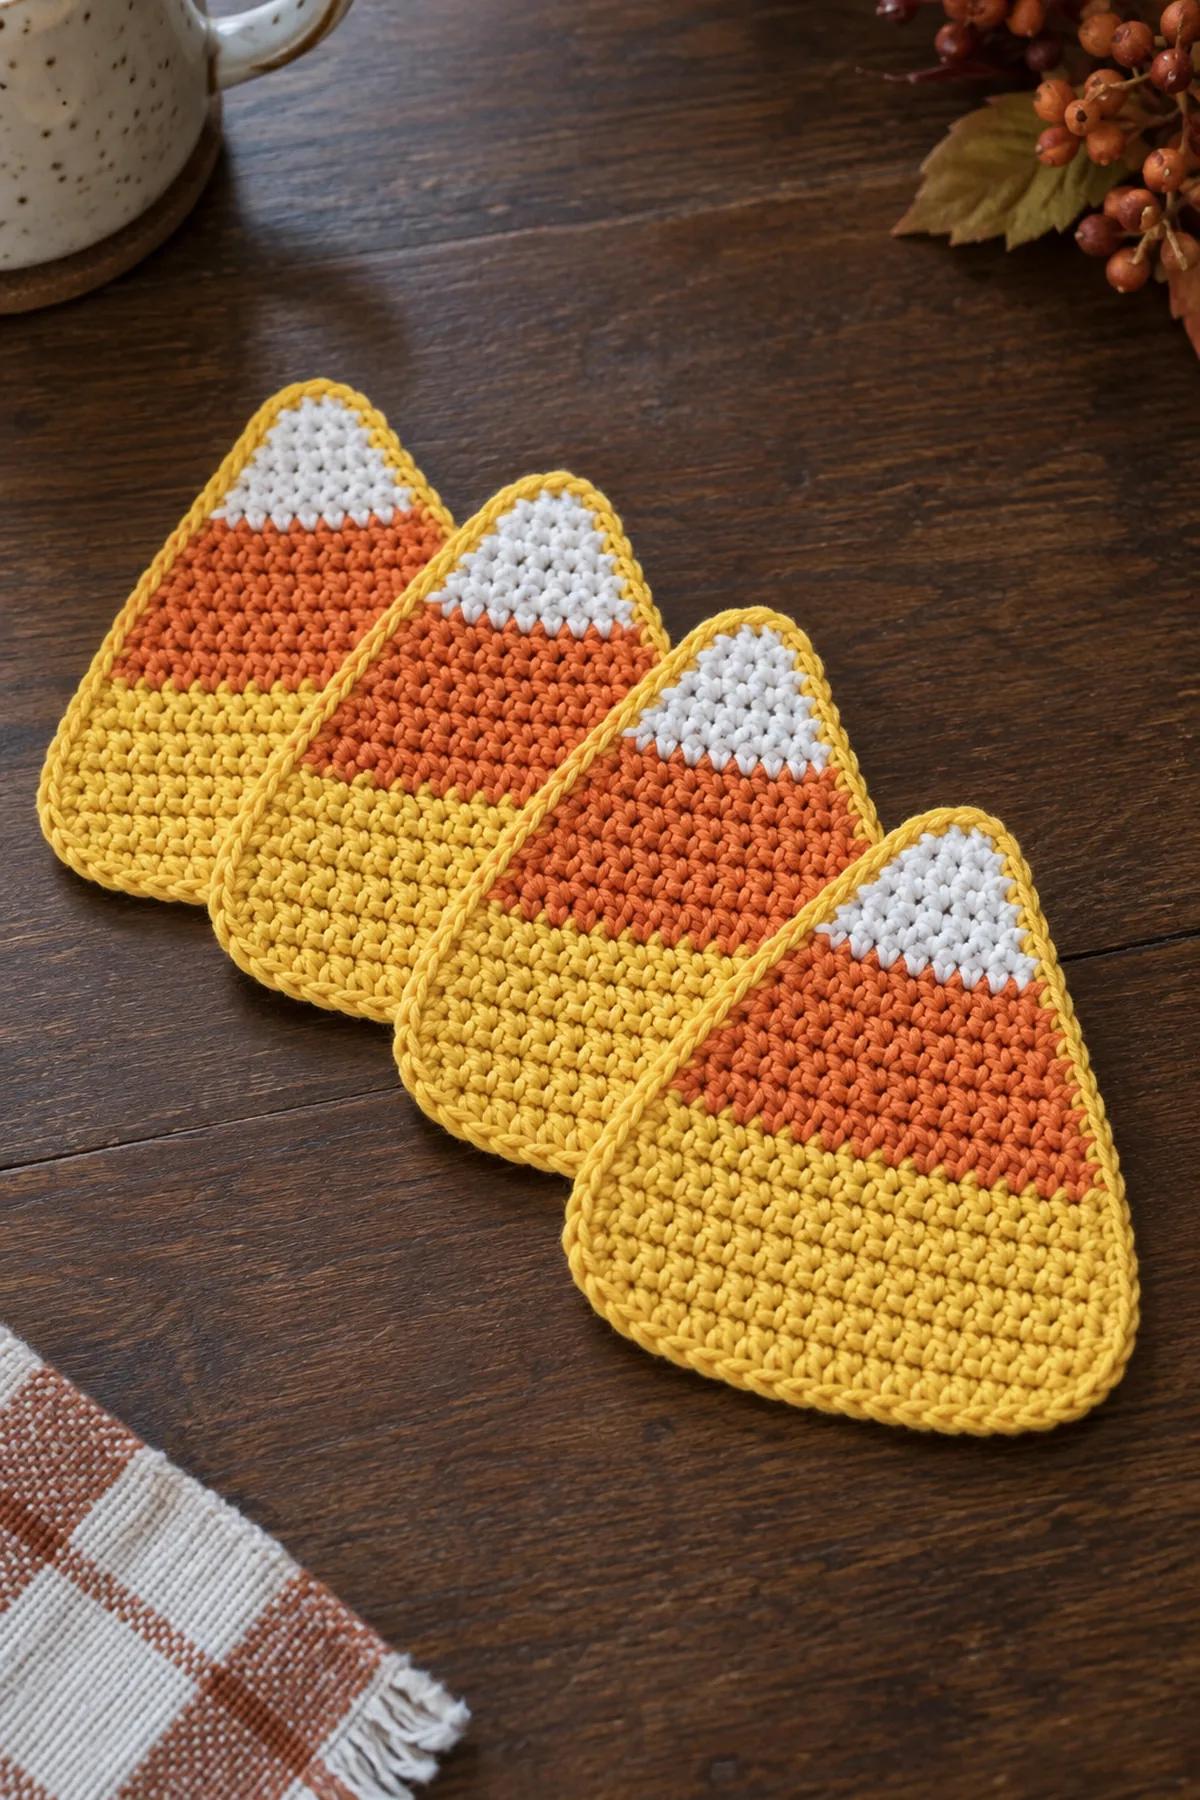
A broad yellow base, a narrow orange stripe and a white tip make these crochet candy corn coasters easy to recognize from across the table. Each coaster is a single flat layer of cotton. Make the same twenty-row shape four times, then block the set together for matching sizes.
Begin at the white tip with two single crochets. Increase once at each end of every even row through Row 18, keeping odd rows straight. Rows 19 and 20 stay at twenty stitches. A yellow single-crochet border rounds the corners without stuffing or sewing two layers together.
Pattern Details
- Hook Size: 4 mm, adjusted to gauge
- Finished Size: Before border: target 5 inches wide by 4 inches tall; after border approximately 5.5 by 4.5 inches
- Gauge: Target 16 sc and 20 rows = 4 inches, washed
- Estimated Time: 1-1.5 hours per coaster; 4-6 hours for four
- Construction: Tip-down flat triangle, alternating shaped and plain rows, one 70-stitch edging round
- Skill level: Easy
Why You’ll Love This Project
The stripe sequence is short enough to track on one line: five white rows, four orange rows and eleven yellow rows. A slim outline unifies the set, while the broad lower section gives a cup a flat resting area. These are everyday drink coasters, not potholders.
Materials
- For four coasters, estimated 35 yards white, 40 yards orange and 100 yards yellow worsted absorbent cotton
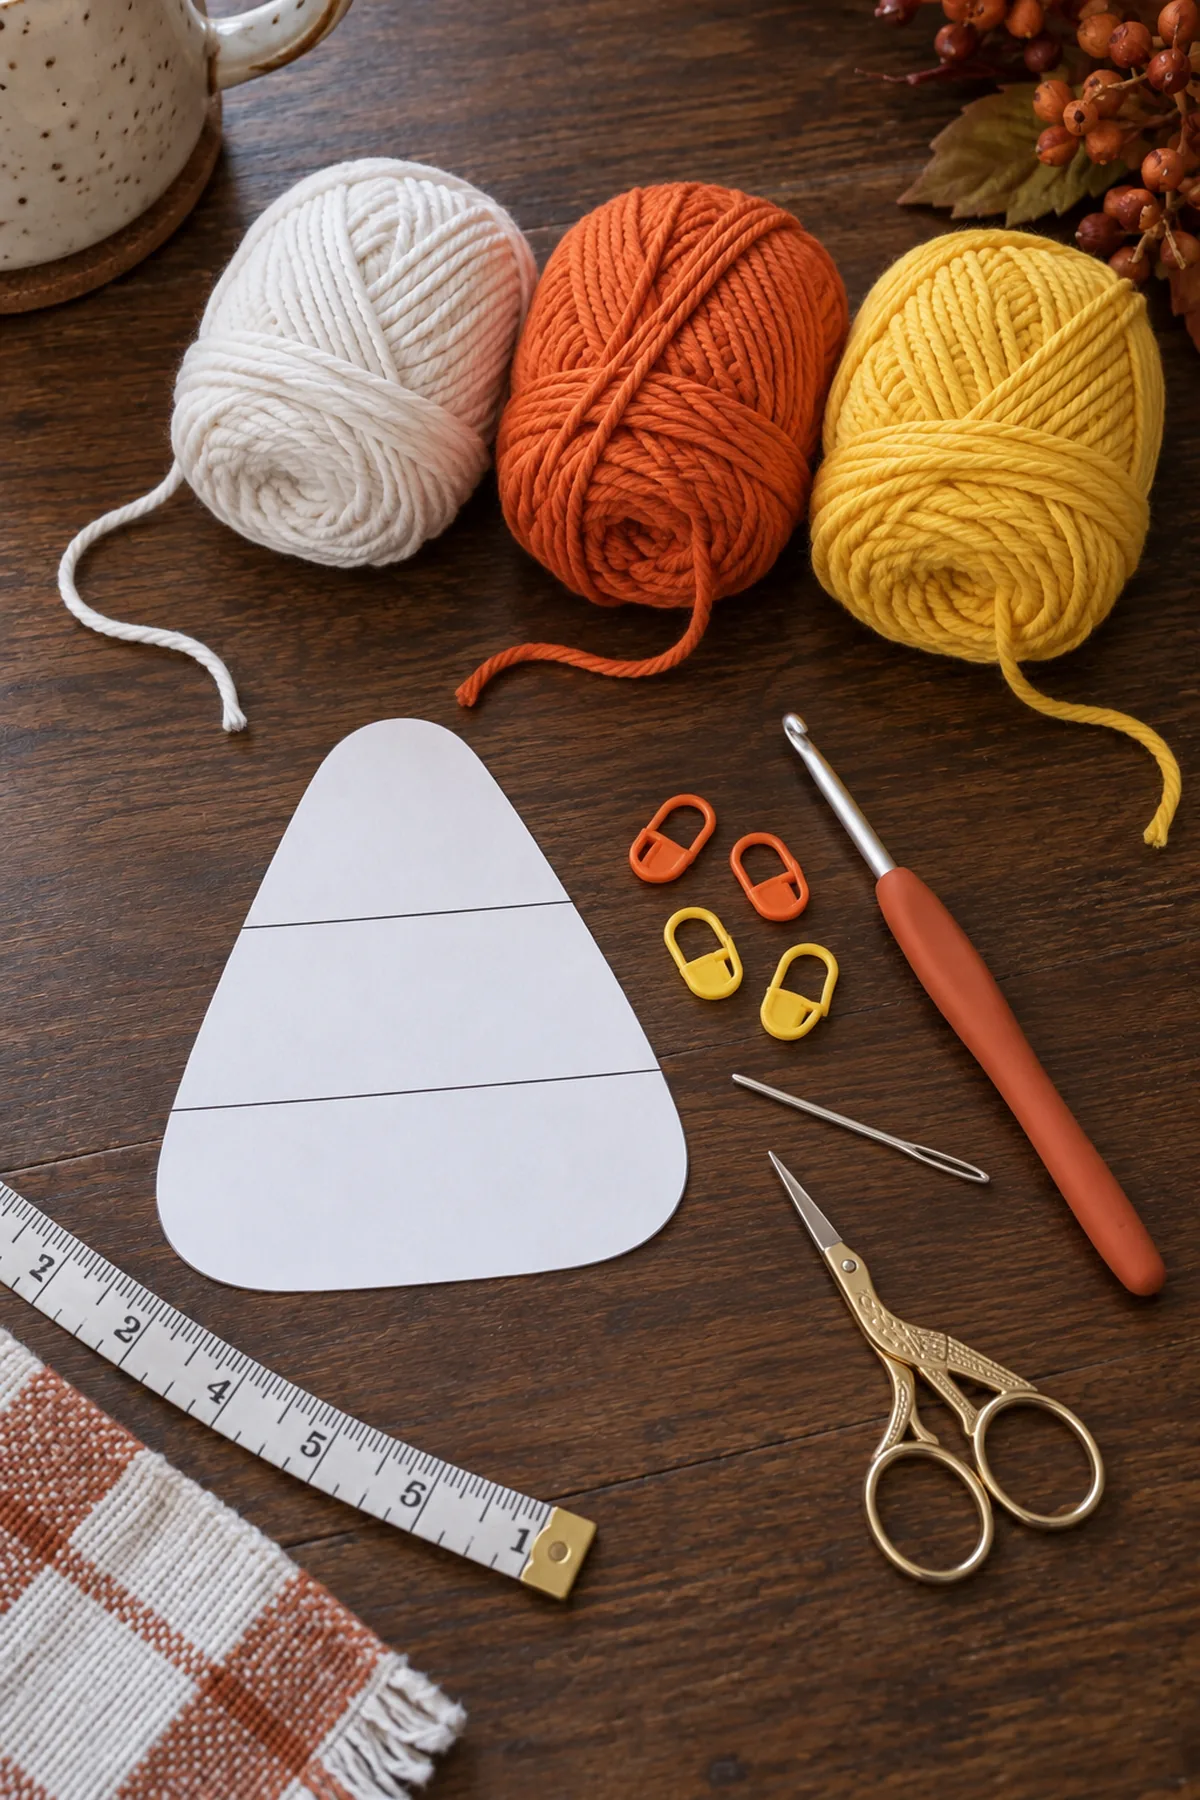
- 4 mm hook; three stitch markers per coaster; tapestry needle; scissors; tape measure
- Paper and pencil for a blocking outline; rust-resistant pins and a suitable blocking surface
Gauge, Measurements, and Planning
At four sc per inch, the final twenty-stitch row is five inches wide. Twenty rows at five rows per inch are four inches high. Draw a 5 by 4-inch triangle with a rounded short tip on paper for the unbordered pieces; put a protective layer between paper and damp crochet. Do not stretch a narrow piece to meet this outline. Adjust the hook after swatching if necessary. Keep all four coasters at the same count and gauge.
Make and wash a gauge swatch before beginning. Measure only after the swatch is completely dry. If the stitch width differs, change hook size rather than pulling the working yarn tighter. Keep a written count at the end of every section so the finished edges remain balanced and the assembly points line up.
Abbreviations and Special Stitches
- ch: chain
- sc: single crochet
- hdc: half double crochet
- dc: double crochet
- sl st: slip stitch
- st(s): stitch(es)
- rnd: round
- BLO: back loop only
- inc: 2 stitches in one stitch
- sc2tog: single crochet two stitches together
Special stitch guidance: Inc = 2 sc in one stitch. On an increase row, work an inc in the first stitch, one sc in every middle stitch and an inc in the final stitch. The two outer increases add two stitches total. Sc2tog is not needed. The turning chain never counts as a stitch.
Important Notes
- Pattern development note: stitch arithmetic and written construction have been reviewed computationally; this design has not been physically sample-tested. Gauge, yardage and finished measurements are planning targets, not a tested guarantee. Swatch and check fit before making a gift.
- Beginning ch 1 or ch 2 and joining slip stitches never count as stitches. Mark the first counted stitch of each round and move the marker after completing the round.
- On flat rows, turn after each row and work the first stitch into the last stitch of the previous row. On joined rounds, join to the first counted stitch and do not turn unless specifically instructed.
- Change color on the final yarn-over of the stitch before the new color is needed. Leave a 6-inch tail and weave it back and forth through same-color stitches after construction.
- Use the written stitch counts for structure and your washed gauge for dimensions. Do not silently add shaping increases to correct a measurement; make a fresh swatch with a different hook first.
- Images are AI-generated visual illustrations, not stitch charts or photographs of a physically tested sample. Follow the written counts and the supplied chart where provided.
Complete Instructions for Crochet Candy Corn Coaster Set
Crochet the Three-Stripe Triangle
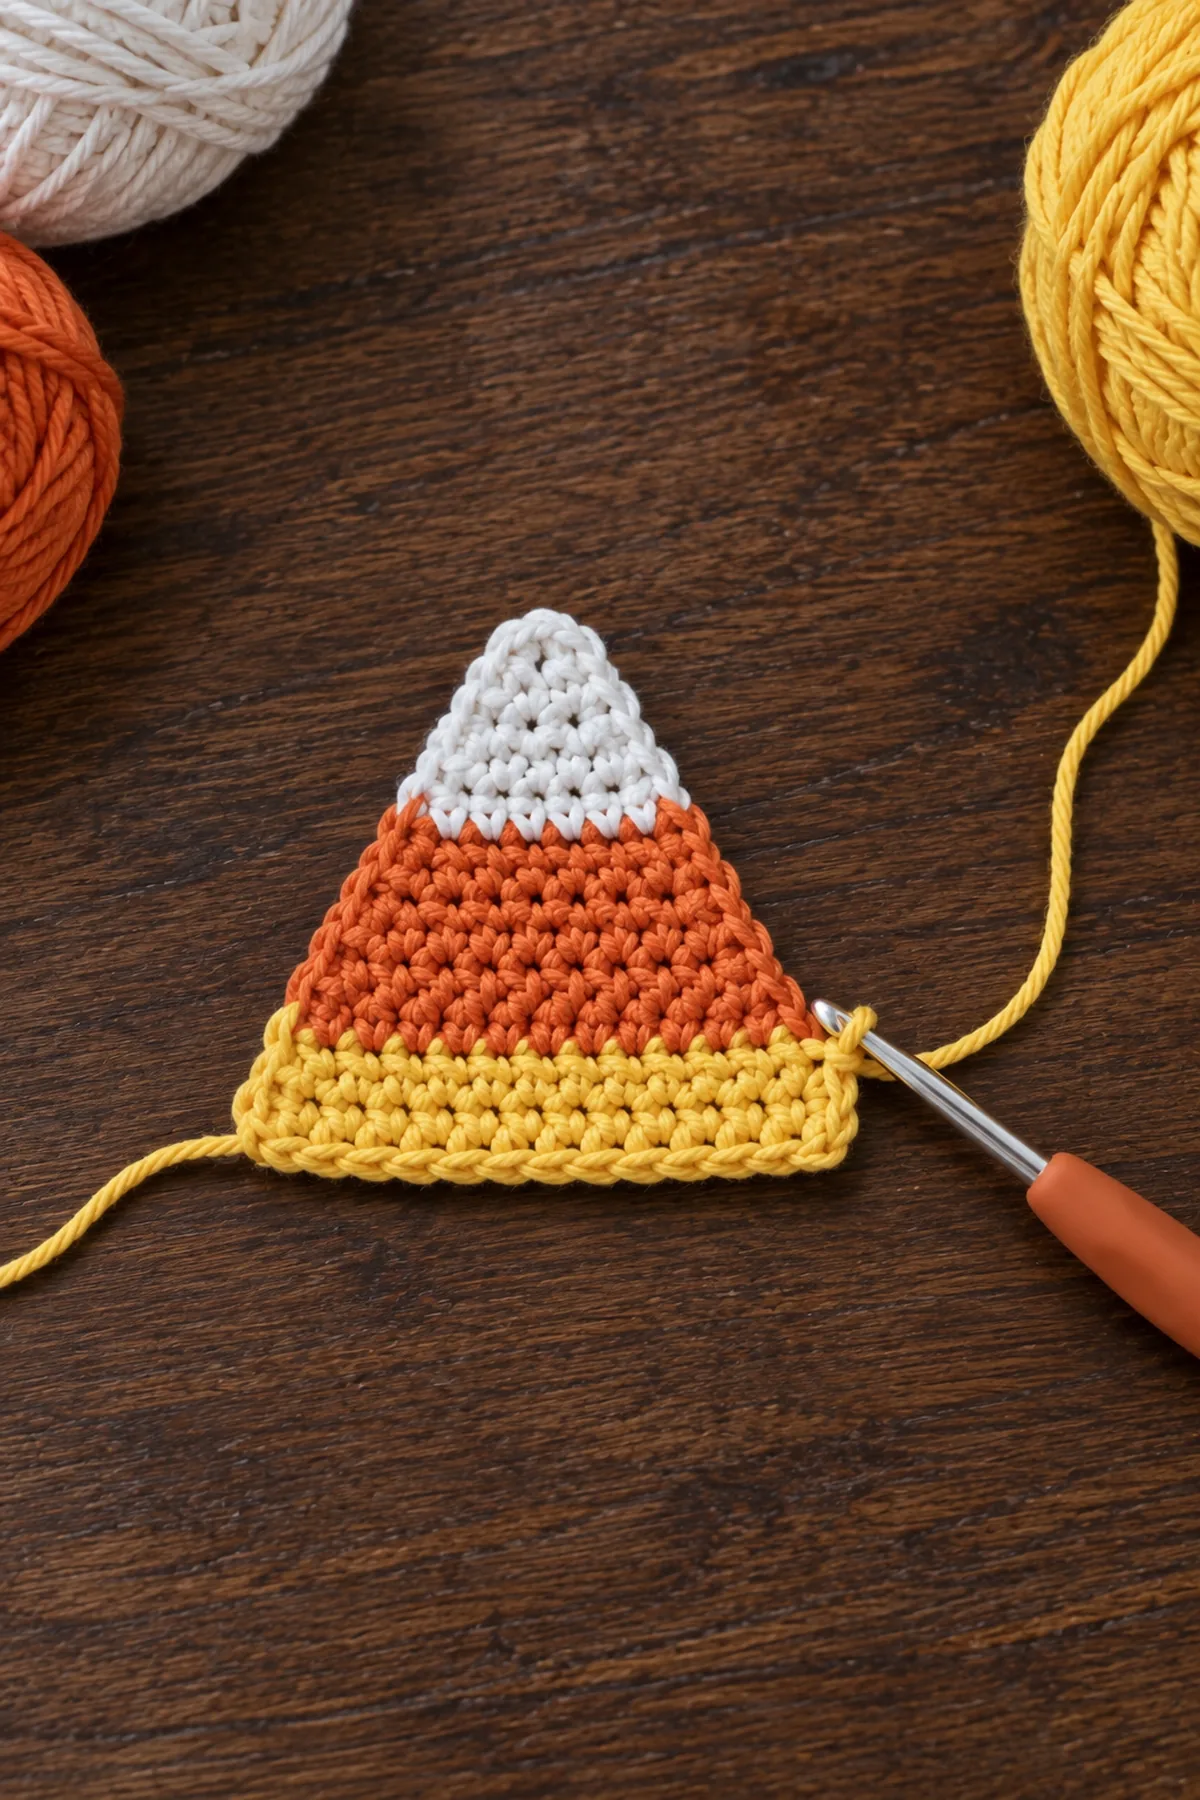
- Row 1: With white, ch 3; sc in second chain and last chain. Ch 1 and turn. (2 sts)
- Row 2: With white, 2 sc in first stitch, sc in next 0 stitches, 2 sc in last stitch (omit middle sc if zero). Ch 1 and turn. (4 sts)
- Row 3: With white, sc in every stitch. Ch 1 and turn. (4 sts)
- Row 4: With white, 2 sc in first stitch, sc in next 2 stitches, 2 sc in last stitch (omit middle sc if zero). Ch 1 and turn. (6 sts)
- Row 5: With white, sc in every stitch. Change to orange on final yarn-over of last sc; ch 1 and turn. (6 sts)
- Row 6: With orange, 2 sc in first stitch, sc in next 4 stitches, 2 sc in last stitch (omit middle sc if zero). Ch 1 and turn. (8 sts)
- Row 7: With orange, sc in every stitch. Ch 1 and turn. (8 sts)
- Row 8: With orange, 2 sc in first stitch, sc in next 6 stitches, 2 sc in last stitch (omit middle sc if zero). Ch 1 and turn. (10 sts)
- Row 9: With orange, sc in every stitch. Change to yellow on final yarn-over of last sc; ch 1 and turn. (10 sts)
- Row 10: With yellow, 2 sc in first stitch, sc in next 8 stitches, 2 sc in last stitch (omit middle sc if zero). Ch 1 and turn. (12 sts)
- Row 11: With yellow, sc in every stitch. Ch 1 and turn. (12 sts)
- Row 12: With yellow, 2 sc in first stitch, sc in next 10 stitches, 2 sc in last stitch (omit middle sc if zero). Ch 1 and turn. (14 sts)
- Row 13: With yellow, sc in every stitch. Ch 1 and turn. (14 sts)
- Row 14: With yellow, 2 sc in first stitch, sc in next 12 stitches, 2 sc in last stitch (omit middle sc if zero). Ch 1 and turn. (16 sts)
- Row 15: With yellow, sc in every stitch. Ch 1 and turn. (16 sts)
- Row 16: With yellow, 2 sc in first stitch, sc in next 14 stitches, 2 sc in last stitch (omit middle sc if zero). Ch 1 and turn. (18 sts)
- Row 17: With yellow, sc in every stitch. Ch 1 and turn. (18 sts)
- Row 18: With yellow, 2 sc in first stitch, sc in next 16 stitches, 2 sc in last stitch (omit middle sc if zero). Ch 1 and turn. (20 sts)
- Row 19: With yellow, sc in every stitch. Ch 1 and turn. (20 sts)
- Row 20: With yellow, sc in every stitch. Do not turn; keep yellow attached for the border. (20 sts)
Add the Rounded Yellow Border
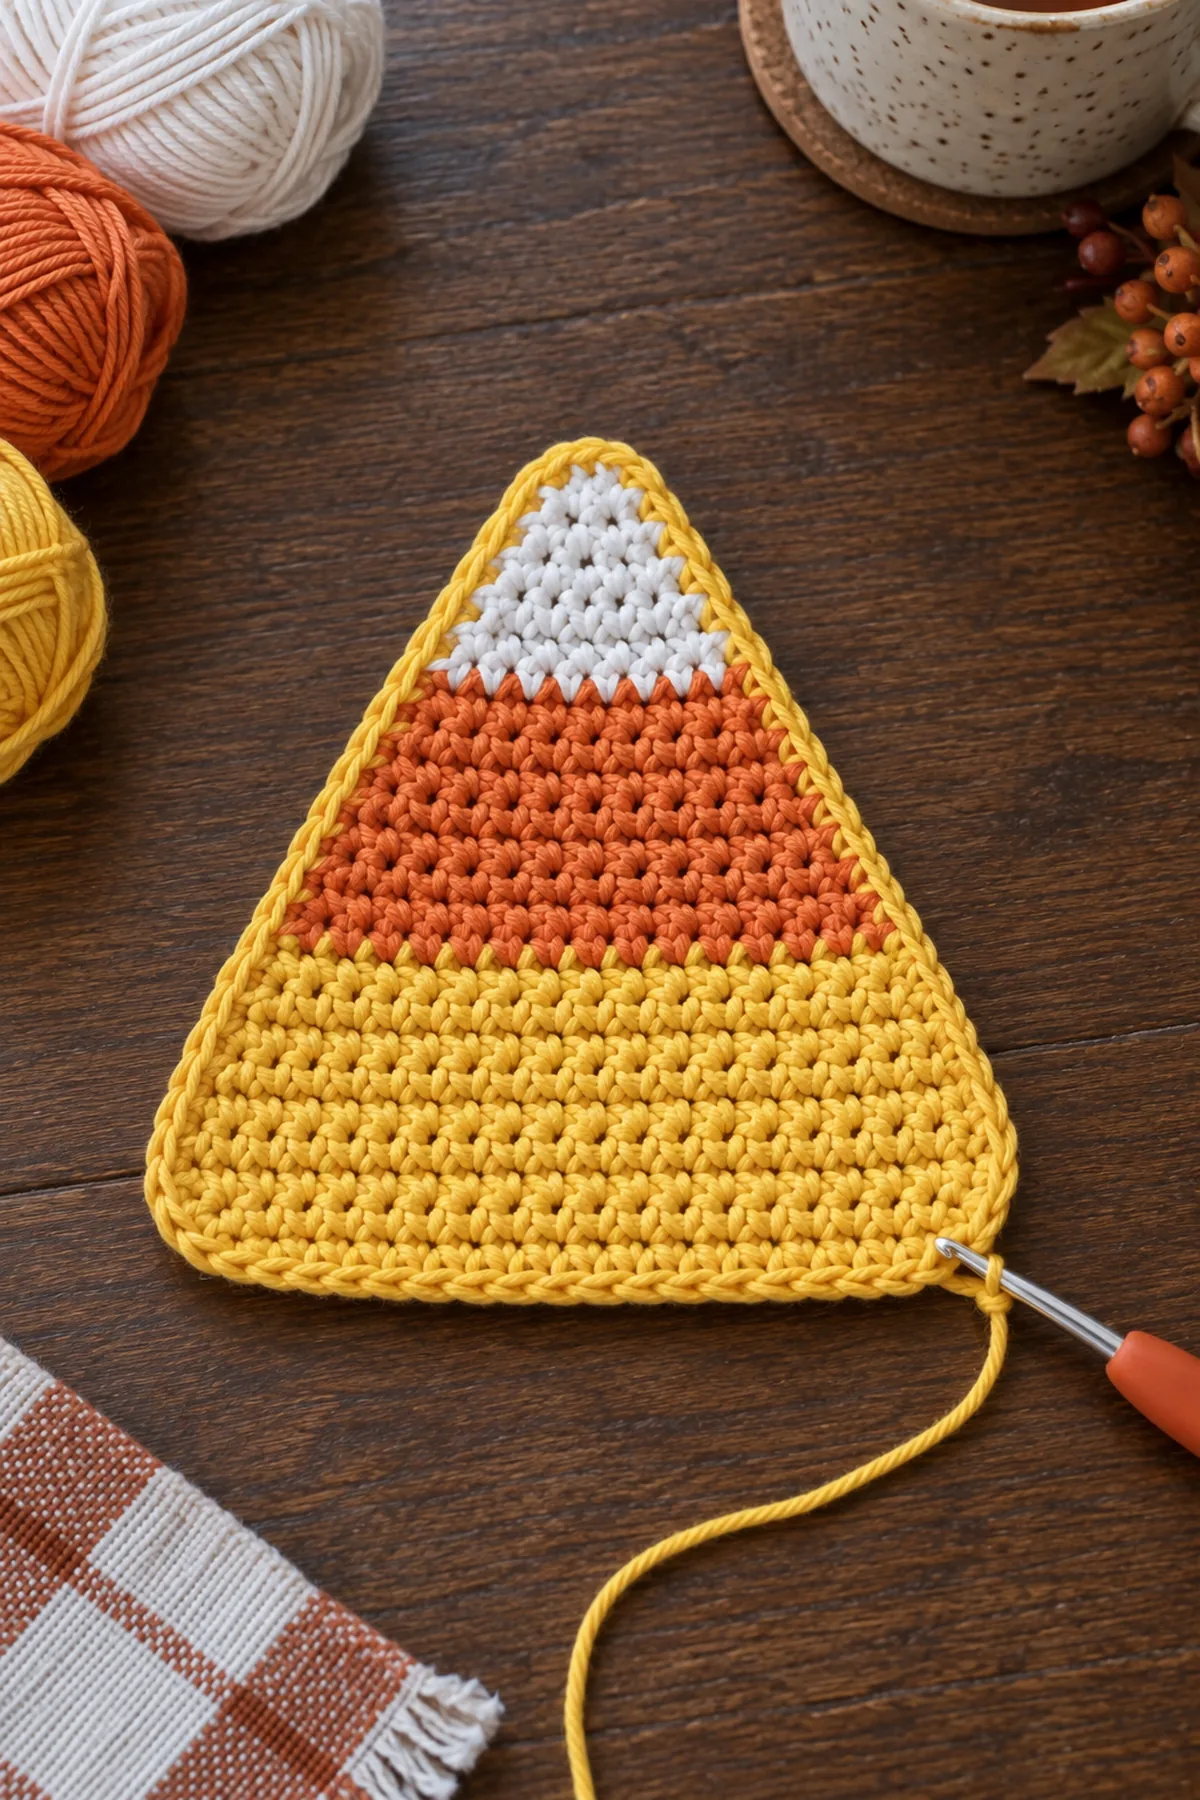
- Work with the right side facing. Fasten the Row-20 yarn off if necessary to reposition. Join yellow in one end stitch of Row 20. Ch 1 and work 3 sc in that corner stitch, sc in the next 18 bottom stitches, and 3 sc in the other bottom corner stitch. (24 sts along bottom)
- Continue up the first sloping side: sc once in each of the 20 row ends. Mark the last of these 20 stitches. The row-end spaces are separate from the bottom-row top loops just worked.
- Across the short tip, work 3 sc into each of the two unused foundation-chain loops. Continue down the other sloping side, sc once in each of its 20 row ends. Join to the first sc without an extra stitch and fasten off. (70 sts)
- Border arithmetic: bottom 3+18+3=24; first slope 20; tip 3+3=6; second slope 20. Total 70. Do not add stitches at the joins between these four sections. The tip has a soft rounded corner, not a sharp long point.
Make Four and Block the Set
- Repeat the full pattern three more times for four matching coasters. Check each has twenty body rows, the same stripe breaks and seventy edging stitches.
- Dampen according to the cotton care label; shape flat to approximately 5.5 by 4.5 inches without pulling the tip long. Let dry completely, then remove pins and check all edges lie on the table.
- Use under a stable cup or glass on a suitable surface. These coasters are not tested trivets, oven mitts or protection against very hot cookware. Dry them between uses, and do not leave damp cotton on moisture-sensitive furniture.
Assembly and Shaping
There are no seams, appliques, stuffing or glued layers. Weave color-change tails back into their own color bands before edging. Block all four flat with the yellow bases level and the white tips centered. Set an empty cup on the broad yellow area only after the coasters are completely dry; its base must sit entirely inside the flat fabric without rocking.
Lay every component on a flat surface before joining. Match the marked centers first, then divide each remaining edge into equal sections. Work through both layers with consistent tension and pause after each section to check that the fabric lies flat. This measured approach prevents twisting and keeps decorative details facing the intended direction.
Finishing
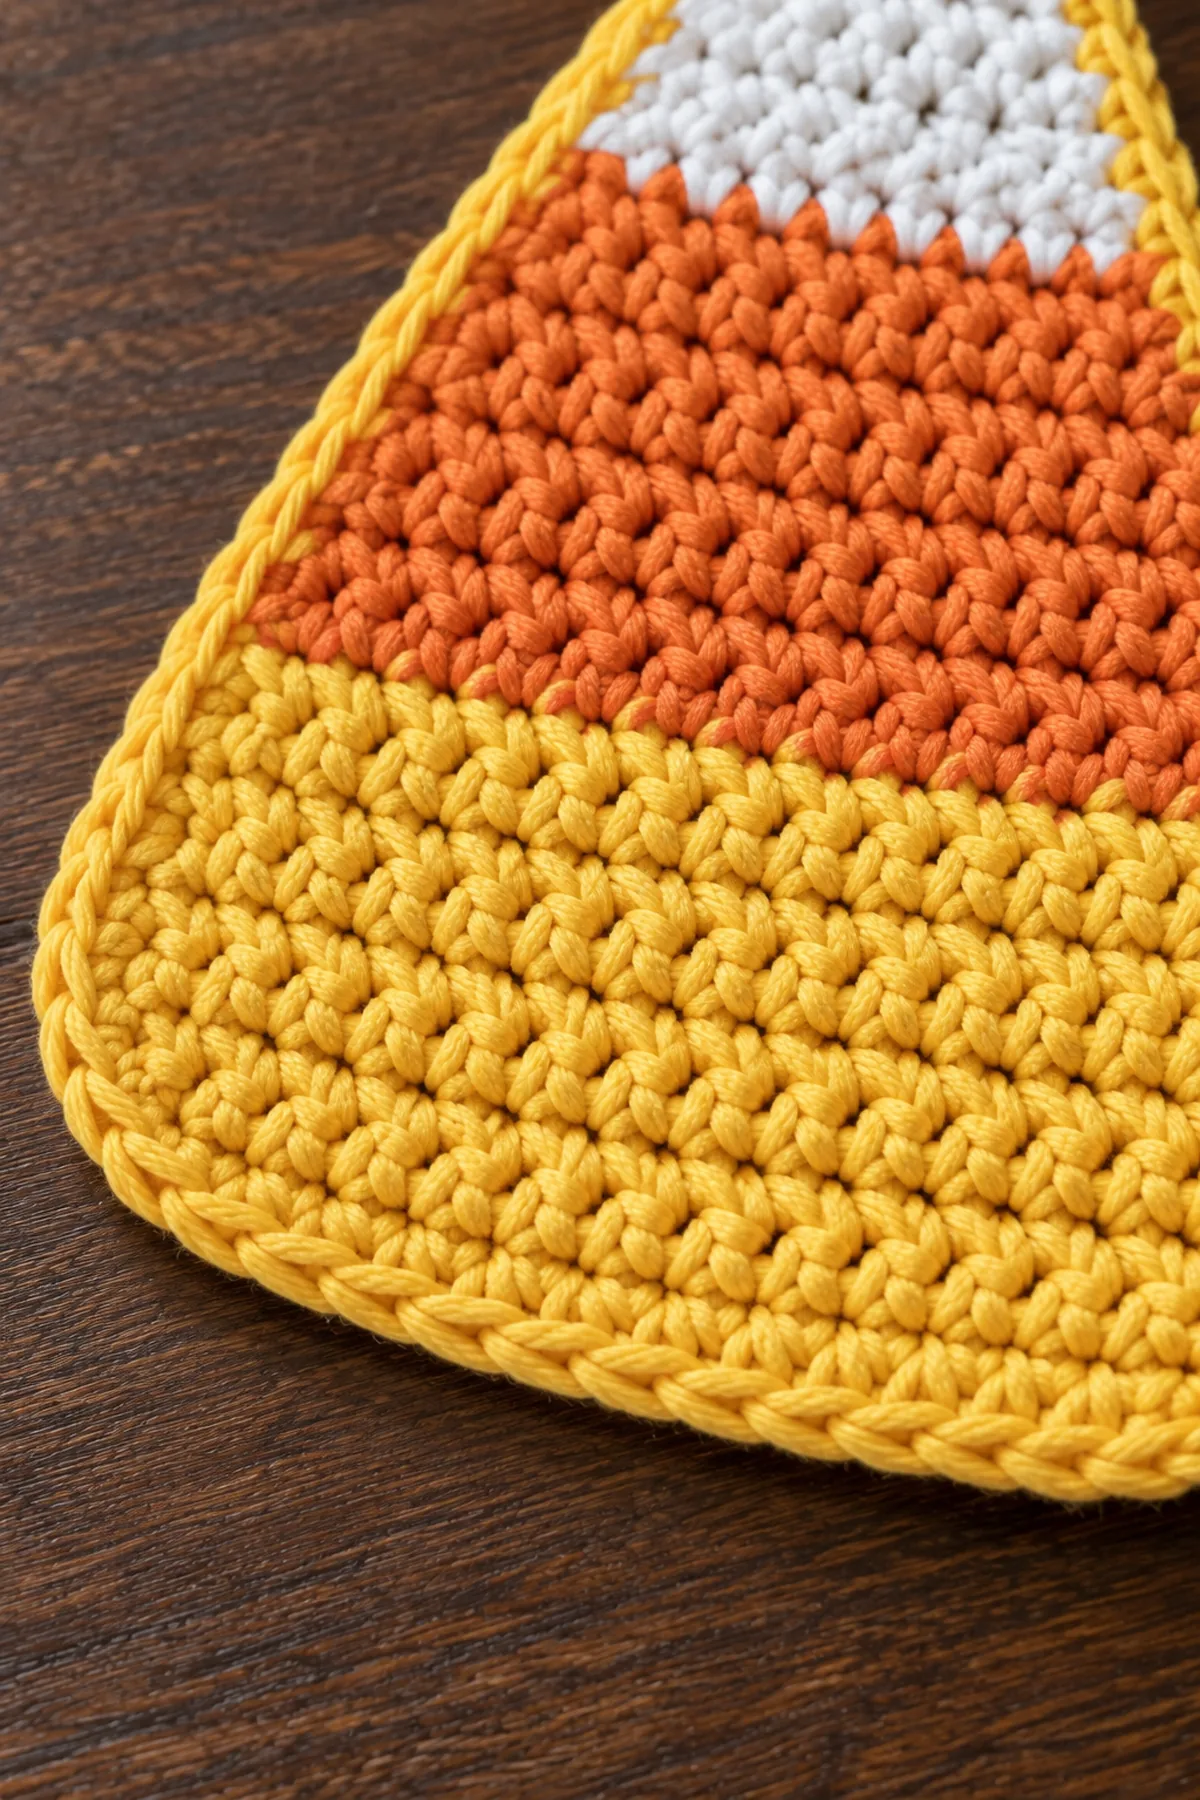
- Fasten off with a 6-inch tail; weave through three separate groups of stitches, changing direction twice.
- Damp-block gently according to the fiber label, check the intended shape, and dry fully before assembly or use.
- Inspect both sides, all joins, and every decorative attachment; resecure a loose stitch before gifting.
- Include the fiber content and washing instructions with the finished item. Keep the item away from candles and other heat sources.
For a polished result, weave each tail through several same-color stitches, reverse direction once, and trim only after the fabric has been gently stretched. Block to the listed dimensions without flattening textured stitches. Inspect joins, borders, straps, and decorative pieces before the project is used or gifted.
Helpful Tips
- Count in small marked sections instead of counting an entire dark-colored edge repeatedly.
- Use a pale working surface behind black yarn so both loops of the stitch remain visible.
- Keep a row tally and record your swatch measurements beside the size you selected.
- If shaping ripples or pulls, stop at that checkpoint and compare counts and gauge before progressing.
Good lighting and a contrasting stitch marker make counting much easier. If a section looks uneven, compare the current count with the previous checkpoint before continuing. Fixing one missed stitch early is faster than compensating later, and it preserves the measurements used by the assembly instructions.
Frequently Asked Questions
Can I change the colors?
Yes. Keep the yarn weight and fiber behavior consistent and use enough contrast for the decorative detail. Make a washed swatch with every major yarn substitution.
Is this pattern physically tested?
No physical sample test is claimed. The stitch counts are computationally checked and the written construction is reviewed. Make a gauge swatch, use the measurement checkpoints, and test fit or assembly before gifting.
Can a beginner make this?
This is an intermediate project because shaping and assembly require careful counting. Practise the named special stitches in a small swatch before working the main piece.
Conclusion
Keep the completed measurements and your yarn details with your pattern notes. The finished piece should match the described construction before it is styled or gifted. If a checkpoint does not match, correct the underlying count or gauge instead of concealing the difference during finishing.
BabyYarnie Printable Crochet Pattern Card
BabyYarnie — easy-to-follow crochet for everyday makers.
Project: Crochet Candy Corn Coaster Set
Skill level: Easy Hook: 4 mm, adjusted to gauge Yarn: Worsted
Finished size: Before border: target 5 inches wide by 4 inches tall; after border approximately 5.5 by 4.5 inches
Card Materials
- For four coasters, estimated 35 yards white, 40 yards orange and 100 yards yellow worsted absorbent cotton
- 4 mm hook; three stitch markers per coaster; tapestry needle; scissors; tape measure
- Paper and pencil for a blocking outline; rust-resistant pins and a suitable blocking surface
Card Instructions
- Crochet the Three-Stripe Triangle: White Rows 1-5, orange Rows 6-9, yellow Rows 10-20; increase both ends of every even row through 18 to reach 20 sc.
- Add the Rounded Yellow Border: One yellow edging round: 24 bottom, 20 first side, 6 tip and 20 second side = 70 sc.
- Make Four and Block the Set: Make four matching single-layer coasters, block and dry fully before use.
Finish: Check every count, weave in all ends, block to measurement, and inspect each join.