
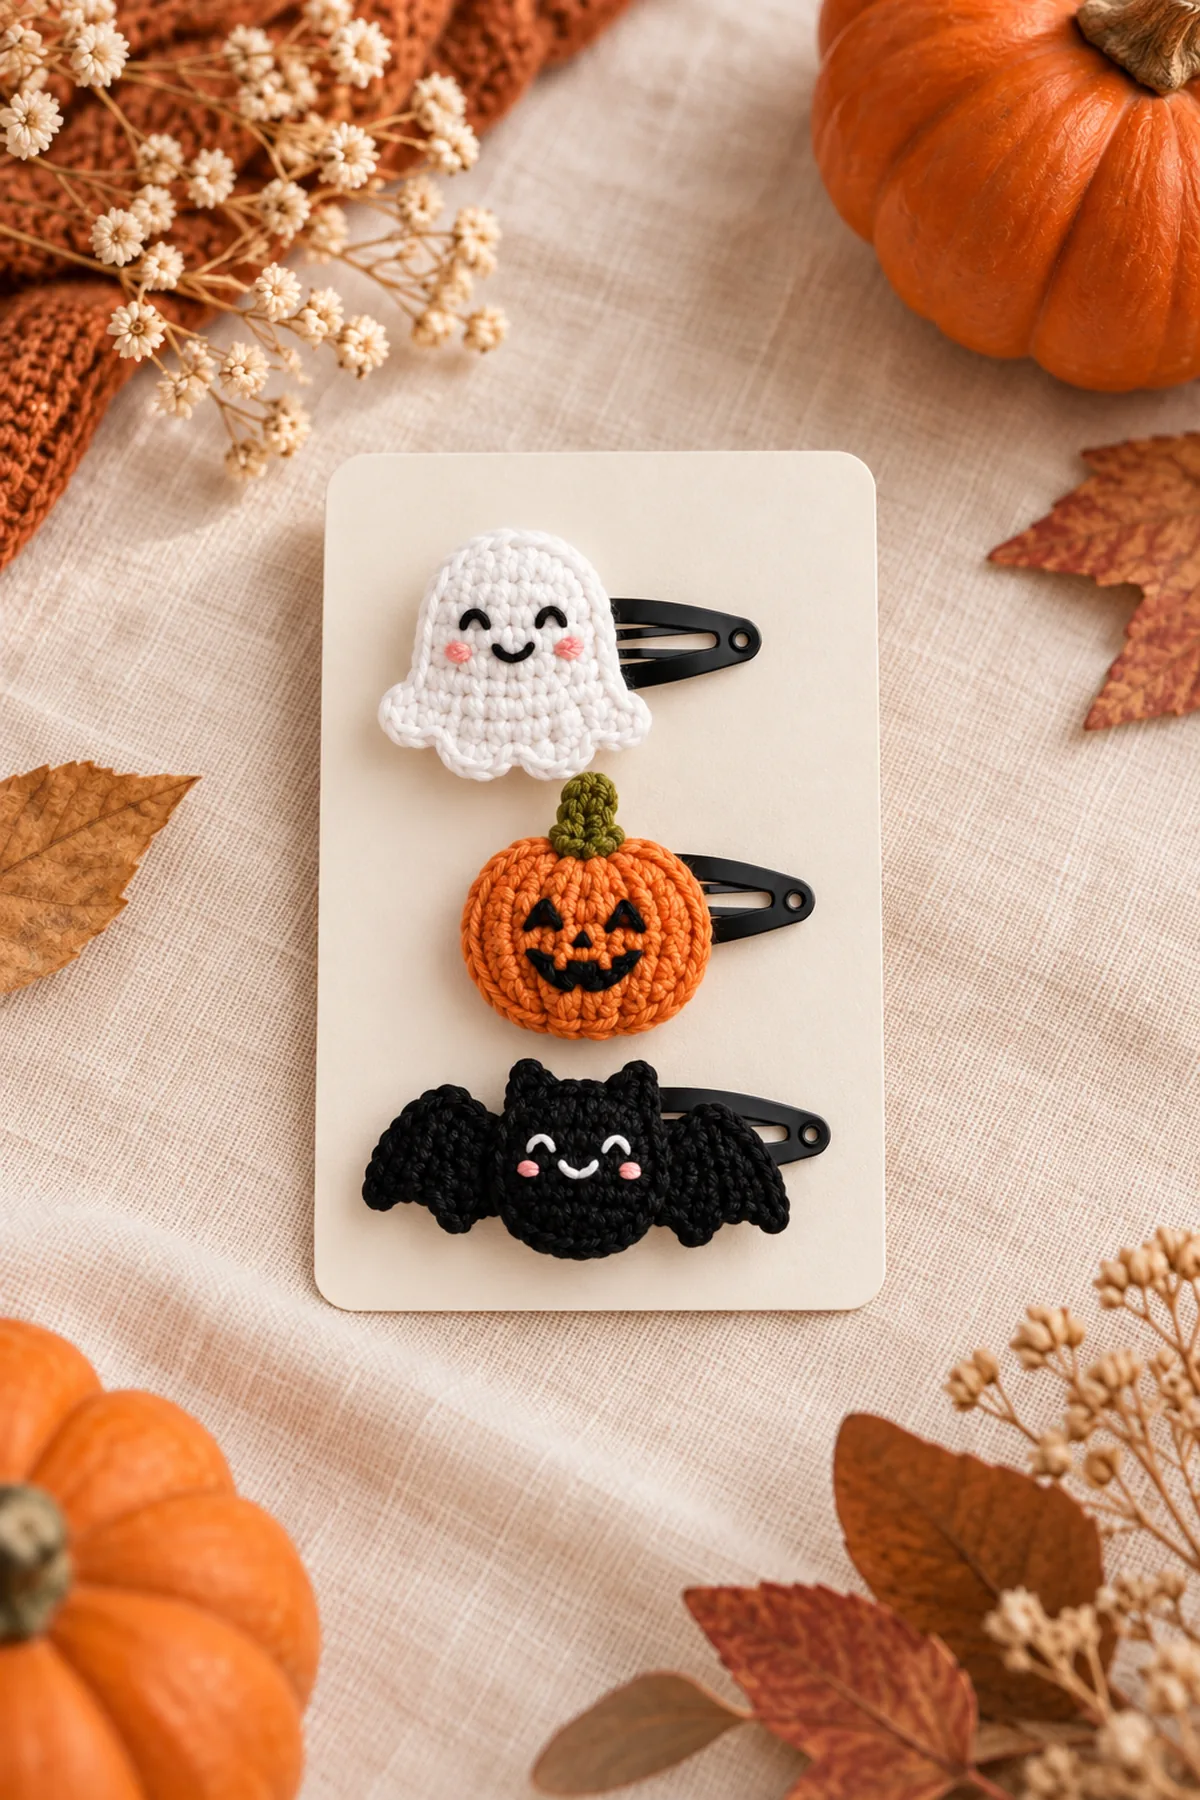
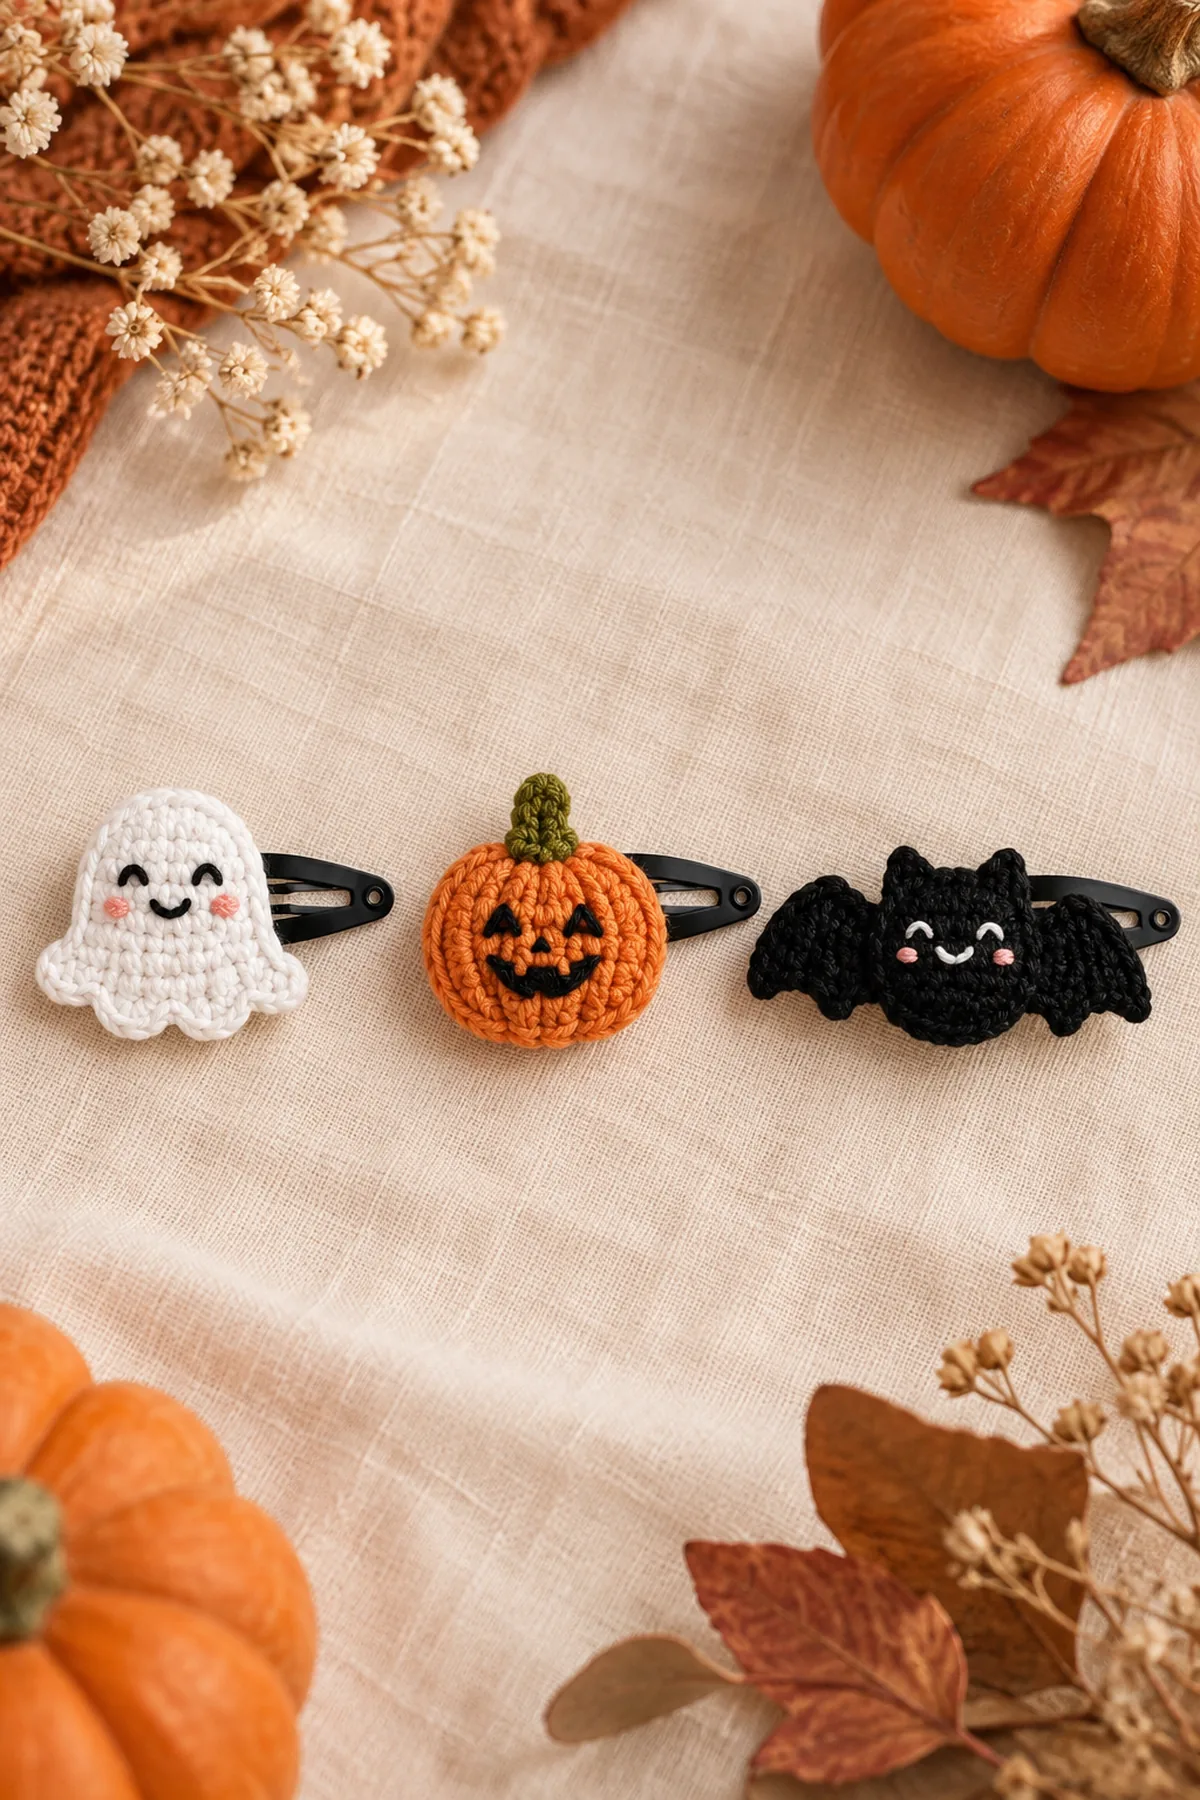
These original BabyYarnie Halloween crochet hair clips turn three classic motifs—a friendly ghost, a ribbed pumpkin, and a smiling bat—into lightweight accessories for older children and adults. Each motif is worked flat with embroidered features, then stitched to felt around a metal snap clip so the crochet does not interfere with the clip mechanism.
The pumpkin begins with a counted circle and surface ribs, the ghost is shaped in short turned rows, and the bat combines a small round body with two tapered wings. All three designs are written separately so every accessory named in the title is fully covered.
Why You’ll Love This Project
The motifs use tiny yarn amounts, work up quickly, and are easy to personalize with different expressions. Their shared scale and restrained Halloween palette make the finished trio feel coordinated without copying the exact arrangement or extra motifs in the reference image.
Materials
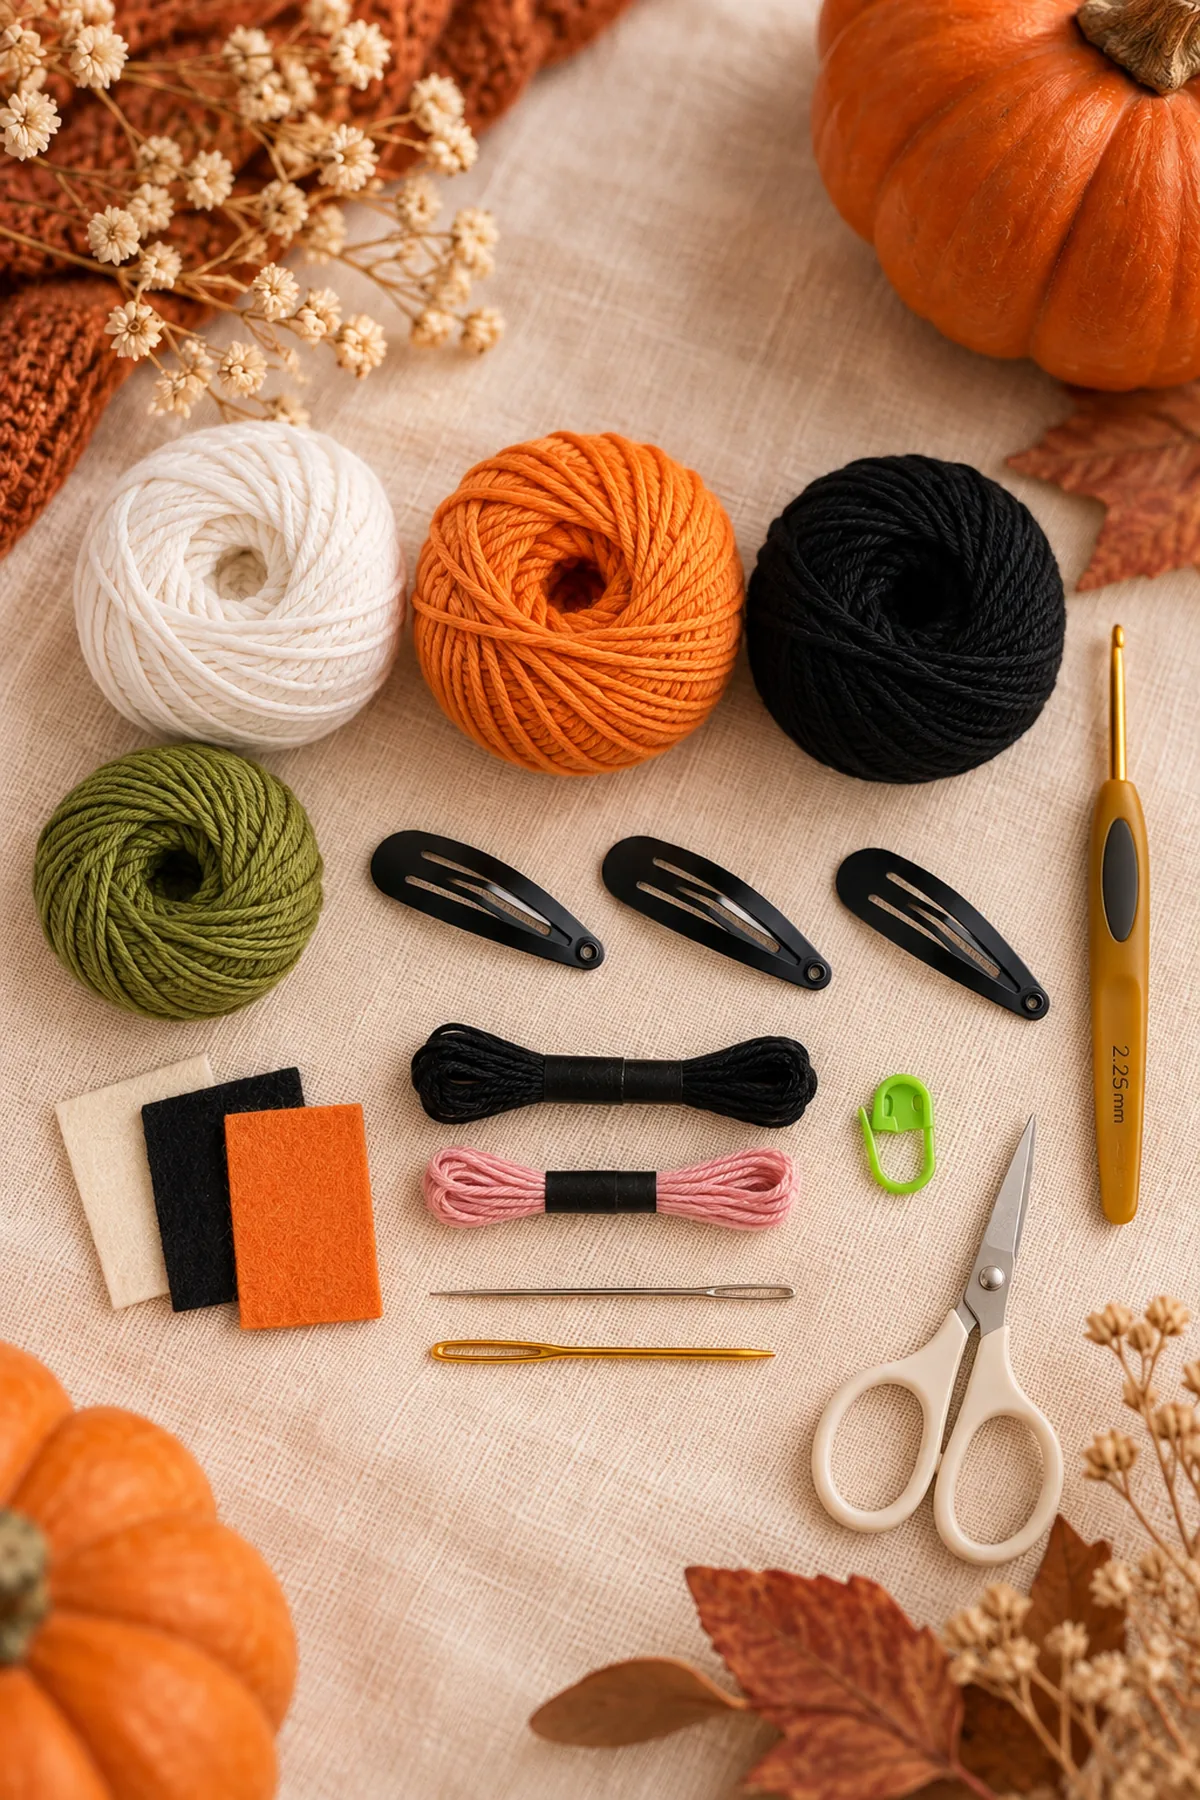
- Approximately 15 yards each white, orange, and black sport-weight cotton yarn
- Approximately 5 yards green sport-weight cotton yarn
- Small amounts black, white, and pink embroidery thread
- 2.25 mm crochet hook
- Three 2-inch metal snap hair clips
- Three small pieces of color-matched craft felt
- Sharp yarn needle and sewing needle
- Strong polyester sewing thread
- Scissors
- Removable stitch marker
Gauge, Measurements, and Planning
A firm fabric keeps the motifs crisp. The 24-stitch pumpkin circle should measure about 2 inches across; adjust the hook rather than adding rounds if your motif is much larger.
Make and wash a gauge swatch before beginning. Measure only after the swatch is completely dry. If the stitch width differs, change hook size rather than pulling the working yarn tighter. Keep a written count at the end of every section so the finished edges remain balanced and the assembly points line up.
Abbreviations and Special Stitches
- ch: chain
- sc: single crochet
- hdc: half double crochet
- dc: double crochet
- sl st: slip stitch
- st(s): stitch(es)
- rnd: round
- inc: work 2 sc in one stitch
Special stitch guidance: Surface slip stitch: hold the yarn behind the motif, insert the hook from front to back, pull up a loop, then pull that loop through the loop already on the hook. Keep every surface stitch relaxed so the pumpkin remains flat.
Important Notes
- These accessories contain metal clips and small components and are not suitable for babies or children under age 3.
- Use only with direct adult supervision; remove before sleep, naps, car-seat use, or active play.
- Embroider every face—do not use safety eyes, beads, buttons, or glued decorations.
- Keep yarn tails short and fully enclosed between the crochet motif and felt backing.
- Sew the backing securely and keep all stitches clear of the snap hinge and moving lower blade.
Complete Instructions for Cute Halloween Crochet Hair Clips – Ghost, Pumpkin & Bat
Crochet the Pumpkin Clip
Work in joined rounds and mark the first stitch.
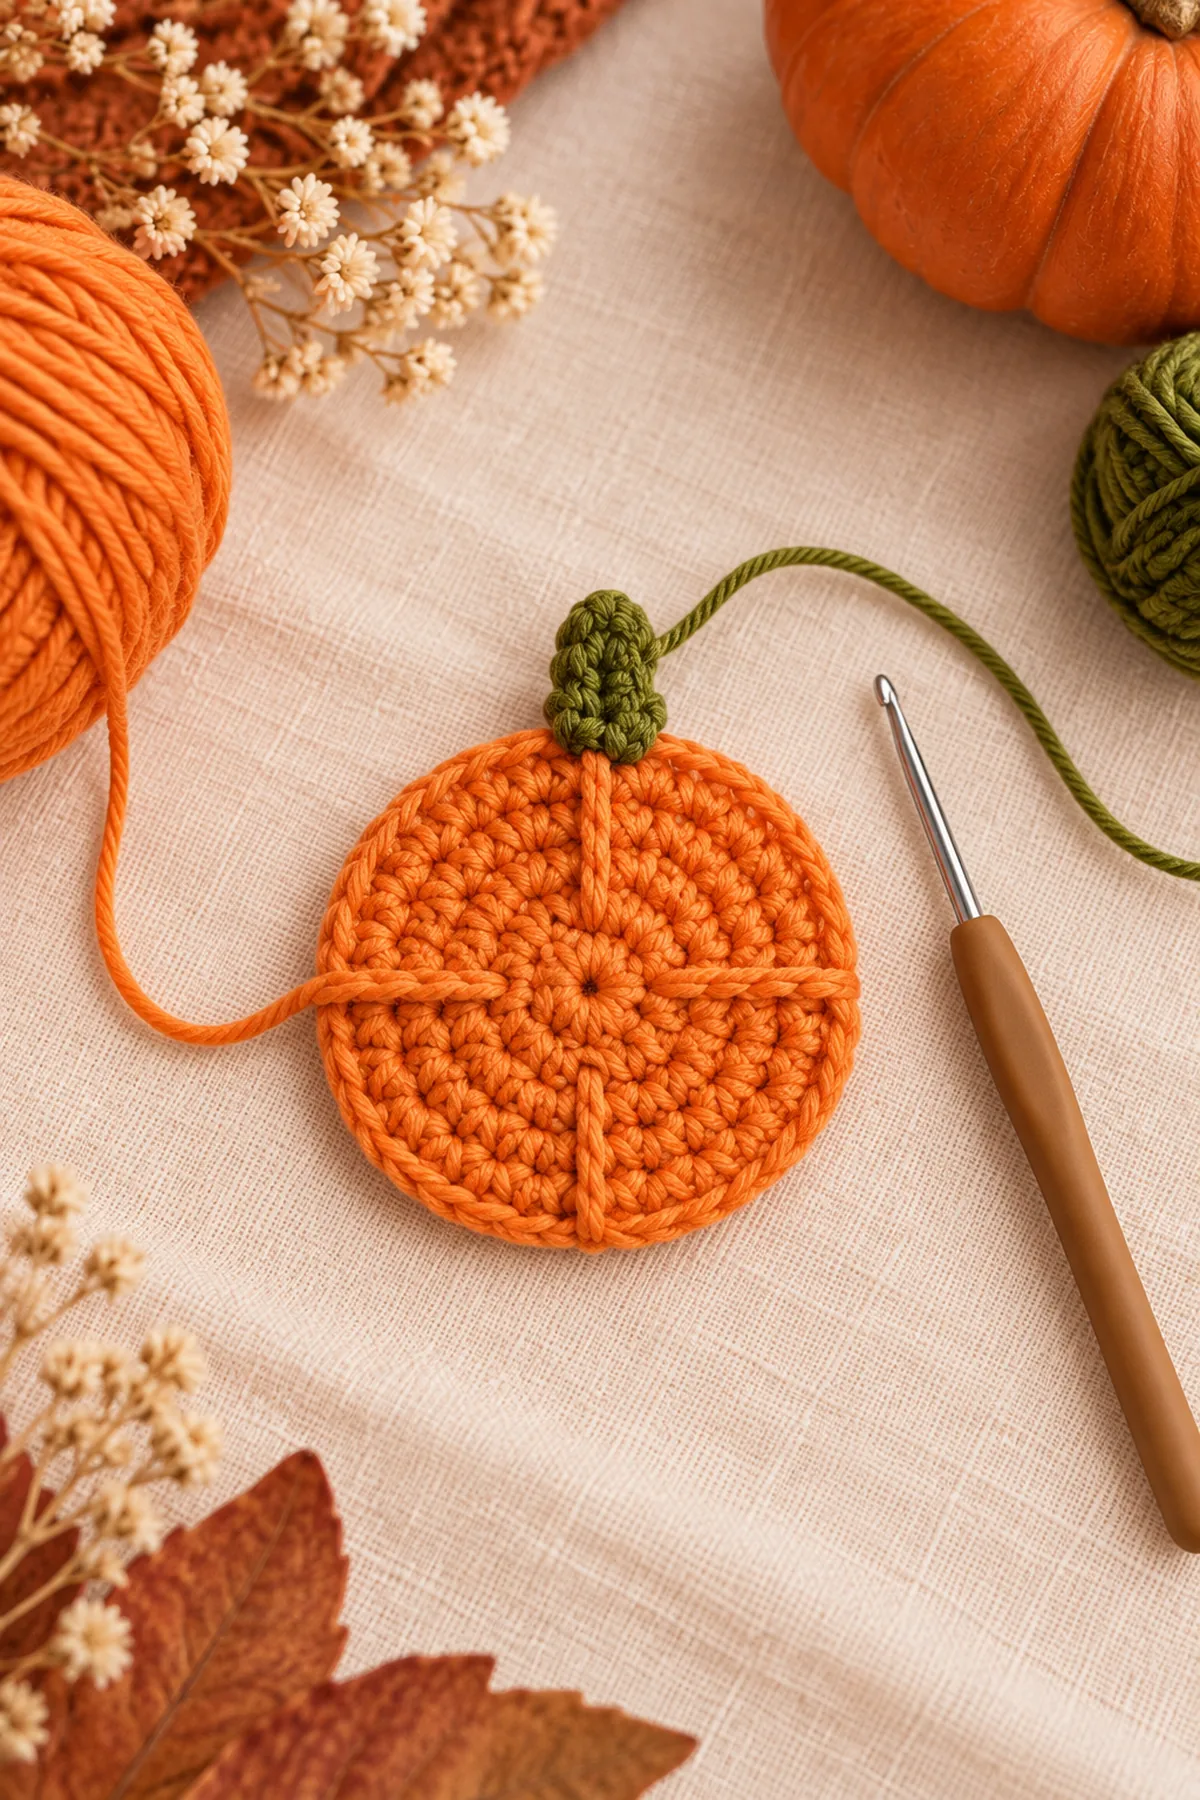
- Pumpkin Rnd 1: With orange, make 6 sc in a magic ring. Join without turning. (6 sts)
- Pumpkin Rnd 2: Work 2 sc in every stitch. (12 sts)
- Pumpkin Rnd 3: Repeat [sc in next stitch, inc in next stitch] six times. (18 sts)
- Pumpkin Rnd 4: Repeat [sc in next 2 stitches, inc in next stitch] six times. (24 sts)
- Fasten off. Add four relaxed vertical surface-slip-stitch ribs. With green, join at the top, ch 4, sl st in the second chain and next 2 chains, then secure the stem to the pumpkin.
- Embroider two small triangular eyes and a curved mouth with black thread, anchoring every end on the wrong side.
Crochet the Ghost Clip
Turn after every row; the turning chain does not count as a stitch.
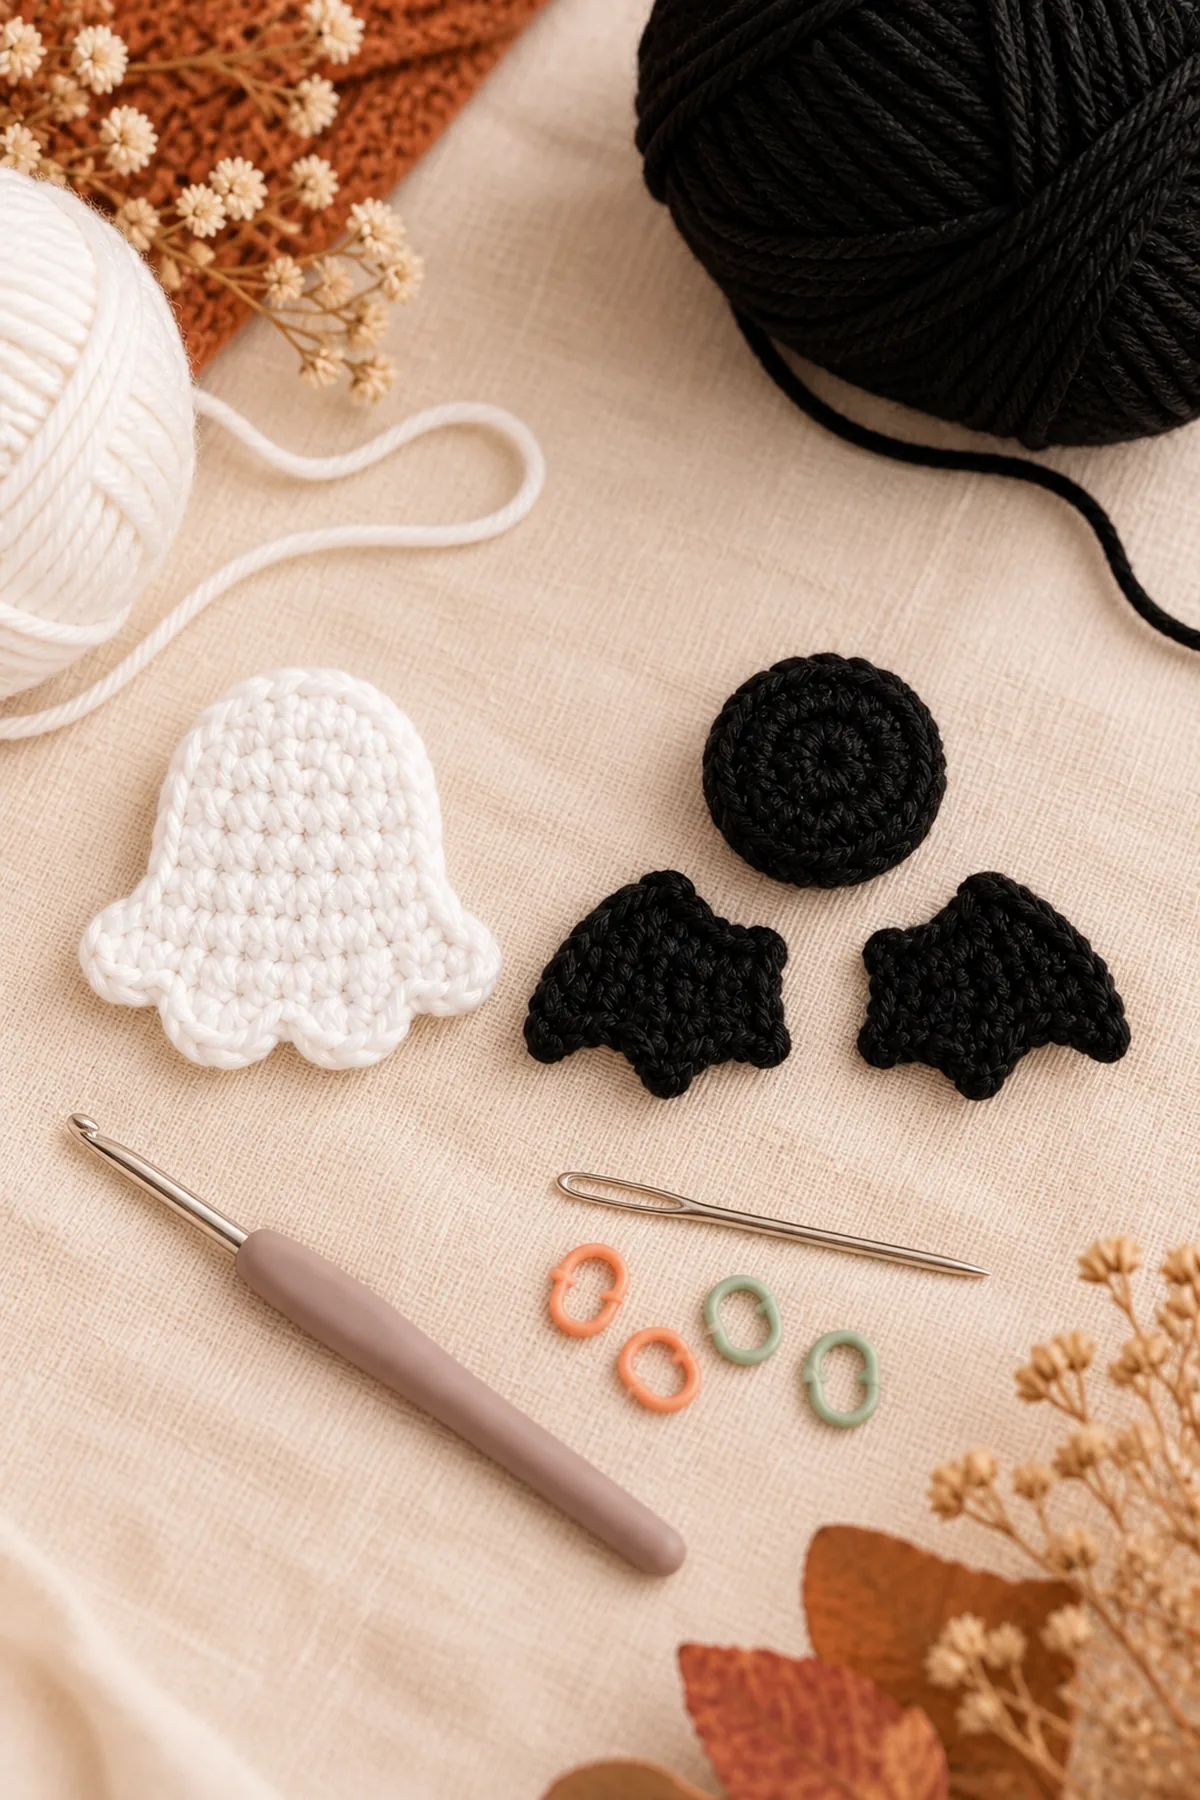
- Ghost Row 1: With white, ch 7. Sc in the second chain and across. Turn. (6 sts)
- Ghost Row 2: Ch 1, inc, sc in next 4 stitches, inc. Turn. (8 sts)
- Ghost Rows 3–6: Ch 1, sc across. Turn. (8 sts)
- Ghost Row 7: Ch 1, sc2tog, sc in next 4 stitches, sc2tog. Do not turn. (6 sts)
- Work down the side, then create three lower bumps with [sl st, 3 hdc in the next edge space, sl st] repeated three times. Continue evenly around the second side and rounded top; join and fasten off.
- Embroider two small black oval eyes, a tiny smile, and optional pink cheek stitches.
Crochet the Bat Clip
Make the body first, then attach two mirror-image wings.
- Bat Body Rnd 1: With black, make 6 sc in a magic ring. (6 sts)
- Bat Body Rnd 2: Work 2 sc in every stitch. (12 sts)
- Bat Body Rnd 3: Repeat [sc in next stitch, inc in next stitch] six times. Join and fasten off. (18 sts)
- For the first wing, ch 8. Starting in the second chain, work sl st, sc, hdc, dc, tr, dc, and sc. Fasten off. Make a second wing the same way and turn it over to mirror the first.
- Sew each wide wing edge to one side of the body. At the top, join black yarn and work [ch 3, sl st in second chain and next chain, sl st to body] twice for two small ears.
- Embroider two white eyes and a tiny pink smile, hiding all ends on the wrong side.
Attach the Motifs to the Hair Clips
Complete one clip at a time and test its mechanism before continuing.
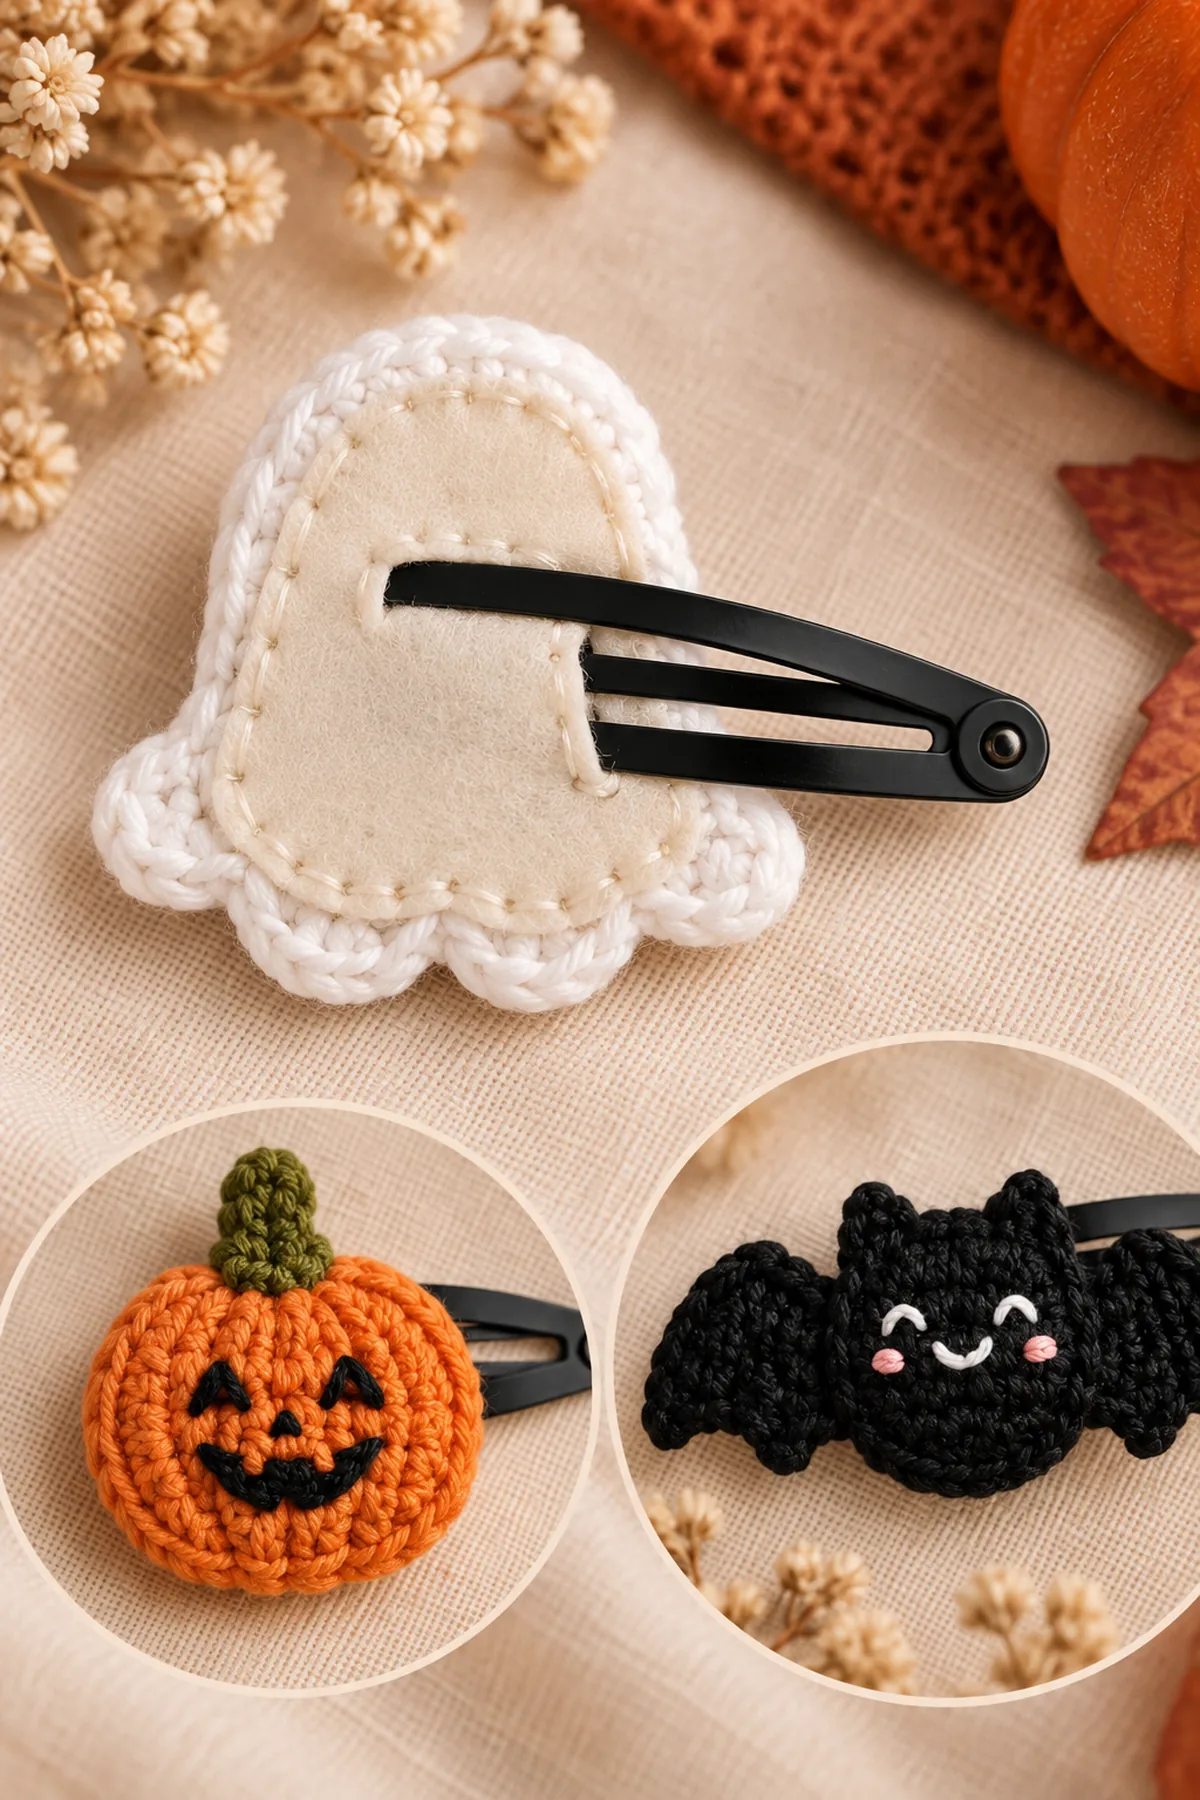
- Cut a felt backing about 1/8 inch smaller than each motif. Make a narrow slit only where the stationary top blade of the snap clip passes through the felt.
- Slide the felt onto the top blade so it rests beneath the crochet motif. Center the clip horizontally and keep the hinge and lower blade completely clear.
- With strong sewing thread, stitch around the complete felt edge through the back loops of the motif. Add several small anchoring stitches through the opening in the stationary clip blade where available.
- Knot securely between the felt and crochet, trim the thread, snap the clip open and closed ten times, and pull-test the motif before wear.
Assembly and Shaping
Keep each motif centered over the stationary top blade. The felt must conceal embroidery tails and attachment stitches while remaining clear of the hinge, spring, pointed end, and moving lower blade.
Lay every component on a flat surface before joining. Match the marked centers first, then divide each remaining edge into equal sections. Work through both layers with consistent tension and pause after each section to check that the fabric lies flat. This measured approach prevents twisting and keeps decorative details facing the intended direction.
Finishing
- Steam lightly from several inches away without touching the yarn, felt, or metal clip with the iron.
- Check that every embroidered feature is tight and that no yarn or thread end is exposed.
- Open and close each clip ten times to confirm that the hinge and lower blade move freely.
- Pull-test the motif and felt backing before every use; discard the accessory if any stitch loosens or the metal bends.
For a polished result, weave each tail through several same-color stitches, reverse direction once, and trim only after the fabric has been gently stretched. Block to the listed dimensions without flattening textured stitches. Inspect joins, borders, straps, and decorative pieces before the project is used or gifted.
Helpful Tips
- Use smooth mercerized cotton for crisp small shapes and clean embroidery.
- Trace the finished motif onto felt, then cut inside the traced line so the backing stays hidden.
- Make mirror-image bat wings by flipping the second finished wing before sewing.
- For a coordinated set, keep all three motifs between 2 and 2.5 inches wide and use the same style of snap clip.
Good lighting and a contrasting stitch marker make counting much easier. If a section looks uneven, compare the current count with the previous checkpoint before continuing. Fixing one missed stitch early is faster than compensating later, and it preserves the measurements used by the assembly instructions.
Frequently Asked Questions
Are crochet hair clips safe for babies?
No. These clips contain metal and small components and are intended only for older children age 3+ or adults with direct supervision. Remove them before sleep and active play.
Can I glue the motifs to the clips?
Do not rely on glue alone. A fitted felt backing and complete sewn edge create a more inspectable attachment; optional fabric glue can hold pieces temporarily while you sew.
Can I use acrylic yarn?
Yes, but smooth cotton usually produces crisper small motifs. Whatever fiber you choose, work firmly and test the finished attachment.
Conclusion
The finished Halloween hair clip set includes every named design: one friendly ghost, one ribbed pumpkin, and one winged bat. Counted construction, embroidered faces, fitted felt, and tested sewn attachments give the trio a neat handmade finish for supervised wear by older children or adults.
BabyYarnie Printable Crochet Pattern Card
BabyYarnie — easy-to-follow baby crochet for everyday makers.
Project: Cute Halloween Crochet Hair Clips – Ghost, Pumpkin & Bat
Skill level: Easy Hook: 2.25 mm Yarn: Sport
Finished size: Motifs approximately 2–2.5 inches wide on 2-inch snap clips
Card Materials
- Approximately 15 yards each white, orange, and black sport-weight cotton yarn
- Approximately 5 yards green sport-weight cotton yarn
- Small amounts black, white, and pink embroidery thread
- 2.25 mm crochet hook
- Three 2-inch metal snap hair clips
- Three small pieces of color-matched craft felt
- Sharp yarn needle and sewing needle
- Strong polyester sewing thread
- Scissors
- Removable stitch marker
Card Instructions
- Crochet the Pumpkin Clip: Increase an orange circle from 6 to 24 stitches, add four surface ribs, a short green stem, and an embroidered face.
- Crochet the Ghost Clip: Shape a six-to-eight-stitch white ghost in turned rows, add three lower bumps, then embroider a friendly face.
- Crochet the Bat Clip: Make an 18-stitch black body, two mirrored tapered wings, two tiny ears, and securely embroidered features.
- Attach the Motifs to the Hair Clips: Back each motif with fitted felt, sew around the full edge and stationary clip blade, then test the snap mechanism and pull-test the join.
Finish: Check every count, weave in all ends, block to measurement, and inspect each join.