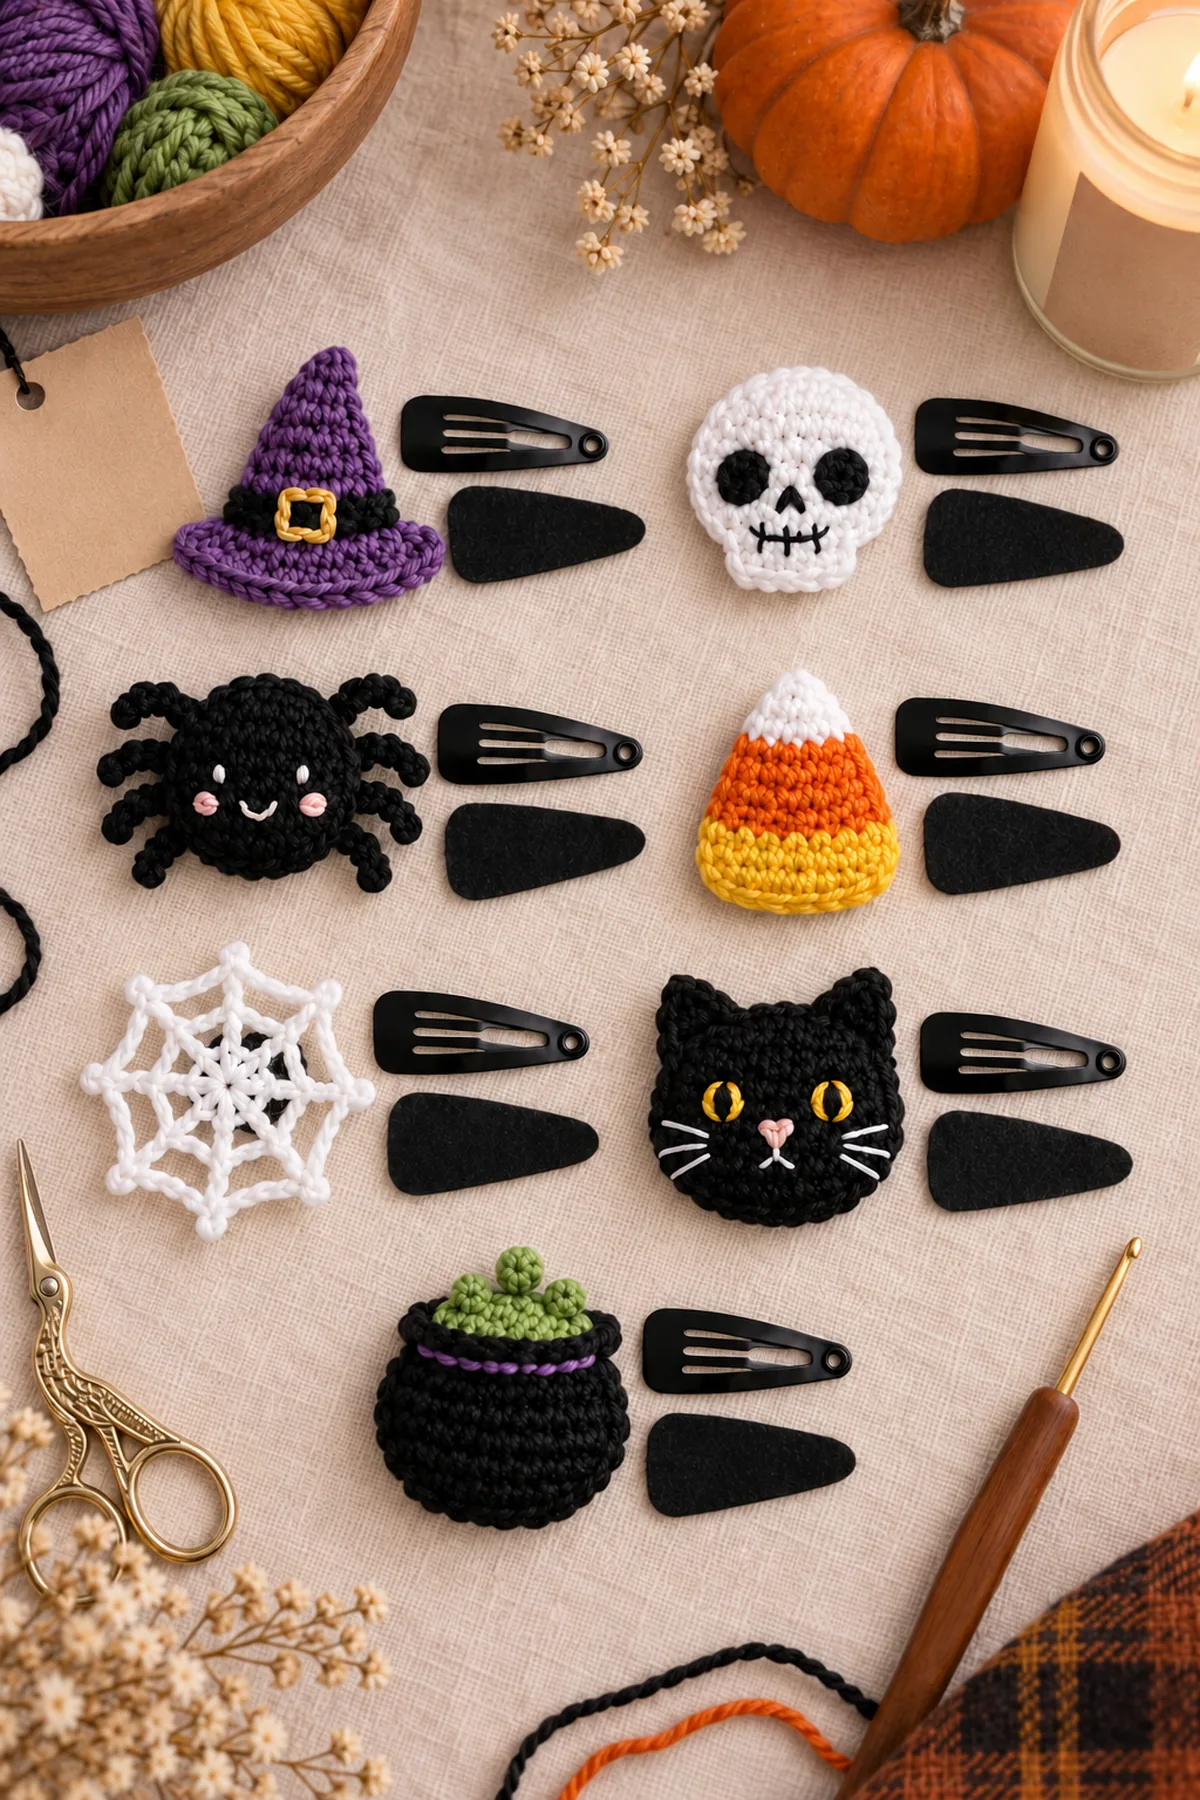
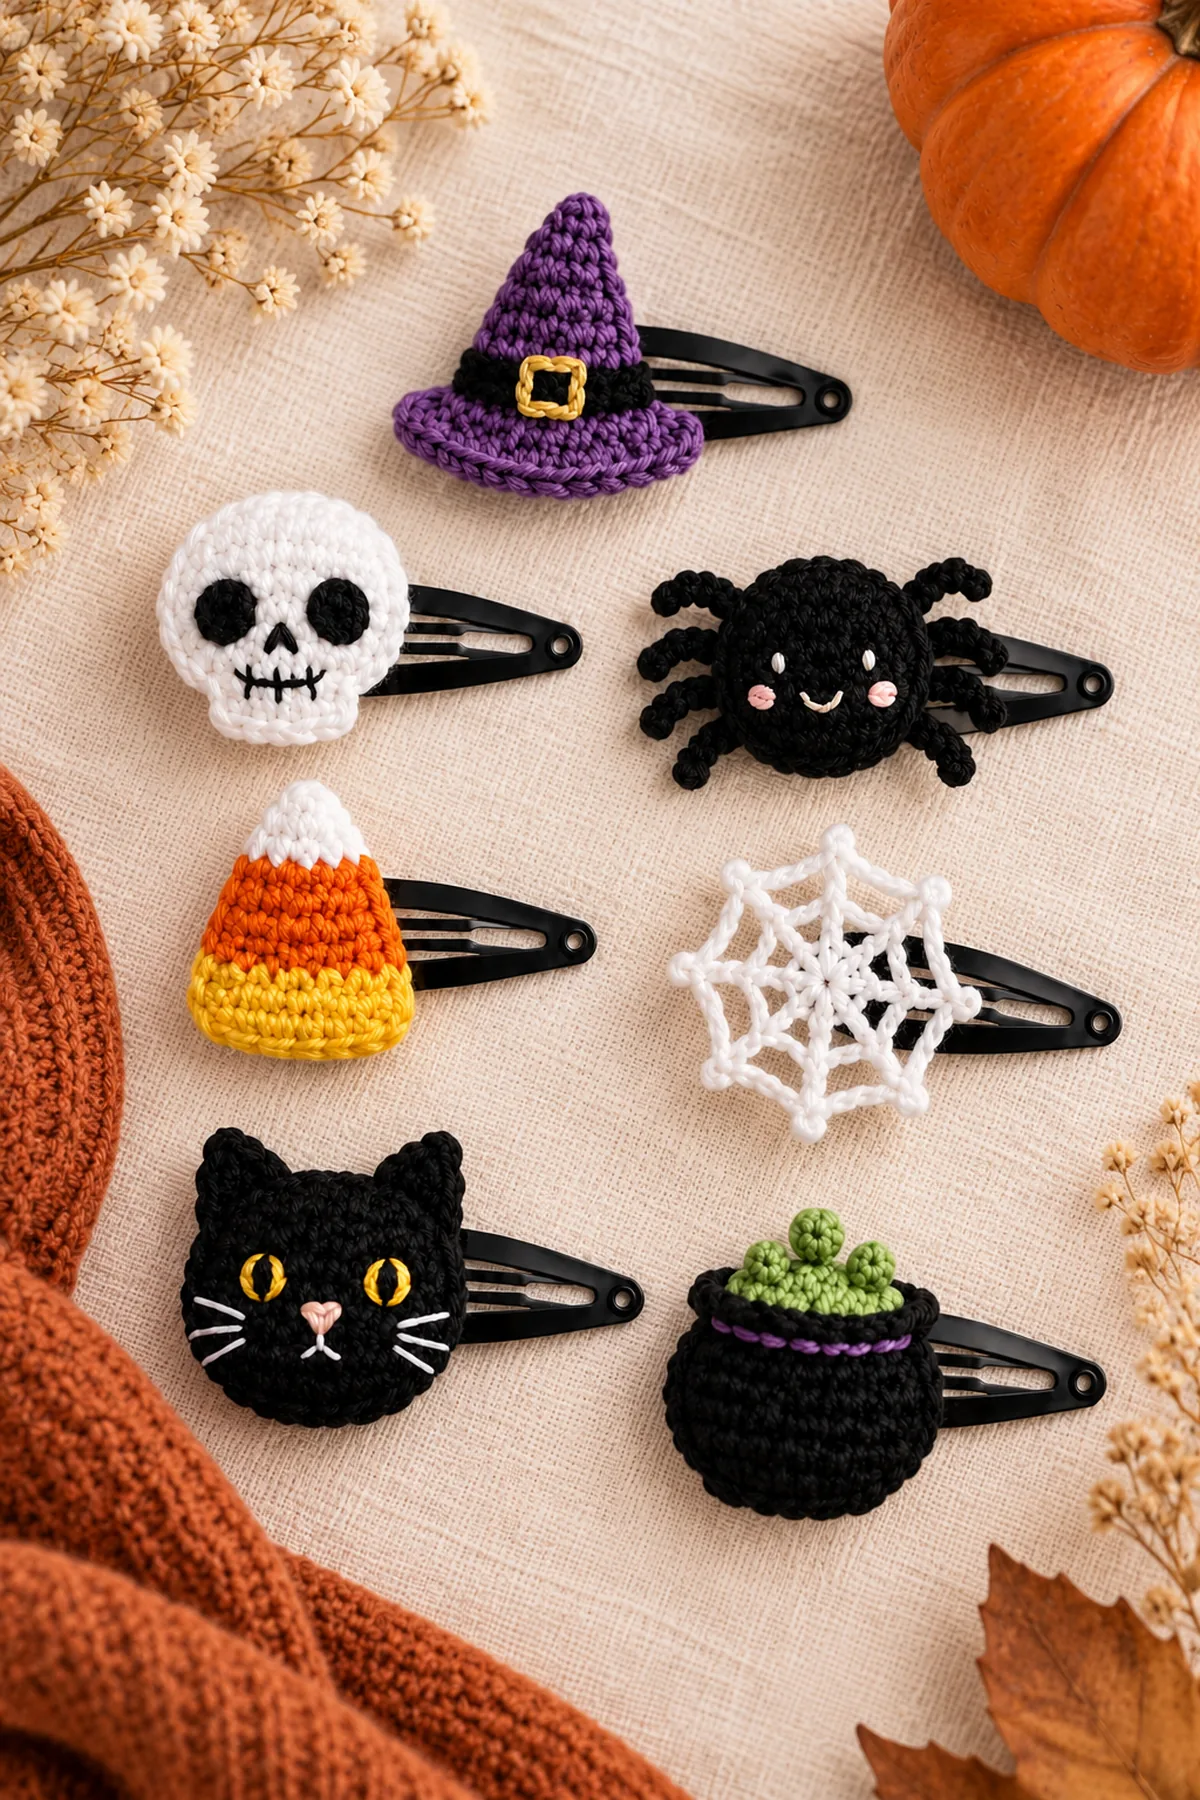
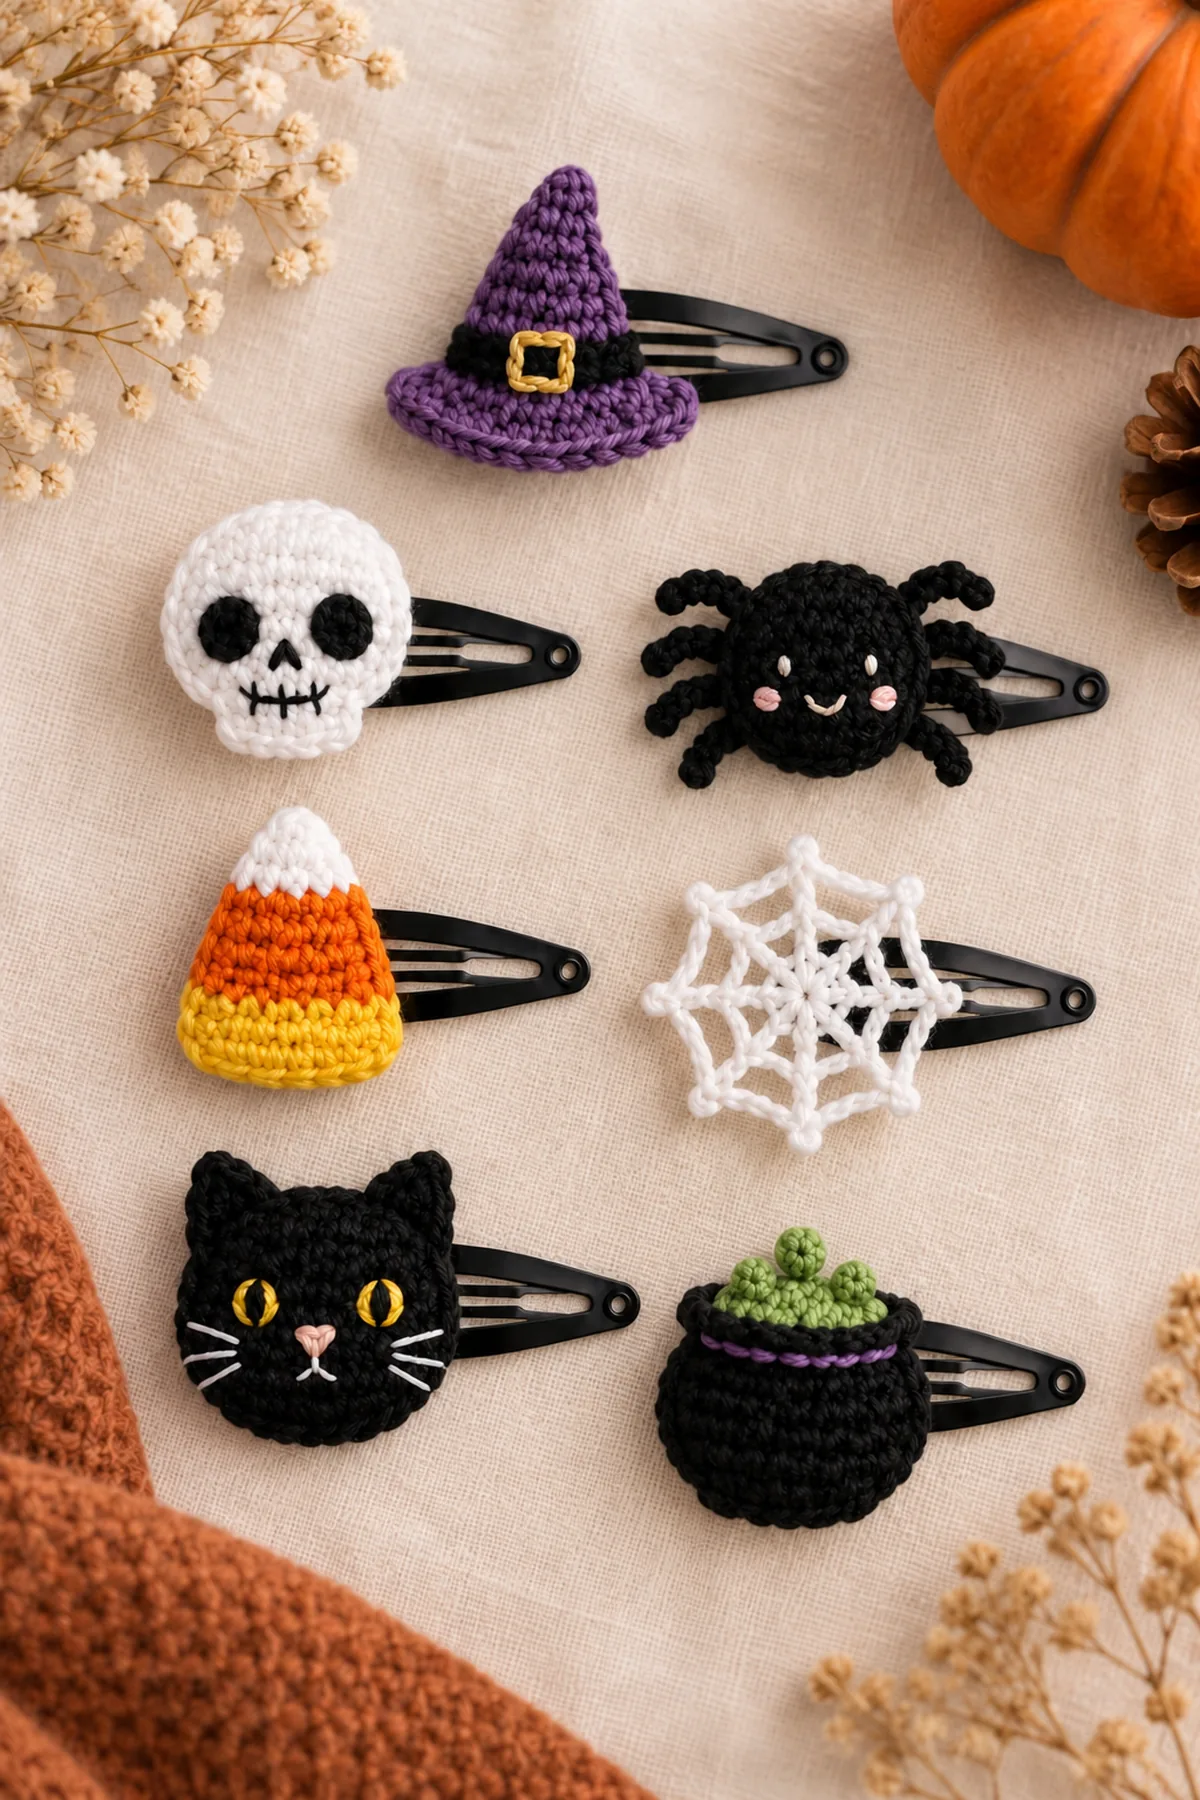
This halloween crochet clip motifs tutorial follows the supplied design photograph while using independently written BabyYarnie instructions. Seven flat Halloween crochet snap-clip motifs selected from the supplied ten-design reference: purple witch hat with black band and gold embroidered buckle, white skull, black eight-legged spider, yellow-orange-white candy corn, white eight-spoke spiderweb, black cat with gold embroidered eyes, and black cauldron with purple rim and green bubbles. No hard eyes. A companion to the existing ghost, pumpkin and bat tutorial. Make one motif as a trial, check its measurements and backing attachment, then complete the seven-design set.
This companion adds the seven designs beyond the ghost, pumpkin and bat in our earlier Halloween clip tutorial. Each motif has its own complete instructions. Make only the designs you want, or use the linked trio to complete a ten-design display.
Pattern Details
- Hook Size: 2.25 mm starting point
- Finished Size: Motifs approximately3-5cm across, excluding spider legs; mount on5cm snap clips
- Gauge: Target8sc and8rows per2.5cm in sport cotton; verify motif fits backing
- Estimated Time: 6-10 hours for all seven clips
- Construction: Separate flat motifs in joined or spiral circles and turned rows; embroidered features and sewn felt backing on snap clips
- Skill level: Intermediate
Why You�ll Love This Project
Small flat motifs turn leftover cotton into a coordinated set. Their shapes vary from solid circles and tapered rows to an open chain web, so the collection offers several short projects without repeating the earlier trio.
Materials
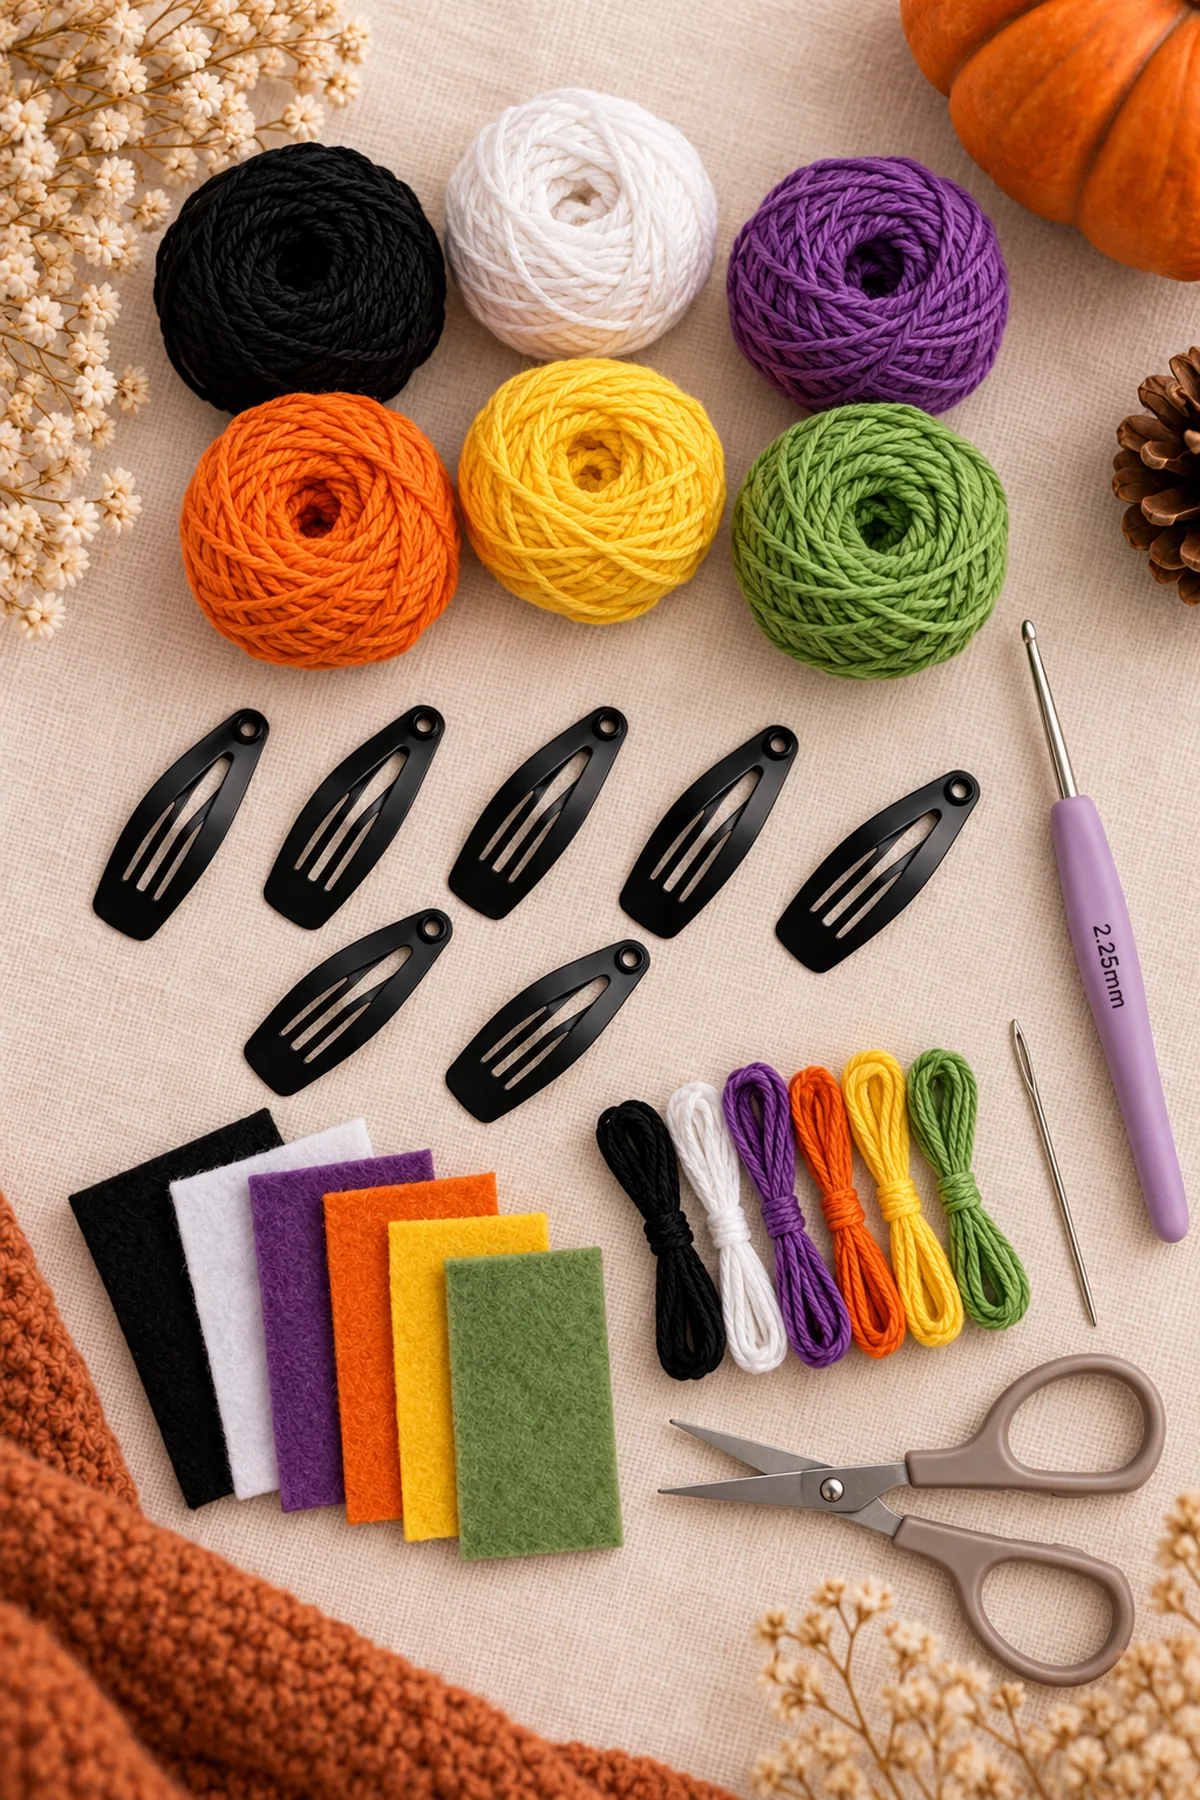
- Planning allowance: 20m black,10m white,5m purple and3m each yellow, orange and green sport cotton, plus swatch allowance
- Small amounts of gold, pink, white and black embroidery thread;2.25mm hook
- Seven5cm metal snap clips; color-matched felt; strong sewing thread and sewing needle; blunt yarn needle, scissors and markers
Gauge, Measurements, and Planning
At target gauge the24-stitch circular motifs are about2.4cm in diameter before ears or jaw additions. The12-stitch hat base is about3.75cm wide, and the18-stitch brim is about5.6cm wide. Check each motif against its5cm clip before making the backing. The spider legs extend beyond the body but remain short sewn fabric strips. The open web is stabilized by its felt backing rather than starched into a rigid item.
Make and wash a gauge swatch before beginning. Measure only after the swatch is completely dry. If the stitch width differs, change hook size rather than pulling the working yarn tighter. Keep a written count at the end of every section so the finished edges remain balanced and the assembly points line up.
Abbreviations and Special Stitches
- ch: chain
- sc: single crochet
- sl st: slip stitch
- st(s): stitch(es)
- inc: 2 sc in one stitch
- sc2tog: single crochet two stitches together
- BLO: back loop only
- RS: right side
Special stitch guidance: Sc2tog: insert hook into the first stitch and draw up a loop; repeat in the next stitch, yarn over and draw through all three loops. This uses two old stitches and produces one. Inc uses one old stitch and produces two. Ch 1 at a row end or round start does not count. A joining slip stitch does not count unless the web instructions explicitly include it. Change color on the last yarn-over of the preceding stitch, then secure both tails on the wrong side.
Important Notes
- Development note: stitch arithmetic and assembly directions are reviewed, but no physically crocheted sample or tested gauge is claimed. Finished measurements, time and yarn quantities are planning estimates; check an actual swatch and trial assembly.
- Images are AI-generated design illustrations. They show the intended appearance and are not stitch charts or photographs of a physically tested sample.
- The reference image supplies the required visual direction. These instructions are independently authored; no source wording, pattern chart or image pixels are reproduced.
- Joined sole and circular motif rounds are not turned. Flat panel rows are turned after ch 1. Mark the first real stitch, keep the turning chain out of the count and remove markers before use.
- Metal clips and small motifs are accessories for older children and adults, not babies or toddlers. Remove before sleep. Embroider all faces and sew each motif securely; use no beads, hard eyes or glued attachments.
Complete Instructions for Crochet Halloween Hair Clips: Seven More Motifs
Purple Witch Hat with Embroidered Buckle
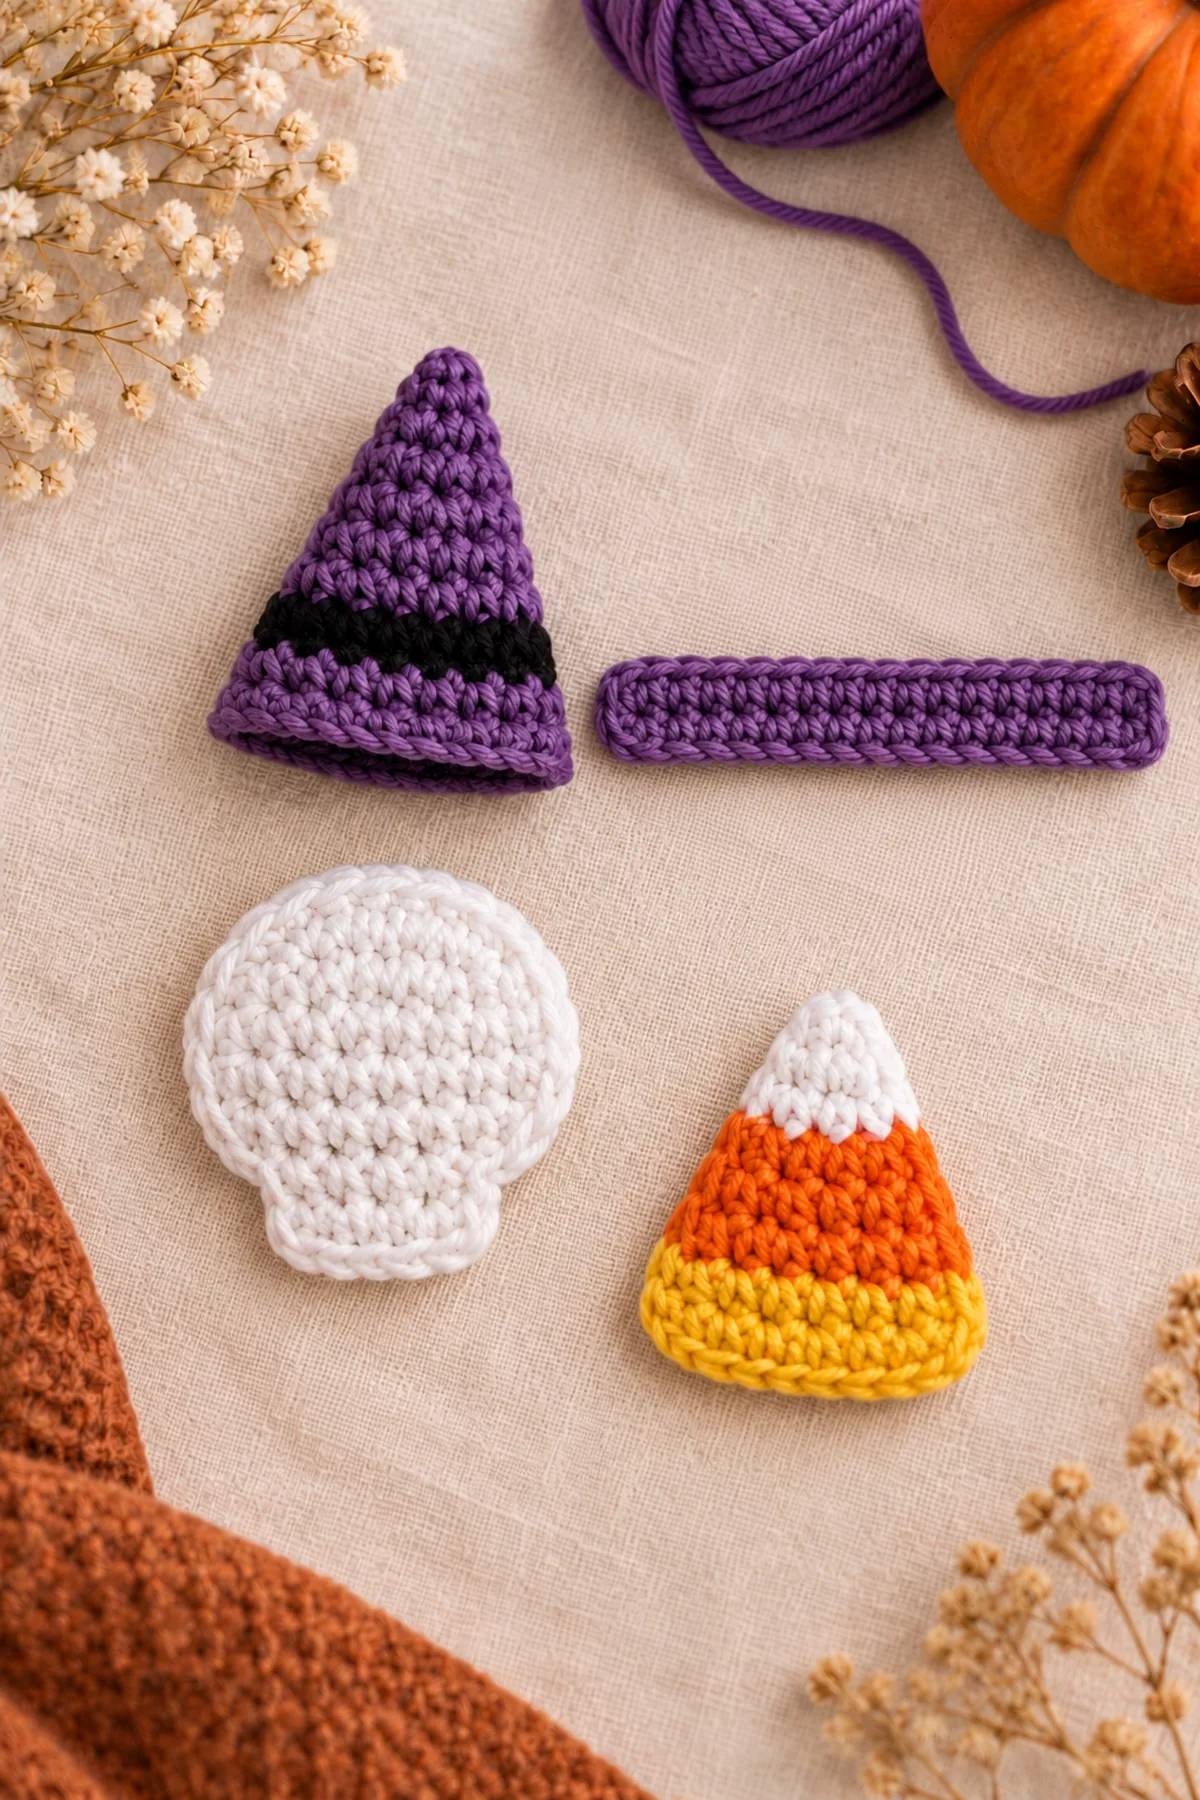
- Hat crown Row 1: ch 13; sc in second chain from hook and in each remaining chain. (12 sts) Ch 1 and turn; this chain never counts.
- Hat Row 2: Sc2tog, sc in next 8, sc2tog; ch 1 and turn. (10 sts)
- Hat Row 3: Sc2tog, sc in next 6, sc2tog; ch 1 and turn. (8 sts)
- Hat Row 4: Sc2tog, sc in next 4, sc2tog; ch 1 and turn. (6 sts)
- Hat Row 5: Sc2tog, sc in next 2, sc2tog; ch 1 and turn. (4 sts)
- Hat Row 6: Sc2tog, sc2tog; ch 1 and turn. (2 sts)
- Hat Row 7: Sc2tog; fasten off. (1 sts)
- Use purple for Row1, black for Row2, purple for Rows3-7. Change on the last yarn-over immediately before the new row; fasten and weave the unused color ends. Row1 is the broad base and the final one-stitch row is the tip.
- Hat brim Row 1: ch 19; sc in second chain from hook and in each remaining chain. (18 sts) Ch 1 and turn; this chain never counts.
- Row 2: Sc in each stitch. Ch 1 and turn after each row except the last; fasten off after the last row. (18 sts)
- Work the brim in purple. Center the12 foundation loops of the crown along the center12 stitches of one brim long edge, leaving3 brim stitches beyond each side. Sew these12 pairs together. Embroider a small gold rectangle over the center of the black band, using four short straight stitches with an additional center bar; no separate buckle hardware.
White Skull with a Short Jaw
- Skull circle Round 1: 6 sc into a magic ring. (6 sts) Tighten the ring, mark the first sc, and work a continuous spiral without joining or turning.
- Round 2: inc in each stitch. (12 sts)
- Round 3: [sc in next 1 stitches, inc in next stitch] 6 times. (18 sts)
- Round 4: [sc in next 2 stitches, inc in next stitch] 6 times. (24 sts)
- Fasten off. Mark six consecutive bottom perimeter stitches before making the jaw. Join white in the first of these six; jaw Row1: sc in all six marked stitches, ch1 and turn. (6 sts) Do not make a separate foundation chain.
- Row 2: Sc in each stitch. Ch 1 and turn after each row except the last; fasten off after the last row. (6 sts)
- Jaw Row 3: Sc2tog, sc in next 2, sc2tog; ch 1 and turn. (4 sts)
- Fasten off. The circular part is the skull crown and the short tapered extension is the jaw. Embroider two filled black oval eyes on the front, with two stitch widths between them. Add an inverted V for the nose and a short horizontal mouth line crossed by three short vertical tooth stitches. Secure all threads on the back, under the felt.
Black Spider with Eight Short Legs
- Spider body Round 1: 6 sc into a magic ring. (6 sts) Tighten the ring, mark the first sc, and work a continuous spiral without joining or turning.
- Round 2: inc in each stitch. (12 sts)
- Round 3: [sc in next 1 stitches, inc in next stitch] 6 times. (18 sts)
- Round 4: Sc in each stitch. Fasten off; flatten gently, do not stuff. (18 sts)
- Spider leg Row 1: ch 7; sc in second chain from hook and in each remaining chain. (6 sts) Ch 1 and turn; this chain never counts.
- Row 2: Sl st in each of the6 stitches. Ch 1 and turn after each row except the last; fasten off after the last row. (6 sts)
- Make eight legs in black. Each leg is a six-sc strip with a slip-stitch return row; fold very slightly at its center for an angled silhouette. Number body perimeter1-18 with1 at the top. Sew one leg end to each of body positions3,5,7,9,11,13,15,17: four on each side. Catch both leg rows in each attachment.
- Lay the spider flat and arrange the eight short legs without crossing. Tack each leg midpoint to its eventual backing so the strip cannot form a loose loop. Embroider two tiny white eyes, two pink cheek stitches and a short smile on the body. Do not add plastic eyes.
Three-Color Candy Corn
- Candy corn Row 1: ch 11; sc in second chain from hook and in each remaining chain. (10 sts) Ch 1 and turn; this chain never counts.
- Rows 2-3: Sc in each stitch. Ch 1 and turn after each row except the last; fasten off after the last row. (10 sts)
- Candy Row 4: Sc2tog, sc in next 6, sc2tog; ch 1 and turn. (8 sts)
- Candy Row 5: Sc in each stitch. Ch1 and turn. (8 sts)
- Candy Row 6: Sc2tog, sc in next 4, sc2tog; ch 1 and turn. (6 sts)
- Candy Row 7: Sc in each stitch. Ch1 and turn. (6 sts)
- Candy Row 8: Sc2tog, sc in next 2, sc2tog; ch 1 and turn. (4 sts)
- Candy Row 9: Sc2tog, sc2tog; ch 1 and turn. (2 sts)
- Candy Row 10: Sc2tog; fasten off. (1 sts)
- Color sequence: yellow Rows1-3, orange Rows4-7, white Rows8-10. Row1 is the wide bottom, Row10 the one-stitch top. Fasten off and weave the color tails into their own bands.
- Embroider two small black filled eyes on the orange band, a short black curved mouth below and two pink cheek stitches beside them. Keep the triangular outline flat; the motif has no stuffing and no seam around its edge.
White Eight-Spoke Spiderweb
- Web Round1: in white work8sc into a magic ring; join with sl st to first sc. Do not turn. (8 sts) Keep a small central opening while securing the ring tail.
- Web Round2: Ch1; [sc in next sc, ch3]8times. Join to first sc; do not turn. Count all chains and eight anchoring sc in the stated total. (32 sts)
- Web Round3: Sl st into the first chain space without counting that move; sc in this first space, ch4; [sc in each next chain space, ch4]7times. Join to first sc; do not turn. Count all chains and eight anchoring sc in the stated total. (40 sts)
- Web Round4: Sl st into the first chain space without counting that move; sc in this first space, ch5; [sc in each next chain space, ch5]7times. Join to first sc; do not turn. Count all chains and eight anchoring sc in the stated total. (48 sts)
- After Round4 fasten off and secure the tail. Each round has eight spaces and eight anchoring sc; the chain lengths increase3,4,5 to open the web. The stated32,40,48 counts include chains, not just sc.
- Lay the web flat on white felt and pin its eight outer anchoring points without pulling. With white sewing thread tack the eight outer sc, eight middle sc and center ring to the backing. The eight radial alignments and three chain rings must remain visible. Trim the backing just inside the outside chain outline so it supports the web without protruding.
Black Cat with Pointed Ears
- Cat face Round 1: 6 sc into a magic ring. (6 sts) Tighten the ring, mark the first sc, and work a continuous spiral without joining or turning.
- Round 2: inc in each stitch. (12 sts)
- Round 3: [sc in next 1 stitches, inc in next stitch] 6 times. (18 sts)
- Round 4: [sc in next 2 stitches, inc in next stitch] 6 times. (24 sts)
- Cat ear Row 1: ch 5; sc in second chain from hook and in each remaining chain. (4 sts) Ch 1 and turn; this chain never counts.
- Ear Row2: Sc2tog, sc2tog; ch 1 and turn. (2 sts)
- Ear Row3: Sc2tog; fasten off. (1 sts)
- Make two ears in black. Place the circle with its first perimeter stitch at top center. Sew the four foundation loops of one ear along face perimeter stitches2-5; sew the other along22,23,24,1. Point the one-stitch tips outward and up.
- Embroider two gold almond-shaped eyes with short black vertical pupil stitches, a tiny pink triangular nose, a short downward black mouth line and two white whisker strokes on each cheek. These are sewn yarn marks rather than attached plastic components.
Black Cauldron with Green Bubbles
- Cauldron body Row 1: ch 9; sc in second chain from hook and in each remaining chain. (8 sts) Ch 1 and turn; this chain never counts.
- Pot Row2: Inc in first stitch, sc in next 6, inc in last stitch; ch 1 and turn. (10 sts)
- Pot Row3: Inc in first stitch, sc in next 8, inc in last stitch; ch 1 and turn. (12 sts)
- Pot Rows4-7: Sc in each stitch. Ch1 and turn after each row. (12 sts)
- Pot Row8: Sc2tog, sc in next 8, sc2tog; ch 1 and turn. (10 sts)
- Pot Row9: Sc in each stitch. Fasten off. (10 sts)
- Cauldron rim Row 1: ch 14; sc in second chain from hook and in each remaining chain. (13 sts) Ch 1 and turn; this chain never counts.
- Row 2: Sc in each stitch. Ch 1 and turn after each row except the last; fasten off after the last row. (13 sts)
- Green brew Row 1: ch 11; sc in second chain from hook and in each remaining chain. (10 sts) Ch 1 and turn; this chain never counts.
- Row 2: Sc in each stitch. Ch 1 and turn after each row except the last; fasten off after the last row. (10 sts)
- Green bubble Round 1: 4 sc into a magic ring. (4 sts) Tighten the ring, mark the first sc, and work a continuous spiral without joining or turning.
- Round 2: inc in each stitch. (8 sts)
- Use black for body and rim, green for brew and bubbles. Make three identical8-stitch bubbles; flatten and fasten off. Row1 of the body is the bottom and Row9 its opening. Center the10-stitch green brew strip behind Row9 so one green row shows above it, then sew its entire lower long edge to the back of the body opening.
- Center the13-stitch black rim across the10-stitch opening, distributing the extra three stitches as a slight overhang at the two ends. Sew the rim along its lower long edge to the front of the body and catch the brew strip behind it. Embroider a purple line across the center10 positions of the visible rim.
- Arrange three flattened green bubbles at different heights along the exposed green strip. Sew every bubble around its entire perimeter to the brew fabric or supporting felt; none floats on a long yarn stem. Keep the two highest circles just above the rim, as a compact bubbling silhouette.
Sew All Seven Motifs to Snap Clips
- For each motif, cut a color-matched felt silhouette about2mm inside its outer edge. For the spider include a narrow felt support under each leg; for the web use the stabilizing backing already prepared.
- Open a5cm snap clip. Cut a small slit in the felt where the lower blade will emerge, feed only that blade through, and lay the fixed upper plate on top of the felt. Keep the hinge and moving blade free. Place the crochet motif above the fixed plate.
- With doubled matching sewing thread, stitch the crochet edge to felt around the perimeter with small closely spaced stitches, enclosing the fixed upper plate between them. At the plate sides make several thread wraps around the fixed metal edges, passing through crochet and felt without crossing the moving blade. Knot inside the backing sandwich and bury the tail.
- Close and reopen the clip five times. Nothing should catch in the hinge, cover the snap tip or pull the motif away. Tug the motif, each ear, leg and bubble gently while holding the clip. Re-sew any moving part before wearing.
- For the other three designs in the supplied reference, use our existing ghost, pumpkin and bat hair clip tutorial. This article covers the seven additional motifs in full.
Assembly and Shaping
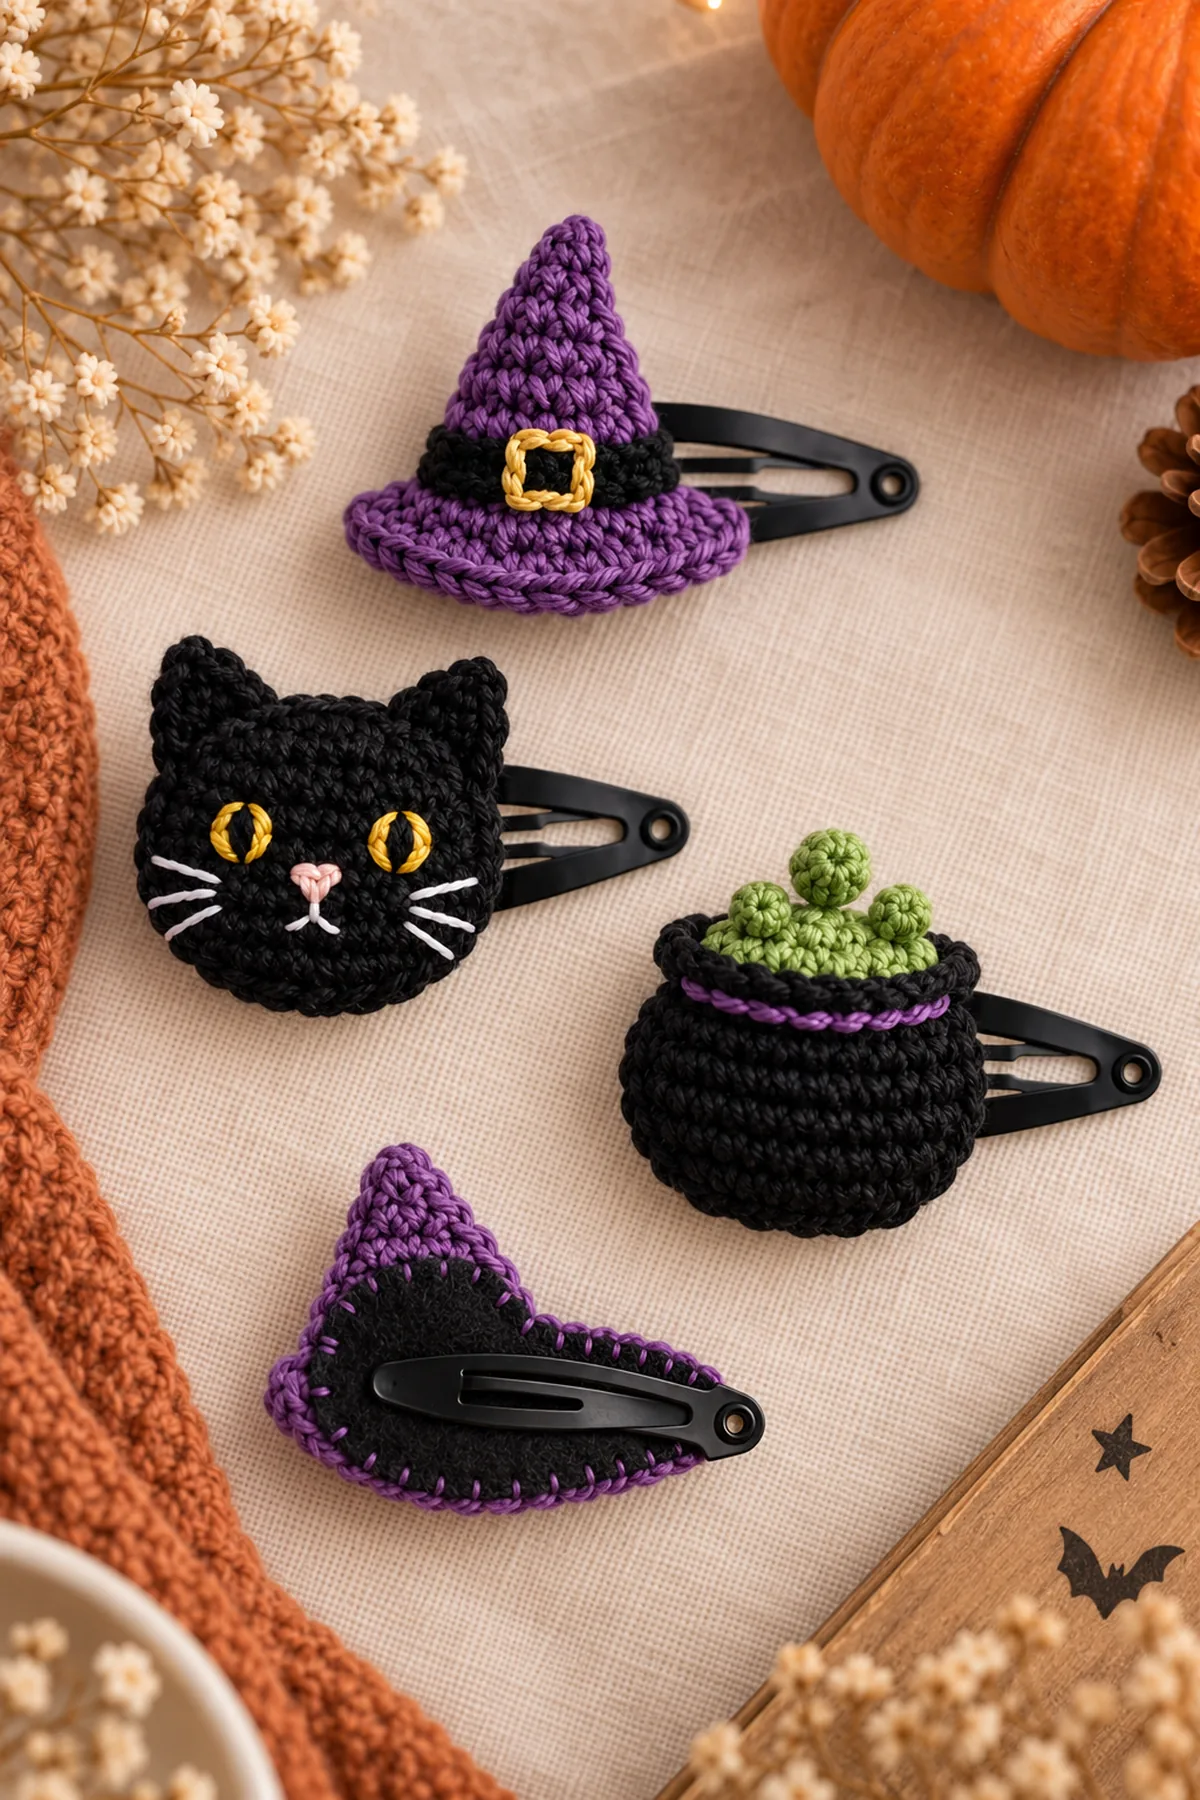
Finish all embroidery before adding felt. The hat joins crown to brim, the skull jaw is worked on, spider legs and cat ears are sewn, and the cauldron layers are sewn flat. Each completed silhouette then encloses the fixed plate of one snap clip between crochet and felt. Keep all moving metal parts clear.
Lay every component on a flat surface before joining. Match the marked centers first, then divide each remaining edge into equal sections. Work through both layers with consistent tension and pause after each section to check that the fabric lies flat. This measured approach prevents twisting and keeps decorative details facing the intended direction.
Finishing
- Weave each cotton tail through several stitches on the wrong side, reverse direction, then trim without leaving a loop. Keep the inside smooth and free of knots that press against skin.
- Compare the finished outline with the written design and inspect all joining points from front and back. Sew again through the fabric if a strap, panel or motif lifts at an attachment.
- Follow the yarn care label, reshape gently and air-dry fully. Check attachments again after washing or cleaning and keep the material and care details with a gift.
For a polished result, weave each tail through several same-color stitches, reverse direction once, and trim only after the fabric has been gently stretched. Block to the listed dimensions without flattening textured stitches. Inspect joins, borders, straps, and decorative pieces before the project is used or gifted.
Helpful Tips
- Use removable markers to separate each shaped end from straight sections; a marked segment is easier to count than a complete oval.
- Work matching pieces in the same sitting and measure them flat. A pair that differs in size before assembly will still differ after finishing.
- Check the chain foundation for twists before working its underside. Count actual stitch tops instead of interpreting the generated illustrations as charts.
- Before fastening every seam permanently, pin or clip the pieces into their described positions and check alignment. Remove every temporary pin after the seam is complete.
Good lighting and a contrasting stitch marker make counting much easier. If a section looks uneven, compare the current count with the previous checkpoint before continuing. Fixing one missed stitch early is faster than compensating later, and it preserves the measurements used by the assembly instructions.
Frequently Asked Questions
Is this the written pattern shown in the reference image?
No. The supplied image is a design reference. These are new BabyYarnie directions with separately reviewed stitch counts and assembly points.
Has the finished project been physically tested?
No physical sample test is claimed. Arithmetic checks establish stitch consumption and output, but cannot verify real fit, drape, gauge or yarn quantity. Make a trial and measure it before gifting.
Can I change the yarn?
Yes, after swatching. Choose a smooth washable cotton and match the stated gauge and actual component measurements. A yarn weight label alone does not establish the size.
Conclusion
Keep notes of your actual yarn, hook, gauge and finished measurements. Match both members of a pair and check every sewn attachment before use or gifting. Save the written counts with your project so a later replacement can be made to the same measurements.
BabyYarnie Printable Crochet Pattern Card
BabyYarnie � easy-to-follow crochet for everyday makers.
Project: Crochet Halloween Hair Clips: Seven More Motifs
Skill level: Intermediate Hook: 2.25 mm starting point Yarn: Sport cotton
Finished size: Motifs approximately3-5cm across, excluding spider legs; mount on5cm snap clips
Card Materials
- Planning allowance: 20m black,10m white,5m purple and3m each yellow, orange and green sport cotton, plus swatch allowance
- Small amounts of gold, pink, white and black embroidery thread;2.25mm hook
- Seven5cm metal snap clips; color-matched felt; strong sewing thread and sewing needle; blunt yarn needle, scissors and markers
Card Instructions
- Purple Witch Hat with Embroidered Buckle: Crown12,10,8,6,4,2,1; black Row2. Purple brim18x2 centered under12-stitch base; gold embroidery.
- White Skull with a Short Jaw: White circle6,12,18,24; worked-on jaw6,6,4; embroidered eye sockets, nose and teeth.
- Black Spider with Eight Short Legs: Body6,12,18,18; eight6sc strips with6-slip-stitch return; four per side, sewn ends and midpoint tacks.
- Three-Color Candy Corn: Rows10,10,10,8,8,6,6,4,2,1; yellow1-3, orange4-7, white8-10.
- White Eight-Spoke Spiderweb: 8sc center; eight(sc,ch3), eight(sc,ch4), eight(sc,ch5); totals32,40,48 including chains; tack every ring to felt.
- Black Cat with Pointed Ears: Face6,12,18,24; two ears4,2,1 at upper perimeter; gold and pink embroidered face.
- Black Cauldron with Green Bubbles: Body8,10,12,12×4,10,10; rim13x2, brew10x2, three bubbles4,8; sew compact cluster and purple rim embroidery.
- Sew All Seven Motifs to Snap Clips: Sew each motif to felt around fixed clip plate; moving blade and hinge stay free; test mechanism and every attachment.
Finish: Check every count, weave in all ends, block to measurement, and inspect each join.