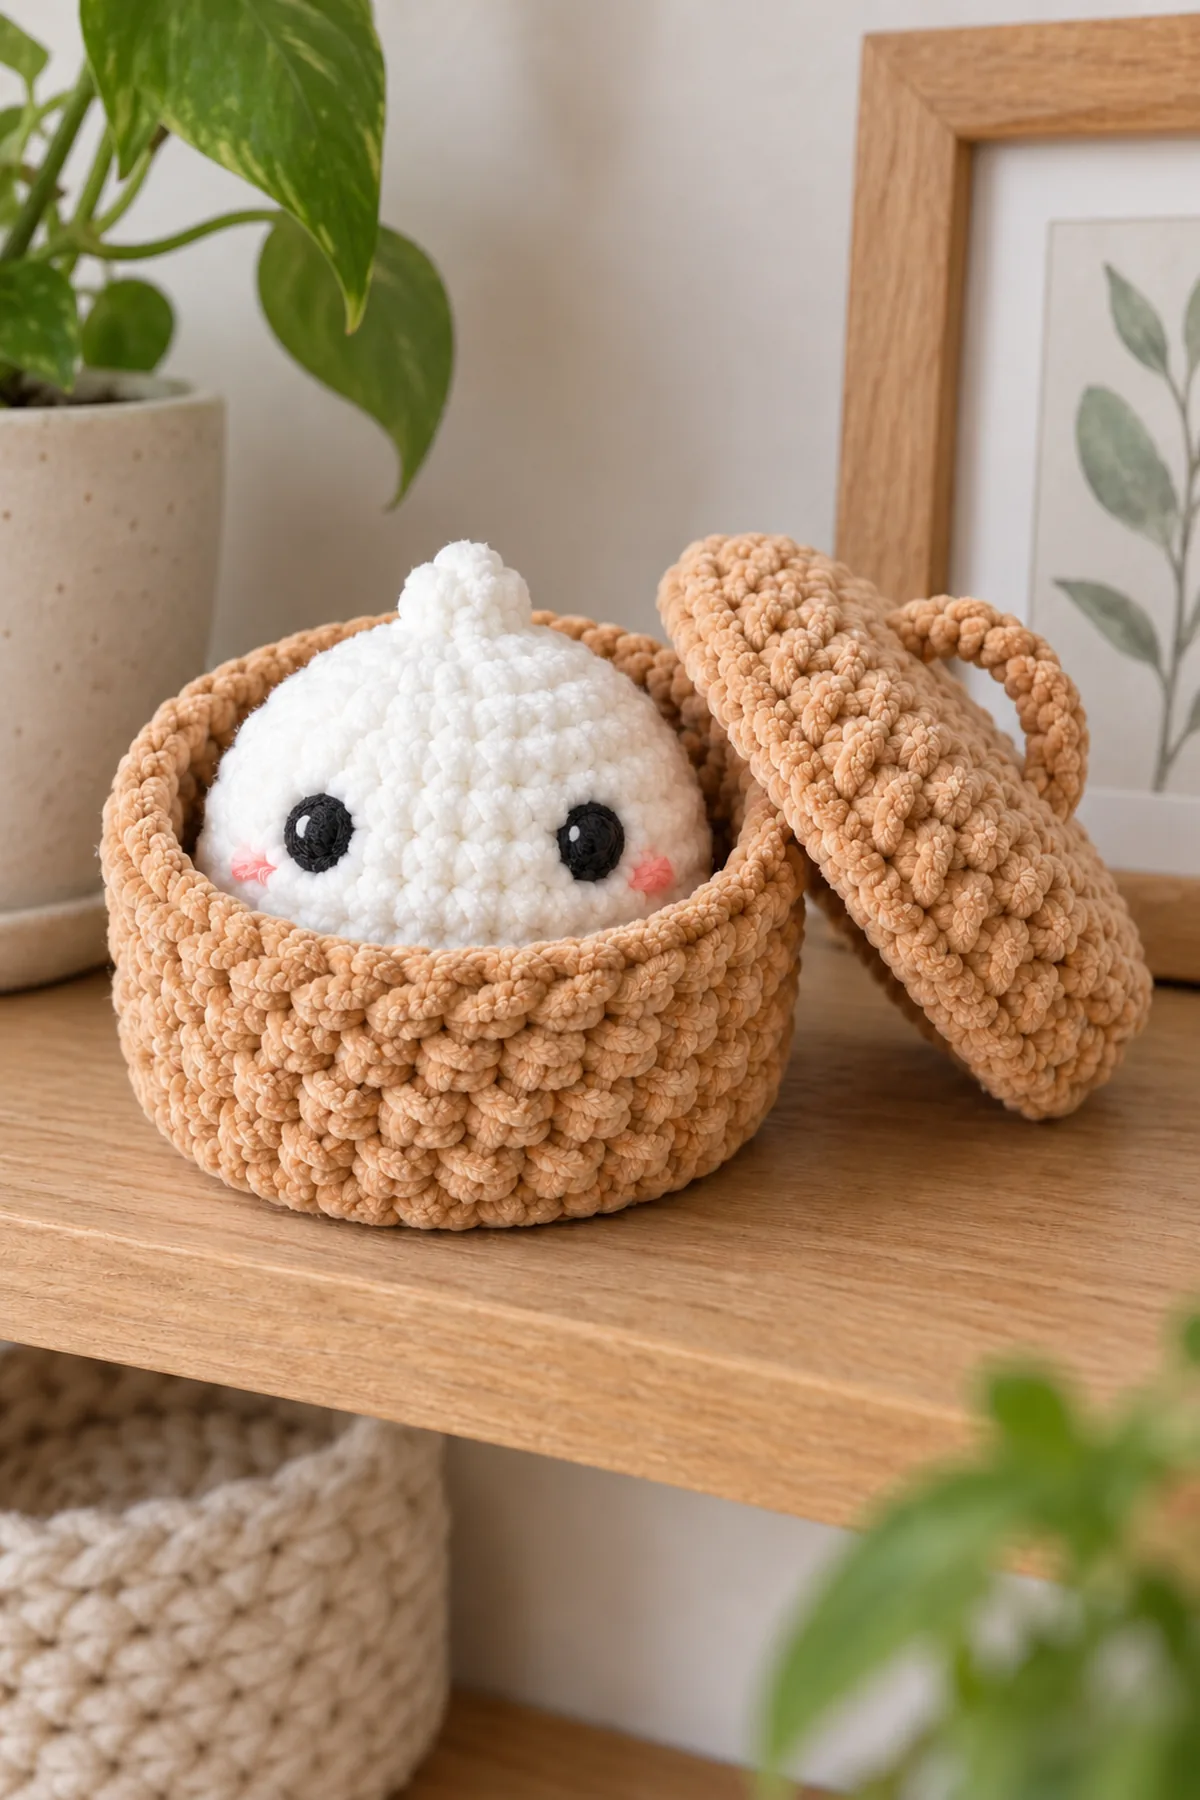
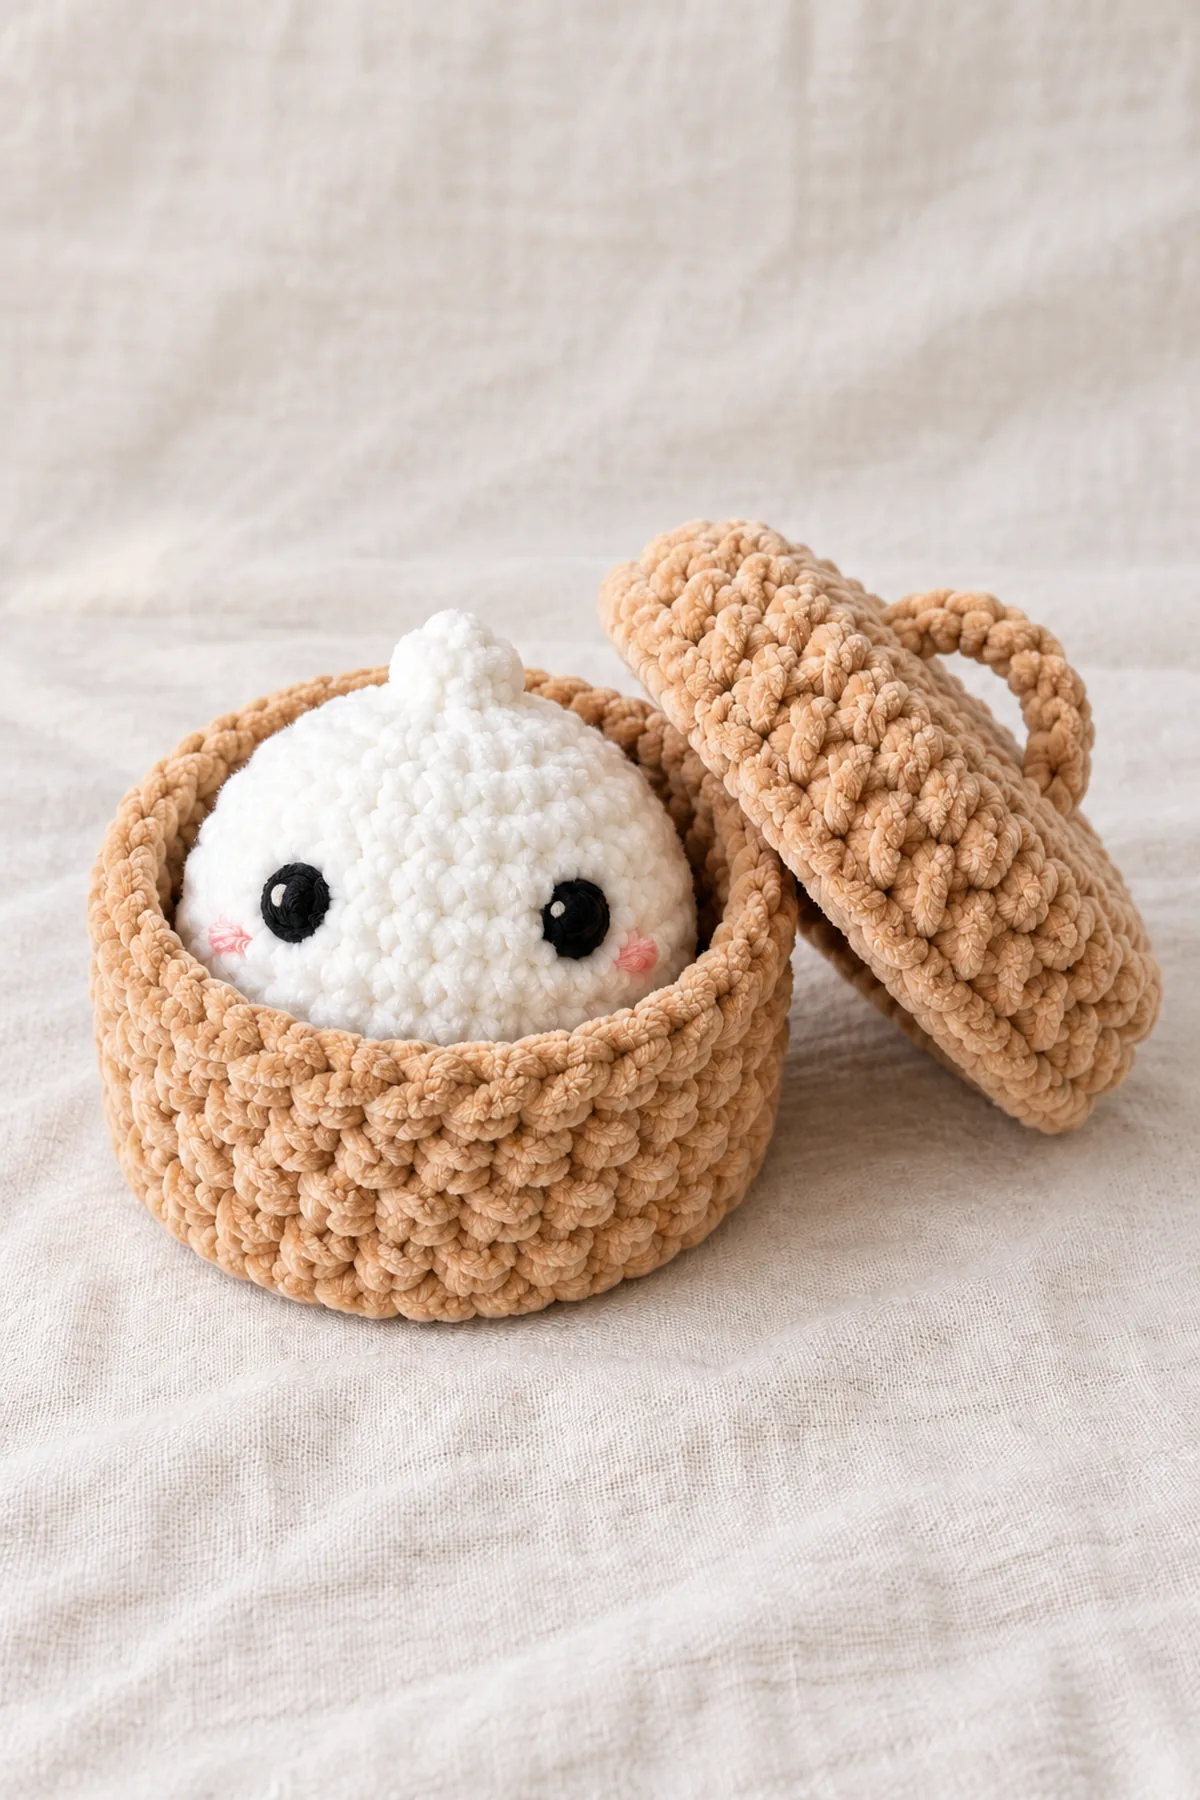
This original BabyYarnie crochet dumpling and basket tutorial turns the supplied visual reference into independently written crochet instructions. White plump dumpling plush with a small gathered-looking crochet crown, black embroidered eyes and subtle pink cheeks, fitting loosely inside a tan round crochet steamer-style basket. Independent tan removable overlapping fitted lid with a short central crocheted arch handle. Basket, lid and dumpling all have complete instructions; decorative fiber objects, no food-contact claim. All directions use US terminology. The article covers every component rather than only presenting a finished-picture idea.
The reference is a shape and color guide, not a source of written instructions. The construction below is independently developed. Keep the named components and assembly order together; substituting an unrelated toy body changes the silhouette and the fit of its companion pieces.
Pattern Details
- Hook Size: 4.5 mm starting point; use same hook and yarn thickness for all three fitted parts
- Finished Size: Planning dumpling3.8in wide and about4.3in high; basket4.5in outer diameter, lid5.1in diameter
- Gauge: Target12 sc and14rounds per4in in firm chenille; fit-check parts before finishing
- Estimated Time: 7-10 hours
- Construction: Pointed4-stitch crown grows to36-stitch dumpling;42-stitch flat basket base and straight walls;48-stitch lid with overlapping lip and8-stitch short handle
- Skill level: Intermediate
Why You’ll Love This Project
Plush yarn gives the simple geometry a soft outline, while separate counting checkpoints let you inspect each shape before closing a seam. The tutorial keeps the small facial details embroidered and explains exactly where each piece joins. A slow assembly pass matters more than rushing the final round.
Materials
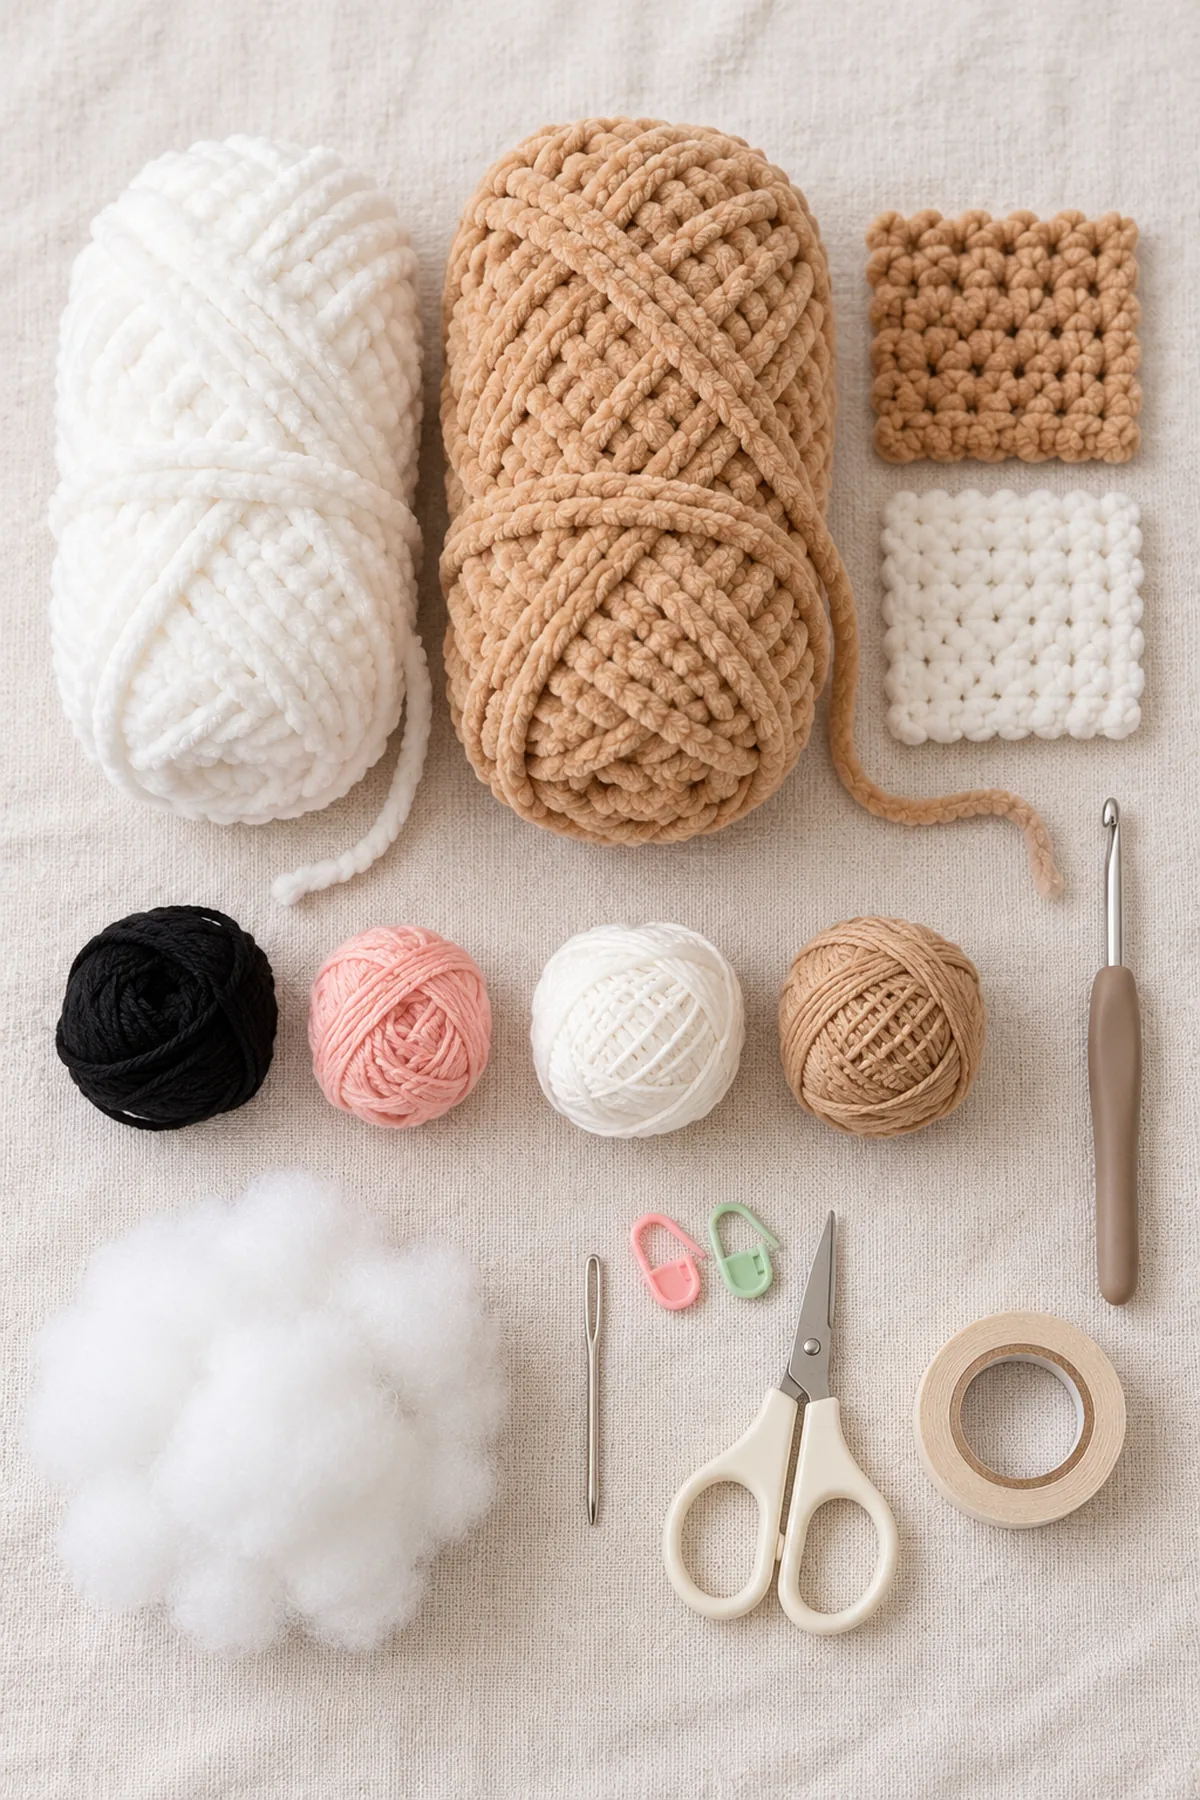
- Planning allowance: 65 yards white bulky chenille and100 yards tan chenille of identical thickness, plus swatch allowance
- 4.5 mm hook; black and blush smooth embroidery yarn; matching white and tan smooth sewing yarn; washable fiberfill for dumpling only
- Blunt needle, markers, scissors, tape; no wire, glue, plastic eyes or stiff plastic inserts
Gauge, Measurements, and Planning
Fit is more important than the nominal yarn label. The36-stitch dumpling circumference is12in, about3.8in across. Basket rim42sts gives14in outer circumference, about4.5in across; its fabric thickness reduces the usable opening. Lid48sts gives16in circumference, about5.1in across. Check that the actual dumpling slips in and out without force and that the lid lip clears the outside basket wall. The closed lid fits the empty basket, not over the protruding stuffed dumpling. No fit guarantee is claimed without a physical sample.
Make and wash a gauge swatch before beginning. Measure only after the swatch is completely dry. If the stitch width differs, change hook size rather than pulling the working yarn tighter. Keep a written count at the end of every section so the finished edges remain balanced and the assembly points line up.
Abbreviations and Special Stitches
- ch: chain
- sc: single crochet
- hdc: half double crochet
- dc: double crochet
- sl st: slip stitch
- st(s): stitch(es)
- inc: 2 sc into one stitch; consumes 1 and produces 2
- dec: invisible single-crochet decrease; consumes 2 and produces 1
- BLO: back loop only
- FLO: front loop only
Special stitch guidance: Invisible decrease: insert through the front loop of each of the next two stitches, yarn over and draw through both front loops, then yarn over and draw through the two remaining loops. On flat panels use a standard sc2tog through both loops instead. A turning ch 1 and a finishing slip stitch never count. Work circular pieces as spirals unless a joined finishing round is explicitly named. Change color on the final yarn-over of the stitch before the new color is required; knot no exposed loops and bury tails inside the project.
Important Notes
- Development disclosure: stitch arithmetic and assembly instructions are reviewed, but no physically crocheted sample or tested gauge is claimed. Sizes, yarn amounts and time are planning estimates. Swatch, compare components and test the assembly before gifting.
- Images are AI-generated design illustrations, not photographs of a tested sample or stitch charts. Follow the written instructions rather than counting stitches in the pictures.
- Use the supplied photograph only as a mandatory visual design reference. This is an independent BabyYarnie pattern, not the source creator’s pattern and not an authorized reproduction of its written instructions.
- These plush projects are decorative keepsakes, not certified infant toys. Do not put them in an infant sleep space. Use embroidered features only; no plastic eyes, wire, pellets, glued parts or detachable decorations.
- Mark the first counted stitch of every spiral round. Do not join or turn circular pieces. Turn each flat row after ch 1; work the first sc in the last stitch of the previous row. Remove every marker during finishing.
- For chenille, leave 8-inch tails. Thread a smooth matching sewing strand alongside fragile pile yarn when securing seams; do not rely on a knot alone. Tug every seam and embroidery path before display or gifting.
Complete Instructions for Crochet Dumpling Plush with Fitted Steamer Basket
Shape the White Dumpling
- Dumpling crown Round 1: 4 sc into a magic ring. (4 sts) Tighten the ring, mark the first sc, and work a continuous spiral without joining or turning.
- Round 2: inc in each stitch. (8 sts)
- Round 3: [sc in next 1 stitches, inc in next stitch] 4 times. (12 sts)
- Round 4: [sc in next 1 stitches, inc in next stitch] 6 times. (18 sts)
- Round 5: [sc in next 2 stitches, inc in next stitch] 6 times. (24 sts)
- Round 6: [sc in next 3 stitches, inc in next stitch] 6 times. (30 sts)
- Round 7: [sc in next 4 stitches, inc in next stitch] 6 times. (36 sts)
- Rounds 8-10: Sc in each stitch. (36 sts)
- Round 11: [sc in next 4 stitches, dec across next 2] 6 times. (30 sts)
- Round 12: [sc in next 3 stitches, dec across next 2] 6 times. (24 sts)
- Round 13: [sc in next 2 stitches, dec across next 2] 6 times. (18 sts)
- Round 14: [sc in next 1 stitches, dec across next 2] 6 times. (12 sts)
- Round 15: dec 6 times. (6 sts)
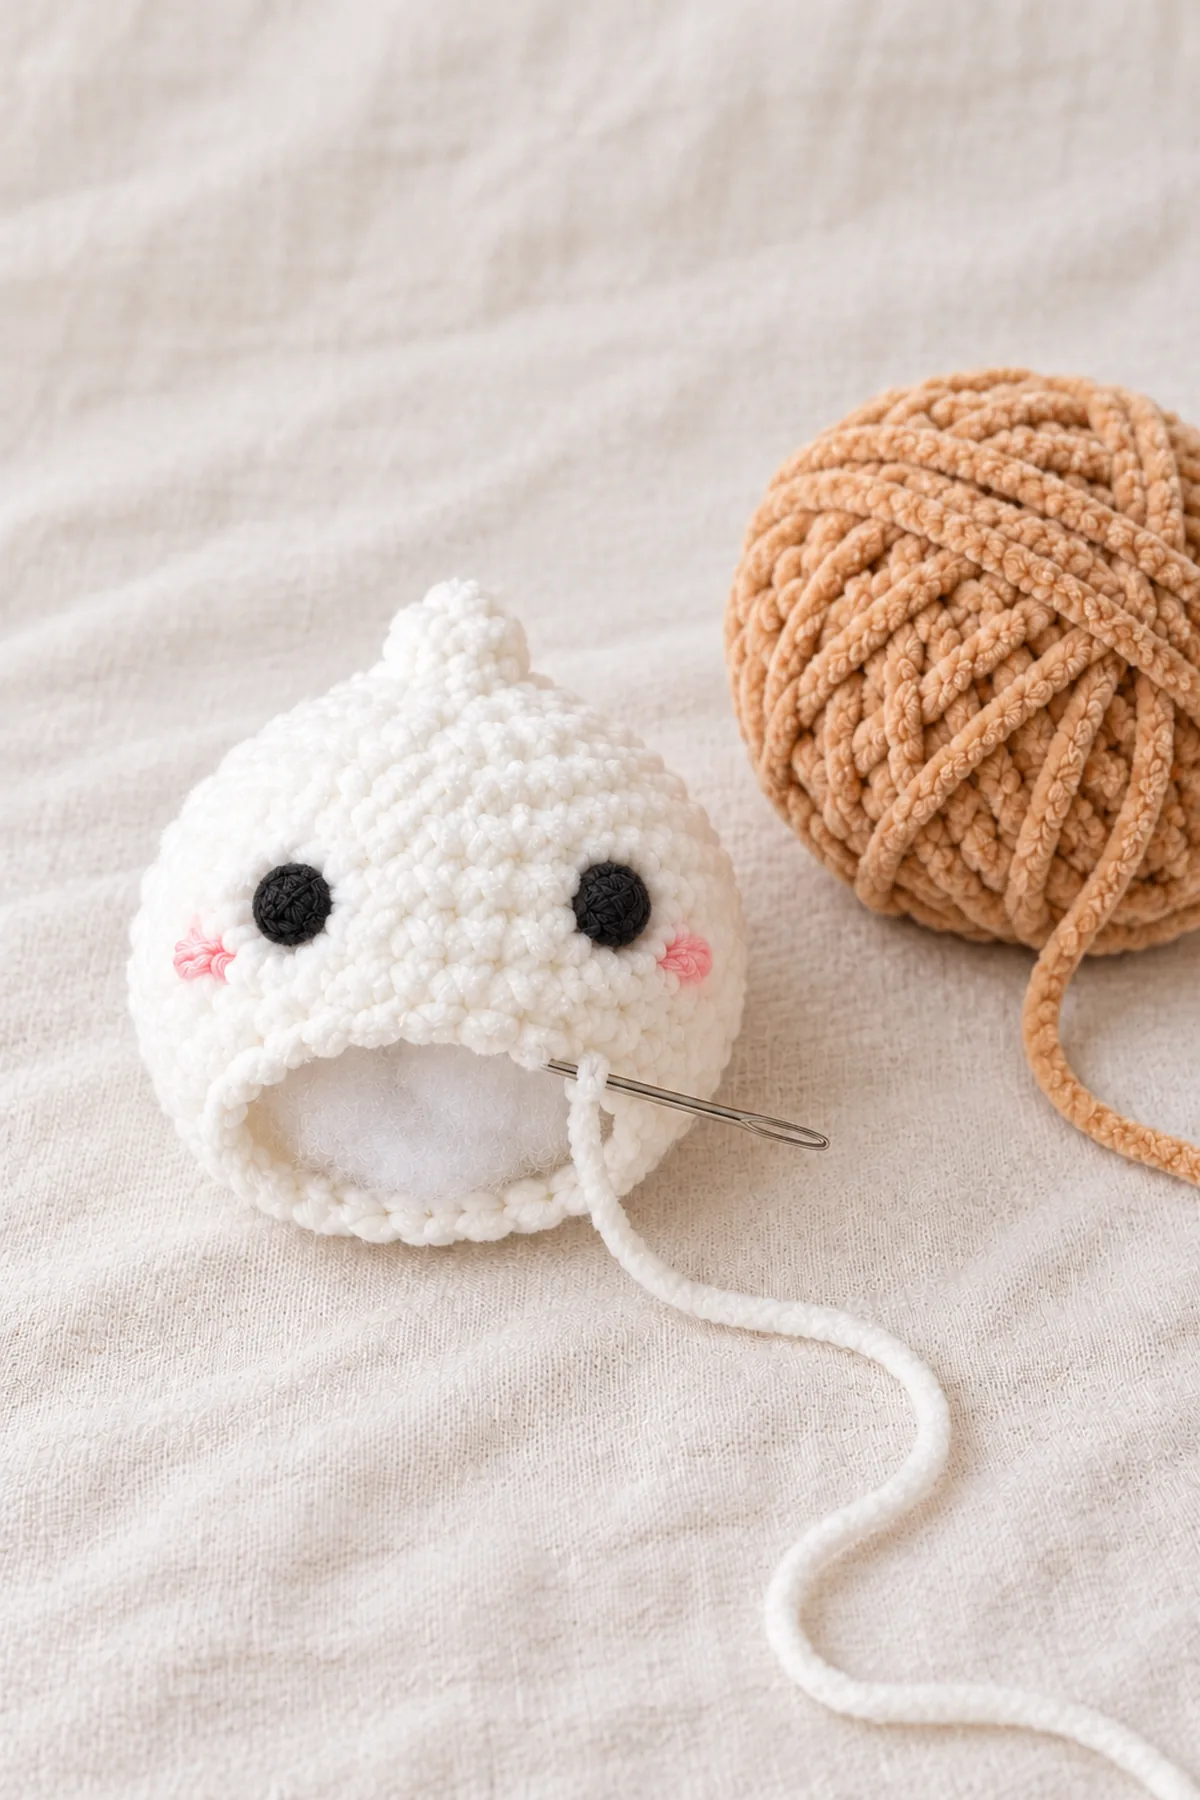
- Start at the tiny crown and finish at the bottom. Embroider two small black filled eyes between Rounds7 and8, about six stitches apart, with two tiny pink cheek stitches just outside and one round lower. Anchor all ends internally. Stuff during Rounds12-14 without stretching. After Round15 draw the tail through the6remaining front loops, pull closed and bury. The4-stitch starting tip remains a small soft nipple; do not add dangling gather cords.
Crochet the Tan Steamer-Style Basket
- Basket base Round 1: 6 sc into a magic ring. (6 sts) Tighten the ring, mark the first sc, and work a continuous spiral without joining or turning.
- Round 2: inc in each stitch. (12 sts)
- Round 3: [sc in next 1 stitches, inc in next stitch] 6 times. (18 sts)
- Round 4: [sc in next 2 stitches, inc in next stitch] 6 times. (24 sts)
- Round 5: [sc in next 3 stitches, inc in next stitch] 6 times. (30 sts)
- Round 6: [sc in next 4 stitches, inc in next stitch] 6 times. (36 sts)
- Round 7: [sc in next 5 stitches, inc in next stitch] 6 times. (42 sts)
- Round 8: Sc in each stitch. Work BLO only to turn the base into walls. (42 sts)
- Rounds 9-15: Sc in each stitch. (42 sts)
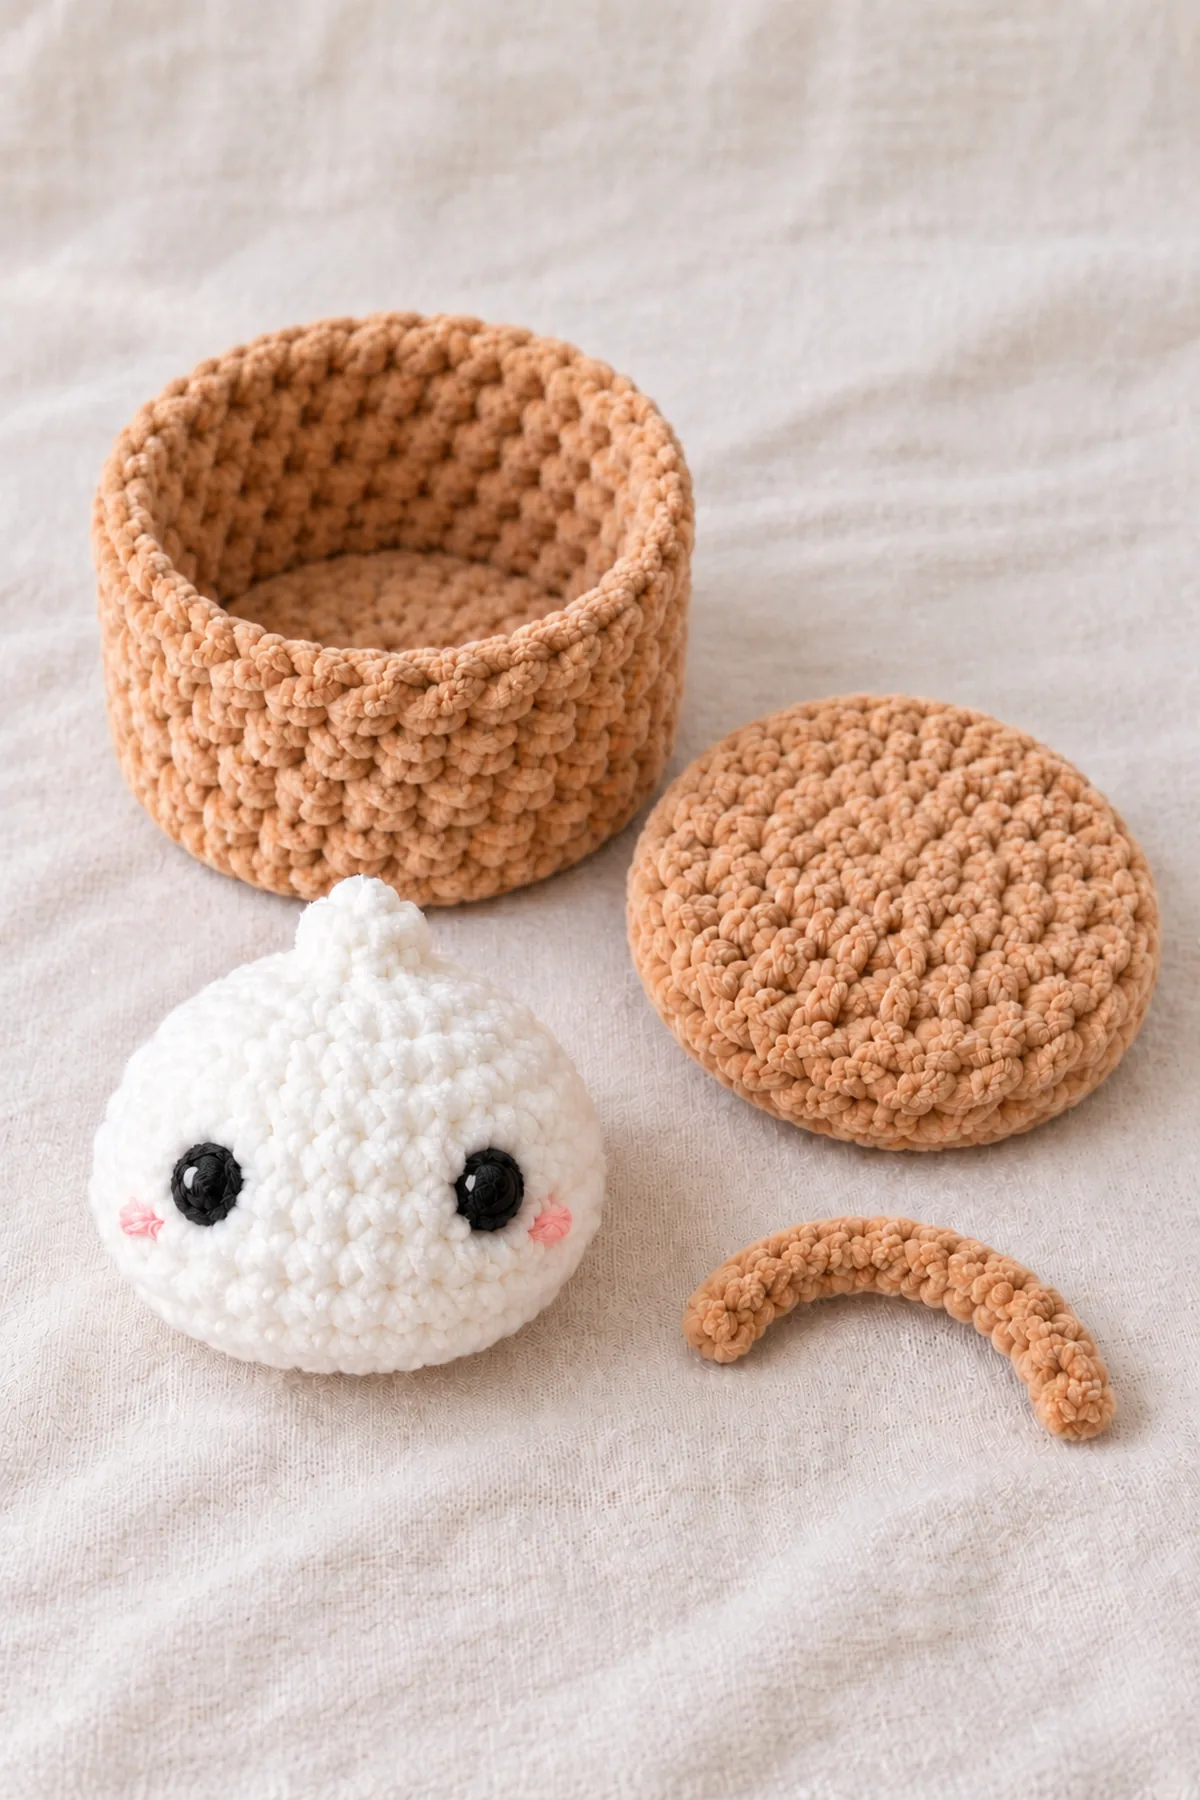
- After Round15, sl st to the next stitch only to finish; this stitch is not counted. Fasten off, bury the tail and firm the top edge with matching smooth tan yarn woven once through each of the42stitch tops without cinching. Do not stuff or add wire. Stand the basket on its seven-round flat base.
Make the Fitted Lid and Short Handle
- Lid top Round 1: 6 sc into a magic ring. (6 sts) Tighten the ring, mark the first sc, and work a continuous spiral without joining or turning.
- Round 2: inc in each stitch. (12 sts)
- Round 3: [sc in next 1 stitches, inc in next stitch] 6 times. (18 sts)
- Round 4: [sc in next 2 stitches, inc in next stitch] 6 times. (24 sts)
- Round 5: [sc in next 3 stitches, inc in next stitch] 6 times. (30 sts)
- Round 6: [sc in next 4 stitches, inc in next stitch] 6 times. (36 sts)
- Round 7: [sc in next 5 stitches, inc in next stitch] 6 times. (42 sts)
- Round 8: [sc in next 6 stitches, inc in next stitch] 6 times. (48 sts)
- Round 9: Sc in each stitch. Work BLO only to turn down the overlapping lid lip. (48 sts)
- Rounds 10-11: Sc in each stitch. (48 sts)
- Fasten off with an uncounted slip stitch and bury the tail. The lid top remains flat; its three48stitch side rounds form a shallow downward lip that overlaps the basket’s outside rim. Do not sew the lid permanently to the basket.
- Lid handle Row 1: ch 9; sc in second chain from hook and in each remaining chain. (8 sts) Ch 1 and turn; this chain never counts.
- Row 2: Sc in each stitch. Fasten off with a long sewing tail. (8 sts)
- Center the8-stitch-long handle across the lid. Sew the first two and last two stitches of the strip to two opposite points on lid Round3, leaving four middle stitches as a short arch. Each two-stitch end is anchored through both handle rows with matching smooth thread and reinforced twice. The arch is a display handle, not a load-bearing hanger.
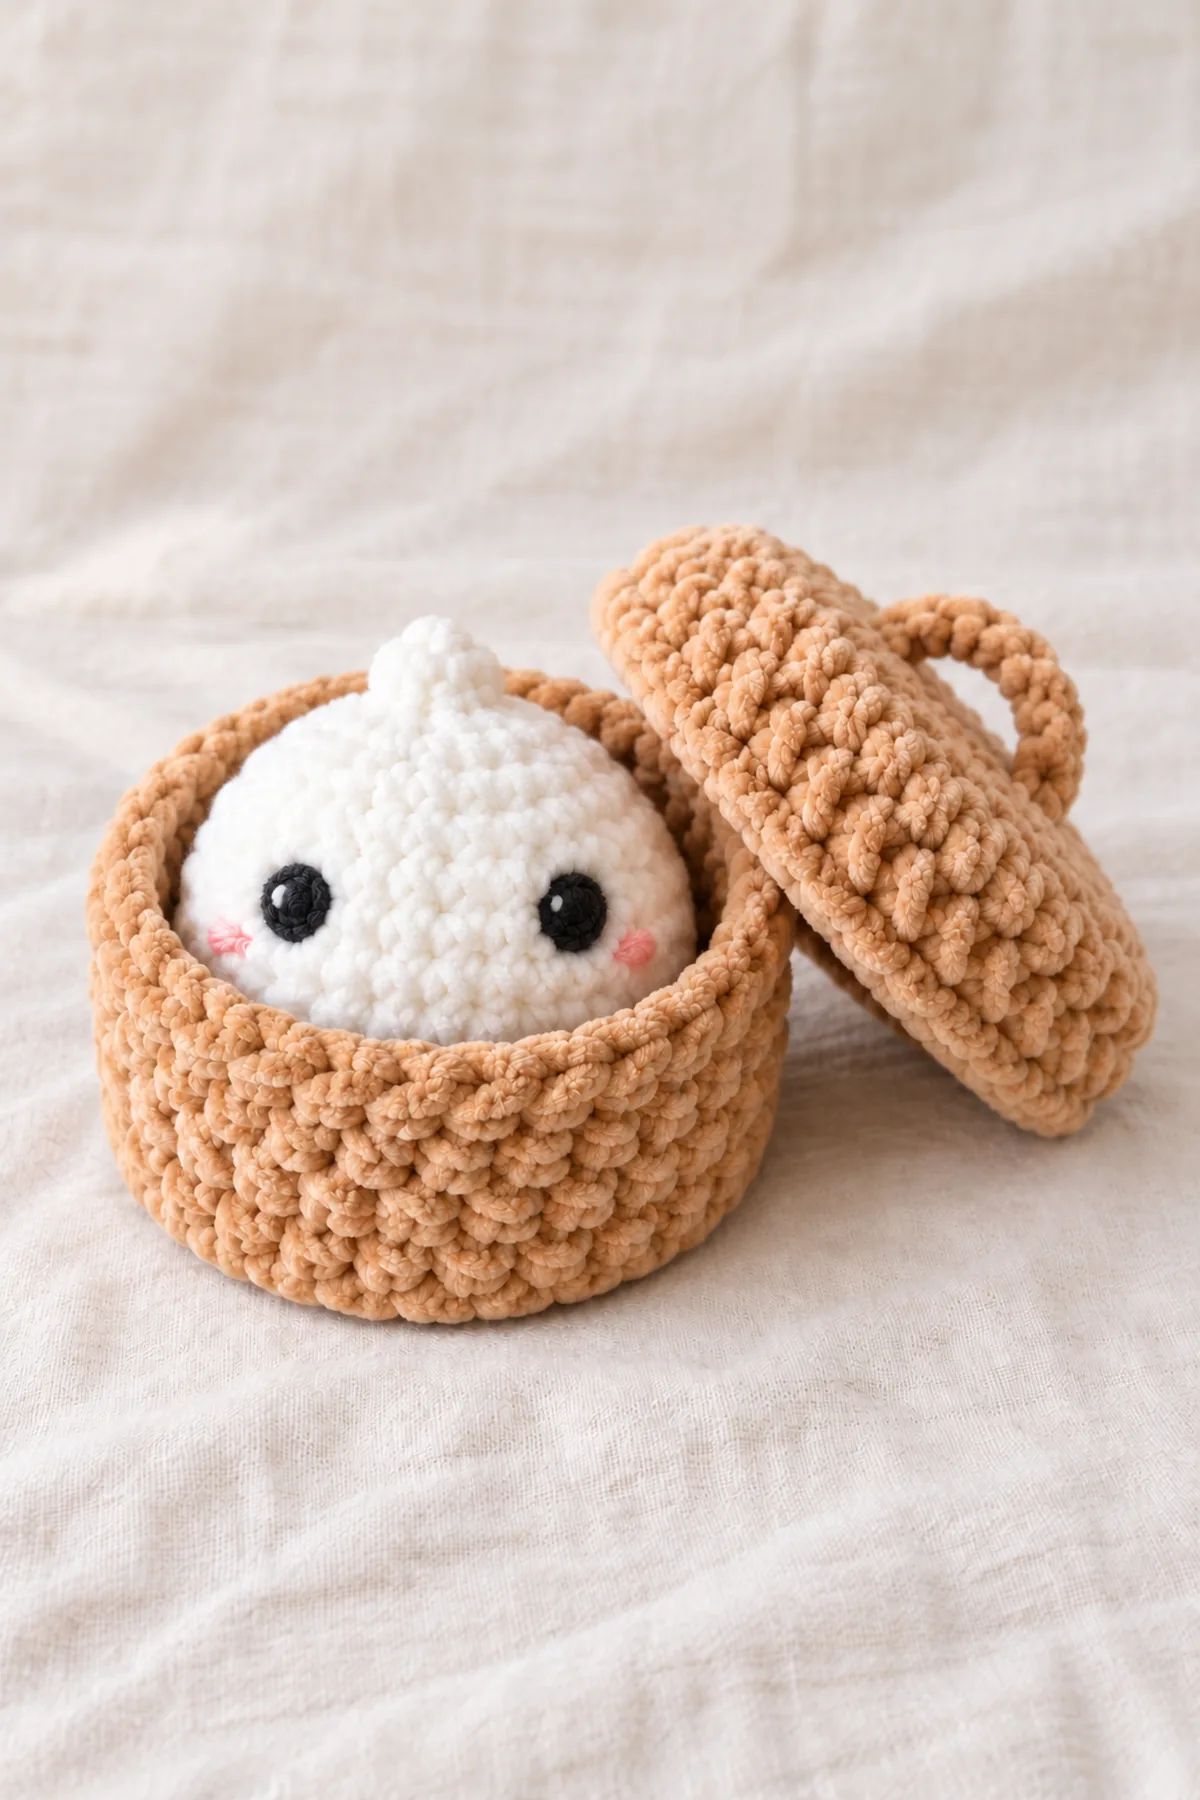
- Trial-fit the lid on the empty basket: it should seat without forcing the rim inward and lift off easily. With the lid removed, place the dumpling in the basket; the upper face and crown remain visible above the rim.
Check the Three-Piece Display Set
- Check the base seam of the dumpling, the basket ring closure and both handle ends. Keep basket and lid unstuffed and soft.
- The set is decorative crochet play-food imagery, not a food-safe steamer, food storage vessel, chew item or heat-resistant kitchen utensil. Never place it near steam, a cooker or an open flame.
- Store the dumpling beside the closed empty basket, or display it inside with the separate lid lifted or laid beside it. Do not press the lid onto the stuffed figure to imitate a fit that the dimensions cannot provide.
Assembly and Shaping
The white dumpling, tan basket and removable lid stay three independent objects. Only the short arch is sewn to the lid. The basket remains an unstuffed container with a flat base; the dumpling is closed and stuffed. Set the lid beside the open basket while the plush is inside.
Lay every component on a flat surface before joining. Match the marked centers first, then divide each remaining edge into equal sections. Work through both layers with consistent tension and pause after each section to check that the fabric lies flat. This measured approach prevents twisting and keeps decorative details facing the intended direction.
Finishing
- Stop before closing and inspect both sides of every seam. Add small tufts of stuffing, keeping the perimeter flexible rather than tightly packed.
- Secure all sewn edges with two passes in opposite directions. Bury yarn ends through three separate internal paths before trimming.
- Remove every temporary pin and marker. Press lightly around each closure and check that no stuffing escapes and no long loops can be pulled out.
- Follow the actual yarn care label; reshape gently and air-dry completely. Do not steam polyester chenille. Inspect again after cleaning and supply the fiber and care information with the finished gift.
For a polished result, weave each tail through several same-color stitches, reverse direction once, and trim only after the fabric has been gently stretched. Block to the listed dimensions without flattening textured stitches. Inspect joins, borders, straps, and decorative pieces before the project is used or gifted.
Helpful Tips
- Count stitch tops with a contrasting marker at each increase segment; chenille pile can hide a missed stitch.
- Make both members of a paired component in the same session and compare their widths before sewing.
- If stuffing is visible, change to a smaller hook and remake the affected piece. Do not conceal large gaps with excessive surface embroidery.
- Use a blunt needle and a smooth matching sewing yarn to anchor plush-yarn parts without stripping the chenille core.
Good lighting and a contrasting stitch marker make counting much easier. If a section looks uneven, compare the current count with the previous checkpoint before continuing. Fixing one missed stitch early is faster than compensating later, and it preserves the measurements used by the assembly instructions.
Frequently Asked Questions
Is this the pattern from the reference photograph?
No. The photograph supplies the required visual direction only. All stitch counts, construction choices and tutorial wording here are independently authored for BabyYarnie.
Has the crochet sample been physically tested?
No physical sample test is claimed. The numerical stitch audit checks consumption and output, but cannot establish actual drape, fit, gauge, seam behavior or yarn quantity. Make a swatch and a trial assembly.
Can I substitute yarn or use plastic eyes?
Substitute only after checking a dense, stuffing-proof fabric and the relative size of all components. Use securely embroidered eyes and details, not plastic eyes or loose embellishments.
Conclusion
Keep your actual yarn, hook, gauge and completed measurements with the pattern. Check the finished outline against the described design, then inspect every seam and attachment before gifting. The written checkpoints are the construction authority; a styled illustration is not a substitute for a correct stitch count.
BabyYarnie Printable Crochet Pattern Card
BabyYarnie — easy-to-follow crochet for everyday makers.
Project: Crochet Dumpling Plush with Fitted Steamer Basket
Skill level: Intermediate Hook: 4.5 mm starting point; use same hook and yarn thickness for all three fitted parts Yarn: Bulky chenille
Finished size: Planning dumpling3.8in wide and about4.3in high; basket4.5in outer diameter, lid5.1in diameter
Card Materials
- Planning allowance: 65 yards white bulky chenille and100 yards tan chenille of identical thickness, plus swatch allowance
- 4.5 mm hook; black and blush smooth embroidery yarn; matching white and tan smooth sewing yarn; washable fiberfill for dumpling only
- Blunt needle, markers, scissors, tape; no wire, glue, plastic eyes or stiff plastic inserts
Card Instructions
- Shape the White Dumpling: White crown4,8,12,18,24,30,36; three even rounds; decrease30,24,18,12,6; embroider and close.
- Crochet the Tan Steamer-Style Basket: Tan base6 to42; BLO wall-turn42; seven further42sc rounds; finish with uncounted slip stitch.
- Make the Fitted Lid and Short Handle: Lid6 to48, BLO turn plus two even48sc lip rounds;8sc x2row arch sewn at both two-stitch ends; lid fits empty basket.
- Check the Three-Piece Display Set: Verify loose insertion and overlapping empty-basket lid; display with lid beside protruding dumpling.
Finish: Check every count, weave in all ends, block to measurement, and inspect each join.