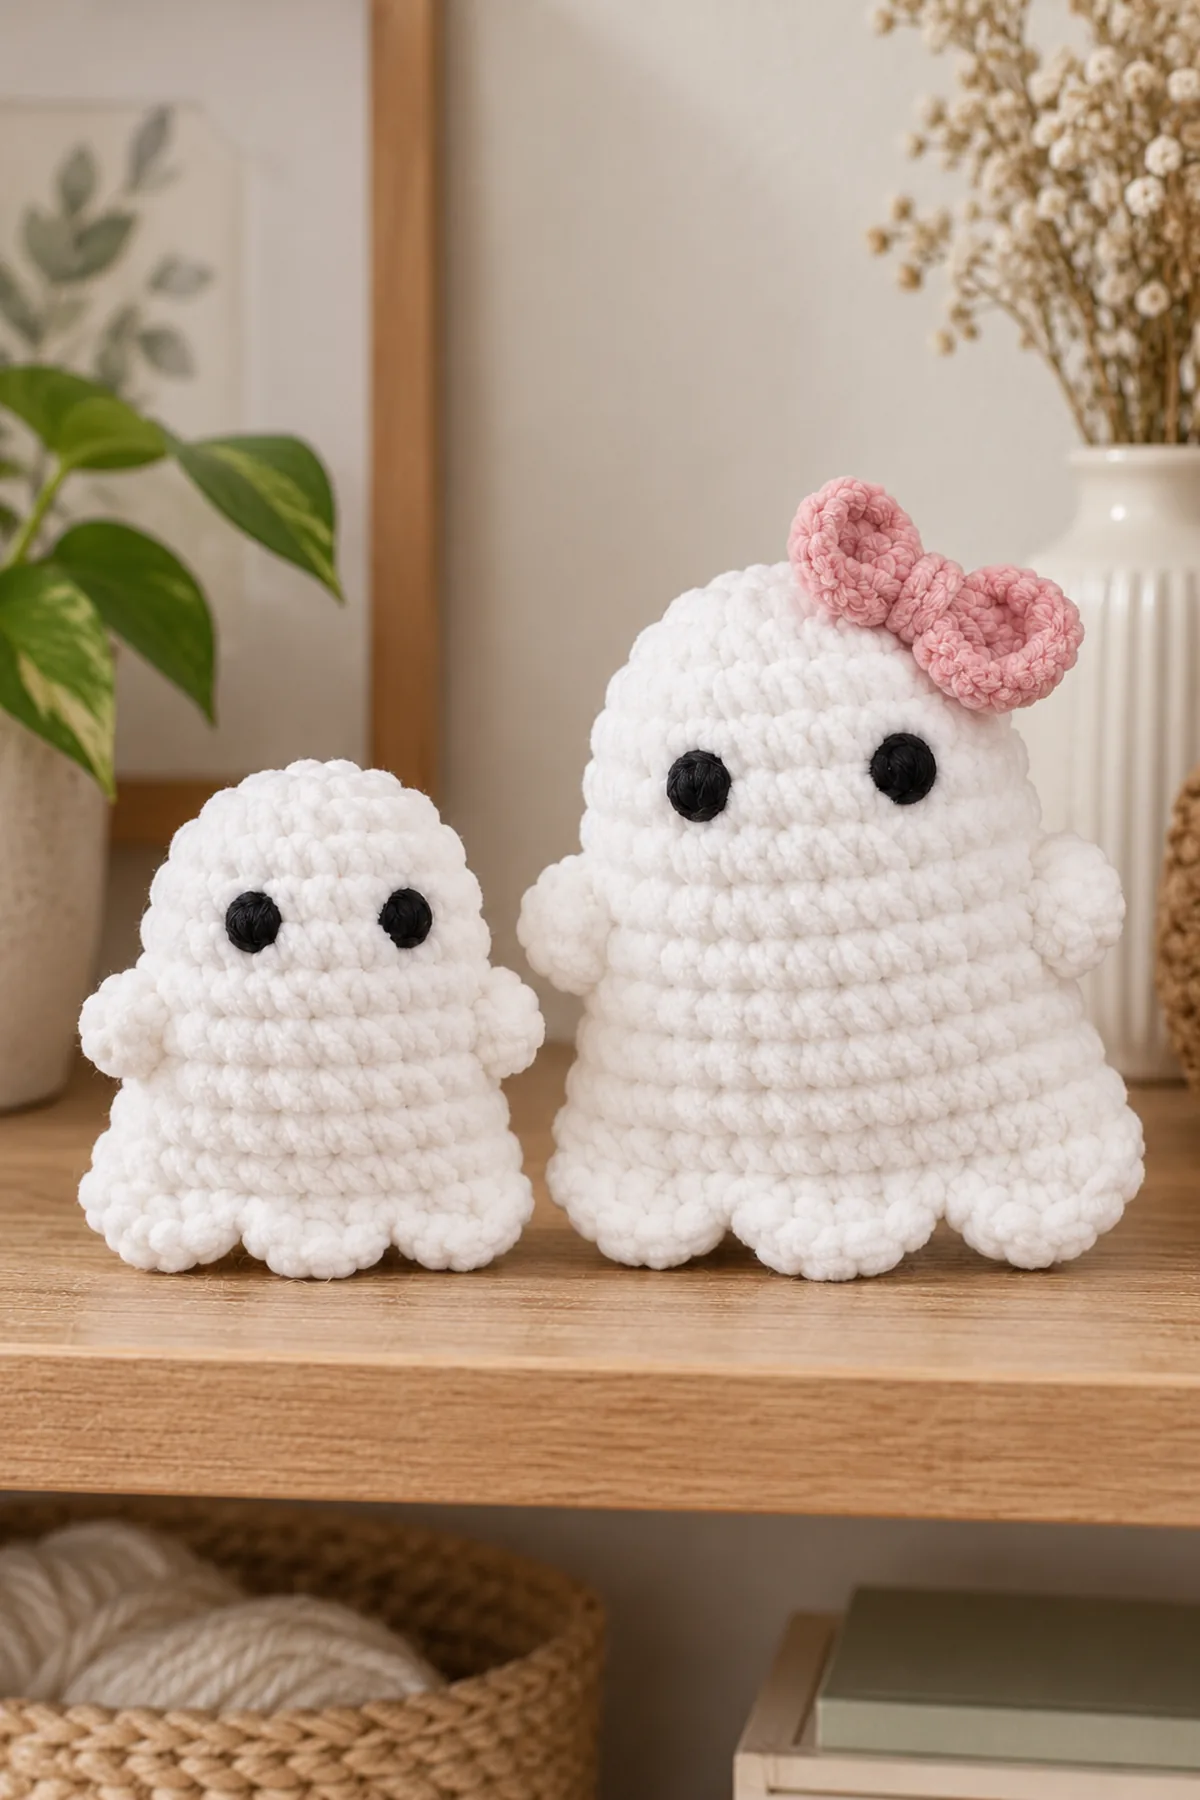
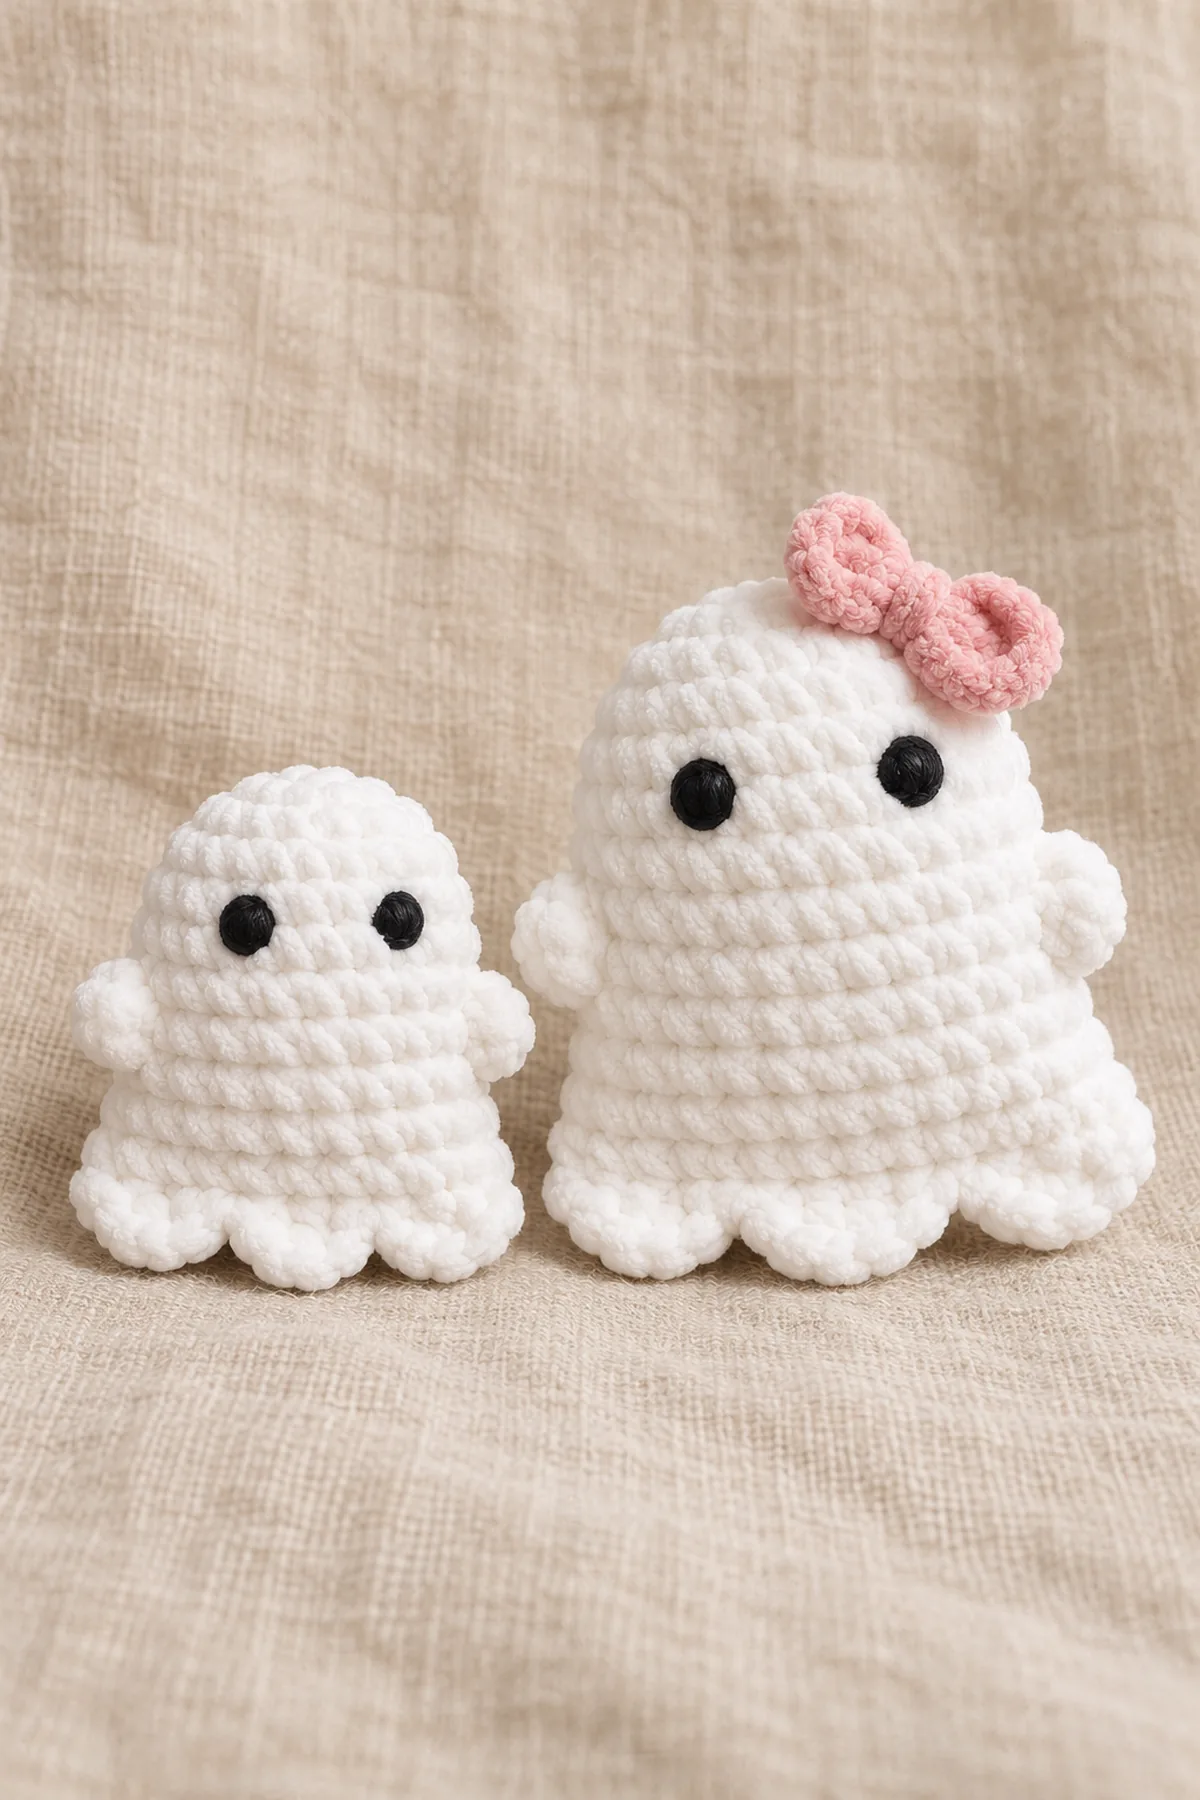
This original BabyYarnie crochet pocket ghost tutorial turns the supplied visual reference into independently written crochet instructions. Two white bell-shaped chenille ghosts with a domed top, two stubby arms and exactly three front lower scallops; larger ghost has a fully sewn blush-pink flat bow. Shallow pillow bodies made from two shaped flat panels, not the existing site’s spiral pear body or Halloween trio. Two securely embroidered round black eyes, no mouth. All directions use US terminology. The article covers every component rather than only presenting a finished-picture idea.
The reference is a shape and color guide, not a source of written instructions. The construction below is independently developed. Keep the named components and assembly order together; substituting an unrelated toy body changes the silhouette and the fit of its companion pieces.
Pattern Details
- Hook Size: Small: 3 mm with DK chenille; large: 4.5 mm with bulky chenille, adjusted for dense fabric
- Finished Size: Planning small 3.5 inches high and 3 inches wide; large 4.8 inches high and 4.3 inches wide, excluding arms
- Gauge: Small target 20 sc/24 rows per4in; large target14 sc/18 rows per4in
- Estimated Time: 5-8 hours for the pair
- Construction: Two shaped 15-stitch flat panels per ghost, shallow stuffing, sewn closed perimeter; three lower scallops, two small sewn arms; flat bow on larger ghost
- Skill level: Intermediate
Why You’ll Love This Project
Plush yarn gives the simple geometry a soft outline, while separate counting checkpoints let you inspect each shape before closing a seam. The tutorial keeps the small facial details embroidered and explains exactly where each piece joins. A slow assembly pass matters more than rushing the final round.
Materials
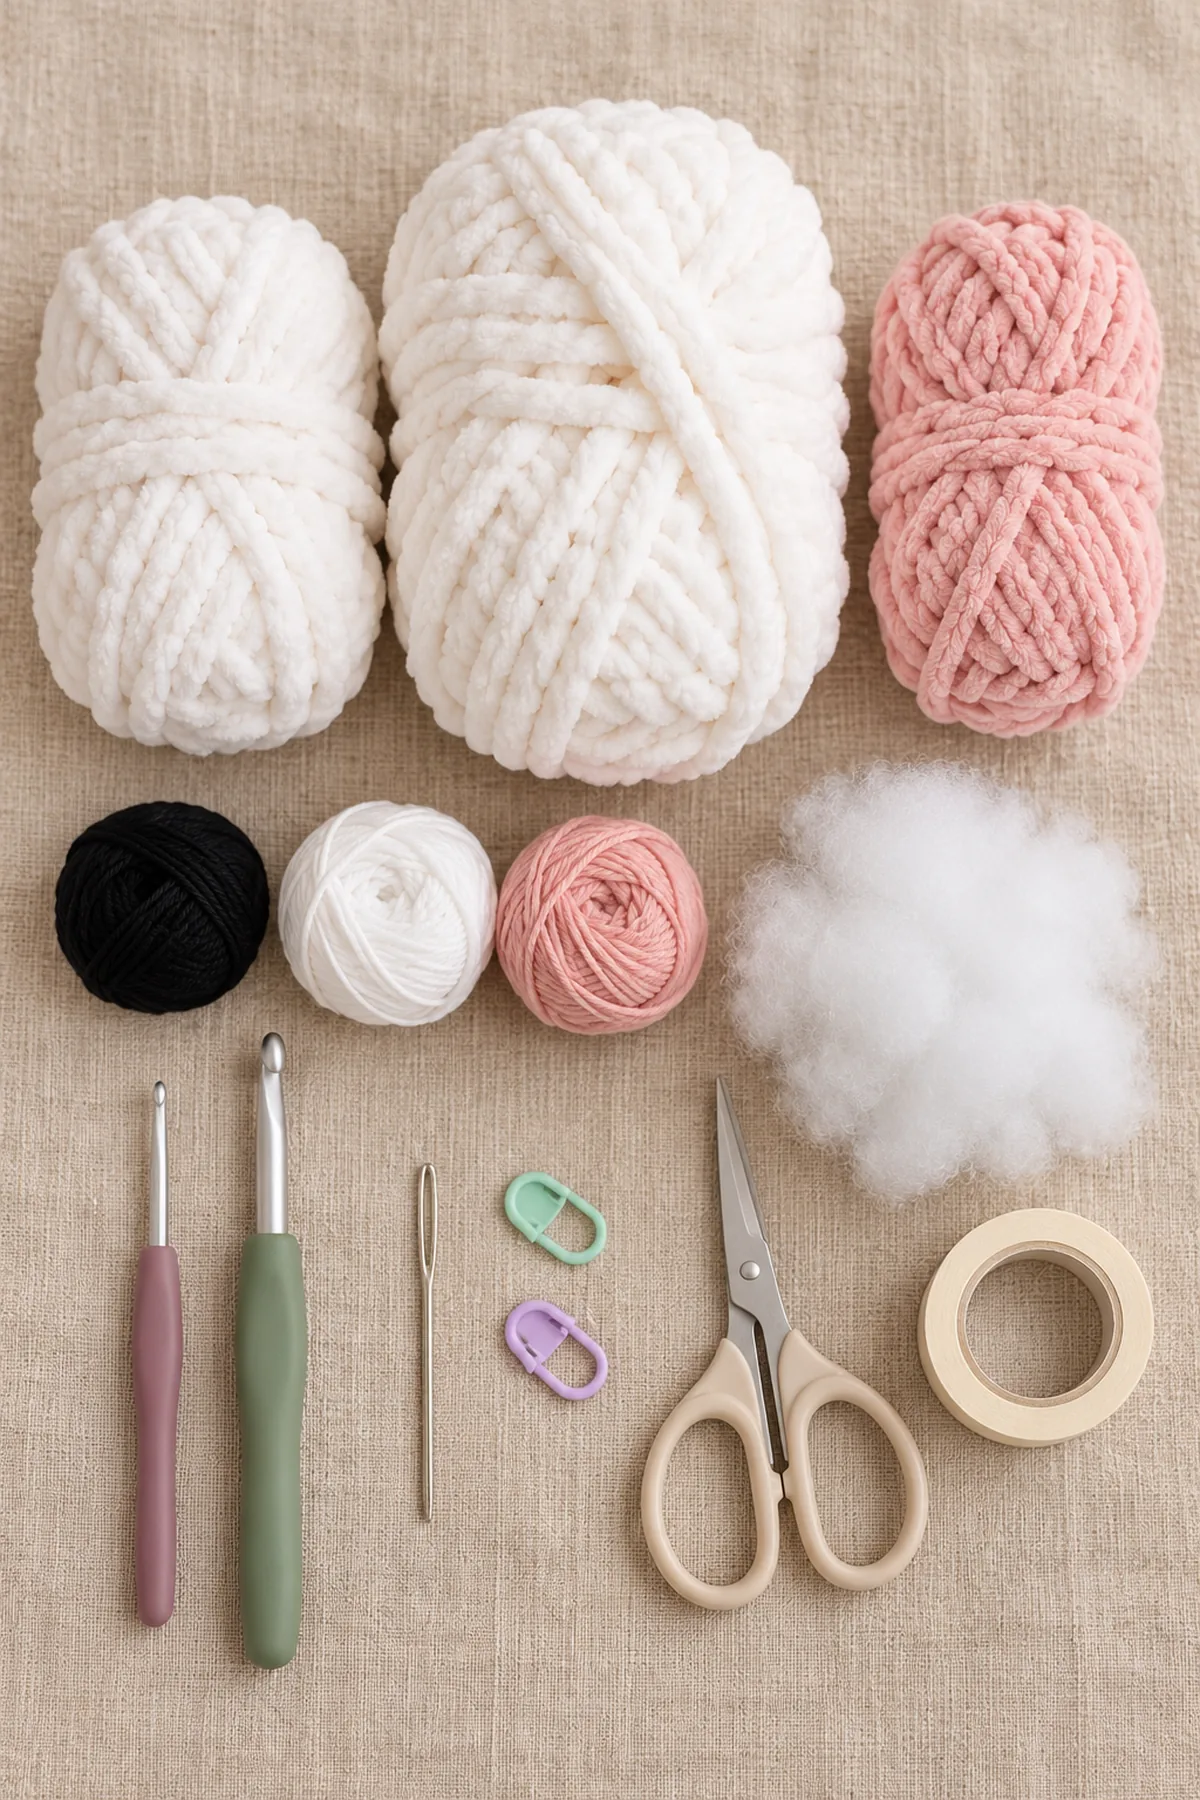
- Planning allowance: 55 yards white DK chenille for small ghost, 85 yards white bulky chenille for large ghost, 10 yards blush-pink bulky chenille for bow
- 3 mm and 4.5 mm hooks; black smooth embroidery yarn, matching white/pink smooth seam yarn, washable fiberfill
- Blunt needle, markers, scissors and tape; no glue, plastic eyes, ribbon or keychain hardware
Gauge, Measurements, and Planning
Make both sizes with the same panel counts but their separately specified yarn and gauge. This article is one coordinated duo, not two renamed duplicate patterns. At the small gauge the panel is3in wide; at the large gauge it is about4.3in wide. Each has20rows before the lower trim. Leave the stuffing light so the silhouette remains a bell-shaped pillow rather than a round pear.
Make and wash a gauge swatch before beginning. Measure only after the swatch is completely dry. If the stitch width differs, change hook size rather than pulling the working yarn tighter. Keep a written count at the end of every section so the finished edges remain balanced and the assembly points line up.
Abbreviations and Special Stitches
- ch: chain
- sc: single crochet
- hdc: half double crochet
- dc: double crochet
- sl st: slip stitch
- st(s): stitch(es)
- inc: 2 sc into one stitch; consumes 1 and produces 2
- dec: invisible single-crochet decrease; consumes 2 and produces 1
- BLO: back loop only
- FLO: front loop only
Special stitch guidance: Invisible decrease: insert through the front loop of each of the next two stitches, yarn over and draw through both front loops, then yarn over and draw through the two remaining loops. On flat panels use a standard sc2tog through both loops instead. A turning ch 1 and a finishing slip stitch never count. Work circular pieces as spirals unless a joined finishing round is explicitly named. Change color on the final yarn-over of the stitch before the new color is required; knot no exposed loops and bury tails inside the project.
Important Notes
- Development disclosure: stitch arithmetic and assembly instructions are reviewed, but no physically crocheted sample or tested gauge is claimed. Sizes, yarn amounts and time are planning estimates. Swatch, compare components and test the assembly before gifting.
- Images are AI-generated design illustrations, not photographs of a tested sample or stitch charts. Follow the written instructions rather than counting stitches in the pictures.
- Use the supplied photograph only as a mandatory visual design reference. This is an independent BabyYarnie pattern, not the source creator’s pattern and not an authorized reproduction of its written instructions.
- These plush projects are decorative keepsakes, not certified infant toys. Do not put them in an infant sleep space. Use embroidered features only; no plastic eyes, wire, pellets, glued parts or detachable decorations.
- Mark the first counted stitch of every spiral round. Do not join or turn circular pieces. Turn each flat row after ch 1; work the first sc in the last stitch of the previous row. Remove every marker during finishing.
- For chenille, leave 8-inch tails. Thread a smooth matching sewing strand alongside fragile pile yarn when securing seams; do not rely on a knot alone. Tug every seam and embroidery path before display or gifting.
Complete Instructions for Crochet Bell-Hem Pocket Ghost Duo
Crochet Four Bell-Shaped Panels
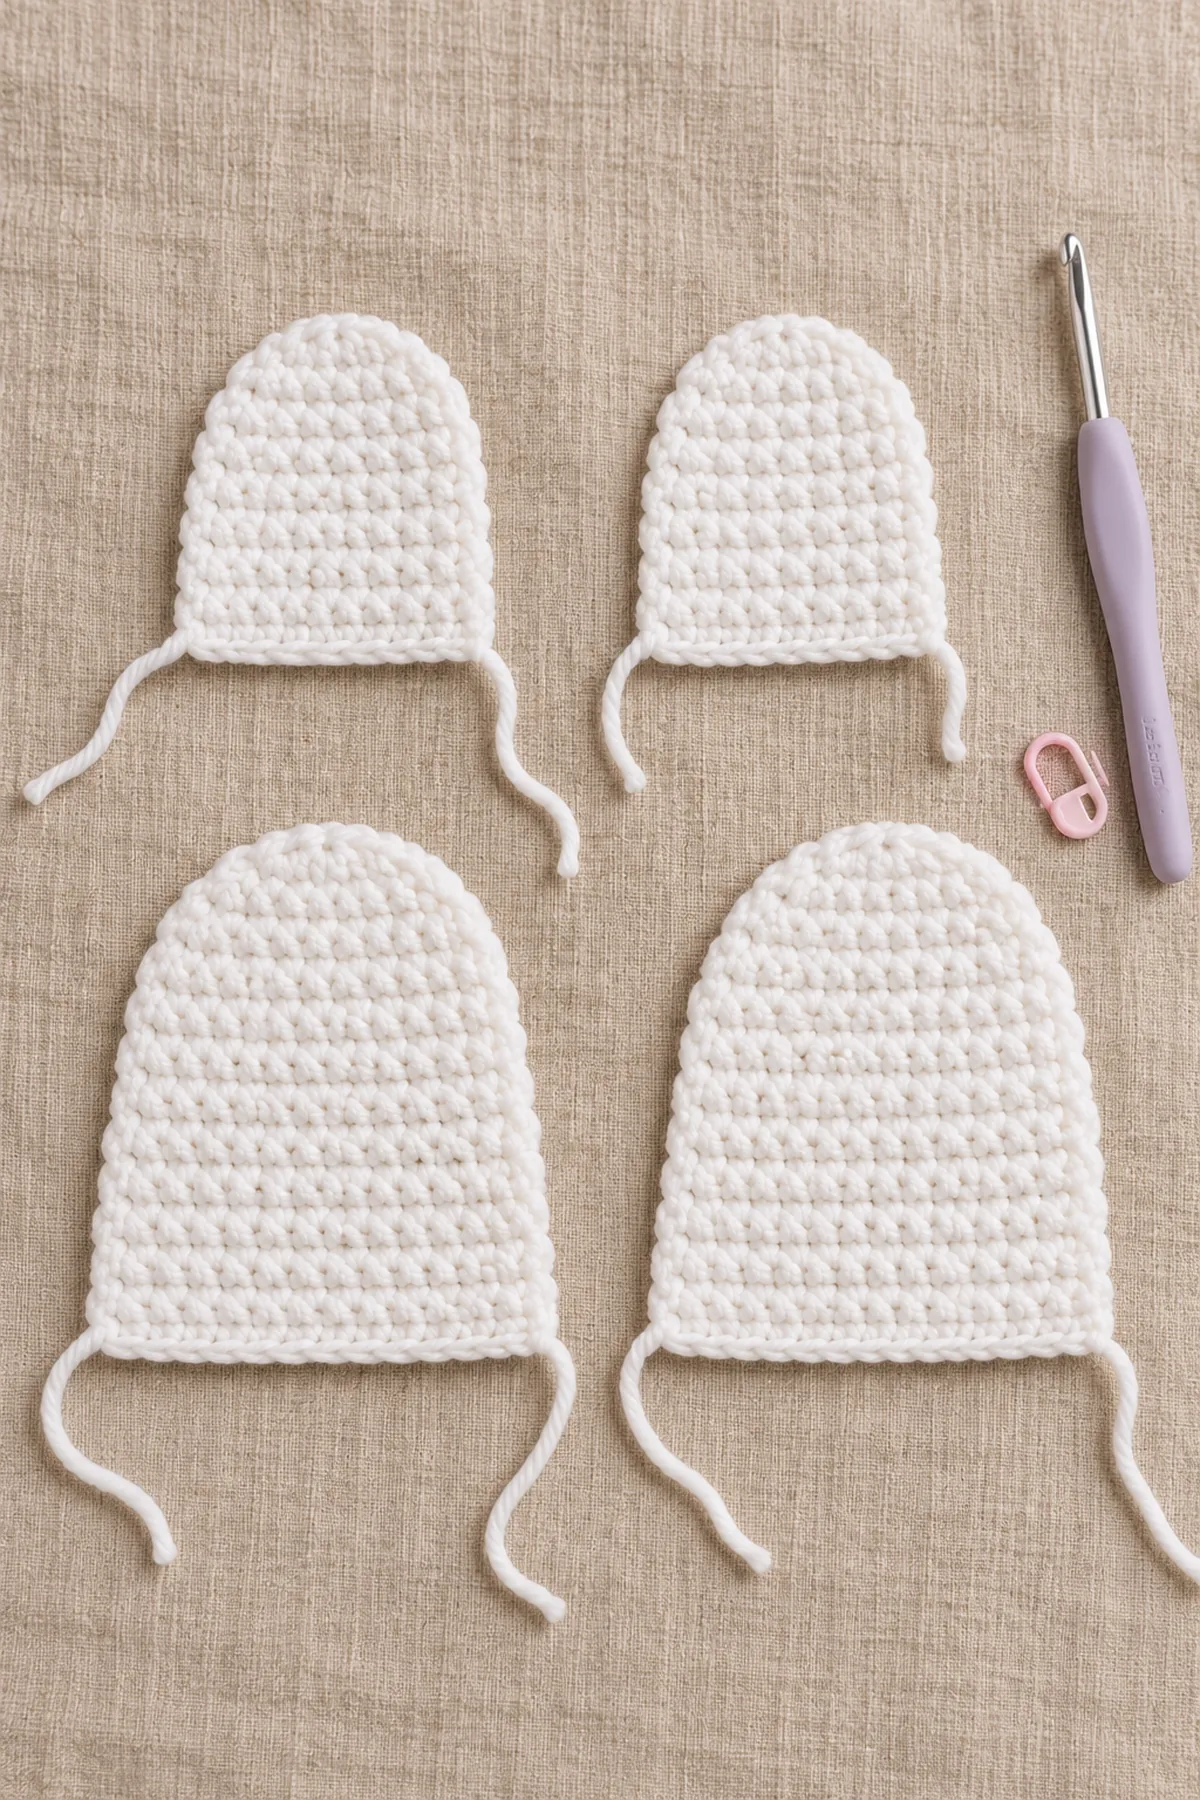
- Ghost panel Row 1: ch 16; sc in second chain from hook and in each remaining chain. (15 sts) Ch 1 and turn; this chain never counts.
- Rows 2-13: Sc in each stitch. Ch 1 and turn at every row end. (15 sts)
- Row 14: Sc2tog, sc in next 11 stitches, sc2tog; ch 1 and turn. (13 sts)
- Row 15: Sc2tog, sc in next 9 stitches, sc2tog; ch 1 and turn. (11 sts)
- Row 16: Sc2tog, sc in next 7 stitches, sc2tog; ch 1 and turn. (9 sts)
- Row 17: Sc2tog, sc in next 5 stitches, sc2tog; ch 1 and turn. (7 sts)
- Row 18: Sc2tog, sc in next 3 stitches, sc2tog; ch 1 and turn. (5 sts)
- Row 19: Sc2tog, sc in next 1 stitches, sc2tog; ch 1 and turn. (3 sts)
- Row 20: Sc in each stitch. Fasten off; the three-stitch edge is the crown. (3 sts)
- Make two panels in DK for the small ghost and two in bulky chenille for the large. Row1 is the straight bottom edge; the short Row20 edge is the rounded crown. Keep the three-stitch crown centered above the base. Do not add a circular spiral body.
Sew the Bodies and Add Three Lower Scallops
- Before joining, embroider two black filled oval eyes on one panel of each size, about one stitch wide, centered between Rows11 and12 with five clear stitches between them. Bury the ends on the wrong side. The second panel has no face.
- Place matching panels wrong sides together. Starting at a bottom corner, sew corresponding row ends up one side, across the three crown stitches, down the other side and along the bottom. Leave a six-stitch section at the bottom open temporarily. Insert small tufts of stuffing in the central upper area, then close all six remaining pairs.
- With the face toward you and crown upward, join white at the right end of the front panel’s15-stitch foundation edge. Work across the15 unused foundation loops toward the left. Repeat exactly three times: sl st in next loop, skip next loop,5dc in next loop, skip next loop, sl st in next loop. Each scallop consumes5old loops. (21 sts) Count the anchoring slip stitches in this trim total only. Fasten off and secure both tails inside the closed seam. The trim remains free and unstuffed.
Make the Arms and the Large Ghost Bow
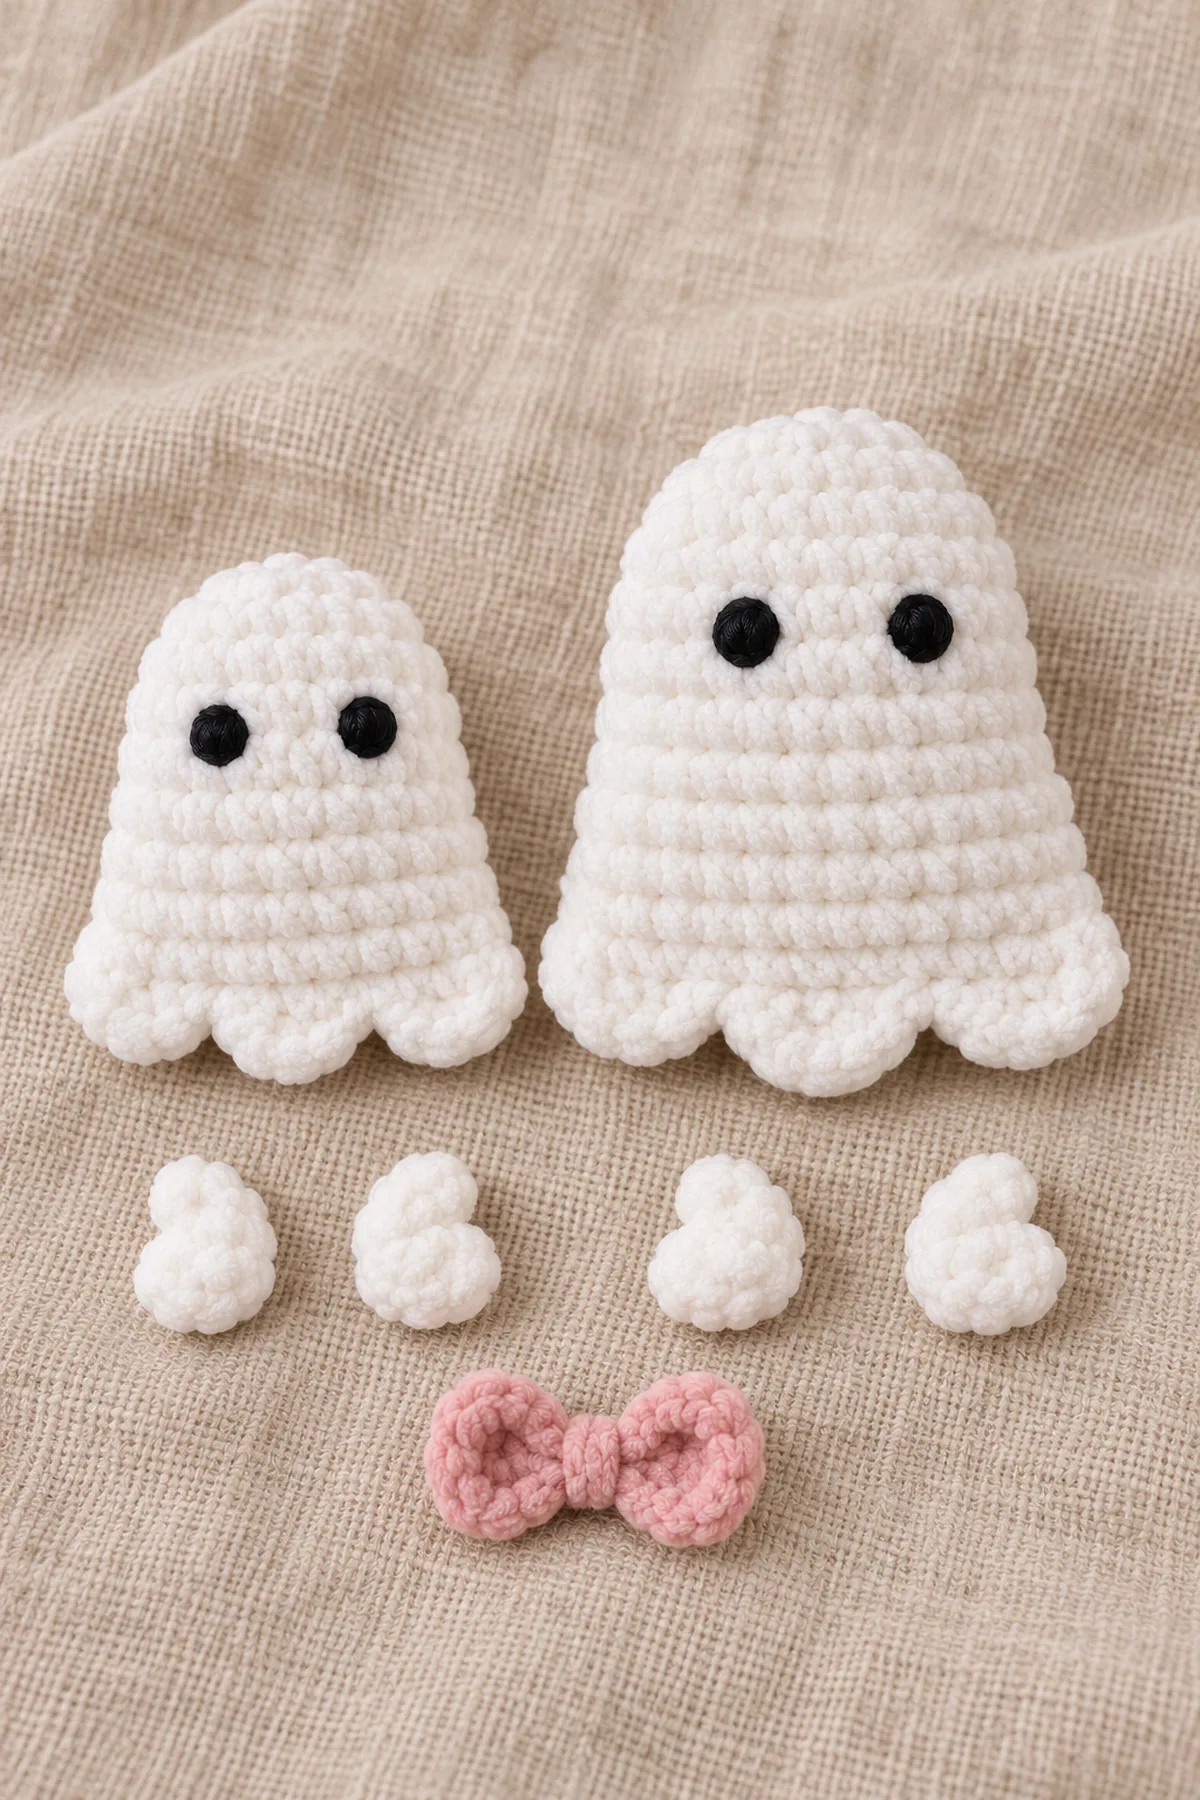
- Ghost arm Round 1: 6 sc into a magic ring. (6 sts) Tighten the ring, mark the first sc, and work a continuous spiral without joining or turning.
- Round 2: inc in each stitch. (12 sts)
- Rounds 3-4: Sc in each stitch. (12 sts)
- Make two arms per ghost in its matching yarn. Do not stuff. Flatten each12-stitch opening and sew six opposing pairs closed. Sew that full folded edge to a side seam between body Rows7 and10; distribute the six sewing stitches evenly across these four row ends. Both arms must project sideways at the same height.
- Bow strip Row 1: ch 11; sc in second chain from hook and in each remaining chain. (10 sts) Ch 1 and turn; this chain never counts.
- Rows 2-3: Sc in each stitch. Ch 1 and turn; fasten off after Row 3. (10 sts)
- For the large ghost only, fold the bow strip across its midpoint so the two5-stitch halves form two soft lobes; gather and wrap its middle four times with pink yarn. Sew through every center wrap and both panel layers of the bow. Fully sew the bow’s center and both lobe tips to the upper-right crown of the larger ghost. No long loops or detachable bow ends remain.
Inspect the Coordinated Duo
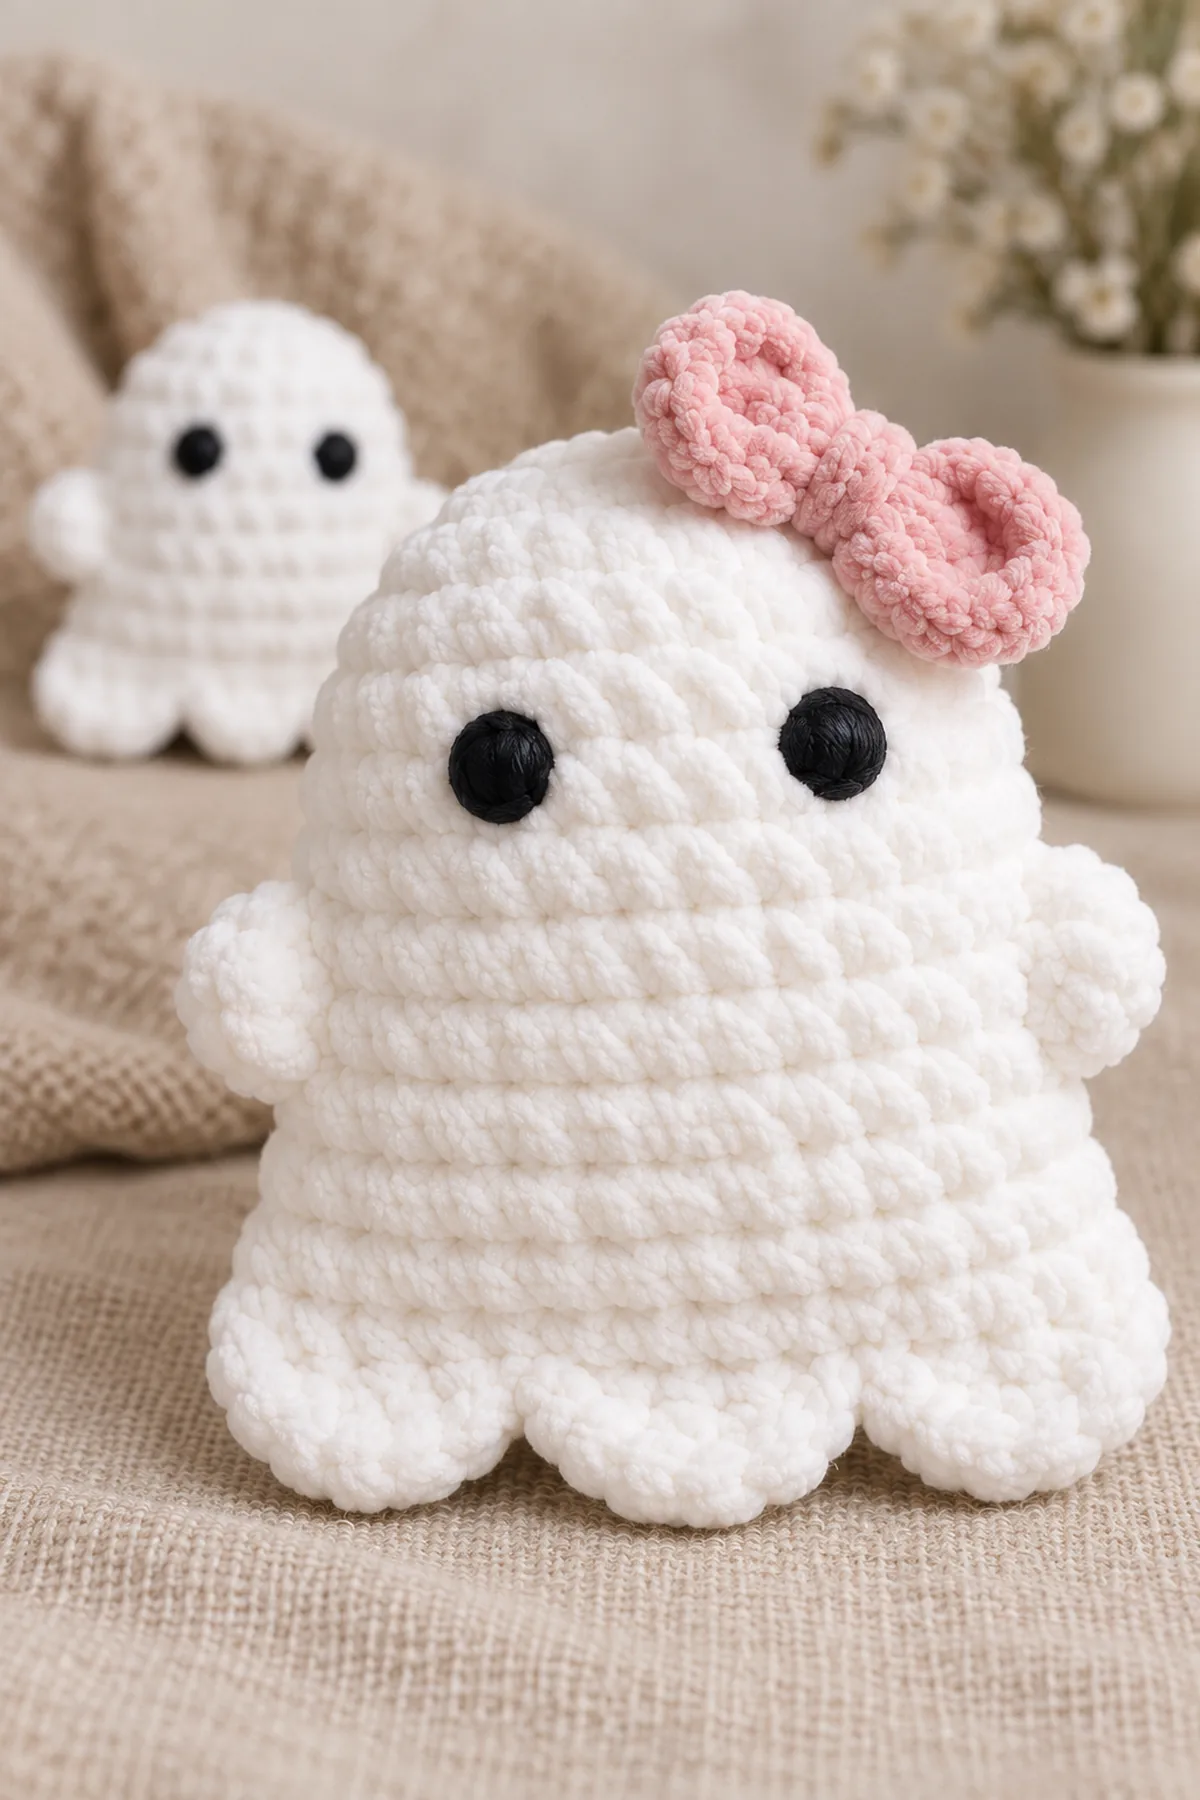
- Set both ghosts upright against a plain backdrop. Each has two oval eyes, two arms and three rounded front hem scallops. The large ghost alone wears the pink bow.
- Check that the lower seam is fully closed independently of the scallop trim. Hold the body while tugging each arm and every sewn bow point; redo any moving attachment.
- This flat-panel pair differs structurally from BabyYarnie’s existing large spiral ghost and multi-character Halloween trio. Keep the panel method and three-lobe hem rather than relabeling those earlier tutorials.
Assembly and Shaping
The two panels form a lightly stuffed pillow body. The fifteen-pair bottom seam closes it before scallops are added to the front foundation loops. Sew unstuffed arms to the completed side seams, then secure the pink bow at three locations on the large ghost only.
Lay every component on a flat surface before joining. Match the marked centers first, then divide each remaining edge into equal sections. Work through both layers with consistent tension and pause after each section to check that the fabric lies flat. This measured approach prevents twisting and keeps decorative details facing the intended direction.
Finishing
- Stop before closing and inspect both sides of every seam. Add small tufts of stuffing, keeping the perimeter flexible rather than tightly packed.
- Secure all sewn edges with two passes in opposite directions. Bury yarn ends through three separate internal paths before trimming.
- Remove every temporary pin and marker. Press lightly around each closure and check that no stuffing escapes and no long loops can be pulled out.
- Follow the actual yarn care label; reshape gently and air-dry completely. Do not steam polyester chenille. Inspect again after cleaning and supply the fiber and care information with the finished gift.
For a polished result, weave each tail through several same-color stitches, reverse direction once, and trim only after the fabric has been gently stretched. Block to the listed dimensions without flattening textured stitches. Inspect joins, borders, straps, and decorative pieces before the project is used or gifted.
Helpful Tips
- Count stitch tops with a contrasting marker at each increase segment; chenille pile can hide a missed stitch.
- Make both members of a paired component in the same session and compare their widths before sewing.
- If stuffing is visible, change to a smaller hook and remake the affected piece. Do not conceal large gaps with excessive surface embroidery.
- Use a blunt needle and a smooth matching sewing yarn to anchor plush-yarn parts without stripping the chenille core.
Good lighting and a contrasting stitch marker make counting much easier. If a section looks uneven, compare the current count with the previous checkpoint before continuing. Fixing one missed stitch early is faster than compensating later, and it preserves the measurements used by the assembly instructions.
Frequently Asked Questions
Is this the pattern from the reference photograph?
No. The photograph supplies the required visual direction only. All stitch counts, construction choices and tutorial wording here are independently authored for BabyYarnie.
Has the crochet sample been physically tested?
No physical sample test is claimed. The numerical stitch audit checks consumption and output, but cannot establish actual drape, fit, gauge, seam behavior or yarn quantity. Make a swatch and a trial assembly.
Can I substitute yarn or use plastic eyes?
Substitute only after checking a dense, stuffing-proof fabric and the relative size of all components. Use securely embroidered eyes and details, not plastic eyes or loose embellishments.
Conclusion
Keep your actual yarn, hook, gauge and completed measurements with the pattern. Check the finished outline against the described design, then inspect every seam and attachment before gifting. The written checkpoints are the construction authority; a styled illustration is not a substitute for a correct stitch count.
BabyYarnie Printable Crochet Pattern Card
BabyYarnie — easy-to-follow crochet for everyday makers.
Project: Crochet Bell-Hem Pocket Ghost Duo
Skill level: Intermediate Hook: Small: 3 mm with DK chenille; large: 4.5 mm with bulky chenille, adjusted for dense fabric Yarn: Bulky chenille
Finished size: Planning small 3.5 inches high and 3 inches wide; large 4.8 inches high and 4.3 inches wide, excluding arms
Card Materials
- Planning allowance: 55 yards white DK chenille for small ghost, 85 yards white bulky chenille for large ghost, 10 yards blush-pink bulky chenille for bow
- 3 mm and 4.5 mm hooks; black smooth embroidery yarn, matching white/pink smooth seam yarn, washable fiberfill
- Blunt needle, markers, scissors and tape; no glue, plastic eyes, ribbon or keychain hardware
Card Instructions
- Crochet Four Bell-Shaped Panels: Each panel15sc x13rows; paired decreases13,11,9,7,5,3 then one3sc crown row; make two per size.
- Sew the Bodies and Add Three Lower Scallops: Embroider, sew two flat panels closed with light stuffing; three5-position scallops across15 foundation loops.
- Make the Arms and the Large Ghost Bow: Four unstuffed12-stitch arms flattened and sewn; large ghost gets one10sc x3row gathered pink bow.
- Inspect the Coordinated Duo: Check closed pillow seams, all arm edges and three scallops; secure bow at center and both tips.
Finish: Check every count, weave in all ends, block to measurement, and inspect each join.