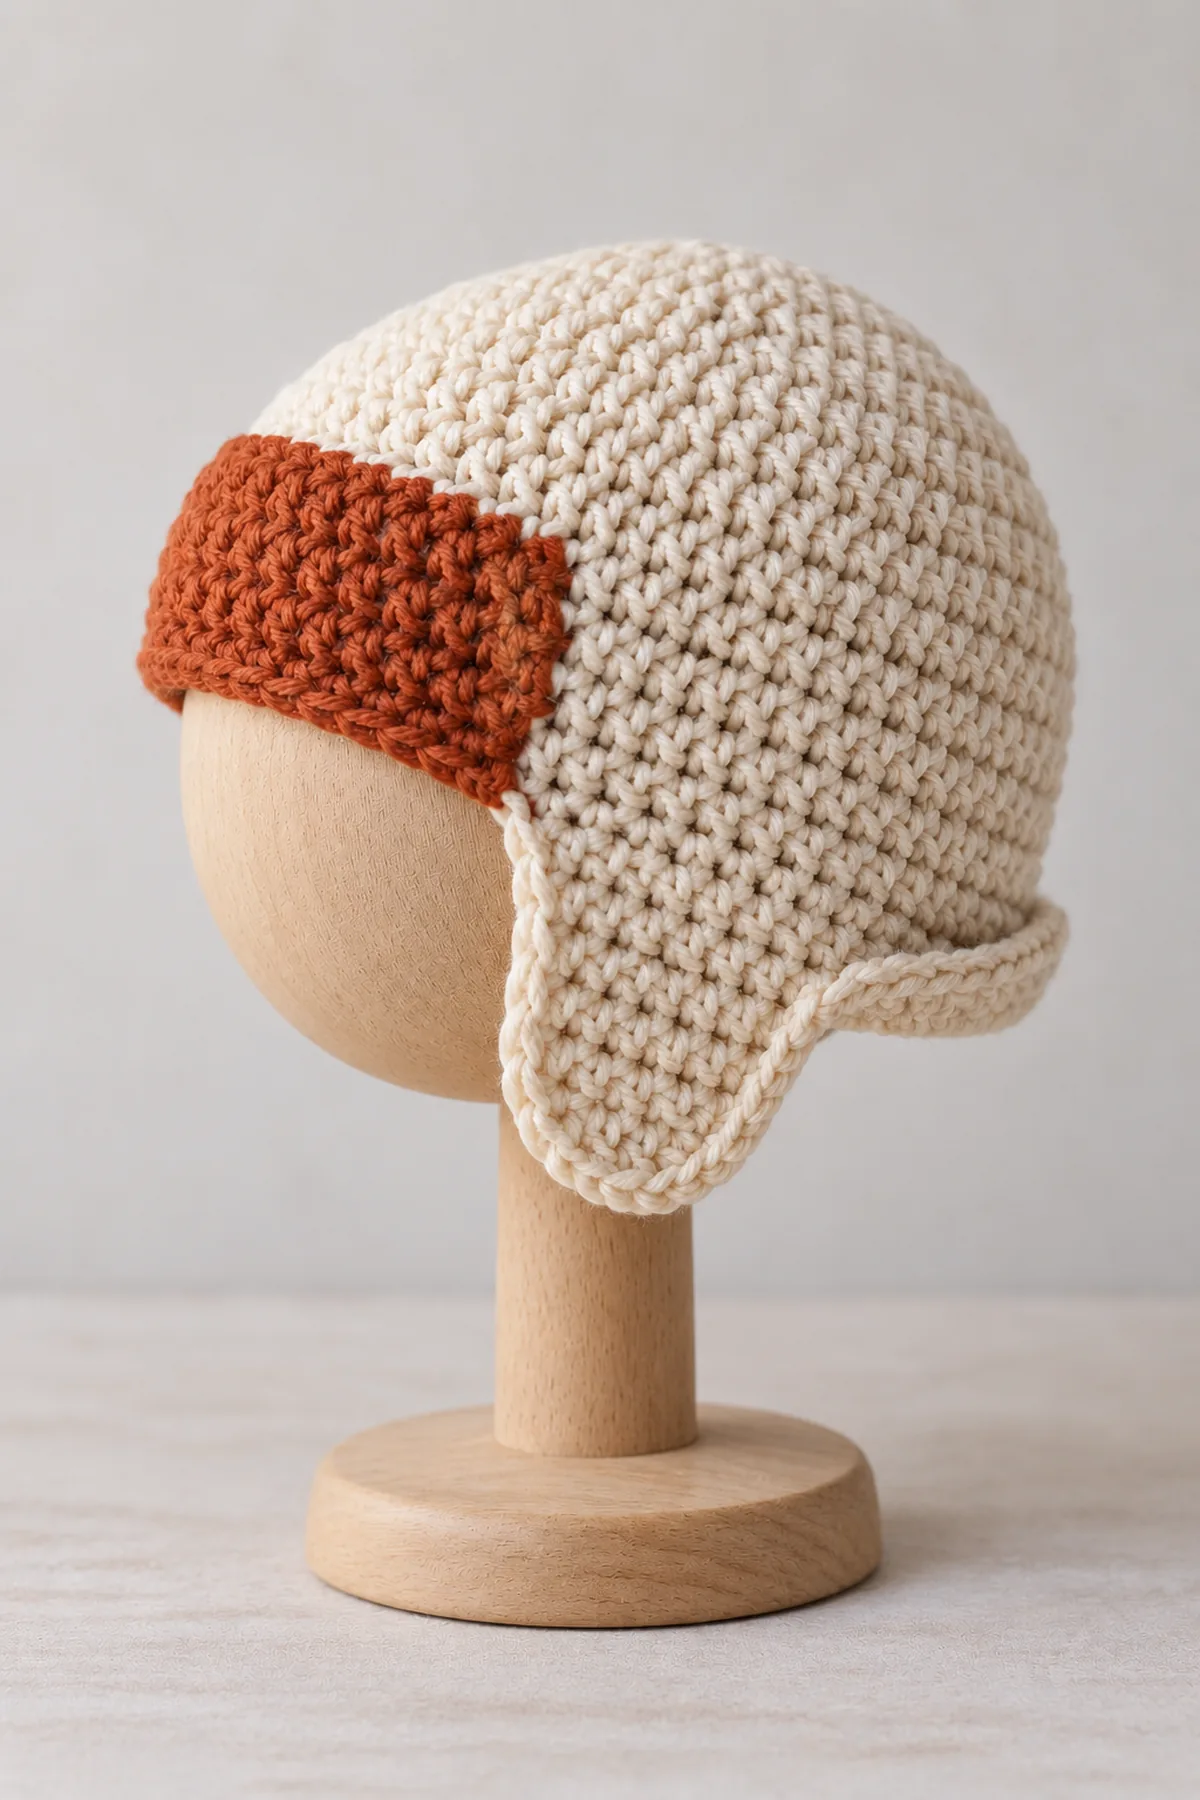
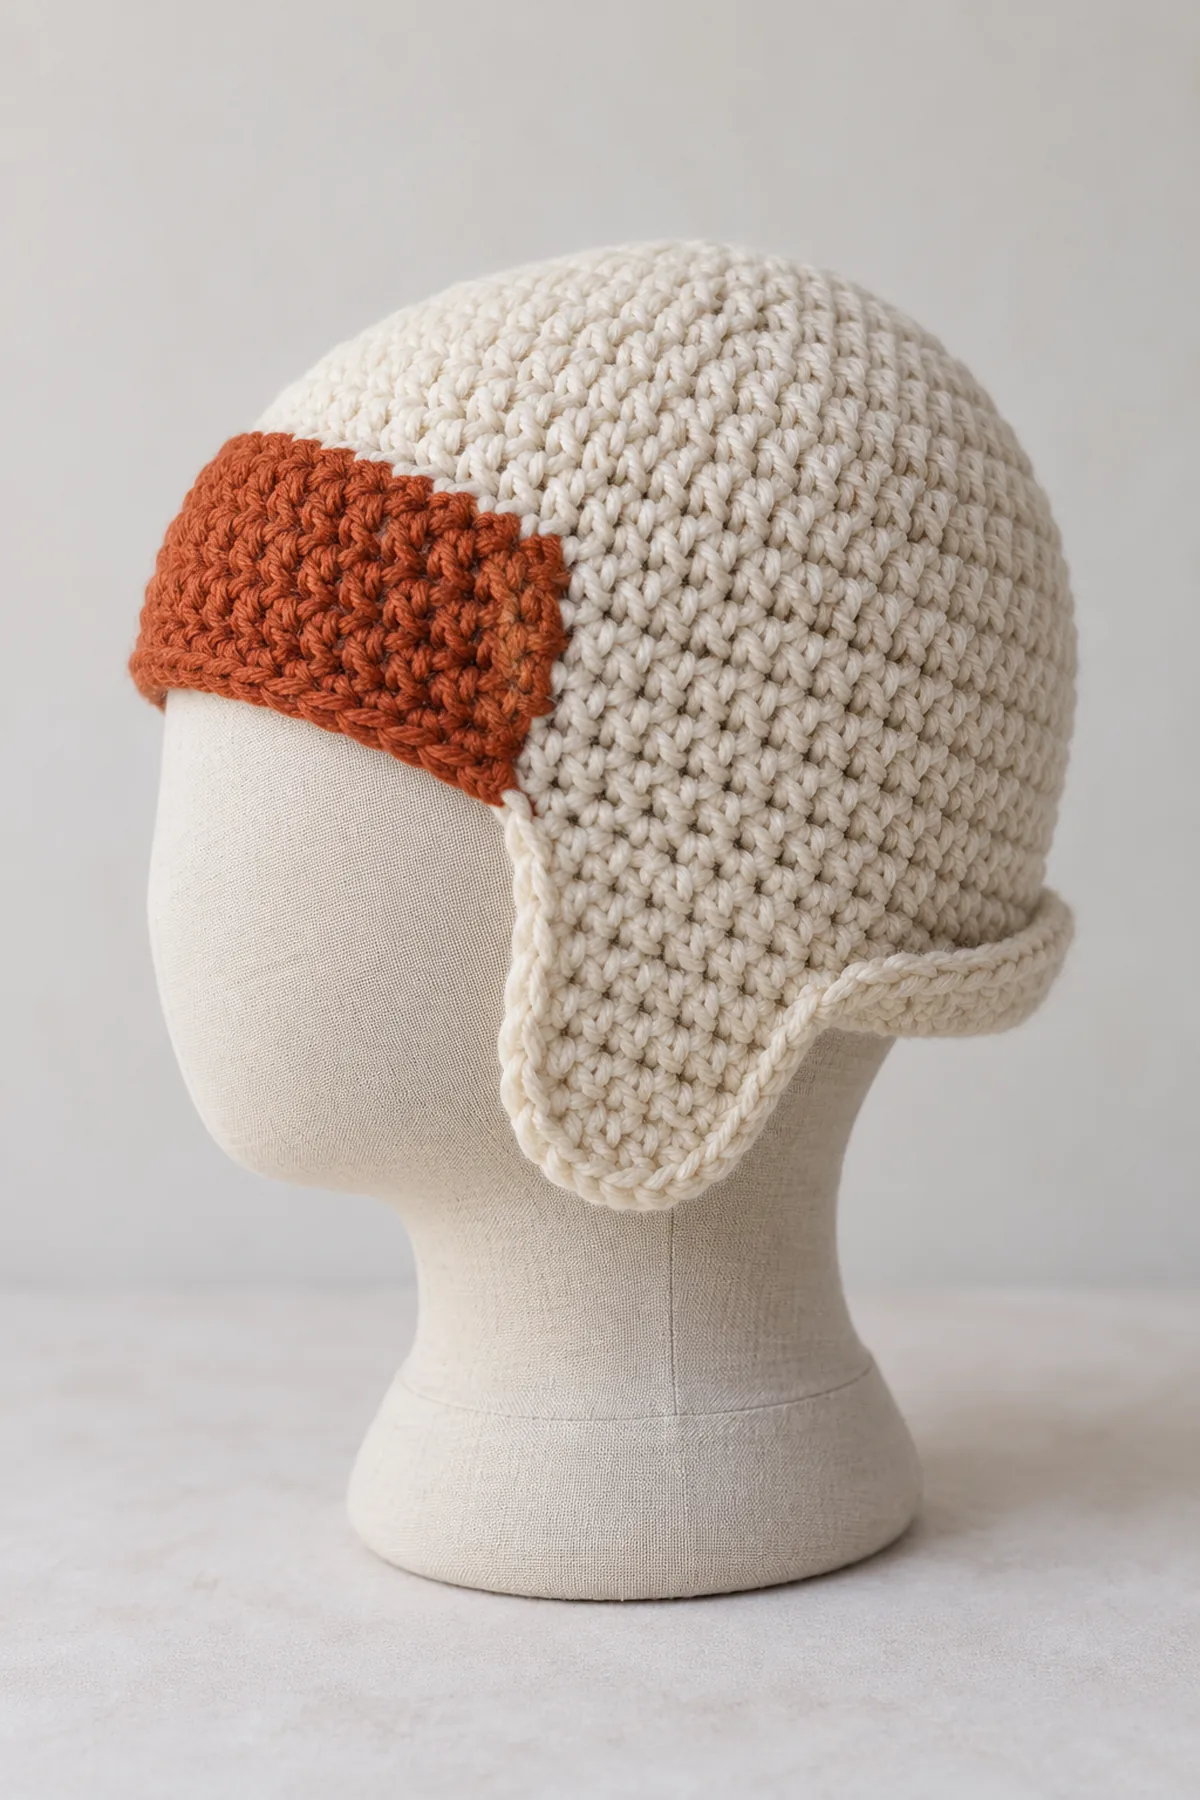
This original crochet toddler aviator hat uses the construction described in its own design brief: A fitted cap for ages 2–4 with short integral earflaps, a flat contrasting forehead band, and a narrow turned-up back edge; no dangling chin ties or pom-poms. The written stitch arithmetic is checked, while gauge and fit must still be confirmed by making a sample before gifting or use.
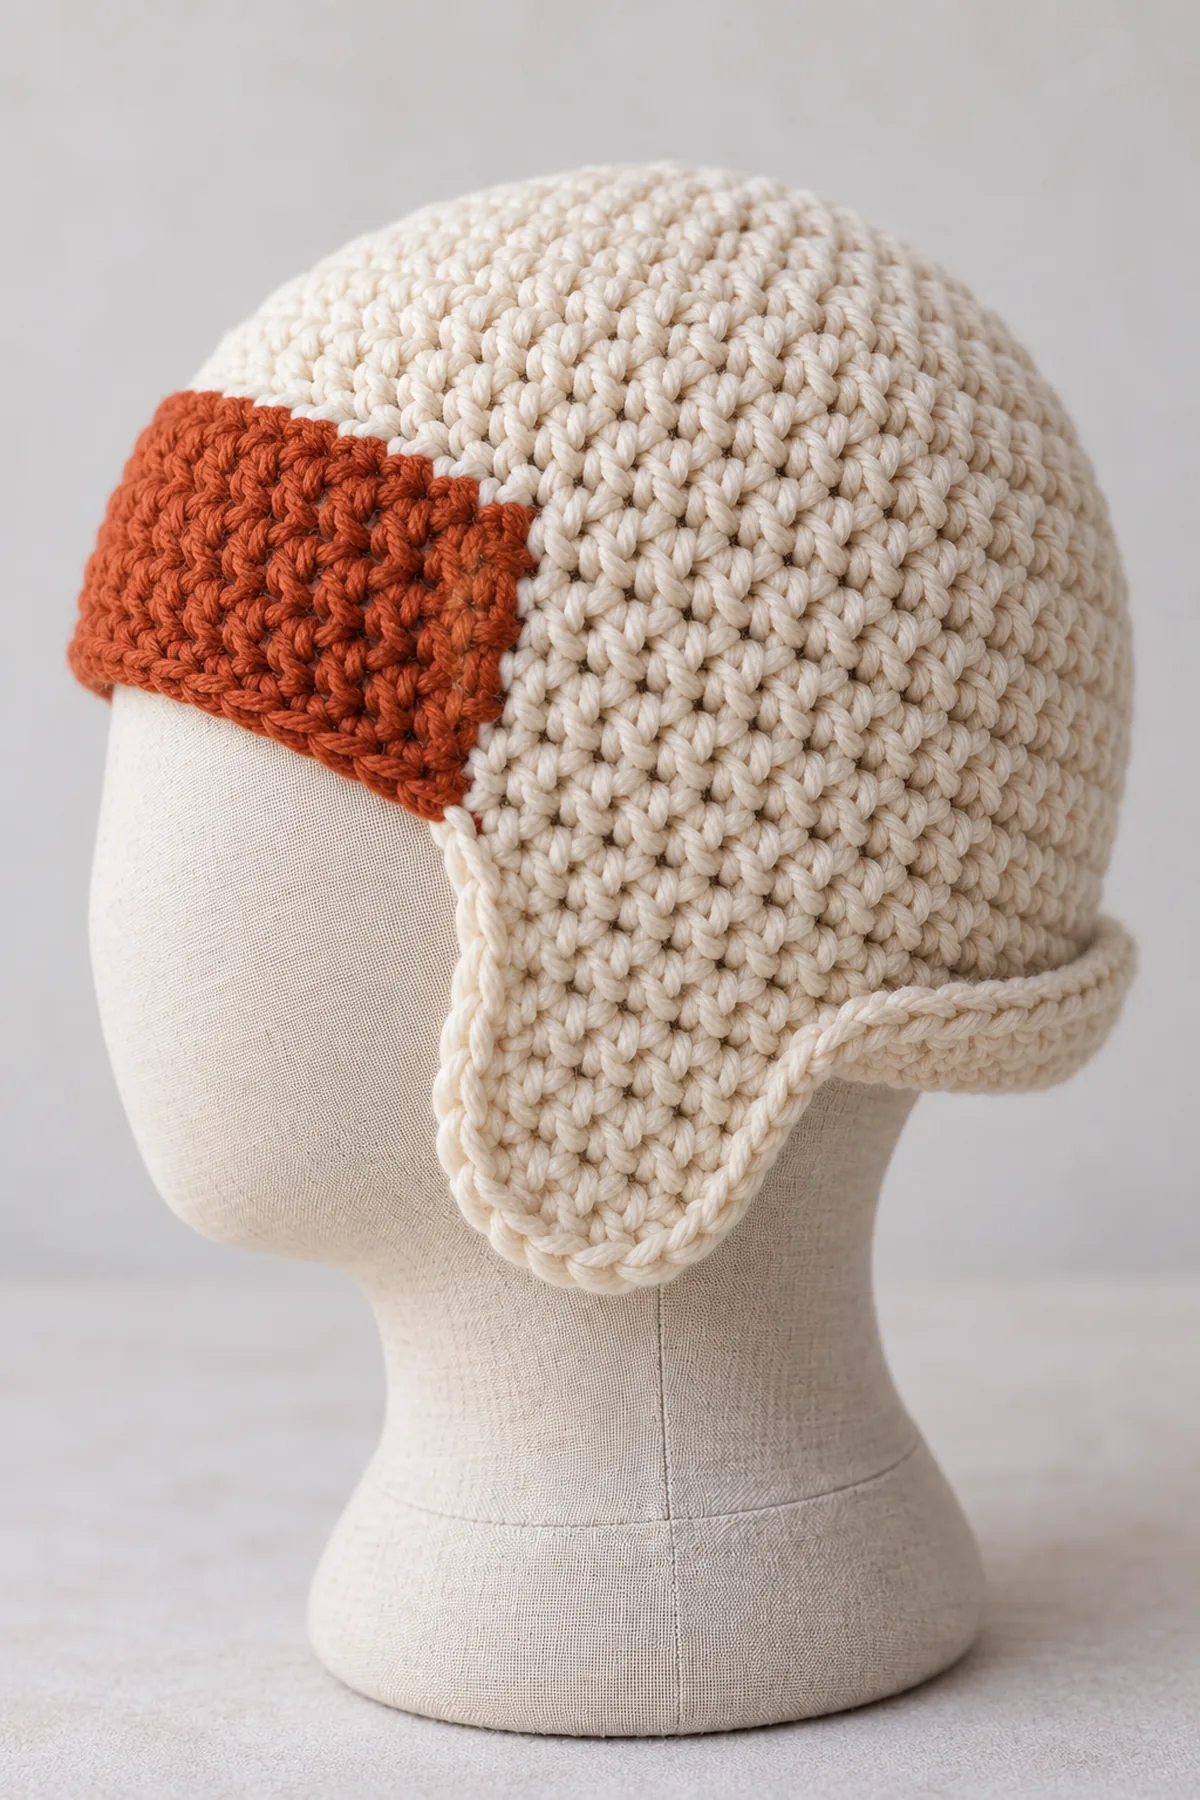
A fitted cream hdc cap gains two short integral side earflaps, a flat rust forehead band and a narrow turned-up back edge. The cap is sized by washed circumference, not by age alone; no dangling ties, faux goggles or pom-poms are added.
Pattern Details
- Hook Size: 4 mm for body; 3.5 mm for flat band, adjusted to washed gauge
- Finished Size: Planning sizes 2–3 (3–4) years: cap circumference 18 (20) inches, center depth 5 (5.5) inches before flaps
- Gauge: 16 hdc and 13 joined rounds = 4 inches after washing; band 20 sc = 4 inches
- Estimated Time: 5–7 hours
- Construction: Eight-segment crown to 72 (80) hdc, seven (eight) even body rounds, side sectors 14 (16) each, front 20 (24), back 24
- Skill level: Intermediate
Why You’ll Love This Project
The shaping is visible at each checkpoint, so a maker can count, measure, and correct the fabric before assembly. The result is a distinct project rather than a recoloring of an older pattern.
Materials
- Planning allowance 180 (220) yards washable soft DK cotton blend in cream and 45 (55) yards rust for the forehead band, plus swatch allowance
- 4 mm and 3.5 mm hooks, four stitch markers, measuring tape, blunt needle and scissors
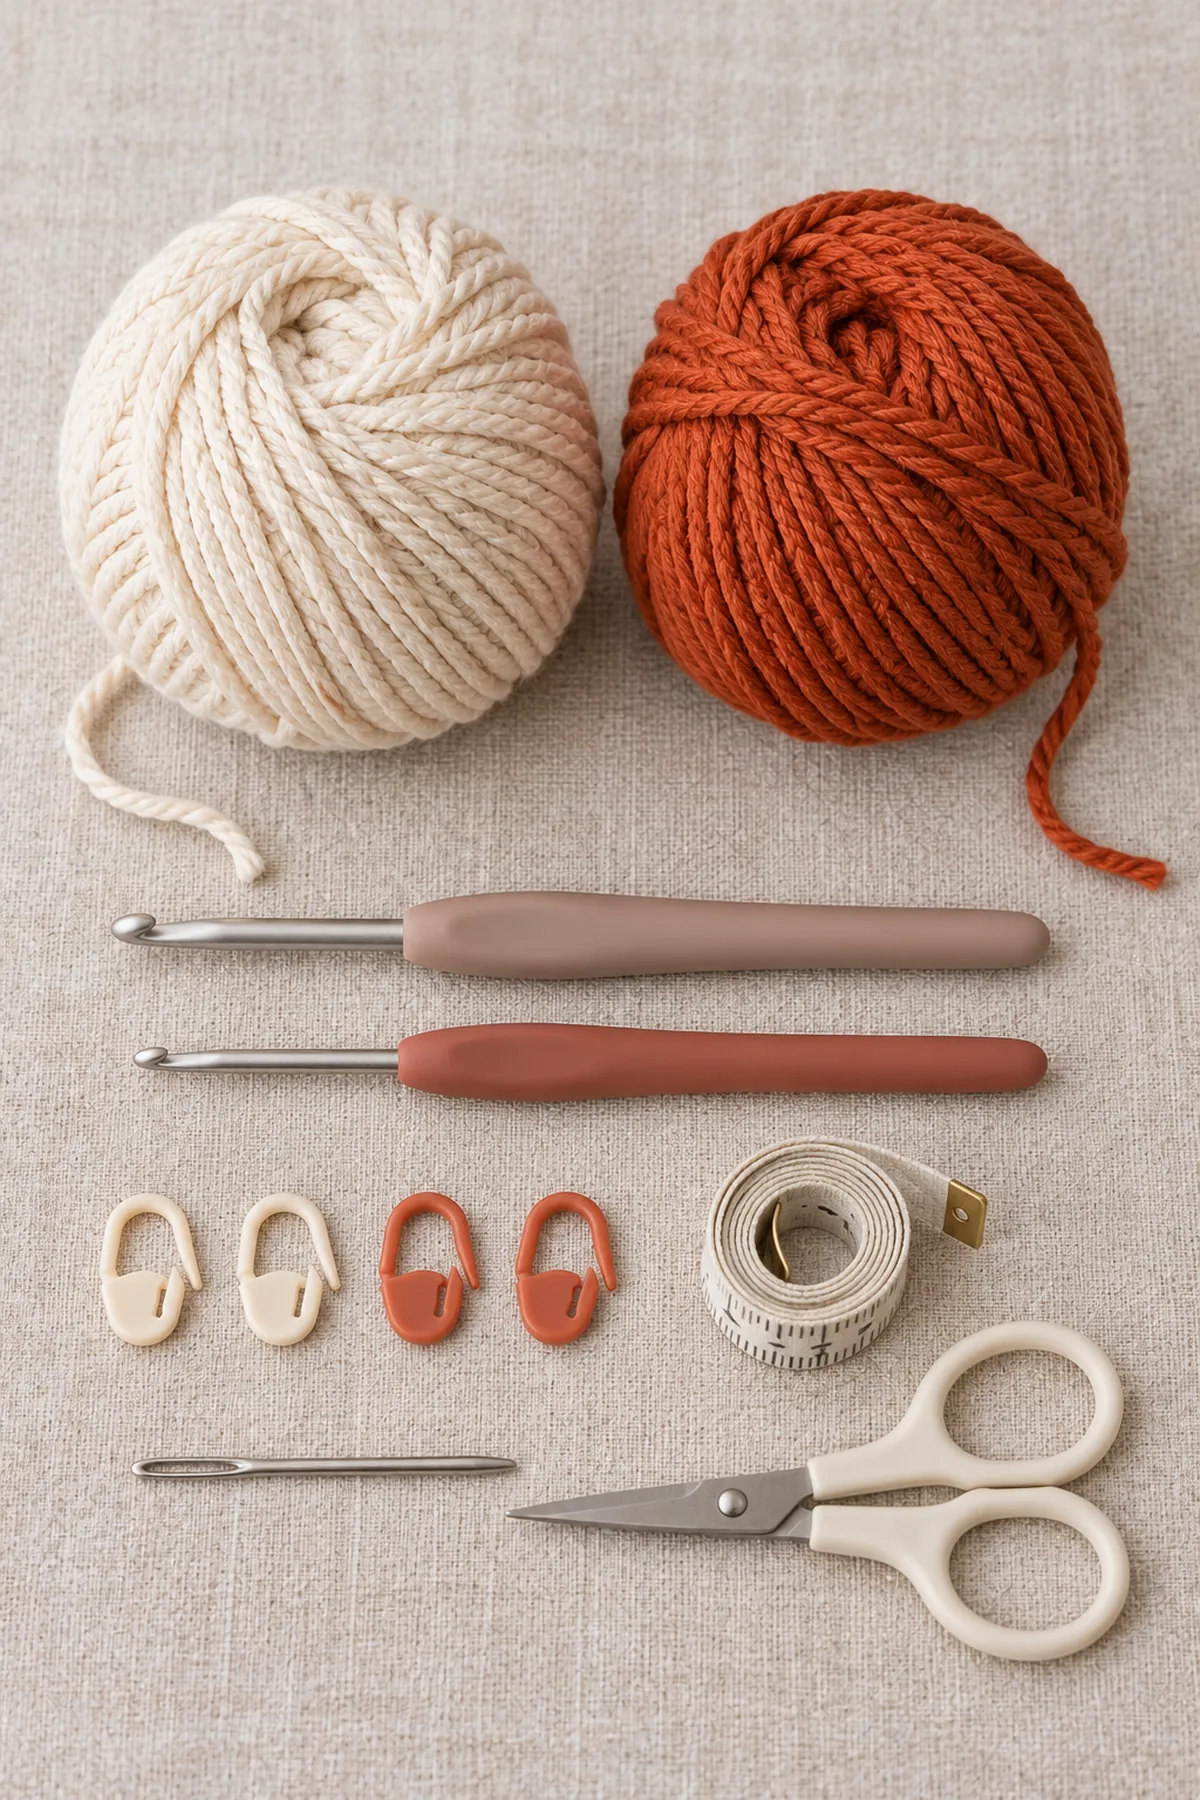
Gauge, Measurements, and Planning
At four hdc per inch the 72 (80)-stitch cap targets 18 (20) inches around. At roughly 3.25 rounds per inch, nine (ten) crown rounds plus seven (eight) wall rounds give a planning depth near 5 (5.5) inches. Measure a washed sample and compare a well-fitting cap; the result must be snug enough to stay put but never binding. The 2–4 year age label is not a substitute for head measurement.
Make and wash a gauge swatch before beginning. Measure only after the swatch is completely dry. If the stitch width differs, change hook size rather than pulling the working yarn tighter. Keep a written count at the end of every section so the finished edges remain balanced and the assembly points line up.
Abbreviations and Special Stitches
- ch: chain
- sc: single crochet
- hdc: half double crochet
- dc: double crochet
- sl st: slip stitch
- st(s): stitch(es)
- rnd: round
- BLO: back loop only
- inc: two single crochets in one stitch
- sc2tog: single crochet two stitches together
- dec: single crochet two together
- RS: right side
- WS: wrong side
Special stitch guidance: For body hdc increases, work two hdc in one old stitch. All body rounds join to first counted hdc, do not turn, and exclude the beginning ch 1 and join. Earflaps are turned sc rows: sc2tog over first two and last two old stitches of every decrease row; turning ch 1 does not count.
Important Notes
- Development note: the written stitch arithmetic is computationally checked, but no physically crocheted sample or wear test is claimed. Gauge, yardage, fit and dimensions are planning targets; swatch and check before gifting.
- Beginning chains and joining slip stitches do not count unless the step explicitly says otherwise. Mark the first counted stitch and write down every shaping count.
- Use soft washable yarn. Do not add plastic eyes, beads, buttons, long ties or other detachable parts to young-child projects.
- AI-generated photographs are design illustrations, not stitch charts or evidence of a physically tested sample. Follow the written counts and your measured gauge.
- Use only with supervision. These projects are not for infant sleep or unsupervised crib use; inspect seams and attachments before each use.
Complete Instructions for Crochet Toddler Aviator Earflap Cap
Crochet the Fitted Cap
- With cream and 4 mm hook, make a magic ring. Crown Round 1: 8 hdc, join to first counted hdc without turning. (8 sts) Mark eight equal growth segments.
- For Crown Round n, repeat [hdc in next n−2 old stitches, inc in next old stitch] eight times. Round 2 (16 sts); Round 3 (24 sts); Round 4 (32 sts); Round 5 (40 sts); Round 6 (48 sts); Round 7 (56 sts); Round 8 (64 sts); Round 9 (72 sts). For the large cap alone work Round 10 (80 sts).
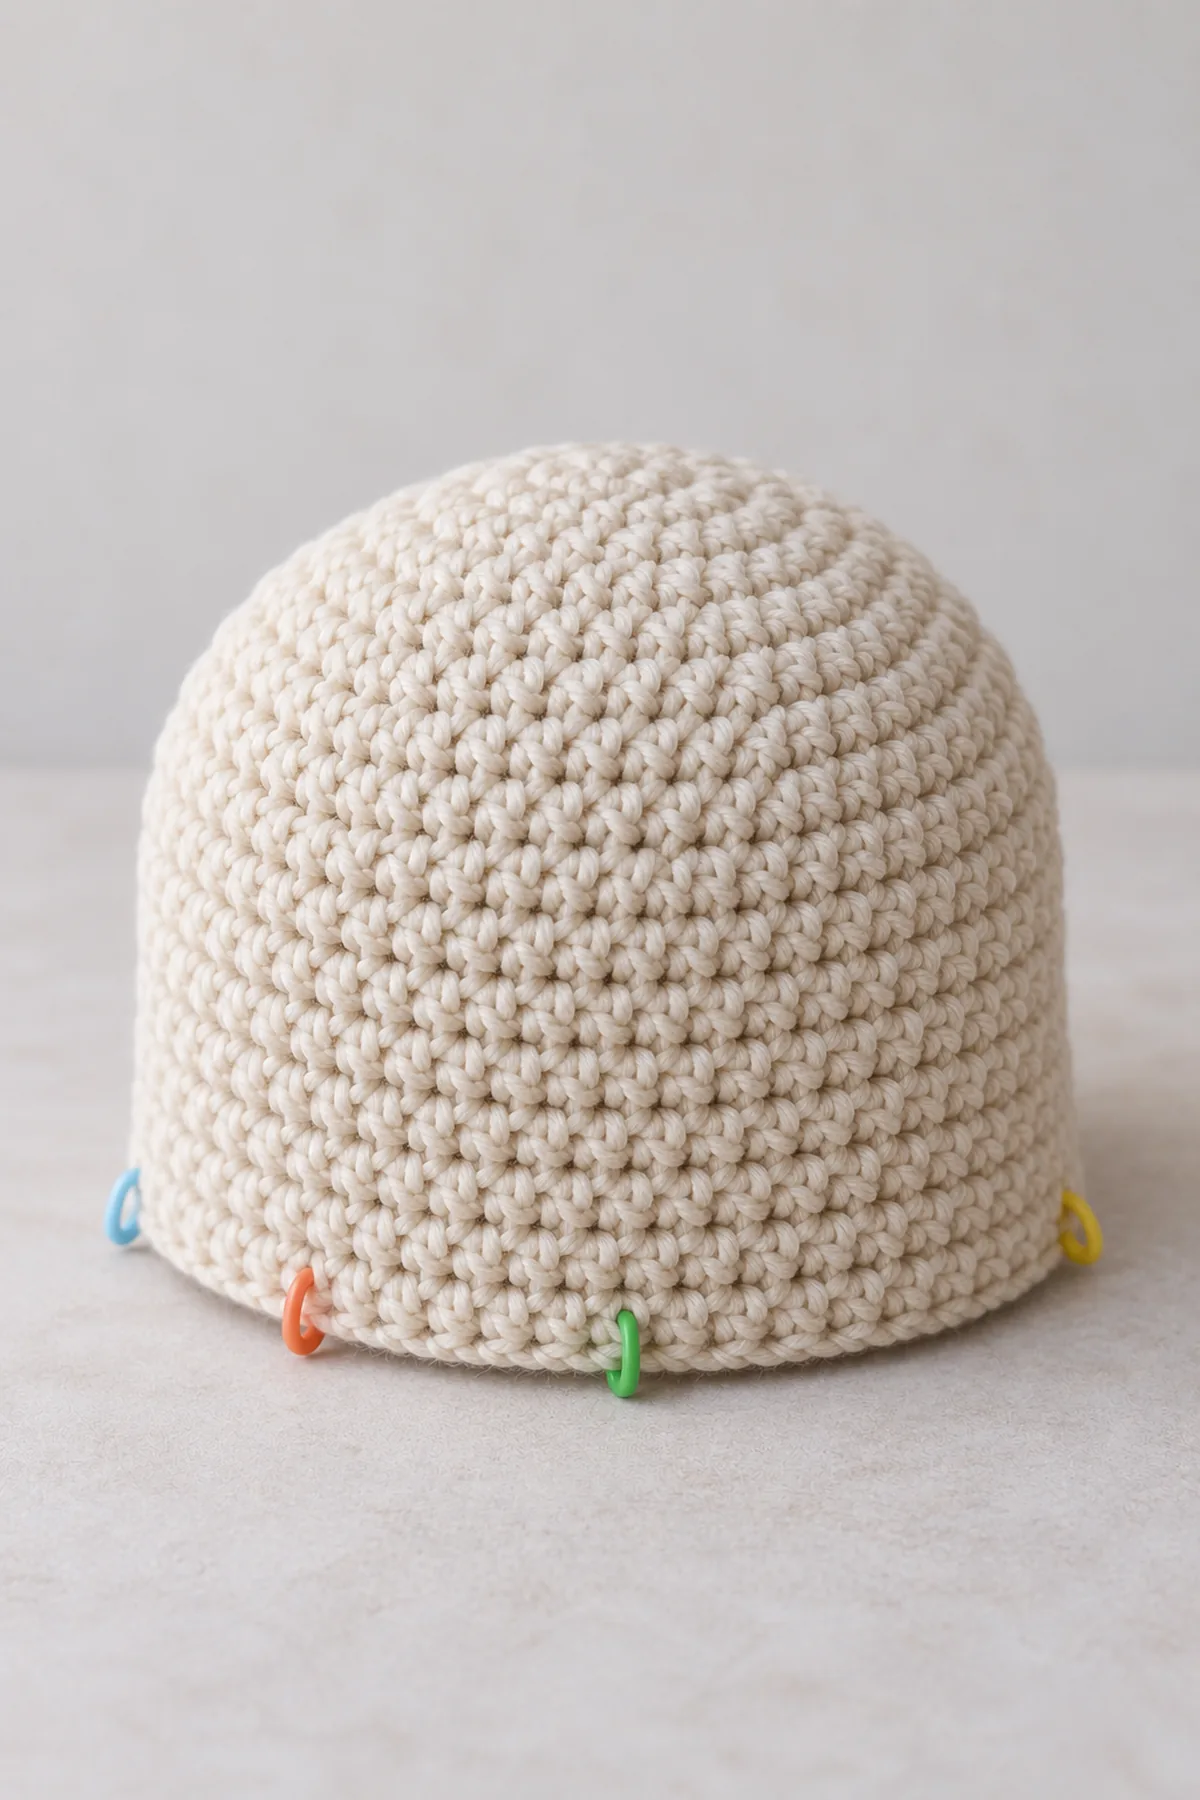
- Small cap Body Rounds 1–7: hdc in all 72 stitches, join, no turning. (72 sts) Large cap Body Rounds 1–8: hdc in all 80 stitches. (80 sts) Measure depth and adjust only complete even body rounds to the washed target.
- At the final lower edge, mark four consecutive sectors beginning at the front left boundary: front 20 (24), right ear 14 (16), back 24, left ear 14 (16). Their sums are 72 (80). Check that the two ears are opposite the side positions before adding any rows.
Shape Both Short Integral Earflaps
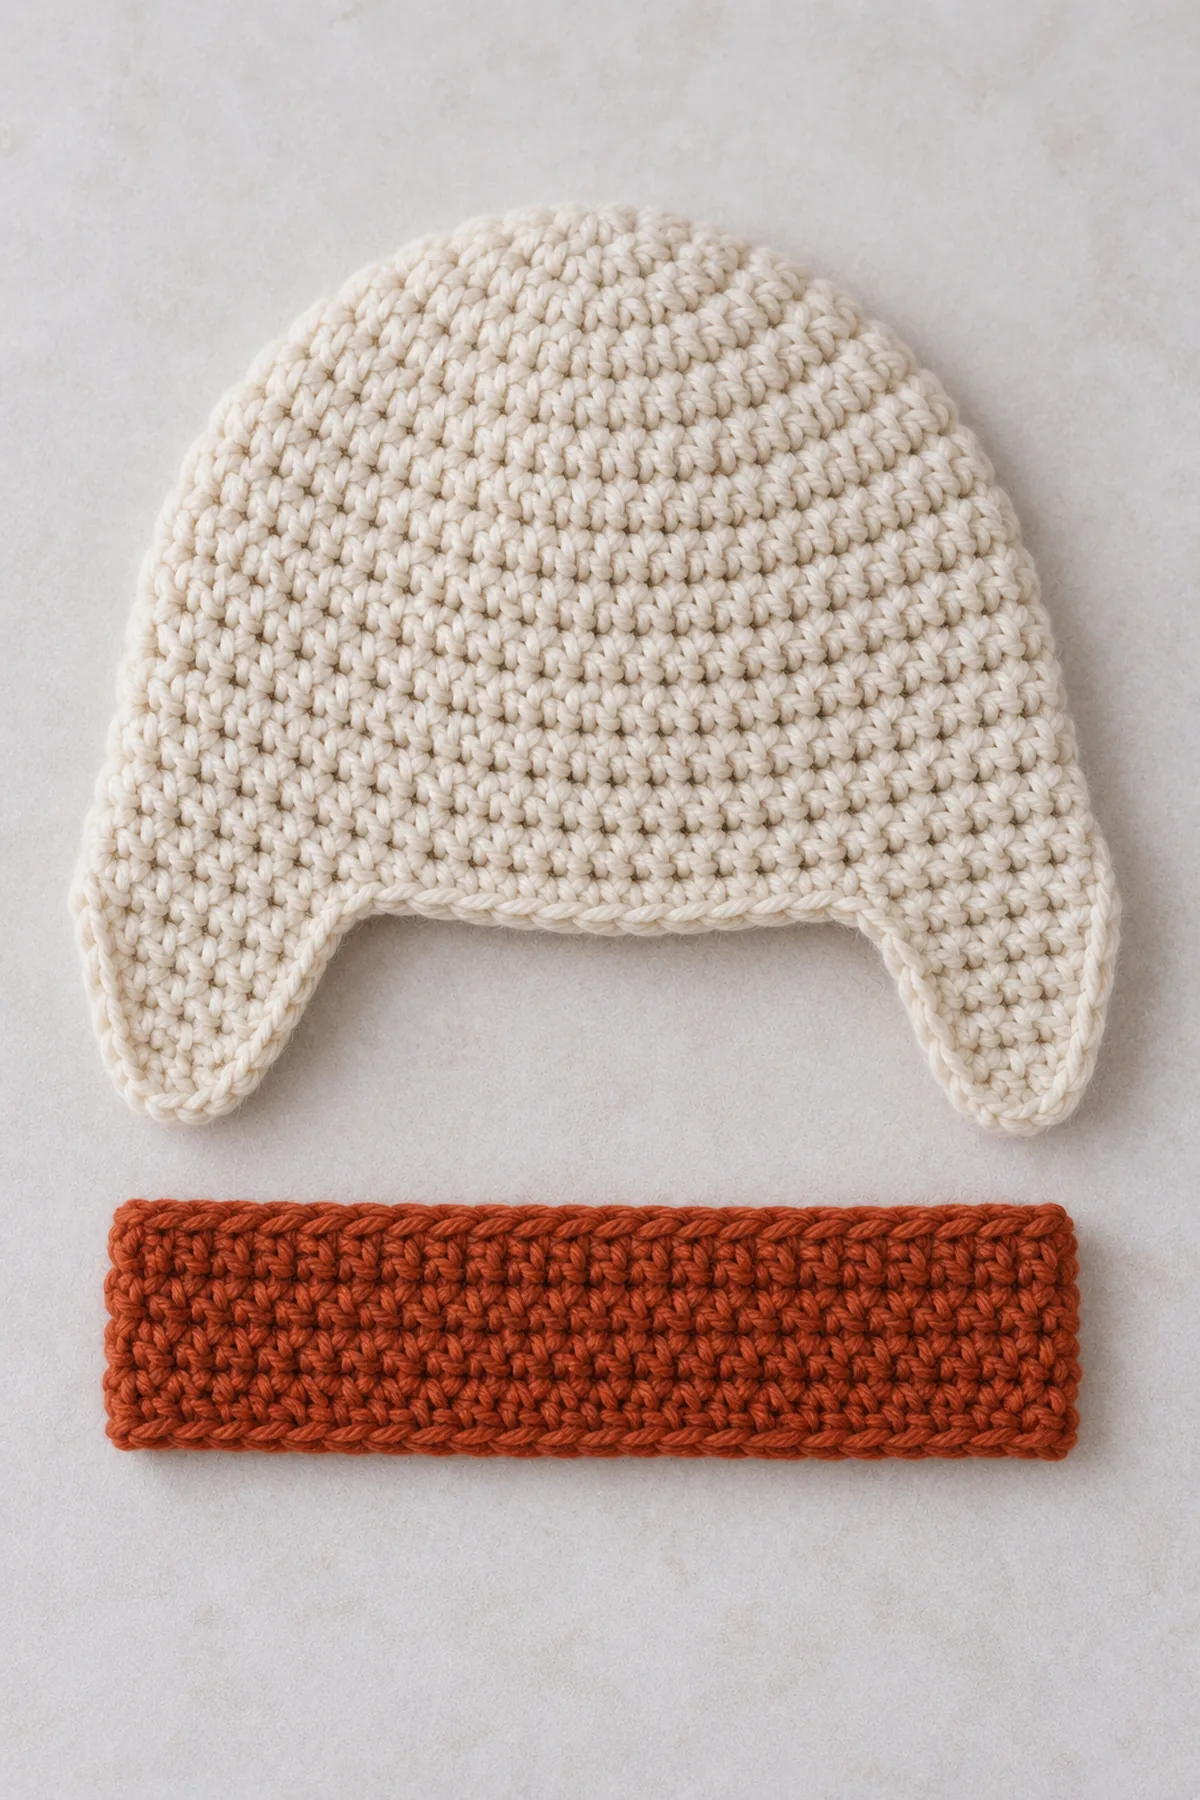
- Join cream at the start of the marked right ear sector. Flap Row 1: sc in each of its 14 (16) lower-edge stitches, ch 1 and turn. (14, 16 sts) Do not work the adjacent front or back sectors.
- Rows 2–5 for the small flap, or Rows 2–6 for the large flap: sc2tog over first two old stitches, sc across the middle, sc2tog over final two old stitches; ch 1 and turn except after final row. Counts small: 12, 10, 8, 6. Counts large: 14, 12, 10, 8, 6. (6 sts)
- Fasten off. Repeat the same Row 1 and decrease sequence on the opposite marked side sector; match row counts and finished lengths exactly. Do not attach chin ties, buttons or pom-poms.
Add the Forehead Band and Back Turn-Up
- Rust band with 3.5 mm hook: ch 21 (25); sc in second chain and each following chain, ch 1 and turn. (20, 24 sts) Work three more sc rows of the same width, turning after Rows 2–3. The band has four rows total and stays flat, not padded.
- Place the band across the 20 (24) front-sector stitches so it does not extend into either ear sector. Sew all four band edges with small even stitches; make a second pass at all four corners and bury the ends beneath the band.
- Join cream at the first of 24 back-sector stitches. Back Row 1: sc across 24, ch 1 and turn. (24 sts) Rows 2–3: sc across 24, turning after Row 2 only. (24 sts) Fold these three rows outward/upward and tack at left corner, middle and right corner with repeated stitches.
- Steam-free block gently and measure the finished opening. Check that the forehead band does not obstruct vision, the earflaps cover ears without pressure, and every back fold tack is secure. Use with supervision; remove for sleep.
Assembly and Shaping
The 14 (16)-stitch earflaps grow directly from the two marked side sectors. Sew the separate flat rust band flush over the 20 (24)-stitch front sector, with every corner secured; work the back extension directly on its 24 stitches, fold it out and stitch its three anchor points. Nothing hangs below the flaps.
Lay every component on a flat surface before joining. Match the marked centers first, then divide each remaining edge into equal sections. Work through both layers with consistent tension and pause after each section to check that the fabric lies flat. This measured approach prevents twisting and keeps decorative details facing the intended direction.
Finishing
- Fasten off with a long tail and weave it through three separate stitch groups, reversing direction twice.
- Wash and dry according to the yarn label; measure again only after the fabric is fully dry.
- Inspect both sides of every seam and embroidered feature; remove all markers and repair any loose end.
- Keep a written note of the finished dimensions, yarn, hook and care instructions with the gift.
For a polished result, weave each tail through several same-color stitches, reverse direction once, and trim only after the fabric has been gently stretched. Block to the listed dimensions without flattening textured stitches. Inspect joins, borders, straps, and decorative pieces before the project is used or gifted.
Helpful Tips
- Make a generous washed gauge swatch; compare stitches and rows per inch separately.
- Place contrasting markers at every segment boundary and recount before and after shaping.
- Check dimensions against an existing well-fitting item; never pin a project directly on a child.
- If a section cups, flares, or twists, fix the underlying count or gauge instead of hiding it in a seam.
Good lighting and a contrasting stitch marker make counting much easier. If a section looks uneven, compare the current count with the previous checkpoint before continuing. Fixing one missed stitch early is faster than compensating later, and it preserves the measurements used by the assembly instructions.
Frequently Asked Questions
Is this pattern physically tested?
No physical sample test is claimed. The written counts are audited; make a gauge swatch and verify the complete finished sample before gifting.
Can I change the yarn?
Yes, but only after matching washed stitch and row gauge and checking fabric softness and recovery. Yardage and dimensions change with fiber and tension.
Is this suitable for unsupervised infant sleep?
No. Use only with supervision, omit detachable pieces, and follow current safe-sleep guidance.
Conclusion
Check the finished dimensions against your washed gauge and inspect every seam and embroidered feature. Record any size adjustments and make a complete physical sample before relying on the fit.
BabyYarnie Printable Crochet Pattern Card
BabyYarnie — easy-to-follow crochet for everyday makers.
Project: Crochet Toddler Aviator Earflap Cap
Skill level: Intermediate Hook: 4 mm for body; 3.5 mm for flat band, adjusted to washed gauge Yarn: DK cotton blend
Finished size: Planning sizes 2–3 (3–4) years: cap circumference 18 (20) inches, center depth 5 (5.5) inches before flaps
Card Materials
- Planning allowance 180 (220) yards washable soft DK cotton blend in cream and 45 (55) yards rust for the forehead band, plus swatch allowance
- 4 mm and 3.5 mm hooks, four stitch markers, measuring tape, blunt needle and scissors
Card Instructions
- Crochet the Fitted Cap: Eight growth segments to 72 (80), then seven (eight) straight rounds; sector sum 20+14+24+14=72 or 24+16+24+16=80.
- Shape Both Short Integral Earflaps: Two short integral earflaps, 14→12→10→8→6 or 16→14→12→10→8→6 stitches.
- Add the Forehead Band and Back Turn-Up: Flat four-row 20 (24)-stitch rust front band and three-row 24-stitch cream turned-up back extension.
Finish: Check every count, weave in all ends, block to measurement, and inspect each join.